- Sign In Changes: You now need to sign in using the email address associated with your account, combined with your current password. Using your display name and password is no longer supported.
- If you are currently trying to register, are not receiving the validation email, and are using an Outlook, Hotmail or Yahoo domain email address, please change your email address to something other than those (or temporary email providers). These domains are known to have problems delivering emails from the community.

RustFlames
-
Posts
73 -
Joined
-
Last visited
-
Days Won
9
Content Type
Profiles
Forums
Calendar
Everything posted by RustFlames
-
Power steering pump & Pulley Powdercoated Blue
RustFlames replied to RustFlames's topic in 90-95 WD21 Pathfinders
The color is called peeka blue, It’s a translucent powder so I sprayed it with super chrome first, On the contrary I can’t wait to take it off-road, the coating is very durable, I’ve been doing literally every bracket screw bolt washer I can remove, It was Npora that inspired me to start this restoration. Hoping to win pathy of the year once she’s roadworthy haha Hope you guys can appreaciate the progress so far. I probally will spend another year on it, I want to powdercoat the rear axle. the only blue you should be able to see is when it’s rolled over or when the hoods open. Sent from my iPhone using Tapatalk -
Alternator and starter are basically the only things I have to to do before reassembly of the engine. Sent from my iPhone using Tapatalk
-
Took out as much casting Slag as I could with some 80 and 120 grit sandpaper rolls and then painstakinly hand blended the combustion chambers and exhaust ports to a mirror shine trying to capitalize on my headers Guess the only thing left is a 3 angle valve job, and some S1 jim wolf cams. Sent from my iPhone using Tapatalk
-
Polished my combustion chambers up to 3000 grit it’s not perfect but a hell of a lot better than they were when I pulled them, I know it won’t produce any real noticeable gains but since this Vg30e rebuild is going on a year now ( due to all the powdercoating) I will start a rebuild thread one of these days, porter out all the casting slag out of the intakes and plan to do a little polishing on the exhaust side. truly a labour of love. Sent from my iPhone using Tapatalk
-
Well guys here’s my Vg30e block Powdercoated. I sandblasted it first So now I’m just in the process of blowing it out with compressed air and putting a thin layer of wd40 in the cylinder walls and inside where the crank sits then wrap in saran wrap and put it in the warm house until I can take it to a machine shop. Not planning on boring, Just want it cleaned to perfection before reassembly, Have lots of parts to clean and paint before then Sent from my iPhone using Tapatalk
-
Powdercoated my throttle intake Hell I’ve done most of the engine now Sent from my iPhone using Tapatalk
-
Of all the pathfinders in the scrapyard I’ve looted, I always found a lower Valience not completely corroded to be the elusive of all, I’ve noticed the quantity of Pathys in the pick-n-pull has declined by quite a bit. Sent from my iPhone using Tapatalk
-
The tire carrier is overengineered you could perhaps mount a steel jerry can on I and somehow plumb it in the main tank?
-
Pacesetter Long tube headers coated and wrapped with high temperature black fiberglass wrap (Moose Racing). 50 ft was just enough to do both sides. I was hoping to have enough left over to do the Y-pipe. Probably end up just getting destroyed. I still have to get a spray can of high temp silicone to protect from fraying and debris. The wrap will void the warranty on the headers but you only live once! With the 3 coats Por-20 I'm confident the pipes won't disintegrate from reaching higher temperatures than intended. If they do, let my mistakes be your knowledge! My question is I know the one bung on the drivers side header is for the Exhaust gas re-circulation tube, however there is a second bung just down the pipe from it. It is welded on but does not open up into the header its blocked by the pipe its welded onto. I'm guessing this is to install a temperature sensor. Is this a correct assumption?
-
They do look beefier but I believe the stock ones had just rusted to the point where they were going to fail, I do want to add the calmini lift however I was told at the parts store it would be a 9 month wait as they only build a single small batch once per year, not sure if there was any truth to that but right now I’m saving for an Xterra transmission, are all years of xterra compatible with a VG30E? Sent from my iPhone using Tapatalk
-
Hey everyone I haven't made a post in like 7 years, the ex crashed my pathfinder on an icy morning and slid into a trailer. So it sat in a field for a good long while until I decided it was time to bring it back to life. Someone had come along and cut out my amps and stole my sub. So my first order was to rebuild the stereo. I swapped out the speakers, deck, replaced sub and amp. Deck: Kenwood Double Din DPX503BT Amp: Kenwood 5 Channel amp XR901-5 Speakers: C2- 570x JL Audio Now onto the Dynomatting after upgrading the stereo it was quite evident that there was a lot of resonance between the body panels and the interior pieces especially when the base drops hit. This in turn took away from the music clarity with all the rattling, vibrations. It was the worst inside the front doors and the roof. Dynomat is a sound deadening material that keeps the road noise out, keeps the stereo sound inside. It makes a stock stereo sound great and an upgraded system sound phenomenal. I removed all interior panels, roof pieces (steam cleaned them once they were out) and went to town. I finished the cargo area, roof, pillars. Also to note I rolled up chunks of Dynomat and squeezed them inside the doors to eliminate the annoying buzzing sound in there. Its not a complete project there's a product they make called Dynopad and its thicker and specially designed to be placed on your floors under your carpet/vinyl. It was out of my budget at the time and eventually I will get around to it. This project cost me about $580 Canadian for just the dynomat. Its not cheap but if your serious about music its worth every penny. Also music aside it makes driving much more pleasurable when you take it on the highway the road noise is almost completely cancelled out, let me put it this way its the difference between driving a tin can and driving a Vault. There are other products similar to it but this was what was available to me in the area Hauling it home after it sitting in an impound for over a year. Before that It sat in a field for nearly 5 years The start of my quest to clean the underbody and frame began with dropping the fuel tank After several hours removing all the grit I had discovered some nasty little pinholes I sealed them up with JB steel stick that plugged the holes hopefully forever. 3 coats of Por-15 later and it was looking a hell of a lot better. Later on the Cap for the fuel pump was cleaned up and painted and wires all saudered wrapped The old calipers were looking rough so I replaced them and painted the new ones with some blue caliper paint ( little did I know I would start to paint everything in sight this electric blue scheme) Old springs vs. New comparison Since I had upgraded my shifter to a leather wrap and put a leather knob on my transfer case shifter. I cut this wrap off a BMW in the pick n pull yard. I had to drill out some of the internals to make it fit then I just slapped some contact cement on there and there you have it Been storing some spray cans of tint around for awhiles so decided to black out the tail lights and 3rd brake like, with the leds in there it looks very sharp Every single bolt, nut washers, locknut I removed was caked in rust, I methodically used my wire wheel cleaned everything up and painted with primer and 3 coats of a gloss black rust paint. After I reassembled the front end I realized that my knuckle, lower and upper control arms looked awful bolted to those freshly painted pieces so I continued on dismantling the rest of it. This is a comparison shot of lower control arms before and after primer I figured why not carry on with the blue so I used this raptor box liner paint to coat my upper and lower control arms, transmission support brackets, torsion bars, panhard bar, the torsion bar bracket, I tinted it "Electric Blue" Rear stabalizer bar, that dog bone piece off the front end. this pic I believe is of the first coat, I ended up applying 2 Im still putting it together here is some of the driver side assembled Since the front corner was crumpled I had to order a new radiator support, still in the process of removing the old one I cut out the heating pads and wiring out of some luxury suv at the pick n pull yard and installed them in my seats. Always wanted heated seats Since I was painting the entire frame and underbody with the por-15 black gloss (afterwards I painted over top of that with ashphalt undercoating)there were areas I could not reach, so I dropped the transmission out and ensure nothing was left uncoated from the rear all the way up the firewall Ordered some pacesetters, cleaned all the shipping paint (a real pain in the ass) and gave them 3 coats of por-20 high temp paint. I intend to wrap them with header wrap afterwards. will upload pics once I get around to it There are a few other things I am bouncing around on ( bodywork mostly) but this old girl has come a long way, and I dont intend of stopping here! Hope you guys enjoy this update! It certainly has been awhile!
-
Biker Jared, Im interested in the S2 cams and spring set as well. If you plan on doing it in the spring that would be perfect with me, as that is the only time of year I have to tinker with the pathy. Never really done a buy in like this before, and you will have to explain how it all works,as the only thing Ive ever bought online was pokerstar buy in chips lol
-
Doing some much needed maintenence!
RustFlames replied to RustFlames's topic in 90-95 WD21 Pathfinders
Yeah Pav. The grease in the hubs was very gritty and black, I essentially dug it all completly out and hand packed it with fresh grease, along with the new bearings. No much of a process. Just removing all the old stuff out and slop the new stuff in. Unfortunatly BikerJared, I turfed the old tires as soon as I had the new ones mounted. Yep Precise1 I knew I was tempting fate travelling 500k to work and back on slicks, sometimes you gotta do what you gotta do though. Slartibarfast and Harbinger. Yeah I will be replacing all the bushing soon as possible, thanks for reminder same with centerlink I replaced the inner and outter tie-rods as well just forgot to take pics. Those reverse threads inner tie rods werent cheap, 90 bucks a piece at napa. Yeah I got scolded by my buddys for putting in the bosch's quad platinum plugs, but I havent had any problems so far with them. I will probally be beefing up the pitman arm and centerlink this winter. I just found out the old lady just smashed into the back of a semi with it, (She's fine) suprisingly the airbags never went off. Which was a good thing because she is 8 months pregnant! Looks like I will have a bunch of front end bodywork to deal with when I get home! Everyone tell me that its not worth fixing this vehicle.(My pops even told me he would be disappointed in me If I attempted repairs lol) but they don't understand the joy and sense of acomplishment I feel from improving it. Im afraid Im going to have to let them all down. Well not you diehards of course -
Doing some much needed maintenence!
RustFlames replied to RustFlames's topic in 90-95 WD21 Pathfinders
Now thats better, time for a beer Whats the point of shining up your rims when theres a god awful brown drum peeking out from behind Grinded down and painted, at first I thought it look very homosexual. When the tire was mounted it looked much better Anything to hide the rust haha Put in a new distributor cap as well The hid lights are amazing, I will never go back, converted basically every else inside and out to LED Did some dynomatting to keep the road noise out Afterwards I put on some new rubber and took it in for an alignment. They told me my steering box is quite worn,there is an inch of play in the steering wheel. At least that death wobble is non existent now, Well thats all for now when I get home I will upload my clutch repair pics -
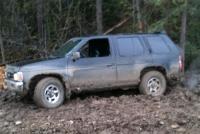
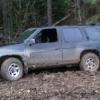
Hey this is basically my first post to show you some of the love Ive putting into that indestructible vehicle, for your viewing pleasure : ) Ever hear the saying dont fix what isn't broken? Well I took it upon myself to do some upgrades. I was driving this to work where the guys gave me the nickname Bald Tires. My ricer friend told me I'm in desperate need of an alignment. Theres at least another kilometer on my fronts for sure So I actually don't live here in Calgary anymore but the "garages" in these townhouse are so slim only passengers on one side can get out. Not enough room to do anything in there, however in the rain I would have it wedged half inside just to keep dry Yeah I took one look in there and figured I needed it to start ripping things apart and putting in less rusty components! Im was totally winging it here and I was in the dark as to how to remove the lower ball joint, eventually I took a zip disc to it not really knowing how the new one was going in... Yeah you gotta be smarter than the hub, while we are in there, might as well replace the inner and outter bearings.. The stock rotors had a lip that is probally pretty normal for a vehicle with 320 k Replaced the rusted/dented bumper for an equally dented shiny bumper! Paint her blue and call her new
