
- Sign In Changes: You now need to sign in using the email address associated with your account, combined with your current password. Using your display name and password is no longer supported.
- If you are currently trying to register, are not receiving the validation email, and are using an Outlook, Hotmail or Yahoo domain email address, please change your email address to something other than those (or temporary email providers). These domains are known to have problems delivering emails from the community.
Leaderboard


Popular Content
Showing content with the highest reputation on 10/30/2019 in Posts
-
I've griped about the AT in the past, but something that's really been bugging me is the drive-by-wire + AT on my 04 when off road, particularly in 4L. The main issue I have is that the truck doesn't crawl at all...it revs and revs and revs and does nothing, and then lunges forward once there's enough revs. I completely despise it about my truck. My offroad outing the other day, and watching the video of it, straight out embarasses me because it looks amateurish, but I know I'm barely even throttling it and you can hear the engine slowly revving up in response. I keep the trans in "1" when in 4L, so it's not a product of a shift either. My question, however...is this normal for anyone else?? Keeping in mind that 03-04 R50 and I think only 03 QX4 have drive-by-wire, I suspect all the drive-by-cable AT guys don't have this problem. I have no driveability issues otherwise. The transmission is responsive all other times, including 4H (this might be hard to substantiate because when I'm in 4H, I'm usually not going slow or not needing to ease up to speed from a stop). I don't suspect issues with the torque converter. My truck doesn't even idle up my driveway, though which has a very moderate slope. By comparison, the FJ80 I've been working on for months will storm up my driveway in idle. The truck accelerates well, and I don't feel any sort of slipping at low or high speeds. Given that, is there something else to consider? I'm considering crawler gears, but not if it just means I'll have to rev higher to get the same results. Is there some way to put a low-speed lock on the TC? Should I crash it into a wall and find an 02 instead? Is there an issue with the transmission I'm not aware of?2 points
-
Well, two years later and Cargo Rack v2 exists now. It's not quite done...I jammed on it all last week, late every night (seriously, I hard slept) so that it would be somewhat usable for the CANVAZ 2019 trip over the weekend. From prior posts here, the issue was clearance for the fridge, and there was just no easy way to re-work v1 to make it fit. So, I bought some more steel and got to it. Same considerations as before, but I struggled to find a similar configuration that let me keep my two crates and incorporate the fridge. The floor space in our trucks just simply isn't wide enough, in my opinion. The anchor mount positions are inconveniently and oddly located, too. I spent countless hours redesigning a setup that met my needs, only to realize there was just another issue to resolve. I think I went through about 5-6 designs in total...it was exhaustive, to say the least. ... Rewinding for a moment...I bought a fridge slide several months ago for a long road trip in our new Telluride. Here's how that project turned out, btw... I've been meaning to do a write-up, but basically, I'm using a cheap solar charge controller to regulate the charging on a 35Ah Harbor Freight sealed battery. The fridge runs off the 2nd battery when the car is off, and runs on the car's battery (while the 2nd battery charges) when the car was running. This was good enough to keep the fridge running in the car overnight. However, for part of my trip, we stayed in cities for two nights, and the lack of driving the 2nd day didn't charge the battery enough. Not that we kept perishable foods in there, so it wasn't problematic. ... Anyway, it was already planned to use that the slide and battery setup over to the truck. The fridge slide is a bit oversized for the fridge, so it's one of the reasons I struggled to get suitable dimensions on this redesign. Another issue was the anchoring to the truck. I did not want to take the same approach on v1, where the feet hang off the frame wherever. I was playing with some ideas for a rail for the rack to slide onto, but that also became a little problematic and somewhat of a waste of resources. I opted to make floor mounts that squared up the positions, so that eventually I can make another floor rack that's suited for other purposes (noting that v1 and v2 have been specifically for camping use because they incorporate a slot for a table...not something I really need for any other use). The mounts use simple 2.5"L x 1.5"W x 0.75"H plywood spacers, and then two pieces of 0.250" plate welded together. The spacers are needed to clear the carpet and such. The metal parts allow me to recess the socket bolts and to give me anchor points. I bent them up to help guide the rack in (this is where I wanted a rail of some sort to connect the front and rear mounts), but also to keep the rack from striking the hatch opening. Shown attached... For mounting the rack, I welded in some round steel tube to prevent the square tube from collapsing when bolted down. I then added in a 3/4" plywood base on the lowest level, since this anchored down my tool box. The upper shelves use 1/2". I welded in tabs to support all the shelves, and screws are used underneath to hold them in. I still need to add some expanded steel on the upper hoops behind the head rests, and better/more tie down points for the upper shelves, and complete the shelf area above the fridge space. I apparently don't have a pic of the rack filled up. But it looks like this: The slots left of the fridge are for a crate+lid, and then a dedicated spot for ratchet set. The space in front is where my toolbox is. The 2nd battery mounts to the right of the fridge. Ignore some of the wireframes in there...I used those to mimic the wheelwells and hatch opening. As you can see in the sketch, there will be another tailgate, but that's another issue in itself. Finally, one fundamental change about this design vs. v1 is that the rack slides directly in and out; it doesn't require me to turn it at an angle. That's why I was trying for the rail approach, just to make it easier to move in and out. The width at its widest is 46", and is 34" wide at the top bar. Rack height (excluding mount height) is 30". Max depth is 31" at the main level, and shortens to 24" at the upper shelves to account for the seatbacks, which can recline up to 3 notches.1 point
-
1 point
-
The tire pressure indicated on the door jamb only applies to stock tires and wheels, stock suspension, and stock weight. If you change any of these, throw that tire pressure recommendation out the window. I haven't run the doorjamb pressure (26psi) on my Pathy in over 20 years. The best way to determine ideal tire pressure for your rig is to do a chalk test.1 point
-
My old 93 With the LT 31x10.50 15 was supposed to be at 26 psi cold. I run 28 for the street with my 33x12.50's. Do the chalk test to find the best pressure for your tire, wheel, truck combo. I would expect it to be in the 26-30 psi range.1 point
-
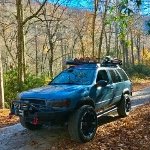
Went got a little dirty today! Sent from my SM-J327P using Tapatalk1 point
-
1 point
-
time for these maybe ? ? https://sfcreation.com/products/front-skidplate-14-aluminium1 point
-
Deep into the Richland Creek Wilderness Area, AR1 point
-
I dare say it would be the reason your cel went off. Ah how I love my diesel. Only got about three sensors in the thing.1 point
-
That's quite the hook on your cherry picker! Looks like it's coming along.1 point

(1)_opt.thumb.jpg.035a5eb628baefe0934fbb6e70f9b39e.jpg)
