

k9sar
-
Posts
9,906 -
Joined
-
Last visited
-
Days Won
15
Content Type
Profiles
Forums
Calendar
Posts posted by k9sar
-
-
I used my roo-bar to tie ropes to when I was rappelling out in New Mexico. Also worked well for running through brush but when it comes to impacting something of size, they do more damage than not. Go big or go without.
-
 1
1
-
-
check/wiggle the connector on top of your MAF. Always an easy check for something that can seriously F*k with your ability to run
-
haven't abused the 05 yet. Just driving it to work while I try to get the 95 through inspection
-
is this rigid line or flex?
-
I jumped from a 95 to an 05 (actually, jumped is a bad word, I have both). I skipped the frameless caR50 mallcrawler model
-
Van is running great. Gonna pull the coils and plugs and do a compression test before winter but I hesitate to even try to pull the 5 plug and risk the insert coming out.
-
thanks for sharing your story. I'm sure it will help some other folks who wander in here looking for ignition/starting solutions.
-
what stud? lol.
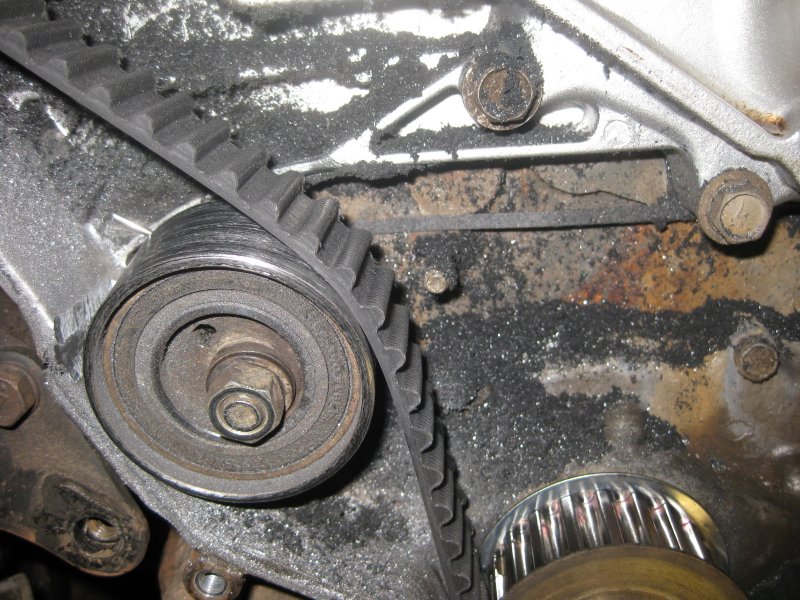
no, the stud is there for the tensioner spring. no roller.
-
I installed mine (several years ago) using the seatbelt through the seat as in the picture and there was an additional anchor strap with a clip on it. I fed that under the headrest and down to the floor-mount that is there to hold the cargo net.
-
yea, I think they were 3 bucks each when I bought mine. If one broke, the other may not be far behind
-
2
-
-
get a replacement from Rockauto. fairly cheap. Easy to replace once you open the door panel. 2 bolts.
-
1
-
-
Thread the insert onto an old sparkplug (with a crushed washer), knurled side furthest closest to the washer, smear some hi-temp RTV around the insert and carefully thread it into the hole. Now for the tricky part.. As soon as you hit resistance from the washer coming in contact with the seat, STOP. If you tighten any more, you will probably remove the insert with the sparkplug. With a quick twist, start the removal of the sparkplug. This tool a few tries and a little bit of intentional buggering of the threads on the insert so it would bind to the head better but if all goes well, your insert should remain in the hole and be flush with the plug seat. Verify with a probe, screwdriver, borescope, whatever. Tape an extension to the punch tool (I just used a steel axel from a lawnmower) and carefully insert the flaring tool into the insert. Smack it a couple of times to spread the first couple of threads and driver the knurls into the aluminum. Wipe (don't spray) any residual RTV from the sparkplug seat.
You can now either wait several hours for the RTV to set or carefully thread in a new (uncrushed washer) sparkplug until it's snug. SLOWLY torque to 15 ft-lbs. This was the most nerve wracking part. Replace the coil and reinstall the guards/shields. Let the RTV cure overnight and it should be good to go in the morning.
NOTE: It is important that you use a new sparkplug when you do this as the crush-washer will conform to any variation in the seat introduced by the insert and knurls. -
Grease the tap and start cutting, approximately 2 to 3 threads at a time, cleaning and regreasing after each set.
Once you get completely through, us a small, long screwdriver to remove any excess grease in the hole. Use a piece of tubing attached to a shop vac and suck out as much foam as possible. Shavings will come with it. Use compressed air to blast out the remaining foam. Clean the hole with brake cleaner (will break-down grease and soap foam) and use more compressed air to cleanout the hole.
-
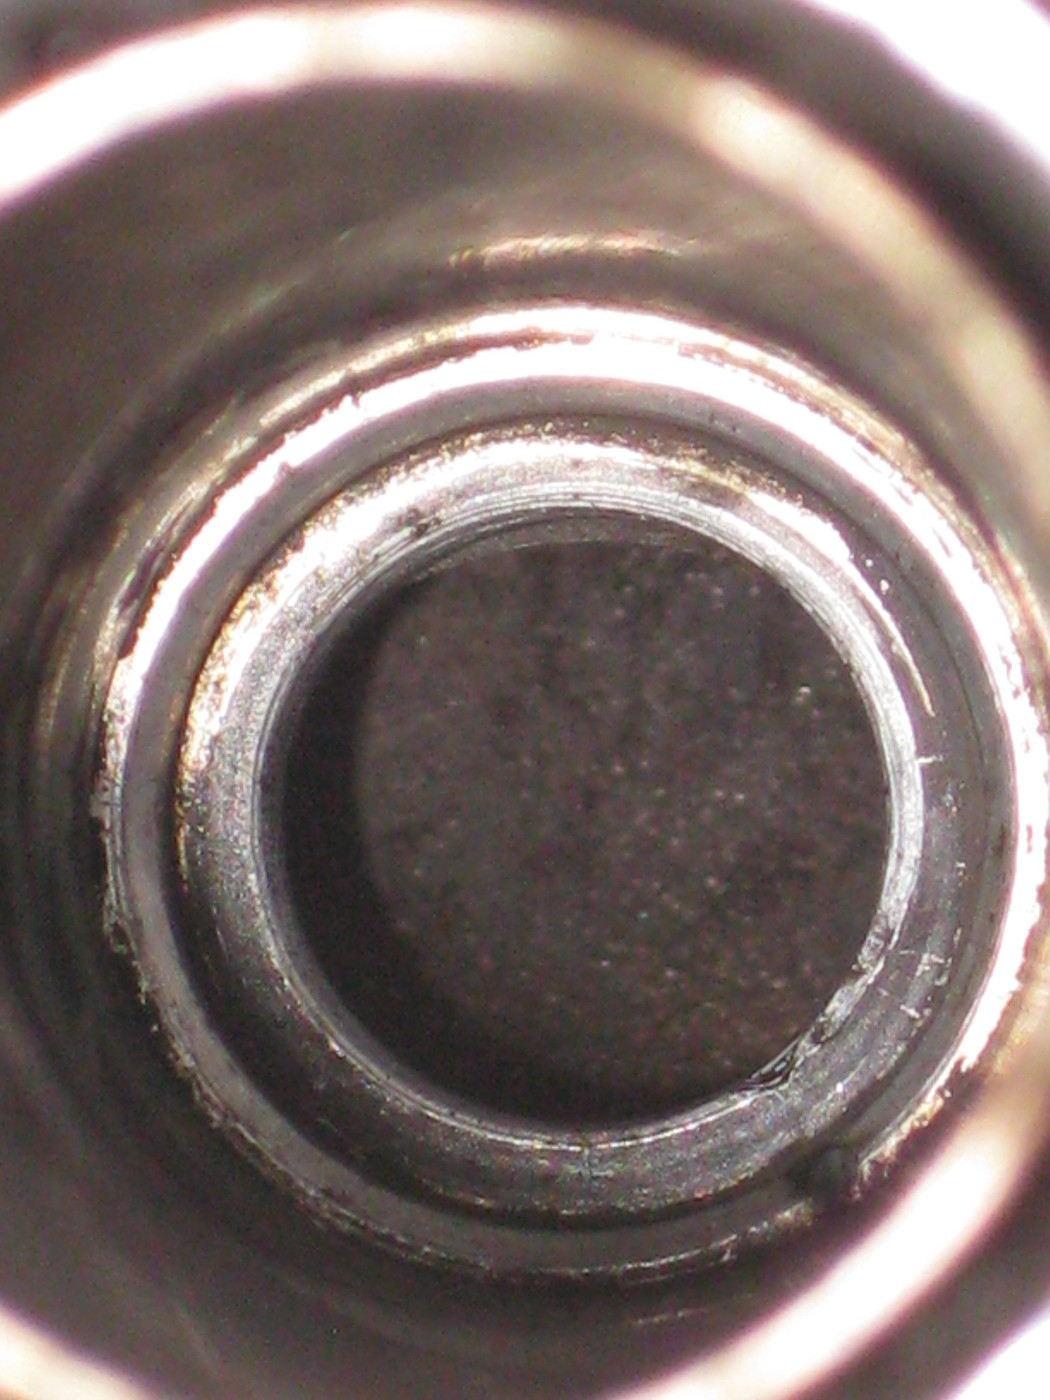
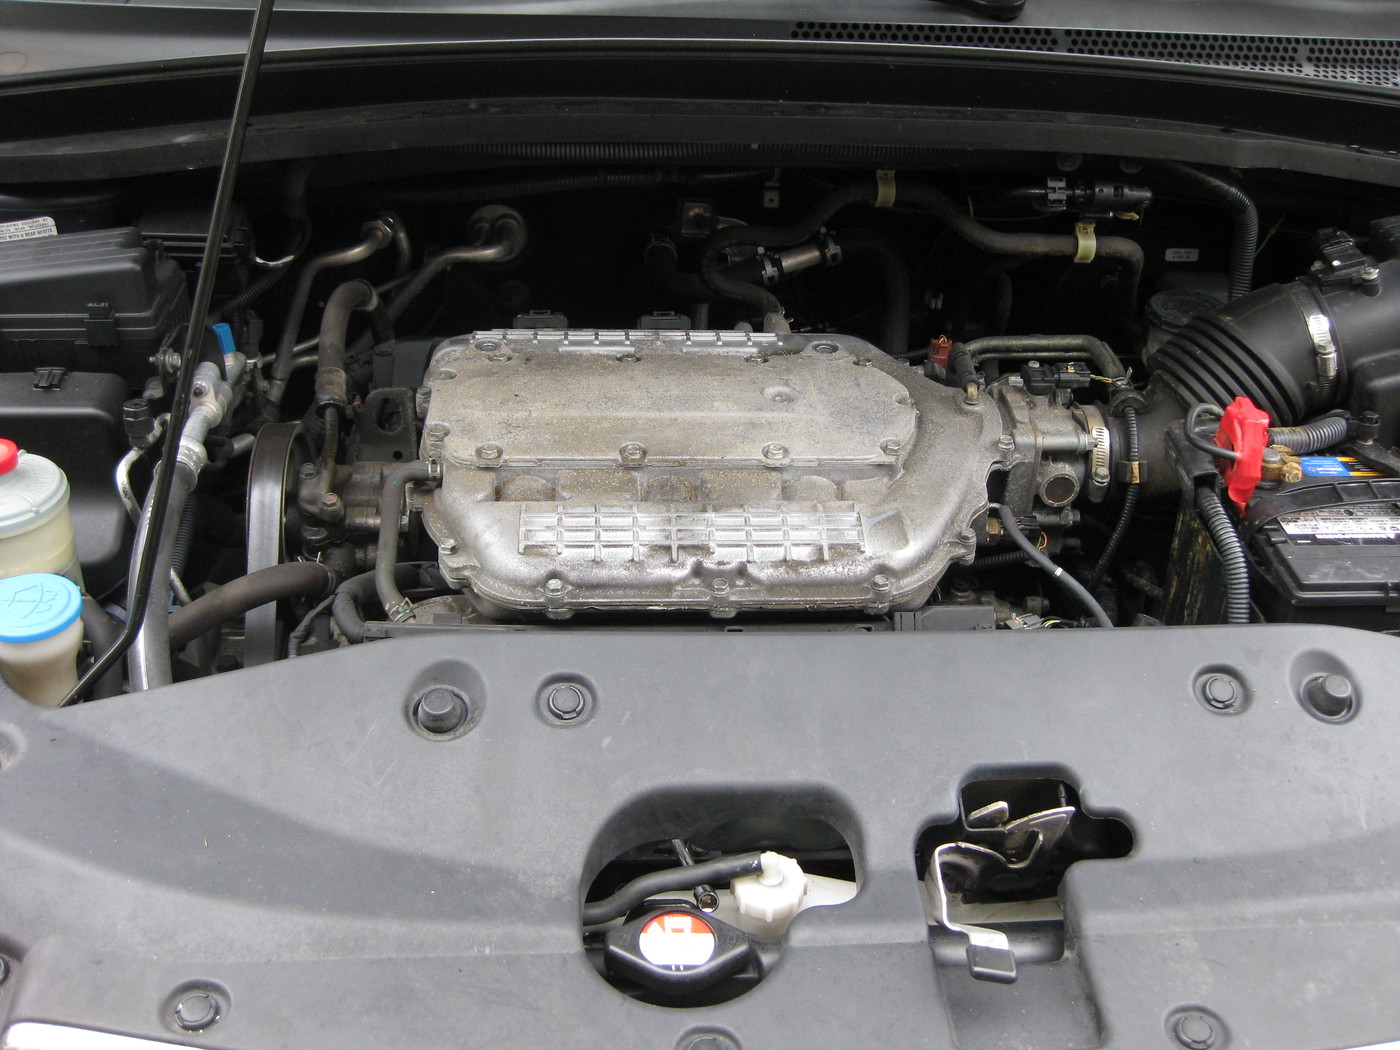
As promised, here are some pictures. I removed the engine cover as well as the plastic shield over the radiator. This allowed easy access to the sparkplug holes.
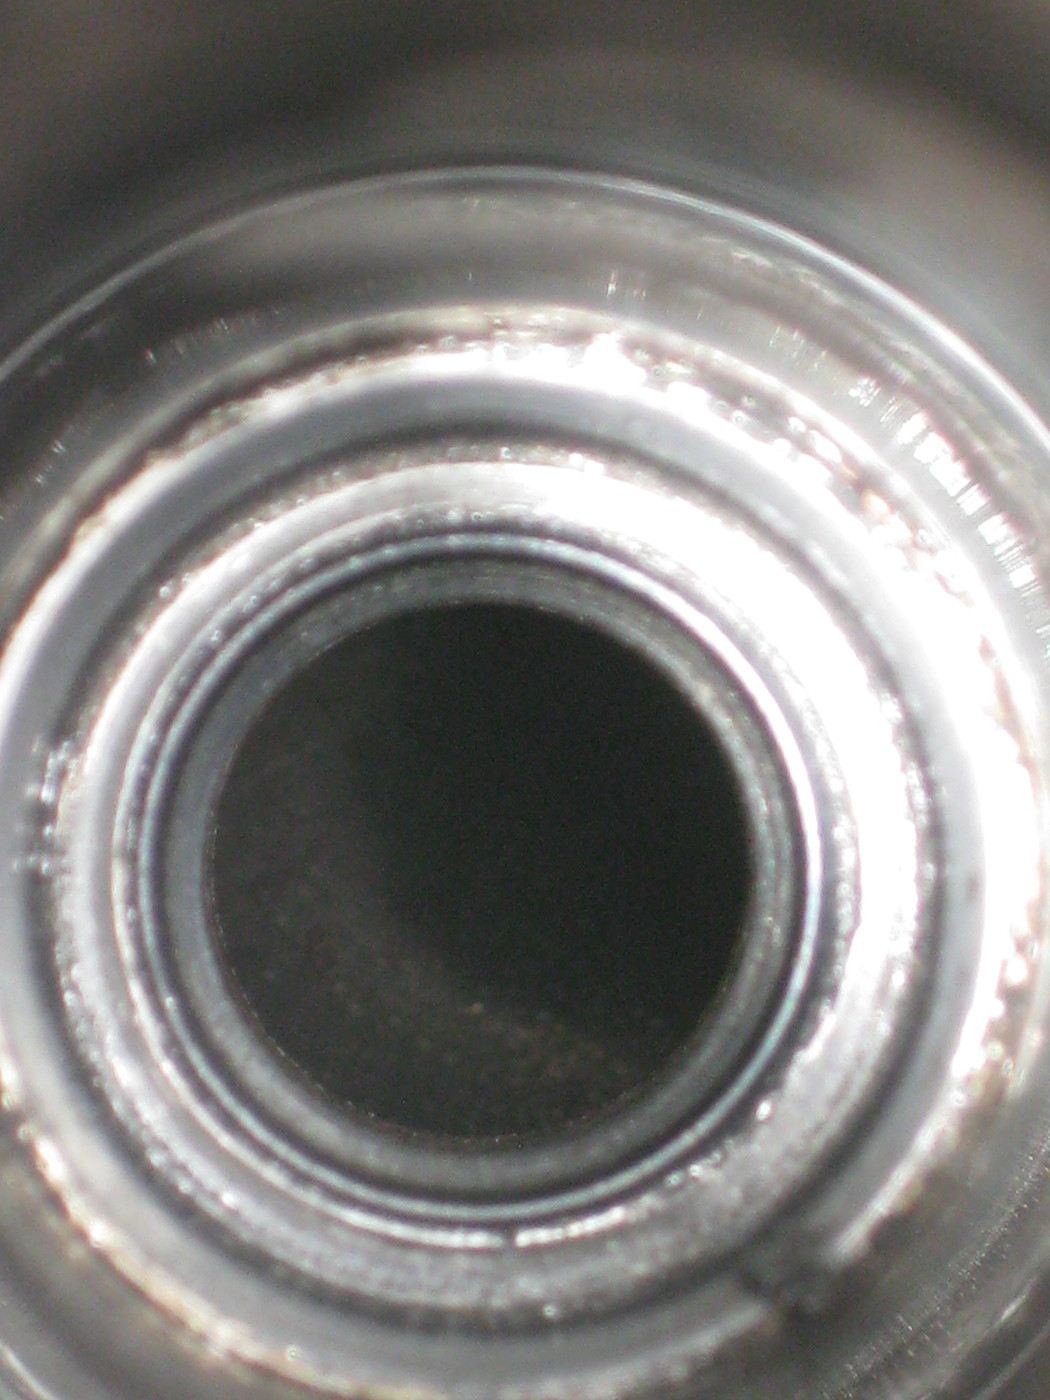
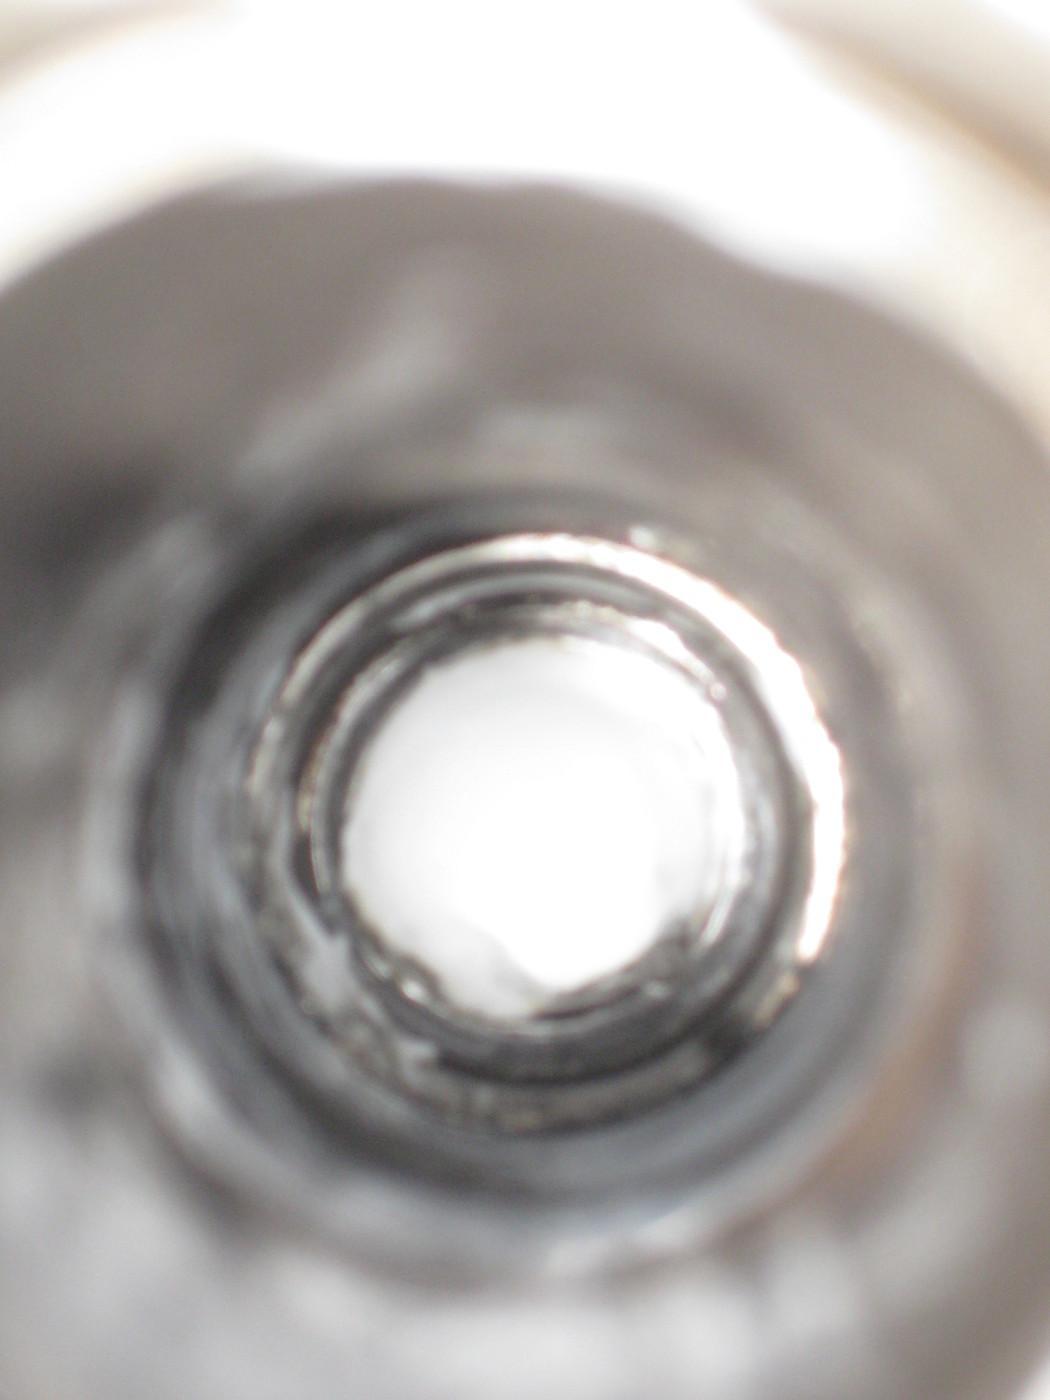
Here you can see the damage to the sparkplug hole
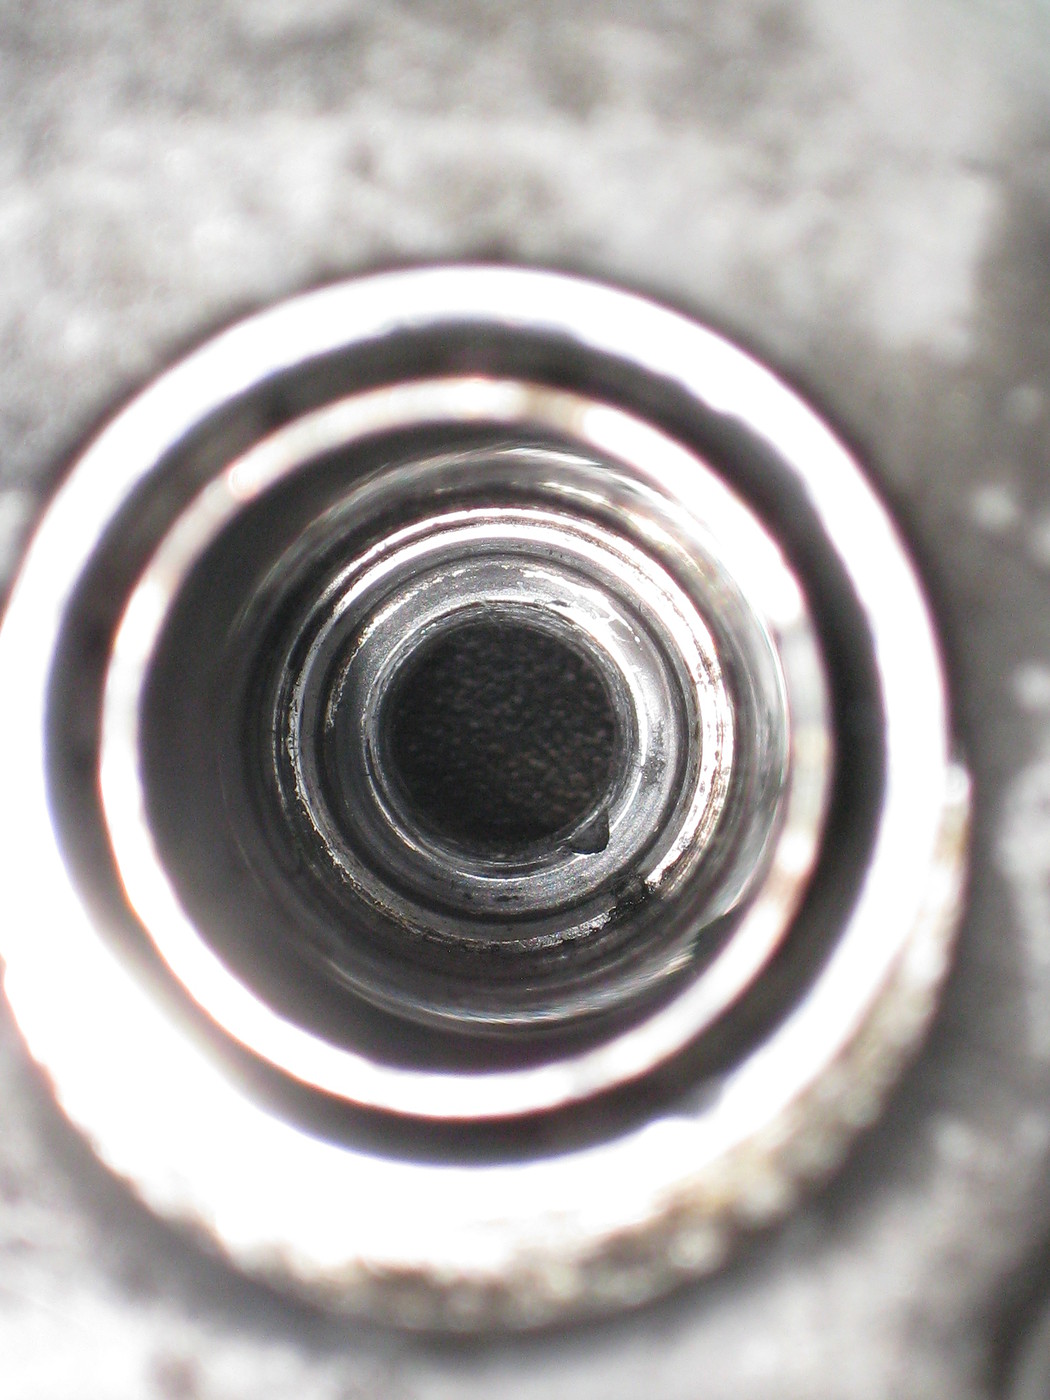
Using a drinking straw stuck on the end of the shaving cream can, I filled the cylinder with foam.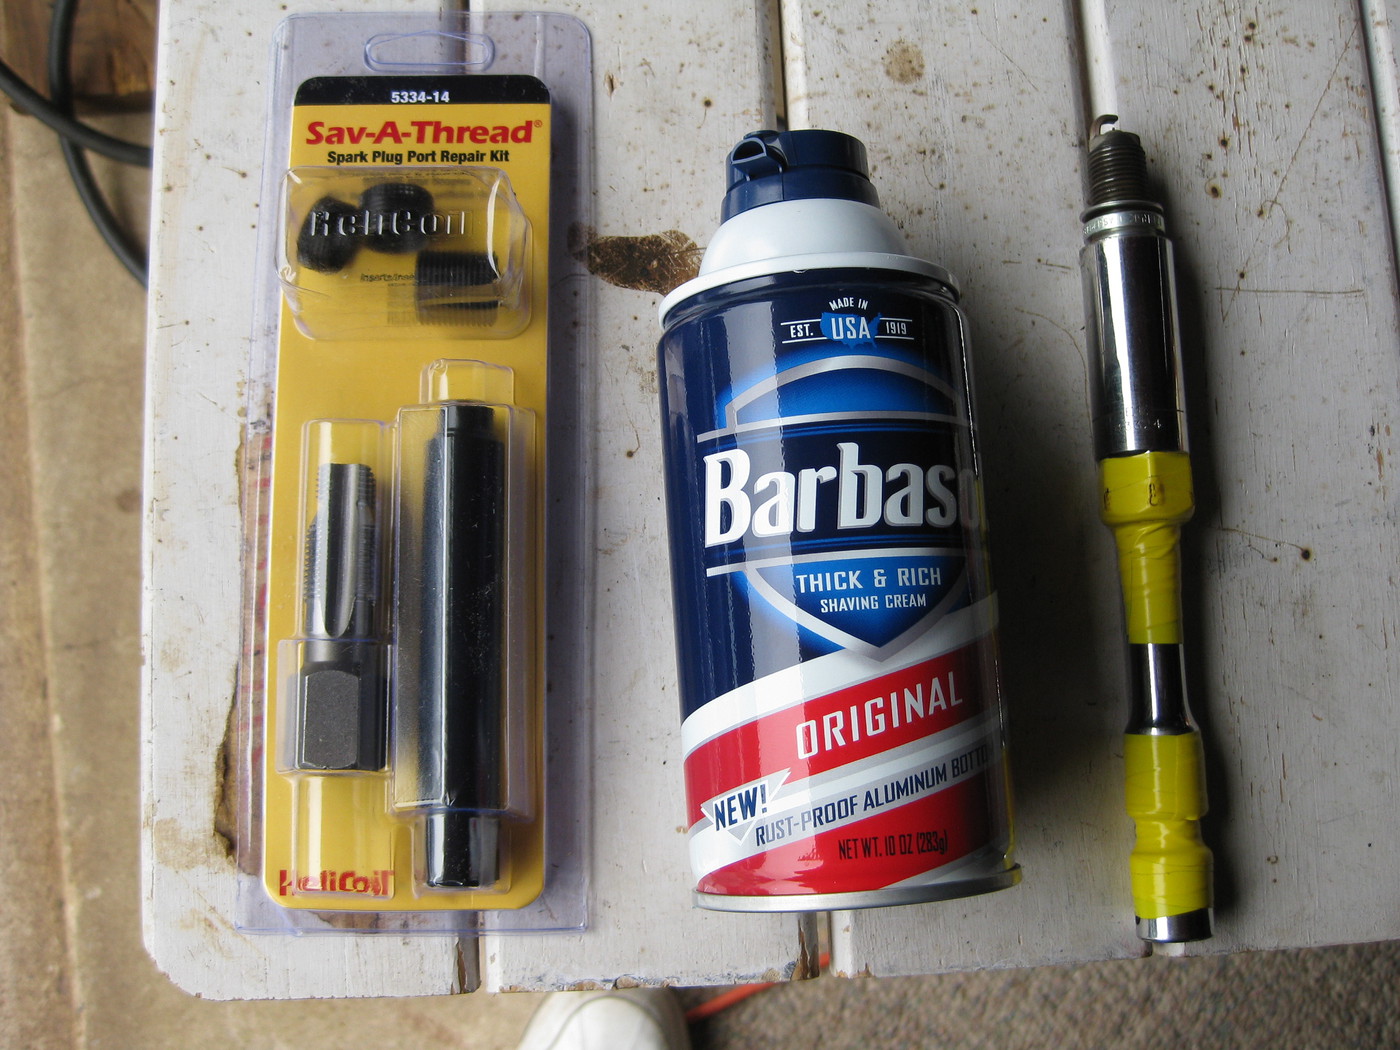
-
So anyone who knows me on facebook knows what I'm up against but here's the story. I'm posting here because my Odyssey forum is much less active and this may be of help for my pathy peeps.
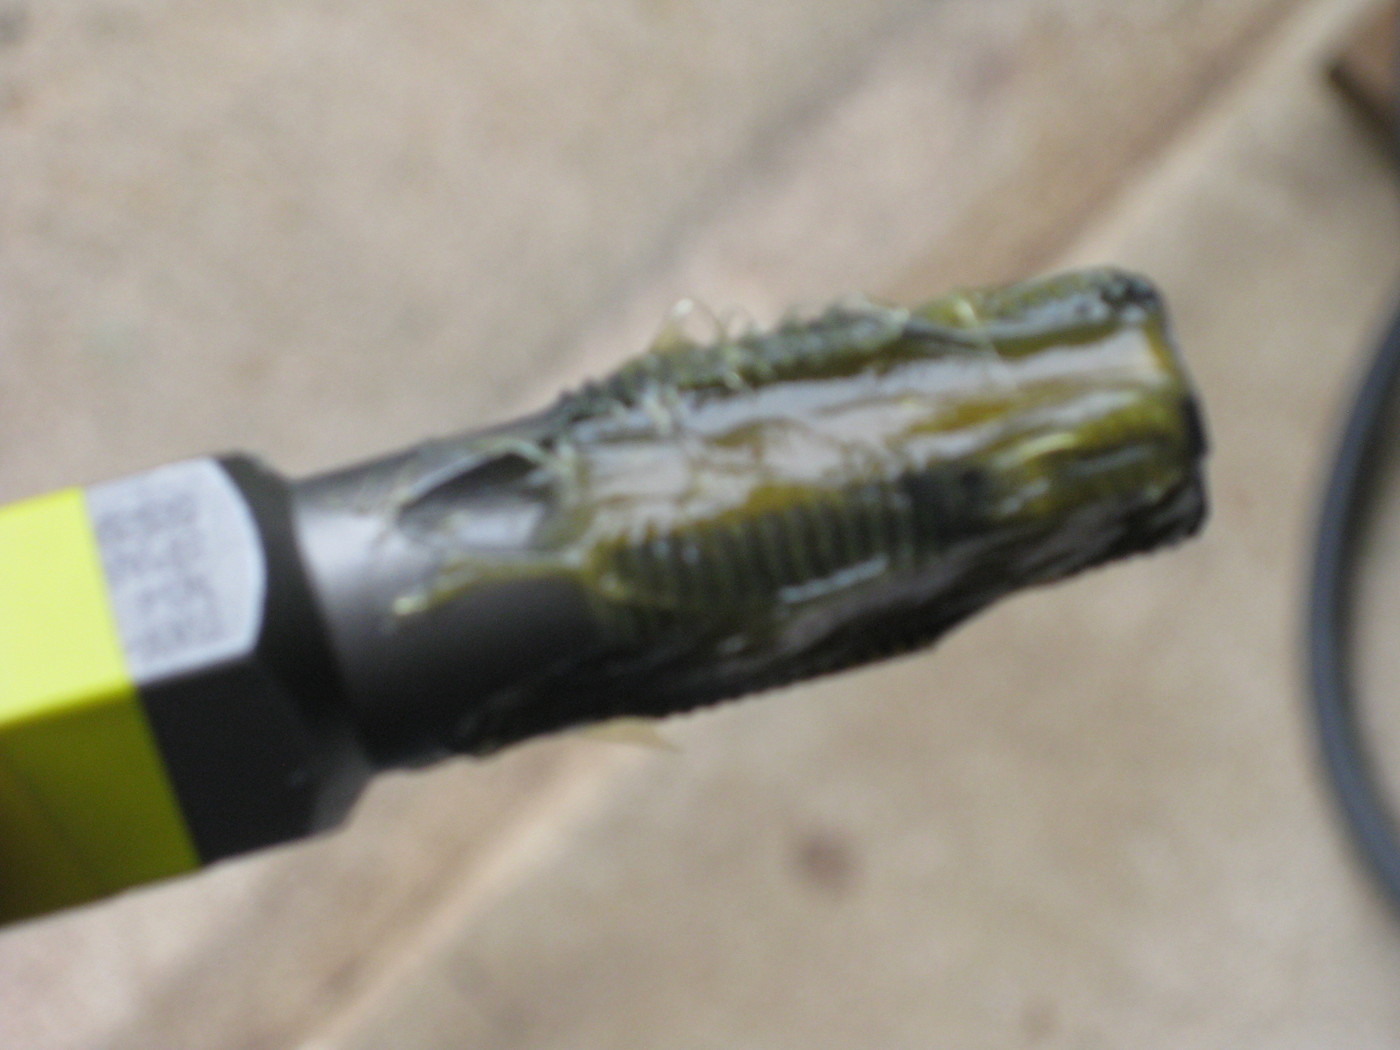
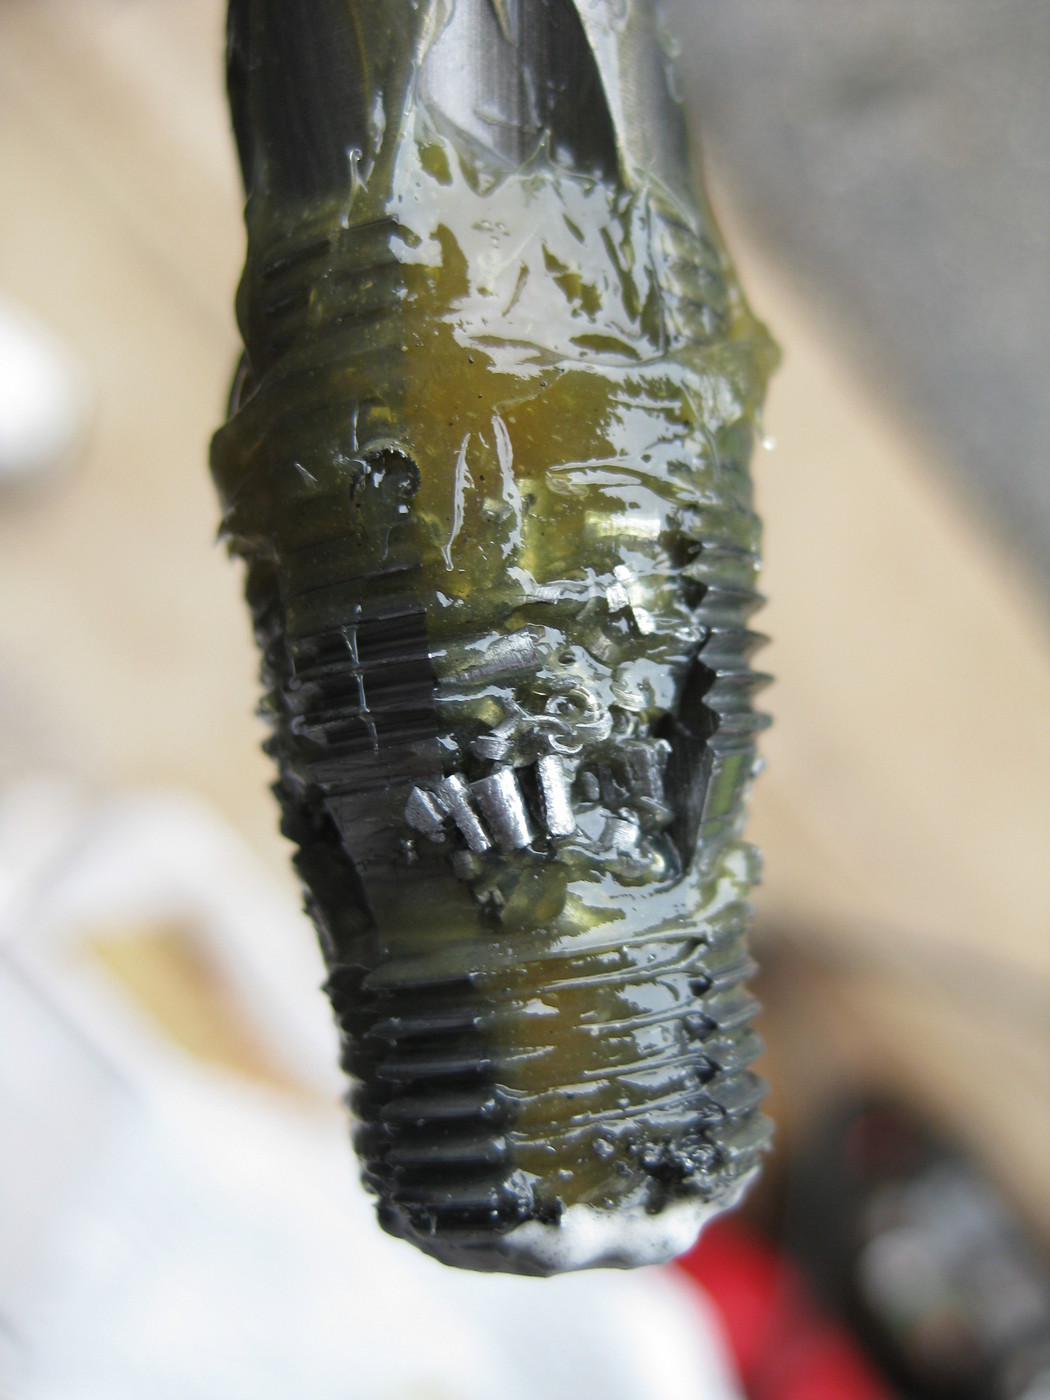
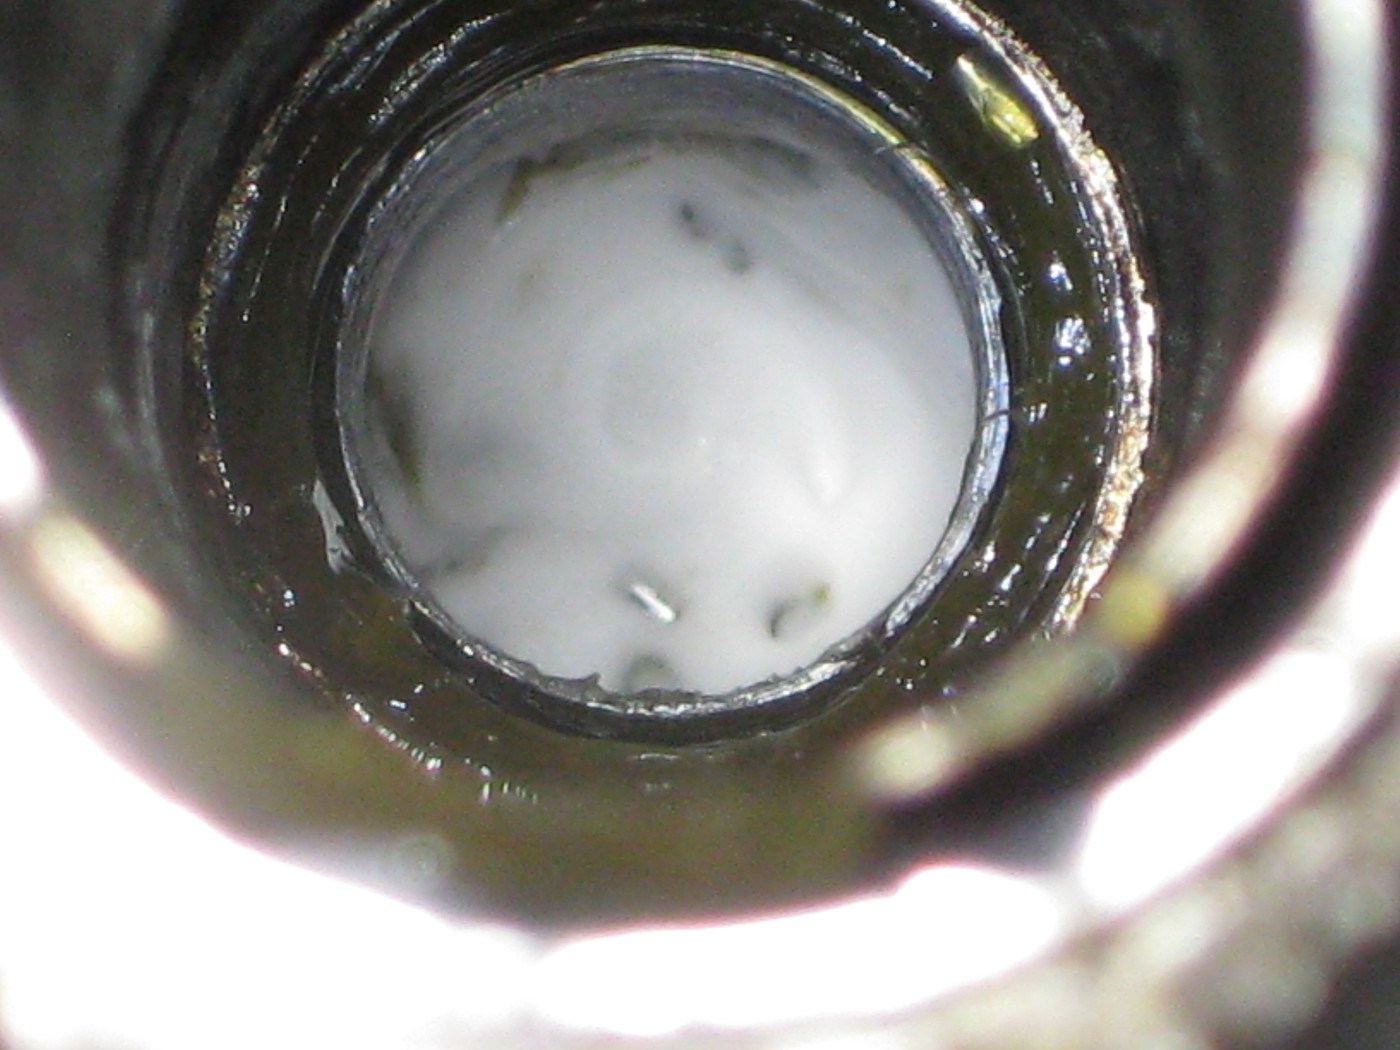
My wife's van was getting a P0305 code which is a misfire on cylinder 5. It would periodically clear itself so I didn't rush to get to it. Several days ago, I decided to determine if the problem was with the #5 coil or the spark-plug. The Odyssey has individual coils for each cylinder. I planned to clear the codes and swap the coils between #5 and #6. This would tell me if it were a bad coil or a faulty plug. #6 came out nice and easy but #5 would not budge. I eventually had to rip the coil head off and try to get some PB Blaster down the sides to release the rest from the deep well it was in. Within a couple of hours of digging, twisting, swearing, pulling etc, I eventually had the coil parts removed. As I was cleaning out the sparkplug well, I noticed that the sparkplug itself rattled a bit in the hole. Not good. I pulled it out and this is what I had:
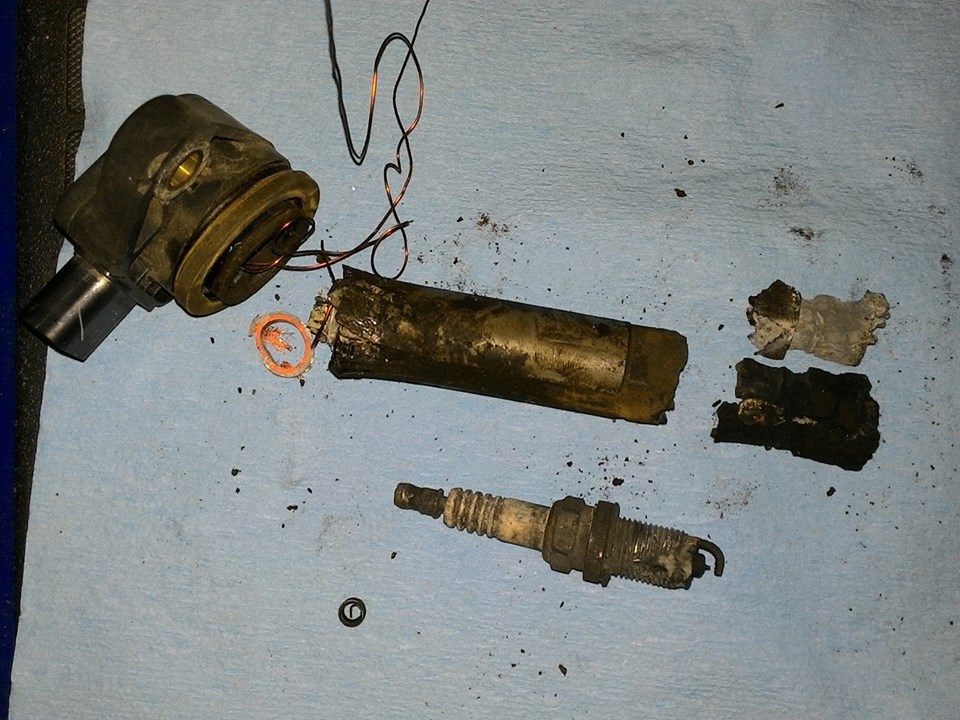
Here is a close-up of the sparkplug:

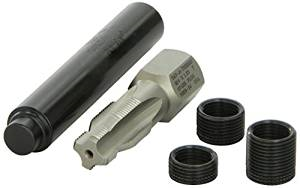
So after a few days researching options, I decided on tapping the spark-plug hole and putting in an insert for new threads. Heli-Coil makes a kit shown below (Thanks Adam)
As for the process, I did pull all other coils and plugs to make sure this was the only problematic one and did a fairly good cleaning on the well for #5 such that a new coil will slip in easily. There was a lot of gunk buildup in there. I plan to do the following steps for the repair:
1. Set cylinder #5 at mid-stroke. I want to minimize the void but need to be far enough down so it doesn't interfere.
2. Using a straw, fill the cylinder with cheap-sh!t foam shaving cream (isn't this use where it got it's name?)
3. Fill the grooves of the tap with a thick grease
4. Slowly tap the sparkplug hole, taking care not to go too fast and to frequently remove it, clean it of shavings and then re-grease it
5. Once tapped, remove the tool and reach in with forceps to grab any visible shavings that escaped the grease
6. a shop-vac and a piece of tubing to suck as much shaving cream out of the cylinder as I can, along with any suspended shavings
7. use an air-gun with an extension down into the cylinder to blow out the remaining shaving cream/shavings
8. Clean everything well with carb or brake cleaner, using air or cranking engine to blow any crud out
9. Make sure new threads are clean and dry
10. Thread insert, knurled end first, onto a new sparkplug and coat the outside with high-temp RTV or thread-lock(red)
11. thread assembly into the newly cut hole. The sparkplug lip should keep from running the insert any further than flush with the head
12. Carefully remove the sparkplug and pray that the insert does not come back with it. If it does, I have a plan using a back-tap
13. insert the set-tool and smack it good with a hammer to spread the knurled part into the aluminum to hold it in place
14. One final cleaning then install the new sparkplug and coil
15. If using RTV, let it sit overnight to cure, preferably 24 hours. If using thread-lock, run the engine to temp to cure the thermoset plastic
In theory.... this should all work. I'll update the post if there are any changes
-
left nut
-
The first weekend I had my truck, I did a bunch of off-roading in the desert southwest... in white-thorn Mesquite. Good thing I had a bottle of black Turtle-Wax Color-Back polish. Took all of those scratches right out
-
many years ago, I just spliced in 3 random wires I had laying around. Guess that wasn't the correct fix but it has work ever since.
-
Here's back when I did mine http://www.nissanpathfinders.net/forum/topic/9142-poor-mans-lift
-
I've read and re-read the huge coil spring thread on here along with countless others and I get more and more confused each and every time, I'm shooting for 3 inches of lift with a set of springs out of preferably a grand cherokee since there's tons of them in the yards around here.
I can get coils for $10/15 a piece but my big thing is I've also read that people have gotten the .60 sized coil springs and achieved no lift, obviously I'd like to avoid that.
The main info thread was written way back and I'm sure there's been a ton more info discovered since then but here's what I think is what I need.
I need the front springs out of a JGC with a v8 with 9 coil springs with a free length of 17-18 inches with a wire diameter of .56 to .60.
I've read that springs with 8 coils are no good and anything smaller than .56 doesn't really give any lift. I need at least 3 inches of lift so I'd really like to only have to pull one set of springs.
Also does anyone have any before and after pics that they could post? All the pics in the threads are dead.
I'll try to find my thread. I know I posted before/after pics when I lifted mine.
-
Welcome!
Interesting to see a 95 SE with a chrome bumper. Thought they were black like mine. Never gave it much thought
-
top of the page next to your name, select My Profile then, on the upper left should be a place for your picture. Hover over it and there should be a box that says "change". click that
-
Iron Maiden
-
I looked at the member map and do not see anyone from Iceland. Perhaps someone just left their location information off. Is anyone out there in Iceland or anyone been to Iceland fairly recently? I have a niece who is going there on Monday for a week and she has no real scheduled plans. Was wondering if there is any first-hand experience/suggestions of things to see or do.

in search of a grille guard, brush guard for a 95 pathfinder
in 90-95 WD21 Pathfinders
Posted
I have a factory one in my garage that isn't going back on the truck. It's in PA though and shipping would be costly