

Precise1
-
Posts
42,909 -
Joined
-
Last visited
-
Days Won
204
Content Type
Profiles
Forums
Calendar
Posts posted by Precise1
-
-
Also in the FSM (that can be downloaded from the pinned thread in the Garage Section) is a list of fault codes you can read from the ECU which might give you an indication of where to start. Even the automatic transmission has diagnostics, so I recommend checking all that first.
There is a good write up on checking the ECU in the Garage/How To section, and the earliest FSM is for 1994; don't worry, 95% of it applies to 90-93 as well, the only real differences are dash, trim, etc.
B
-
Welcome All, enjoy your stay at NPORA!
Sleepingbuddha and bimmers14, take a look in the R50 (1996-2004) FAQ section, there should be some answers for you there to get started.
Deco! Holy Crap, that looks beastly! I'd name it "The Swamp Thing"!

B
-
Don't forget the timing belt! How many miles on it??
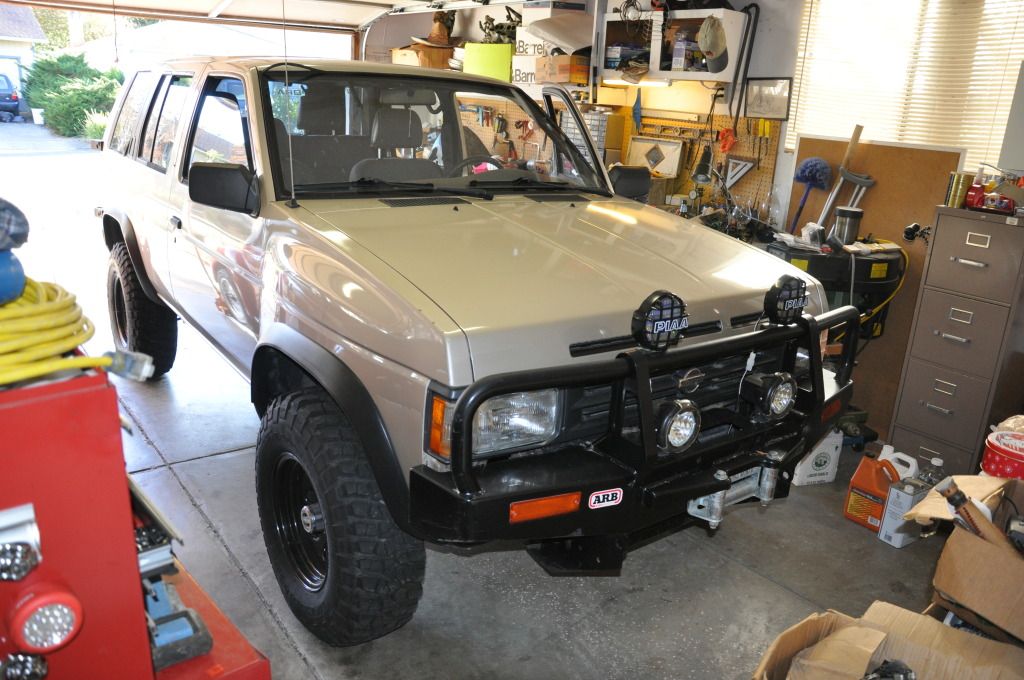
Welcome, and nice truck. It has a lot of potential and I'm partial to the color...

B
-
Welcome Trevor! I like the clean look you have going on there...

I'm glad you decided to keep her; paid for and adequate means a lot, especially when you don't have a lot of resources. As far as I'm concerned, Pathfinders are fairly undervalued vehicles except by this mangy lot here.
While there are a lot of other decent vehicles out there, don't get caught up in new and shiny either. My advice to a youngster is to live low, learn to budget and stack up some coin in the bank first, there is no substitute for that.
As for picture size, to looks fine to me; it doesn't even fill the screen of my monitor. Oh, hard to see on a 4" screen? Well, phones are for texting and emails, not web browsing...

B
-
Welcome, and nice cat!
Admins if you could delete this double post...Idk why this happened
Sent from my HTC6500LVW using TapatalkCrapatalk, as we know it here is why it happened. It'll show an error making you try to post again, meanwhile, there was no error and it already posted once. Just post and refresh, you should see the results...
Neat Jeep! While you can get a Pathy that tall and built, it takes some finesse and effort and would put you right back into 'cant have' territory. A 2-3" lift is actually quite cheap and easy as you have discovered, and the R50s wheel much better than they look like they should. Steve of 4x4design is a stand up guy who backs his product and takes pride in his work. You won't go wrong ordering parts from him.
B
-
Ok, I found the article but I got it a little backwards. I'll post the info anyway, as I'm sure it'll help someone.
Cracked Dash Repair:
Cut out the damaged plastic or vinyl along with any other areas that seem brittle or compromised.
Spray some 3M Polyolefin Adhesion Promoter on the exposed foam.
Apply a thin layer of 3M EZ Sand Flexible Parts Repair, filling the cut out section and overlapping the surrounding good plastic. (this epoxy will dry to a hard plastic consistency)
Once dry, sand to blend with 400 grit but be careful not to break through.
Spray a layer of SEM Texture Coating paint to blend and let dry.
Finish with SEM Color Coat in whatever color matches your dash, or remove it and do the whole thing.
***Since they specify to do this on plastic or vinyl material, the paint product should be appropriate for painting general interior pieces as well***
Added bonus
Kick Panel Repair
Remove the panel, turn it over, prep the surface (the can probably tells you the procedure), push the plastic together, aligned, and apply 3M Semi-Rigid Plastic Repair. Allow to dry and reinstall...
This information was sourced and paraphrased from the May 2015 issue of Popular Mechanics. I tried to find a link to the article, but couldn't.
For what it is worth, I once worked for 3M and used a lot of their products. My general take is that while their stuff is pricey, I've never had anything fail to do what it promised if used correctly. In other words, their products work...
http://3mcollision.com/3m-polyolefin-adhesion-promoter-05907.html
http://3mcollision.com/3m-automix-ez-sand-flexible-parts-repair-kit-05895.html
http://www.semproducts.com/refinish-flexible-coatings/texture-coating
http://www.semproducts.com/refinish-flexible-coatings/color-coattm-aerosols
B
-
Definitely clean those battery terminals and do what you can to improve that battery clamp/connection. Also, make sure the ground strap is clean/has good contact to the chassis (behind the battery IIRC) and across to the motor. Sometimes the starter can't pull enough amps of the ground isn't sufficient.
Sorry, don't know about the ignition...
B
-
I'm sure it will.
MY1PATH has to be right about the connectors, there is no brain or control for the manual gear box and transfer case, so it can only be a matter of the right light coming on at the right time.
Sorry, but I have no manual system to look at for reference...
B
-
Sorry, front differential drop bushings.
Thanks for the information.
Is there a 2"/2.5" suspension lift available?
I was actually just going to buy the cat converter and the muffler and have a shop install it, if that helps.
and
Well, yes, and everything in between. The front has torsion bars so adjustment range spans the entire range of travel (the most you might have to do is re-index the adjuster arm a spline or two), and the rear has springs. You can buy lift springs (AC again), you can go to a junkyard and get Jeep springs (plenty of info on that on this site) and cut them to the height/stiffness you want, or you can contact fleurys (4x4design.com IIRC) who makes HMPE spacers in 1,2,3" increments. Installing them will keep your ride quality and just give you the lift.
Within the 0-3" range front and 0-4+" range in the back, you can do whatever you want quite cheaply and easily...
B
-
Hello fellow Sag!
1) Essentially, yes. 3" is possible, but pushing it. 2-2.5" is within general reasonable limits. If you do a 3" suspension lift, make sure you install front drop bushings. Available from AC 4x4parts.co, and they only give you .25-.5" but at that point it is needed...
2) Are you talking about cat-back systems? I'd guess a big NO. Way different underneath with the bed and leaf springs...
Got a link to it?
B
-
Sorry, not I, but what exactly are you asking? Which plug goes where? Nothing in the FSM about that?
Umm, B... you might have to fix yourself ^ 4x lol
Yeah, I just saw that crap and said WTH?!? Not sure how that happened, no crapatalk here...

GUESS WHOS TRANSMISSION IS BACK IN!!!!!!
Woooooooo!! (mating call of the feral Redneck)
B
-
You have to post pictures once you have them on. I am getting ready to order mine and I was think 3.75 BS. I'd like to see what 4" looks like
About .25" different....
B
-
 2
2
-
-
Ahh, that is good to know!
Wine Country sounds like where my boyfriend is from (family in Napa and Auburn). Yet again another similarity is that my boyfriend is also looking at stepping up to a CBR1000RR, my Daytona even though it's smaller is "very" aggressive, I love riding it!
Anyway back to business my pathfinder is @175,XXX. I am not sure about when the timing was last done if at all, I need to contact the pervious owner he knows of a few things done to her before I bought her. I don't really know if there is a pattern, sometimes it will start fine (multiple times, granted I need to give it a little gas probably needs a fuel system clean), then others it takes a few tries.Yep, I'm in Santa Rosa, about 25 miles northwest of Napa. CBR1000RR is a serious bike, but not comfortable enough on the long rides I like to do. I'm sure he'll like it though (Honda makes solid bikes), and good to see another chick on a bike; good for you, not enough of that....
With the MPFI, it shouldn't need to have the throttle depressed to start, just give the fuel pump a few seconds to build pressure and turn the key. The issue might be a partially clogged fuel filter or a pressure regulator failing.
In the FSM, there is a good diagnostic section that covers hard starts, so that is where I'd start. Test as much as possible before replacing...
B
-
Hah! I was going to say, that looks Pike's peakish...
I like how he tore his fender flare off at 2:25.
I was always fascinated by this race class up that mountain.
https://www.youtube.com/watch?v=1jVcRKwcIXU
Which leads into this form of insanity.
https://www.youtube.com/watch?v=QiVfpzt3a1s
And this neat stunt show...
https://www.youtube.com/watch?v=HARjiJEA8eo
B
-
For whatever it isn't worth...
B
-
1
-
-
I see the 72-80 ft/lbs, but not the 115 ft/lbs. I'd think 80 is fine, and I'm pretty sure that is the number I went with as well; I didn't have a torque wrench that when over 100 ft/lbs back when I replaced mine...
Well after trying the bagel method for about 12 seconds it work. Popped the bushing right out. IMHO DITCH THE GREASE METHOD
Well, I'll be damned... I learned something today and it made me laugh!
Care to elaborate on your specific method?
B
-
I want to say Krylon plastic paint but I have also heard of everything from bed liner to Plastidip as well. Just going to have to search a bit for it.
I did recently read an article in Popular Mechanics on vehicle restoration and they mentioned specific products for plastic trim and dash repair. I'll dig that info up and post it here.
If I don't within 48 hours, yell at me...
B
-
Welcome down there in the OC from the Wine Country up North!
I like your past toys, but that Daytona looks crazy! I'm getting old, so I'll just stick with my CBR1100XX...
About your Pathy... How many miles? Any pattern to the no start issue? CEL ever on?
I agree, it is probably an electrical issue, but maybe just a connection so start there. Download the FSM from the pinned thread in the Garage (1994 is the earliest but it pertains to 95% of your vehicle, and everything under the hood, suspension, exhaust, axles, etc), familiarize yourself with what is where, and next time it doesn't want to start, go jiggle one connector/harness at a time and try to start again...
Also there is a write up in the Garage/How To section on how to check the ECU for stored fault codes; that might tell you something.
Most importantly, when was the last time the timing belt was changed? The VG30e is an interference motor, so it isn't a good gamble to ignore that belt...
B
-
1
-
-
Got that dang broken stud out. Found a squared extractor. I drilled the hole a little deeper and tapped that square extractor in there.
Good job, I'm glad you got it out. I have some of the square style as well and generally prefer them for small bolts, but I figured that if the spiral type didn't work, they wouldn't either... Did you have to re-tap the hole? I have a few tricks for that as well.
B
-
Can you get a small pick or screw driver in there and see if you can tap the broken stud counterclockwise?
B
-
Make sure the keyway for the harmonic balancer isn't damaged, when you get a timing belt you'll have to order one for the vg30e. They have round cogs and a 100k change interval.
Sorry, but 1 minor correction though. The early Pathfinder VG30e had square tooth timing belt with 60k mile change interval, the later years had the rounded tooth belt with 105k mile change interval; the change point was somewhere mid year 1993. If you aren't certain which yours is, it would be best to look before ordering any parts. You should be able to get the top cover to move enough to see quite easily...
B
-
2
-
-
Superglueing a small bolt to it might work since it doesn't seem to be seized, and would be easy to remove/clean up if it didn't work. I know some people have tack welded a bolt much like you describe also. Perhaps try a left handed drill bit as well to see if it will walk it out; I've made my own spade drills and used this trick in machine shops often.
Just be patient though...
B
-
Fair enough, and no worries. I just know from rebuilding mine...
LOL, I don't know if I should be happy or sad for that. Just don't let her see Donnie Darko any time soon!
Here, let me prove that I am real and not scary, mostly, I think. Still a bunny though, and that's just fine...


B
-
1
-
-
Can you give more information on it than that?
B
Getting more power out of the VG30.
in 90-95 WD21 Pathfinders
Posted
MULLET!!!
Ehem. Nice truck!
So, if you want to upgrade and you are pulling/working on the motor, I highly recommend that you ditch the VG30 (actually, just sell it as a running motor) and install a VG33.
VG30E produced 153 hp (114 kW) and 182 lb·ft (247 N·m).
VG33E, with 168 hp (125 kW) and 196 lb·ft (266 N·m) torque.
Add VG30e cams (stock, euro or stage 1 performance), intake/headers and full exhaust (with all the other factory VG30 stuff on it) and it you will have a bullet proof runner producing 180-190hp/200+ lb-ft that passes smog. Bolts up the same, minor bracket work for accessories, no hurting the motor, no detonation, no ecu/injector change. It is running everything at the limits, but within spec...
All documented here Bud, so time to look around a bit.
B