
- Sign In Changes: You now need to sign in using the email address associated with your account, combined with your current password. Using your display name and password is no longer supported.
- If you are currently trying to register, are not receiving the validation email, and are using an Outlook, Hotmail or Yahoo domain email address, please change your email address to something other than those (or temporary email providers). These domains are known to have problems delivering emails from the community.


snosnk
-
Posts
164 -
Joined
-
Last visited
Content Type
Profiles
Forums
Calendar
Everything posted by snosnk
-
http://www.nissanpathfinders.net/forum/index.php?showtopic=8237&hl=
-
CBI did these for me. <edit>Had a server failure and lost the following pics.</edit>
-
Its so nice to be wanted. But I dont have any measurements. Steve at CBI did it all. it took about 6 months for me to decide on a design. Its all mandrel bent, dom (i belive, or thick walled at least) tubing. He used the factory hitch mount holes to mount it. I've done several recoveries and towed a couple of sleds with it. The only damage has been to the powder coating. I've only hung up on it once, but I think it was more the tire carrier (I'll have to get a copy of those pictures). If youre intereseted, I'd be willing to leave him my pathy for measurements and fitment and he can create a mastepiece for you as well. http://www.cbioffroadfab.com/ The bumper is in the foreground. Sliders in the middle. In the back ground are sliders for a full size chevy. Another angle A few more pics here. They will probably load slowly as i only have a 256k upstream. (edit) Notice the difference in the spare tire height between the two pics tmorgan posted. Much better depature angle. I've drug the spare hard enough to wedge rocks into the bead.
-
How many people would buy the 4 1/2" lift?
snosnk replied to tmorgan4's topic in 96-2004 R50 Pathfinders
I'm with Pezzy -
No more spare tire dragging on departure
snosnk replied to snosnk's topic in 96-2004 R50 Pathfinders
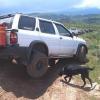
Visibility isnt very good. But at least it wont hang me up any more. -
Just pics today.. what do ya think.. Before: After: More pics Here
-
they wont fit going up. Too long.
-
two blocks on one side, for two inches. thinking teflon is pretty slick, i thought the two pieces might slip on one another. Maybe causing the bolts to break? front end to shift from side to side (I think this would be a little spooky at speed)? Alignment changing? Any number of things could happen. I was just concerned about how the two pieces would stay together.
-
The crank angle sensor is located on the top left corner of your trans (from the drivers seat). It has a single 10mm bolt and a wiring harness to undo. You can get to it from under your Pathy, but you just have to feel around for it. A ratcheting wrench worked better tha a socket wrench due to close tolerances. Its not a bad job to do just plan on a couple of days to do it. The first time I changed my clutch it took all weekend. And I trashed the crank angle sensor. The second time (to replace the CAS) took about 4 hours (with help). Have lots of extensions on hand as its easier to get to the top bolts through the shifter hole. There are a couple of bolts that you have to go in from in front of the radiator to get to them. hope that helps
-
it seems to me that extended warranty runs out at 100k miles. Mine craked at about 60k, dealer fixed it at their expense. edit: and if i would have read a little closer I would have seen some one allready posteed that.. sheesh
-
I've heard of some tacoma guys doing just that. Found this: http://www.4x4wire.com/toyota/tech/tacoma_turn_signal/ Might help
-
<digs out the haynes book>......... looks like fun.. for the vg33 it says (in a nutshell): disconnect the negative terminal from the battery remove the lower engine cover (if equiped) drain the radiator and engine block remove the cooling fan remove the upper radiator hose remove the ac drive belt remove the upper idler pulley bracket (looks like 5 bolts) unbolt the coolant tube from the front of the engine loosen the hose clamp on the lower radiator hose and remove it from the themostat housing cover remove the thermostat housing from the engine be prepared for coolant to spill when the gasket seal is broken remove the themostat scrape off any old gasket material or sealant from the thermostat housing then clean with laquer thinner apply rtv silicone to the perimeter of the cover install the new thermostat with the jiggle valve up (anybody know what a jiggle valve is??) bolt the cover in place within 5 minutes of applying sealant torque to 144-180 in-lbs reverse for install probably a little more than you were after, but i hope it helps.
-
it is a spacer. There is another thread here that is discussing the same thing, with pictures. Instead of going on top of the sping it goes on top of the strut assembly. Between the strut and the body mount. This is the one pic i have.
-
Its been just over a year since I installed the teflon spacers, and havehad no problems. I think the OME springs have started to sag a little as the front tires are starting to rub on the fender wells again. Maybe its time for the AC 2" springs. I did notice that i have a torn cv boot, but i dont know if it was caused by the increased cv joint angles or by age. The ol' girls pushin 150k miles. I'm thinking it time for new cv joints. I'll probably just replace the axles.
-
it does take longer bolts. I used a hammer to beat the studs out of the strut mount and put in 2" bolts. I've had 1" teflon spacers in for about a year and not had any problems. I've got a couple of torn cv boots that i need to replace, but I figure at 150k miles its time to replace the cv joints anyway. edit: I did a search and found a write up i did on my spacers. The 1 pic i have is on my web server which is down right now. Hope to get it back up in the next week or so. http://www.nissanpathfinders.net/forum/index.php?showtopic=2665&hl=lift
-
I did some strut spacers with 1" teflon that have been working ok. Havent had any problems yet, and gained an inch in the front.
-
Help! Cant get Crank pulley off for Timing Belt
snosnk replied to IndianRider's topic in 96-2004 R50 Pathfinders
when i did my '96, i had a problem like this. The puller i had woulnt reach the end of the crank. I had to put the bolt part way back in to give the puller something to push against. Just a thought -
28-30lbs here. BFG AT TA's. I like the cushy ride. (and fewer rattles) Here's the question(s), do you want a softer ride, or are you willing to sacrifice a softer ride for better gas mileage? Do you spend most of your time on road, or off? Lower pressure will have a softer ride and more rolling resistance. Higher pressure will get better gas mileage because of lower rolling resistance. Too low of pressure and the tires will wear on the outside edges. Too high of pressure and the tire will wear in the center. Lower pressure will also give you better traction. When offroad, I run 12-20lbs, depending on conditions. This makes a bigger contact patch and allows your tire to "wrap around" an obstical. Drag racers also run lower pressure to get better grip on the track. The 26lbs Nissan recommends, imho, is just a good place to start. Drive it for a while at 32lbs, then drop to 26lbs. I bet you feel a difference in ride. Then try airing up to 36lbs and see how it feels there. Before you do this I would reccomend you check the pressure range on your tire and not exceed its limits. Experiment. You just need to find a balance to your liking.
-
-
Just a thought. You could stop the power draw by installing a relay that doesnt energize the horn circuit until the key is turned on. edit: Just read again, wont work for your alarm situation.
-
When it comes time for the pesky timing belt replacement and you have to take the pulley off the end of the crank shaft, its possible to use a breaker bar and cheater pipe wedged between the ground and the frame (unibody). Then just bump the starter a couple of times and its loose. Be cautious though, as I would think this could be a little dangerous. Worked well for me.
-
now thats funny
-
Thats what I did. I used the power lead going to my backup lights as a trigger for the relay. I grabbed power from the distibution block for my amps to run the lights. I also ran a switch leg to the front so I can turn them on with a switch. I wired an led in series with the switch so that I would know when they were on. Drivers side backup light. Switch with led
-
R50's have a pilot bushing. I tried the grease trick. Didnt work. I ended up using a 3/4" tap. Just twisted it in and wiggled the bushing back out. Then used a socket and peen hammer to tap the new one in. If you decide to attempt this yourself, watch out for the crank angle sensor. Its in the bell housing at about 11:00 (looking at it from the rear). Its pretty easy to destroy while removing the transmission. You can get it out with a 10mm from underneath. About $50 to replace. Some of the bolts are tough to get to. Make sure you have lots of extensions. One bolt on the front drivers side is easier to get to with a long (several) extension(s) snaked in from under and in front of the radiator. The top bolts on the back, from inside through the shifter hole. Getting everything lined back up is a pita, but once it starts, it goes relatively easy. If you have access to a cherry picker you could use one of these and lift it from the top. Its much easier to handle supported from the top. Another little tidbit.. The throw out bearing is pressed on a carrier and has to be pressed off, then the new one pressed back on. The first time I did the clutch, it took all weekend. Started Friday and finished Sunday. The second time (pilot bushing and crank angle sensor) took about 5 hours. Of course, a couple of friends assisted the second time. That really helps. :bow: Friends Mines made that buzzychatteryschreechy sound only once since I changed the pilot bushing. If I remember correctly, it was pretty cold that day.
-
I had to use a pair of channel-lock pliers to get mine loose. Did'nt think of a torch