
- Sign In Changes: You now need to sign in using the email address associated with your account, combined with your current password. Using your display name and password is no longer supported.
- If you are currently trying to register, are not receiving the validation email, and are using an Outlook, Hotmail or Yahoo domain email address, please change your email address to something other than those (or temporary email providers). These domains are known to have problems delivering emails from the community.

XPLORx4
-
Posts
2,583 -
Joined
-
Last visited
-
Days Won
47
Content Type
Profiles
Forums
Calendar
Everything posted by XPLORx4
-
So, that's one person who's interested. Anyone else? The bumper mounts would be as least as strong as the TJM mounts. Probably the only options would be with/without turn signals and with/without upper tubes around the grille and headlights. (Also, it probably won't have the rubber bumpers on the front.) Here's a pic of the bumper with and without signals.
-
The bumper would pretty much be as close as possible to the look, style, and features of the TJM, not the ARB bar, since the TJM would be used as the template. The turn signals would be something that's more attractive than those on the KMA. Light tabs for mounting aux lights would be the same as the TJM. However, I'm not going to even bother asking the shop to do the research (and tie up my truck at the shop during development) if y'all are going to buy the KMA or build your own. If any of you are concerned about your pocketbook's current size, don't worry about having to lay down cash anytime soon. A bumper, if it does become available, probably wouldn't make it into production until Feb. or March. At this time, I'm just testing the market to see if there are enough people who are serious to go through the trouble. Again, if you aren't willing to wait that long, or can't afford the price tag, and are going to buy the KMA, then I'm not going to bother.
-
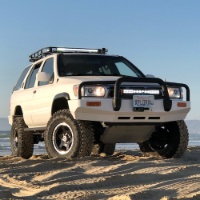
How much interest is there for a front bumper that is designed similarly to a TJM (like mine and Pezzy's)? It seems that the options for front bumpers that used to exist earlier in the year have vanished. The only option now is the KMA bumper. If there are enough people who are interested in a TJM-style bumper, I can work with a local fabricator to have these built, using mine as a template. I'm guessing the cost would be approx $800-$900.
-
After reading a few sites about checking motor oil, most sites made no mention of engine temperature for motor oil check, but some said check it when it's hot. I couldn't find any sites that specifically recommended checking the oil level when it's cold. Click here for info From what I've read, it's more important to let the engine sit for a minute or two before checking the oil level so that most of the oil has had a chance to drain back into the sump.
-
What size are your other tires?
-
Auto locking hubs actually disengage between changes in direction of travel. If you're stuck and need to back out of the hole you're in, the hubs unlock for maybe a 1/4-wheel rotation before re-engaging. This means for that 1/4-turn, you're only in 2WD. Auto hubs can also be weaker than manual hubs. Other advantages of manual hubs include being able to unlock them to use the 4LO transfer case gearing, but still be in 2WD: "2LO" A week or two ago, I was descending a very steep grade (nearly 11%) called "Old Priest Grade" which descends 1540 feet in just 2.7 miles. It's narrow and very curvy. With 2LO, I was able to descend the grade at a safe speed without using my brakes. The vehicle behind me had smoke coming from his brakes by the time we hit the bottom of the grade.
-
Probably cost about $150-$200 for installation. Or, if you have some basic tools and a pair of snap-ring pliers ($10 at your local auto parts store), you can do it yourself and save a bundle on labor by following these photos: Photos of Warn hub installation
-
I don't think you'll do any better with the EGR flares. My 32's rub on them big time, so much in fact the brackets that hold them on are bent enough that the flares are no longer flush with the body. There was one time that the flares were misaligned so much that I couldn't open the rear door without pushing the flare out of the way.
-
Never compared stock vs EGR, since my rig doesn't have the proper holes in the fenders to accomodate factory flares. Besides that, last time I checked, factory flares were a lot more expensive than the EGR flares.
-
So, in other words, they don't increase fuel economy, they just simply maintain it at the optimum level for a longer time. (Old, worn spark plugs can reduce fuel economy.)
-
I bought them second-hand from someone who sold their Pathy. I googled "EGR fender flares" and found that you can get them here
-
5" of backspacing is too much if you want the tires to stick out even with the fender flares. The additional BS may also not move a larger tire's shoulder far enough away from the lower spring perch on the strut. However, +12 offset is 4.5" BS, not 5" BS on an 8" wheel. The wheels shown in the pics above 15x8 with 4" BS and 31" BFG AT's Since that pic was taken, I have installed plastic fender flares and have replaced the wheels and tires with black 15x8 steel wheels with 3.75" BS and 32x11.50R15 Goodyear MT/R's Wheels: Pro Comp Wheels Series 97 15X8 6X5.5 BSM 3.75
-
Since you've upsized your tires, the odometer/speedometer read lower than before. Have you corrected your fuel economy by using the ACTUAL miles traveled, or are you still using the odometer?
-
Like this:
-
Actually, no, the front leaf springs and rear torsion bars are the biggest problems. Those, plus the rear upper A-arms and ball joints. Man those are a pain!
-
These are struts: These are shocks: These are rear lower control arms (one of them is bent) with poly bushings:
-
My money pit was purchased in March 98.
-
Question with replacing bolts on Manual Hubs
XPLORx4 replied to WheelsofFortune's topic in The Garage
Just take one of the studs and nuts with you when you shop. Find a screw whose length is about the same as the stud and whose threads match the threads of the nut. You'll need 12 screws. -
4" of backspacing on 15x8's gets 31" tires to be even with the fender flares.
-
One thing you should note about the LE: it has final drive gearing that is optimized for 235/70R15 tires. 265/75R15's are nearly 10% bigger in diameter. Putting bigger tires on it will make the speedometer/odometer read slower than actual speed, and power/performance will feel sluggish. If you can live with those shortcomings, then get the LE. Otherwise, I would hold out for an SE. Also, the LE wheels are only 15x6.5. Putting anything bigger than a 30x9.50R15 tire is not recommended. You should have at least 15x7 wheels to fit 31" tires. 31x10.50R15 fit nicely on 15x8 wheels with 4" backspacing, and give the rig a much "tougher" stance than the factory equipment.
-
Question with replacing bolts on Manual Hubs
XPLORx4 replied to WheelsofFortune's topic in The Garage
I have heard of many people breaking the included Warn studs off in the hubs, forcing them to replace the entire hub assembly. Worried about that, I kept my factory studs and just used the Warn nuts, but a couple of years ago, 4 of them broke off inside the hub and I had to replace the hub assembly also. Now, I'm using metric cap screws and lockwashers (with blue locktite) to hold the Warn hub on. It's a little more inconvenient to remove the Warn hub body, but at least I don't have to worry about broken studs. -
No matter the reason for door handles that don't automatically unlock when you pull them, I don't think it can't be done easily. There are 2 rods from the door handle to the lock cylinder and latch- one rod operates the lock cylinder, the other operates the latch. You would somehow have to force the lock-cylinder rod move whenever the latch rod moves, but not vice-versa.
-
The steps outlined from the FSM above are for 99.5+ rear bumpers. 96-99 have the metal winglets, but 99.5+ simply have a fully plastic bumper cover. Note in the photo that there are two plastic "holes" in the body where the winglets would attach, but in the FSM diagram, there are no holes.
-
Remove the entire rear bumper cover. The metal winglets are secured to the inside of the bumper cover. Remove the bumper cover by removing the screws and bolts holding the mudflaps on, removing the bolts along the bottom edge of the cover, and by popping off the 6 clips holding it to the rear hatch sill. Then, lightly pull outwards on each side of the bumper where the winglets are. There are plastic clips securing the winglets to the body. You can see where the plastic clips insert into the body in this pic:
-
FWIW, last summer I installed a Flex-a-lite #295 27" electric fan in my Pathy. At first, I was dubious about its cooling ability, but after enduring the summer, it proved itself to be worthy. One thing I did learn, courtesy of my Scan-Gauge, is that "normal" coolant temperature has a very wide range, from 172°F to 225°F. The temp gauge needle starts to move up from its normal 1/2-way position at around 230°F. I don't really know how much fuel economy I gained, but one thing that's nice is that in the summertime, you can get cold AC blowing all the time, even at idle.