- Sign In Changes: You now need to sign in using the email address associated with your account, combined with your current password. Using your display name and password is no longer supported.
- If you are currently trying to register, are not receiving the validation email, and are using an Outlook, Hotmail or Yahoo domain email address, please change your email address to something other than those (or temporary email providers). These domains are known to have problems delivering emails from the community.
Leaderboard


Popular Content
Showing content with the highest reputation on 12/01/2020 in Posts
-
I think you made a solid choice. Mounting my tire carrier is not something I'd even be remotely interested in doing in the street in the rain. Although I didn't need a cherry picker or anything to do it solo, it was still some awkward finagling. I'm sure the resale value on the hitch one makes it a no brainer for your situation, along with the modularity that comes with being able to remove/install it on a whim. I'm a fan of that- my recent Rola basket mounting solution includes some custom brackets I made that allow me to bolt/unbolt my basket for removal in about 5-10 min which is handy for a number of reasons!3 points
-
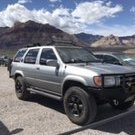
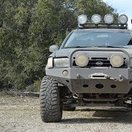
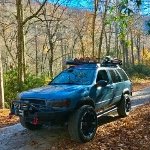
Update time! Yesterday I was finally able to do some engine work! I changed out all six injectors with brand new hitachi units, swapped out the aging spark plugs with some new NGK laser platinums, replaced the valve cover gaskets and spark plug tube seals, and put in a new PCV valve. Had some brittle hoses crack on me so I changed those out as well. Last but not least I put on a universal cone filter using a generic adapter plate I found online. The whole set up cost less than 30 bucks and it cleans up the engine bay SO much. What I really like about it is that I didn’t need to mess with relocating anything because it uses the standard intake for everything behind the filter so it’s basically still stock. I’m so glad I didn’t pay $300 for the full K&N kit What I wasn’t able to do was the front O2 sensors unfortunately. Those things are buried in the heat shielding and impossible to reach without the special socket that has a cutout in the side. I’ll have to source one first before attempting it. Im pretty pleased overall though. It’s incredible to look back at this past year and think about how much I’ve done to this truck! 1. New coils and shocks/struts 2. New tires 3. New rotors and pads 4. New brake booster 5. New chassis parts including control arms, trailing arms, ball joints, tie rods, CVs, end links, panhard, etc 6. new front wheel bearings 7. Fresh oil change in October 8. new fluids in front and rear diffs, as well as Tcase 9. New MAF sensor 10. New injectors 11. New plugs 12. New valve cover gaskets and tube seals 13. New pcv valve and vacuum hoses 14. New IAC valve 15. New factory style intake hose 16. Cold air intake filter 17. Steel bumpers front and rear 18. Tire carrier with gas can 19. Roof basket 20. forward facing, reverse, fogs, and interior map lighting, with central switch panel 21. underbody camera with dash monitor 22. Manual hubs 23. downstream O2 sensors 24. Fresh paint on fender flairs and bumper cover 25. New power steering pump 26. New alternator 27. New starter 28. Missing link Bar installed 29. Hi lift jack, shovel, fire extinguisher, and axe added 30. power valve screws tightened 31. New serpentine belts and idler pulley 32.new fuel filter 33. Acquired spare fuel pump (Not installed yet) Not sure if I missing anything, but that’s quite a list for a single year of work, especially on a low budget. I’m going to take a bit of a breather now with the holiday season, but next up are the upstream O2s, front diff bushings, new fan and fan clutch, and then I’d like to start working on my idea for a reserve gas tank in the spare tire well. After that I’ll be getting some bilsteins and then looking into some rust proofing underneath. Long term I plan to buy an ARB locker for the rear but that’s a long way off for now. Maybe get a SFD eventually and some 33s.2 points
-
its good to be back in Idaho for the holidays!2 points
-
I’ve been wondering this too. Haven’t seen or heard of anyone really running that size on this forum but IMO it would be great fit for the r501 point
-
I can appreciate that. I also thought long and hard about this, and debated trying to track down an OEM tire carrier as well. My situation is that I don’t have a garage or even driveway and live in a neighborhood in the city. I decided I didn’t want to struggle drill into the body of the car out on the street as cars are passing by and my neighbors are walking the dogs.. Particularly in the middle of the rainy season here in the Pacific NW. This seemed like the best solution for me at this time. Not only that but having the option for bolt-on rotopax mounts for spare fuel was appealing as well and with the OEM mount you’d be talking about custom welding etc which is out for me. You’re mileage may vary. Note as well the price was not over 1k - more like $750. On top of that since this is a relatively universal product I figure I can easily sell it for not a big loss if I decide to go a different direction in the future.1 point
-
Yeah they're 15". 8" wide, -19 mm offset.1 point
-
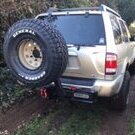
Wilco Hitchgate spare tire carrier finally arrived. I went with the high clearance model. It isn’t cheap but it’s well designed and built like a tank. The spare tire relocation bracket and Rotopax mount bracket (which mounts between the tire and rear hatch) is still backordered but I’ll post pics when those arrive.1 point
-
1 point
-
Been a while! The thread linked to the previous post is a fantastic resource. Just a couple small updates: 1) Earlier this year the exhaust rusted off aft of the muffler so replaced muffler and everything back. More aggressive than stock - sounds fantastic at 2500+ rpm with the pedal down - but as quiet as stock when cruising. 2) Hella 450 fogs to replace stock. Removed a section from bumper to accommodate larger fogs, filled the voids, and prepped and painted entire bumper flat black. 3) Indicator for hubs locked/unlocked. Just an illuminating switch wired to ACC wire for head unit. 4) Full exterior LEDs minus front indicators, headlights, and fogs. Load resistors for rear indicators to avoid hyper flash; attached to inside of rear light housing with heat-conductive double sided tape. 5) SFD kit from Pines to Spines is sitting in a shipping warehouse in Montana waiting for the border to open... No access to garage at the moment so likely that’s it for the winter, though I may try my hand at upholstery and repair the driver’s seat. Everything I’ve found in a yard has been pretty nasty looking. Major plans for next year or two include the rear tire carrier mod, new fenders at all 4 corners, new rockers, SFD kit with 33s, and possibly gear ratio change plus/minus Lokka for the front diff. I’ve toyed with the idea of a SAS for the front and a heavier rear axle along with a Cummins 4BT but that fab is on hold for a long while and I think that motor is just too heavy.1 point
-
Joy riding through North GA...... Sent from my SM-A215U using Tapatalk1 point
-
Ran rug road to turkey creek this week, what an incredible trail and area!!1 point
-
Wheels painted, and tires mounted. I’m pretty happy with the results! Went with General Grabber ATX’s in 31x10.5. They are quieter than I expected for as aggressive as they are but they do rub quite a bit more than I was expecting in reverse so I need to figure that out... Next is figuring out what to do with the spare. Wilco seems to think a Hitchgate high clearance will work with the Curt Hitch, I just need to decide if I want to spend $700 on that, or mount it in a roof basket...1 point
-
Quick update since I’m not breaking any new ground here... Finally got the Warn manual hubs installed last week. Pretty easy install. I was going to re-use the factory studs but ended up over-torquing one ?. Ended up using the double nut method to install the Warn supplied studs. Steering does seem lighter and more direct with the CV’s disengaged on the street. The Bilstein 33-185552’s finally arrived as well, and I was able to install them last night. The install was delayed a bit because I didn’t have a 22mm socket on hand for the lower nut so had to buy one.. Post #38 in Dbot’s build thread helped a ton with the exact modification needed on the top mount in order to mount these on a post-facelift. Again pretty easy install other than having some difficulty having enough room to drill out the top mount on the drivers side (there’s a plastic piece in the way that covers some lines). Turns out the factory shocks were shot so this was a huge improvement with ride/handling, and as everyone knows will provide some additional articulation in the rear suspension. Got my wheels in as well Working on prepping them for paint with the goal of both minimizing the visual effect of the fake beadlocks, and providing some additional color to stand out a bit. Looking forward to seeing the results of the vision! Tires should be mounted by this time next week! The last step of the first phase of the build will be deciding on a mounting solution for the full size spare. I’m trying to avoid getting a pre-facelift tire mount as I’m not 100% thrilled about drilling the car.. Looking at either mounting on the roof in a Rola Vortex basket and using a Yakima basket spare tire mount -https://www.amazon.com/gp/aw/d/B0012SAB30#Ask- (the Yakima mount is lockable which I’ll need because I live in the city and my house doesn’t have a garage) or maybe ponying up for a Wilco Hitchgate. I’m not totally clear if the Hitchgate will work with my Curt hitch and may need to reach out to Wilco to confirm measurements. Any advice here is welcome!1 point
-
True, I was mainly looking for 3.75” BS/-19mm offset based on Tyler’s recommendations here - There doesn’t seem to be any 16’s with those options so I went with the 15’s as a tried and true option with minimal rubbing/trimming..1 point
-
Most likely worn suspension link bushings in the rear suspension. If you have an automatic transmission, just park on smooth level pavement, with trans in park and brake off, have someone rock the truck forward and back while watching the ends of the links at the frame and axle housing. If you see movement more than a couple of mm, the bushings are worn and allowing the rear axle shift and inducing rear steer effects.1 point
-
Thanks to Cuong Nguyen, I finally found the Door Lock Timer. I tested it and will describe my tests and conclusions. I don't like the threads I see where people ask questions, receive a lot of advice and then never come back to let us know if and how the problem was resolved. I had previously tested the door lock switch and found it was functioning properly. After locating the Door Lock Timer, I disconnected the connector and tested for voltages and grounds on it. Refer to the figure in the following link. This is a portion of the wiring diagram for the 1990 Pathfinder chassis wiring in the Chilton manual. If you do not have Chilton, go to the Repair Guide on the autozone.com website. I'm fairly certain that repair guide is a copy of the Chilton manual, but it might be Haynes. https://drive.google.com/open?id=0B3qYZBSJdOoBUXdWMXRkaVdZaDg Notes about the figure: 1) I never located the circuit breaker. 2) The BLU/GRN and BLU/ORN wires are actually YEL/RED and YEL/BLK. I did not take time to determine which corresponded to which as it wasn't necessary for my testing. I used a digital multi-meter to make these tests. The WHT/GRN wire in the connector is 12 Vdc. A continuity test on the BLK wire showed it is connected to chassis ground. I had an assistant (the lovely Mrs. Archer) operate the lock switch while testing the BLK/RED and BLK/YEL wires. They were normally open. At first I tested for 12 Vdc when she operated the switch, but did not get a voltage so I tested for continuity to ground. The BLK/YEL read continuity to ground when the switch was pressed to the lock position. The BLK/RED read continuity to ground when the switch was pressed to the unlock position. I reconnected the timer module and then tested for voltage on the YEL/RED and YEL/BLK wires. There was a constant 12 Vdc output from the timer module on the YEL/BLK wire. This voltage is continuously driving the actuators to the unlock position. It is also a continuous drain on my battery. I disconnected the timer module and left it that way. I can now lock my doors manually. In a week or so I will make a trip to the mainland and to a wrecking yard (Pick-N-Pull) to get a new (used) door lock timer module. I will post again at that time to confirm the problem is resolved.1 point