- Sign In Changes: You now need to sign in using the email address associated with your account, combined with your current password. Using your display name and password is no longer supported.
- If you are currently trying to register, are not receiving the validation email, and are using an Outlook, Hotmail or Yahoo domain email address, please change your email address to something other than those (or temporary email providers). These domains are known to have problems delivering emails from the community.
Leaderboard



Popular Content
Showing content with the highest reputation on 01/17/2019 in Posts
-
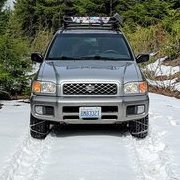
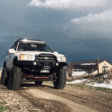
From when we actually had some snow in Alberta. And a new roof rack!5 points
-
Search Rockford CV Boots for the recommended boot replacement on the CVs. I haven’t done it yet but it gets rave reviews. Rockfordcv.com Pt#166-21 & 166-23 (2 of each) per prior posters3 points
-
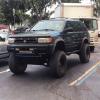
I need to finish up a few things, but I do have some updates. Both good and ugly- Nearing completion: Rear storage drawers for the hatch, just need to clean it up and fix my latching system. Pretty much everything other than the handles were DIY. Roof basket fog lighting, all 7" "bars", four facing front, one on each side, and two facing rear. Wiring is 80% complete, just need to clean it up a bit and wire in the switches. The ugly: After the installation of my new front struts I forgot to re-tighten down the top nut once the vehicle weight had re-loaded the springs (holds the plunger in the hat). This allowed the strut plunger to push up and down inside the hat freely about 1". After finally looking into the clunk, it has mooshed up the threads pretty good and now I can't get the nut down or off. I'm going to cut the nut off and then run a M12x1.25 die down the threads to see if I can clean it up enough that it looks safe. If that fails I can look into dieing down to a smaller M, but the strut steel looks pretty hard. In order for the die to fit fully down the top hat without disassembling the strut we're going to get creative with the die handle tool and go custom. Maybe even shave down the die itself a smidge. Luckily my buddy has a lathe and workshop. Chalking it up to one of those things. Probably top 2 worst mistakes I've ever made. Worst case scenario I have to get new struts and rebuild, I'll update my thread later with pics and updates on all my projects.2 points
-
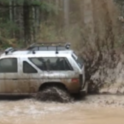
This thread reminded me of this....2 points
-
Funny that you say that. KC gave me a coupon code for another free rock light just for submitting a review, so I think that will be in the works. Thanks!1 point
-
Looks good but I think you need to add another set of undercarriage lights to light the front if the front wheels. Overall fantastic project!!1 point
-
Amazes me that people are allowed to drive their car without knowing at least the basic differences between the caps under the hood... At least it’s a somewhat self correcting problem1 point
-
I agree. Since I am in Highschool I have come to find out that basic knowledge about engines is something that 8/10 people don’t learn. Most people around here don’t even know how the check their oil...1 point
-
Compression will go up a bit generally when you do the test, but if it goes up like crazy then yeah, not great news for the rings. You'd have to tear it down pretty far to do rings, plus possible machine work if it turns out the bore is chewed up. I don't know what a VQ goes for but replacement would be less screwing around for sure. Make sure the motor you're putting in is better than what's coming out! When my dad looked for an engine for his '03, he couldn't find one locally with good compression numbers. One last idea... I've heard of guys freeing up stuck rings by pouring seafoam or marvel mystery oil down the plug holes and letting it soak. If the rings in #1 are just stuck in their slots rather than actually damaged, and you can get them loose again, they may go back to sealing up properly. This assumes that the rings are stuck rather than worn out or damaged, but it's a cheap thing to try, especially if the engine's junk otherwise.1 point
-
Amazes me that people are allowed to drive their car without knowing at least the basic differences between the caps under the hood...1 point
-
Ohhhh nooooooo. On the plus side, now we know how canned icing is made!1 point
-
Yeah that's normal. I see it on most cars especially ones that do a lot of short trips. Google oil cap mayonnaise and you'll see what a blown HG will do.1 point
-
Of course! That’s what this community is here for. Hopefully it all goes well from here. Just check on it periodically, especially the dipstick, to see if anything changes. Depending on the engine model, Nissan makes some pretty robust engine designs, I really wouldn’t worry. Glad I could help.1 point
-
This information is great. I am very thankful for all that you wrote. Based on what you said, you have basically described my driving habits. The temperature is in the thirties and i drive 2-3 mile commutes to school early in the morning. I am very grateful for this piece of mind I was getting a little worried. I dont think I will escalate the situation because I think what you first said about the influx of oil being swooshed around and gasoline entering makes since considering my situation. Also seems a bit low mileage for a blown head gasket. I will keep you posted on any new information I gather. Thank you very much sir! Sent from my iPhone using Tapatalk1 point
-
Just as another bit of supporting evidence, Here’s some pictures from when I rebuilt my engine. The first picture is when I was taking it apart to clean it and replace the timing, the second is after. Look at the timing stuff and rear timing cover and you’ll notice loads of the dark brown dust/gunk. It was just oil residue that had been burned onto the aluminum over time. The engine was otherwise perfectly healthy. It’s a normal thing as engines get older, and this VQ was at 186,000 miles when I did this teardown. Now its bordering 200,000.1 point
-
Don’t be alarmed, I did the same thing recently after rebuilding my engine and having a misfire issue. I pulled off the oil cap, and there was some sort of residue there, and I freaked out, assuming the worst. In this case, what you’re seeing looks normal, at least from what I’ve seen. However, lets not just shrug it off immediately. What you’re likely seeing is the results of colder outside temperatures (assuming its winter where you are currently), short driving trips, or potentially a clogged PCV system (unlikely, but possible). You see, when your engine warms up, it dumps a lot of fuel to help it warm up faster and get the catalytic converters warmed up so emissions and oxygen sensors play nice. A warm engine is more efficient, and your crankshaft bearings take less of a beating at higher temperatures. While everything’s expanding due to heat, and oil is being whisked around, that excess fuel dumped into the cylinder can blow by the piston rings a little under idle/warming conditions. This is called blowby. The result is a small amount of gasoline mixing in with your oil. Conveniently, modern engines have a preventative measure for any damage that would cause, called the PCV (positive crankcase ventilation) valve system, which allows the pressure from the blowby, and the evaporating gasses from the fuel, to be safely vented into the intake to be burned off. The oil cap, being at the top of the engine, and being made of plastic, is typically cooler than the rest of the engine. Residual gasses from the oil and fuel blowby can condense on the oil cap, leaving behind a range of strange debris or colors (sometimes yellow, tan, or dark brown). This is completely normal, and should only really raise a flag if there is a lot of it, your valve covers and other sealed surfaces seem to be seeping oil, or you have poor engine performance/idle (this would indicate a possible faulty PCV valve). This sort of thing tends to pop up the most during colder weather, and especially in winter climates, due to short trip driving or letting the engine idle up to temperature for too long. So now that you have an idea of what the issue COULD be, it’s a lot less alarming. I really wouldn’t worry, but lets check a couple things! First of all, you said you changed the oil. By dumping the oil or checking the dipstick, a very alarming and fast indication of a blown head gasket would be a milkshake-like oil substance. Usually, it looks a lot stranger than brown sludge, so cross that off your list. Do a quick google search on blown head gasket oil, and you’ll see what I mean. It doesn’t take much for the coolant and oil to mix to make the nasty stuff, and you’d definitely notice it if it were severe enough. You also mentioned checking the radiator. While it’s less likely for the oil to make its way into the cooling system with a head gasket issue, it’s still possible, of course. Typically, the exhaust gasses are what make their way into the coolant, and while it can be hard to detect, there are texting kits for about $40 at local auto parts stores that allow you to test and see if you have exhaust gasses in your cooling system. They’re pretty simple to use, but you might only want to for peace of mind if you’re still not convinced. If you want to put some time into diagnostics further, pull your spark plugs and look at the color of the ceramic tips around the electrode. There are plenty of images online that can tell you how to “read” your spark plugs to know if you’re burning oil, running rich, lean, or have a head gasket problem. If it’s a small leak, it may not be noticeable. While you’re at it, rent a compression tester, check cylinder compression, and perform a leakdown test on the cylinders. This can be one of the fastest ways to indicate a failure of some sort, whether it’s a compression issue, valve issue, or head gasket. You could also rent a cooling system pressure tester. If you have a borescope, this can be really useful, but not everyone has one. You can perform a leakdown test according to the factory PSI specs of the vehicle. Typically, if it holds the indicated pressure (typically 13 PSI for older pathfinders), for 5 minutes or more without dropping significantly, you’re fine. Take it with a grain of salt, because a rental kit may not be 100% accurate, and could leak down even if you don’t have a leak, but it’s usually very slow. Sometimes, if you’re lucky (and unlucky I guess), coolant will come out of the damaged part of the head gasket around the heads or block, indicating failure. With a borescope, in short, you could look in each cylinder after a leakdown test to see if there is any coolant puddled up on the piston. Finally, an old trick from one of my mechanic buddies: Get a white piece of printer paper. Take the dipstick and wipe it off, dip it again for fresh oil, and put a good drop of it on the paper. Try and keep it as collected as possible and not splattered all over it. Let it sit until it soaks into the paper all of the way. It could be a while. If there is any small residue from a head gasket failure, typically it’ll sit on top of the paper and not soak in. Otherwise, the oil should soak into the paper and have very little variances in color. Obviously this is no engineering test, but it’s another quick and easy one for peace of mind. With all of this in mind, “brown sludge,” as you called it, could potentially be a different issue, sludge buildup. This comes with a range of other symptoms, however, and can be found various ways. If the previous owner took good care of her and did routine oil changes, cross that off your list. Regardless, throwing in a little Seafoam into the oil a few hundred miles before your next oil change can’t hurt, and could break up any potential sludge you do have (I usually drain about a quart of oil, dump a bottle of seafoam in, and run it like that for a day, changing the oil the next day). Good luck! Let me know if you have any questions!1 point
-
got the rollers on today. Used the 5 to 6 lug adapters to get the r50 pattern to work. Figured if i'm going to use spacers they will be done right. Loktite and torque wrench. Upper links all set up, and then got rid of the jacks! Finally on its own weight! Tomorrow i'll finish the bottom links and the trackbar bracket hopefully. Drilling the knuckle and pitman arm to run heim steering also. Those are 235/65/15 incase you are wondering.1 point
-
Throwback Tuesday........1 point
-
Bell Knob Sent from my iPhone using Tapatalk1 point
-
Top of Peavine peak Sent from my Pixel using Tapatalk1 point
-
Sent from my iPhone using Tapatalk1 point
-
All new on the 97 Quey. Sent from my SM-S737TL using Tapatalk1 point
-
I tend to go with local parts stores for items like this for the waranty. Doesnt matter what happened so long as you have a core its guaranteed for life. Already replaced a bunch of CV axles, wheel bearings/races and brake pads that have paid for themselves. I hadnt wheeled my rig that hard until I moved here and had another DD so these warranties are pretty valuable to me to keep my rig up.1 point
-
So, now that this project is overwith, I would like to thank everyone for helping! Jims truck was quite a project. There certaintly were some challenges. I personally spent 30-40 hours working on his rig. Now, Im not trying to blow my own horn, I just want to let everyone who donated how hard both Scott (Redpath88) and I worked. We were really hoping for more help, but, it just worked out the way it did. I want to share the list of things that I wrote up, updated and, for the most part, completed. So here we go.... Catalytic Converter- This was cut out long ago. I was able to talk a friend out of one that was on his sisters wrecked Pathfinder. Scott had a temporary pipe made so it could be driven without sounding so hideous. He then took Jims truck down to a small exhaust shop in Centraila Washington, who gave us a great deal on having the Cat Converter welded in. The guy was very impressed by our story, but if you want more details, as Scott. Cooling System- This was a two part problem. First, the coolant was the color of the mud that was deposited back on Jims rig on Saturday. I completely flushed the cooling system and installed properly mixed 50/50 longlife coolant (donated by my dealer). The second half of this was..... Electric Fan & wiring- Well, after I got it running correctly(I will go on about that in a bit), Jims rig started to overheat. This worried me a bunch. I found some wires disconnected from the fan controller. We reconnected it and found that it didnt help. Did some searching online and found a wiring diagram for the controller and then verified that it was connected correctly. It did not activate the fan at all. I jumped power and ground to the fan and it worked. I then installed a new fan controller and that baby worked awesome. I barely adjusted the setting knob, and that needle didnt seem to go much past 1/2 way. Works like a charm! Radio- Jims truck was completely missing a radio. Now, to some, this might not seem like a big deal. You ever drive around with no radio? Sucks dont it? I happend to have a CD player laying around that I had removed from my Quest. I rewired it and installed it, and it worked. Jim now has a working radio. I may not be the best, but, gotta start somewhere. Headlamps, front grille, side markers- All of these were long gone. The wrecking yard that kept Jims truck for us, supplied us with some replacements. Only one problem, whoever removed the original lights, stripped and broke off the mounting bolts for the headlamps. I drilled out and retapped 3 different bolts. Installed the replacement lamps and grille. Found one headlamp retainer was broken, we got a replacement. Got all the lamps working but found the turn signals in the bumper were not working. Found the wires had been pulled from the connector. We repaired the connectors and got them all working. Front driving lights- These were mounted on Jims ARB bumper. They were very loose and we werent even hooked up as I found out. I found they were wired into the factory fog light wiring. The problem was, someone hacked the wiring and a lot of the circuits were disconnected. I used my rig as a example and rewired the lights to work properly. I soldered and sealed all of the repairs to prevent future problems. Brake system- When I first drove Jims truck around my neighborhood, the brakes felt very strange. I got his rig on jackstands and removed the wheels. I found mud caked into the calipers and into the drums. I hit them all with a pressurewasher and lubricated as needed. I then flushed his brake fluid as it was blacker than his tires. I also noticed the clutch fluid was the same, so I flushed it too. Both the brake pedal and clutch pedal felt way better. His truck now seem to stop properly and the clutch operation was much smoother. CB Radio- Once again, this doesnt seem to be a big deal to some. But Jim had a CB before, and we thought he should have one again. Scott donated a working Cobra CB and I custom mounted it under the center stack, just in front of the shifter. We did have to get a new cable and antenna. A local CB shop gave us a good deal on both(ask Scott for more details). I was able to hook up the PA speaker that was in his rig, and it all worked great. Front skid plate- Jims original front skid plate was long gone. I wasnt going to worry about it, but, I was concerned about stuff flying up into the engine bay and causing issues. I donated my old skid and installed it with new hardware. Battery and Hold-down- The battery that was in Jims truck was toast at the wrecking yard. We stopped at a local parts store and picked up a decent battery. I then found what I think was the original hold-down. I found it crammed down by the headlight and dang near missed it. I cleaned it up and reused it. Interior parts- A lot of interior pieces were either missing or damaged. Scott was able to obtain replacements including.... Center console lid, Glove box pins, both Sunvisiors, Left rear lower cargo side trim, Steering column covers, and door sill plate and clips. Now, I know I left out some others, so bear with me. Spare Tire- Jims spare tire was long gone. Scott found a replacement on Craiglist and picked it up. I then took the tire and rim to my work were I mounted and balanced the assembly. I then found out why there was no spare. While spinning, I noticed a large amount of wheel movment. Upon further inspection, I found the rim was bent. Inspected further and found no significant damage to the wheel. I instructed Jim that this will be his spare only! Unless he doesnt like his teeth. That would be a bumpy ride(even after balancing. Can you say 13.75 oz!) Front suspension- As many may have noticed from the video and pictures, the front of Jims rig did not sit right. I found that someone, at some point in time, had the torsion bars out(My guess was clutch replacement). I found that they were installed incorrectly. I reindexed the bars and adjust them to a much better height. We then found the front sway bar and links were long gone. Scott donated a replacement from his parts rig. He had to pick up some new links and bushings. He installed them and got the bar fitted correctly. Left Rear Taillight- Well, this was easy. I found the light was damaged. Scott picked up a replacement and I installed it, making sure all the lights worked properly. Engine Runablility- Ok, here we go. Jims truck did not run well when we got it. Backfiring, popping, missing. After moving it two times, It did not want to start a third time. The fuel tank was very low. I filled it with 5 gallons of new fuel, but still did not want to start. I wanted to check the ignition components so I pulled the plugs. I found someone had put brand new NGK plugs in. I gapped them as needed and cleaned them. They were covered with raw fuel. I sprayed the cylinders with brake clean to help the cylinders dry. After sitting for about 30 minutes, I reinstalled them and gave it another try. Popped and wheezed a few times, but no go. I thought I would give the starter a break, and moved onto something else. I came back and tried again. Finally, after almost 3 hours, I got it to idle, but not very well. I let it sit and idle for a while then reved it a bit. Some interesting clouds of smoke erupted from underneath. Once things got a bit more stable, I checked the timing and found it way off. I reset the timing to factory as needed. After more research, I found Jims truck had a few more internal, external and electrical mods. I bumped the timing two degrees and things seemed much happier. Jims truck continually ran better and better even as we gave it back to him. Air Filter- Jim had a cone air filter and adapter installed. I found the adapter was not held down very well and was letting dirt and stuff get into the Air flow meter. I took it apart and cleaned the Air flow meter. I tried to find a new adapter, but it wasnt that easy. So, I realigned the adapter and redrilled it to fit better and more secure. Reassembled and found all worked great. The Body- Jims truck was a mess from years of neglect, weather, grease marks and all out crap on the paint. I throughly cleaned the body with a pressure washer. Scott and his boys washed it and got it looking pretty good. He also went as far as to polish the wheels, which were also a mess. The day before we gave it back, I buffed with a medium compound to remove the crap. I then went back and polished with foam pad to give it a shine. I thought it looked a million times better. Some may say this was overkill, but as a whole group, the better is rig looked, the better he felt. He was very happy with the result. Now, its just up to him to keep it looking good.. Inspection- This was the most interesting challenge of the whole project. Being that Jims truck was in a wrecking yard, the title was marked and destroyed. This meant his rig needed to be inspected by the Washington State Patrol to verify it was roadworthly. Now, when I was in high school, you just drove up, they looked around and off you went. Now appently you need a appointment. Scott did all the leg work here. We wanted to give Jim his rig back sooner, but the appointment schedule was booked for weeks. Luckily, I dont know if Scott did some sweetalking or what, but were were able to fill a recently opening. This was very lucky. Scott took the Pathfinder and it passed the inspection with flying colors. Now, I know I may have left a few things out. Scott kept track of all the money and I think he was able to give Jim a few bucks back to help him with insurance or whatever. I hope this gives everone a little more insight into what all we did to get Jims truck back to operational status. Thanks for taking a few minutes to read this and if anyone has any other questions, by all means let me know. Derek1 point
-
I would love for NPORA to get some recognition over this. It an amazing inspiring story that is much better than 90% of the stuff you usually see on the news. This is not just a local story of something nice happening. It is a story of people around the globe bound only by good intentions all coming together to do something amazing for someone they do not even know. I am so overwhelmed by it all that I do not even know what to say. Life has not been easy for me in the last few years, but I have always kept going forward knowing that life is a journey of ups and downs. When things are down, you just have to look forward to the great things that are surely ahead of you. The folks at the salvage yard wanted to invite me to come back and show them "mrJim" again when it was officially back on the road. Even they felt proud to be a part of such a huge effort of seeing people at their very best. This is a global undertaking and I can tell you that when you hold this up in comparison to the negative things I have undergone -- this outshines it all by far and I can only feel good about everything overall. Thank you all for your part in this incredible act of kindness. You are all in my thoughts and prayers. I do want to send a special thanks to Scott, Derek, and Shane for being on the road at daybreak to drive all the way up to get the Pathfinder so they could take it back to Derek's to be gone over. I was really happy to have had the opportunity to meet them personally. Thank you NPORA!!!!! MrJim1 point