-
Posts
2,684 -
Joined
-
Last visited
-
Days Won
318
Content Type
Profiles
Forums
Calendar
Posts posted by hawairish
-
-
Cool find! Though the whole WVO system would be my reason to not buy it, but everything else is pretty cool.
-
Thanks guys, glad you like it.
Also, I have a few other suggestions for those considering the project:
- I bought an Astro Pneumatic 1427 blind nut tool (~$40). You can make a basic tool using simple parts and set them manually, but it's a more work and may produce inconsistent results. And you'll be doing a few of them. I have a few other projects that I can use the 1427 for, and it's worked well for me already (also used it on the motor mounts and skid spacer for my SFD). It has mandrels for M6, M8, M10, and M12 coarse thread blind nuts. You can obviously go the Standard route; hardware is cheaper and easier to find. But, I'm a metric guy when I have the choice.
- Don't buy from Fastenal. Those guys suck. They couldn't even get an order for 10mm washers right, and they kept sending me the wrong blind nuts. Couldn't tell you why I didn't go through McMaster-Carr first.
- The blind nuts are a little hard to find locally, at least in my case. I went to several local hardware stores, and only one even stocked any blind nuts, but they were too small or stocked in very low quantities. McM-C has them (they're listed as rivet nuts, btw); you'll want 95105A199 (M10) and 95105A191 (M8). These are zinc-plated steel with a low grip-range and large flange...be sure to get these features. These need a 13.5mm or 17/32" drill bit.
- I had the advantage of being able to remove the lower hinge bracket for mocking up placement and punching marks. Since the hinge brackets don't normally come off, you'll need help holding the carrier in place. To lighten the load a little, I'd remove the part that actually holds the wheel from the carrier's frame. Plan on punching then drilling 1-2 holes first, then mocking up placement again, then punching and drilling 1-2 more holes, then mocking up placement again...until all holes are drilled. The hinge brackets have wiggle room, but if some of your holes aren't exactly where you want them, you'll consume that wiggle room quickly. I recommended starting with the outer holes on the lower mount. Also, I'd complete the holes for the lower mount first...that way you can have it support the carrier for finishing the upper holes. Be mindful of keeping it level when it's in the closed position before drilling too many holes.
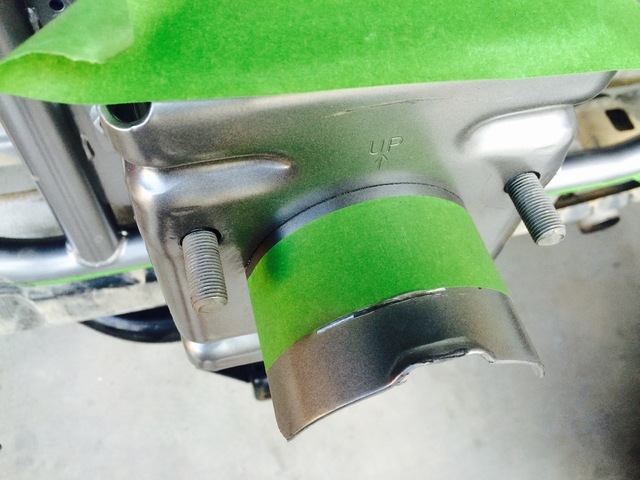
- For cutting the bumper, I have a wannabe Dremel and hand wand. I used painters tape to set lines, and cut-off wheels specifically for plastics to make quick work of things. A utility knife is good for getting the corners, then a flat file to clean things up.
Any other questions, feel free to ask. I thought about doing a build thread, but I think this content is best kept here so people are aware of the OE reinforcement.
-
 5
5
-
That's awesome! So just to reassure myself, you didn't add any reinforcement and it doesn't seem to waiver at all while open, with the tire plus your weight? I didn't think it would require much if any reinforcement, as it is very secure when closed, which is a majority of the time. Looks like I'll be swiping the carrier (and all associated bits) off my 96 before I sell it.
So this is where I say something absurd like, "do at your own risk" and "may the force be with you". It'd also be foolish to not think that the factory reinforcement is there for a reason.
But yes, I did not add any reinforcement. I attempted to get proof tonight of its strength, but let me tell you how difficult it is to get a selfie hanging/standing on a tire carrier. If you want pics of my feet on it, then I have that shot. Also, the tire carrier itself weighs somewhere around 50-60 lbs., so I can say that it'll definitely support over 350 lbs when open.
If I have any concerns, it'd be the carrier opening up too quickly and the inertia causing the lower hinge bracket to torque and indent the quarter panel. The upper hinge bracket has nothing that stops the carrier when opening, only the lower bracket does. But, the area where the lower bracket mount is also probably the most structurally-sound area of the quarter panel, simply because of the shape.
Additionally, my hinge pin setup allows me to put additional tension on the hinges, so it takes more effort to open it and close it. I'm toying with the idea of putting a lift gate strut between the upper mount and carrier to control the motion and act as an limiter on the upper mount.
-
 1
1
-
-
I thought about it, just didn't want to make the trip or deal with what's required just to get the donor vehicle's hatch opened. But, I could also use another wiring harness from it. I'll probably just solder it up directly and be done with it.
I've never gotten anything powder coated, so I didn't have any real expectations. The guy who did them is trying to get his foot in the door, so I gave him a shot. I think they could've turned out better, sure, but both carriers, two SFD sets, and my sliders in 3 different coats for $250. And he ground out the hinge pins and sandblasted everything. The result is fine for my needs and will last a while. And when it's time to refresh things, I'll probably do it again.
-
Is the wire for the swing away there? I feel like I remember you said it was and even the light in the dash was too?
Looks good. You repainted it right? I think I might paint mine, por-15, dries reply smooth and it flipping bullet proof, hmmm giving me ideas. Lol
-Kyle
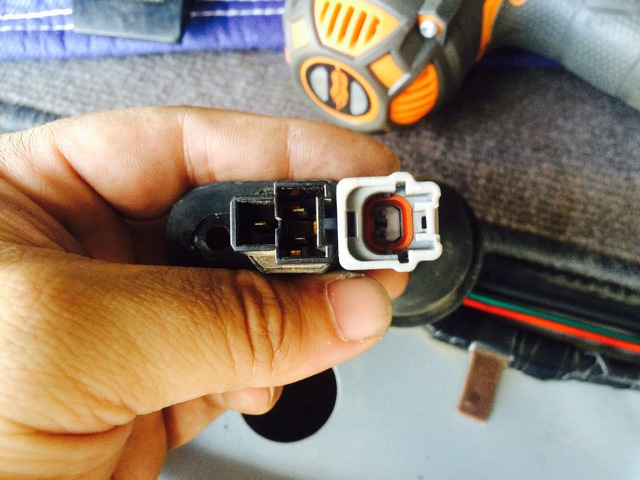
Yep, harness is there and dash light works. The pic with two harnesses...the left is the switch I pulled from the donor, but the right is the pigtail on the truck. I'm trying to figure out when the switch changed. I have the part number, but if the pics I'm seeing for it are of the actual part, there's no way it fits the harness.
I had it powder coated along with the sliders. Doesn't seem to be as durable as I'd expect, but I'm not terribly concerned. It's a truck. It will get used like one.
-
-
That switch is likely a clutch interlock, allowing it to start without the clutch pushed down. Toyotas used to have them, but I haven't seen them before on nissans. Where is it located?
I agree a complete drain is a good idea, and if you do that then you can just use LSD compatible gear oil, and save yourself the $10 tube of additive.
Good luck!
The clutch interlock switch crossed my mind, but also didn't think Nissan had them either. My buddy's Tacoma had one. Not sure he ever used it.
-
Well, I'm essentially done. The results are great...but I don't have any final pics to show for it...was too dark out.
I still need to tackle some trivial stuff like the door switch, a replacement pin to keep it open, and license plate mounting. For the last one, I think I'm going to go with an OEM one. Ain't cheap ($150+) but this carrier is pretty much permanent and this will just plug into the OE wiring. I've got the plate cable tied to the frame for now. I could easily keep it mounted there and run an LED license plate lamp off the low-level brake lamp, but I'd like to keep the space on the frame free for a future project...like a Hi-Lift. A guy nearby is selling a brand new 48" and a bunch of unused accessories for a good deal...how timely!
And you guys might get a kick out of this...I was looking for a new set of 5 wheel locks, but couldn't find any. I currently have a set of 4 and would've preferred to have a single key, but I stumbled across this: http://www.amazon.com/gp/product/B00DP53IWY. It got bad reviews because Jeep owners apparently don't know that they don't have M12 x 1.25 wheel studs. I can only imagine that the other person who gave it 5 stars is a Jeep owner who just impacted it on and said, "Yep, perfect fit!" If you see a 5-star review from Paco, it's very possible that I wrote it. But, I bought it, and it works (not surprisingly), in case you need a locking option. Though, the carrier actually has a provision for a padlock, that would work perfect with steelies.
I've already pulled the underbody tire mount...man there's a lot of space under there. On-board air has been in the back of my mind, and it's a perfect space for a tank. I may also go with the Airlft bags, too...I've still got a little rake, but moving the tire further back and the weight of the carrier (it ain't light!) caused a somewhat noticeable drop.
Anyway, pics tomorrow!
-
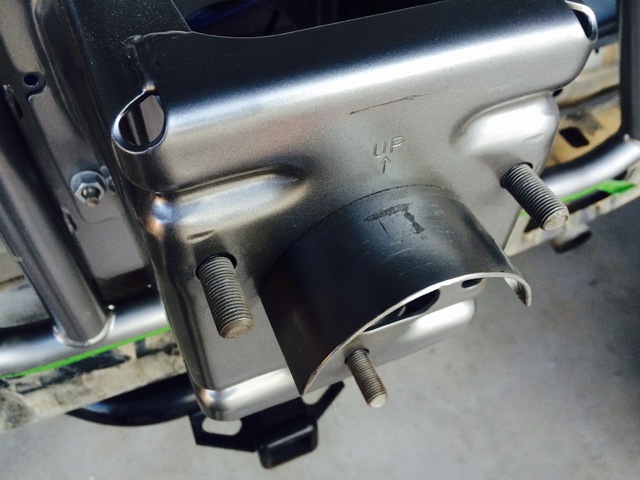
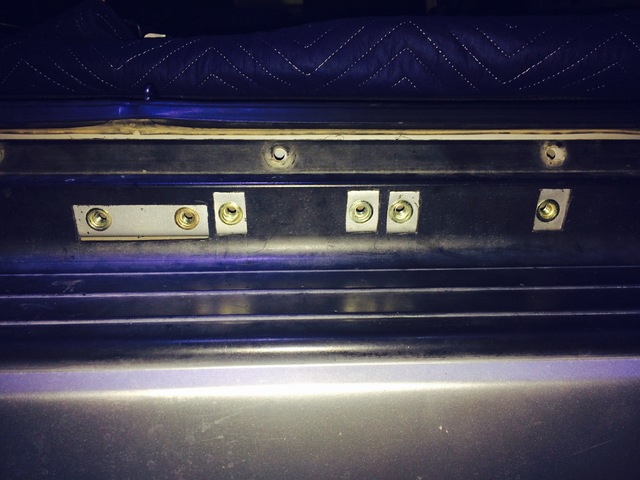
Awesome...just found a hidden gem. In another post, Kyle thought that maybe the metal above the bumper was dimpled or had existing holes for the hardware. This didn't end up being the case unfortunately. But, I'm just about to cut the bumper, and on the back side of it is a light outline of the parts to be cut out.
The reason it's awesome is because I made a template using SketchUp to pinpoint all the bolt locations, but also the areas to cut. My assumption when sketching that is that all the hardware lined up, but when I drilled earlier, it didn't seem to be the case so I was a little worried. Well, looking at the bumper, they aren't lined up, so the way I mounted them is actually spot on.
Still wished they would've just put the damn bolt holes, though
 .
.Back to it...
-
Ok sweet thanks. Do you feel it will be strong enough to take the occasional "oops there is a tree back there" treatment that I tend to subject my truck to? My concern is causing damage to the body if/when I accidentally back into a tree, or slam down on a rock(less likely due to location, but still possible I suppose).
Thanks Again,
Sounds like you need a better bumper!
I guess the best way to answer that question is this:
- If you hit something with the tire, the damage will likely be no different than if your truck originally came with a carrier. Most of the force would be on the latch and bumpstop, and the metal where that is mounted probably isn't reinforced on any R50.
- If you hit something with the carrier frame, it might translate into a little more damage at the mounts because there's no reinforcement to keep it from caving in...but really, I'm not sure how you'd ever really be able to know.
^^ Sounds like you need a backup camera, Nova!
Patrick, this is awesome that you finally decided to just guinea pig this! Glad to hear this appears to support the weight without any reinforcement. I had been thinking about this for a bit and thought that some sort of exterior reinforcement might work too. Basically a base plate on the outside to distribute the weight over a wider surface and not focus it so much to the bolts on the 2 mounts. Not as OEM as you typically like your stuff, but just an idea.
Ha, it took me 30 minutes just to be sure about drilling that first hole. How's it go? Measure 50 times, cut once?
I had thought about the exterior reinforcement option too...would be neat to have some diamond plate or something. But then you still need to think about how to attach it to the panel to keep that weight distributed. Jeeps have those as options, but those really seem like decoration pieces, and water collectors (or, rust covers!).
What I can tell you is that it is really solid. I cut the lip where the tire mounts, and it sits flush now. And then, I hung on it once more for 3 seconds, with tire mounted and carrier fully open. So we're talking about 300 lbs. When it closes, it feels solid. The entire truck vibrates, more like grunts. It reminds me of how solid the rear gate on my Jeep sounded when it closed.
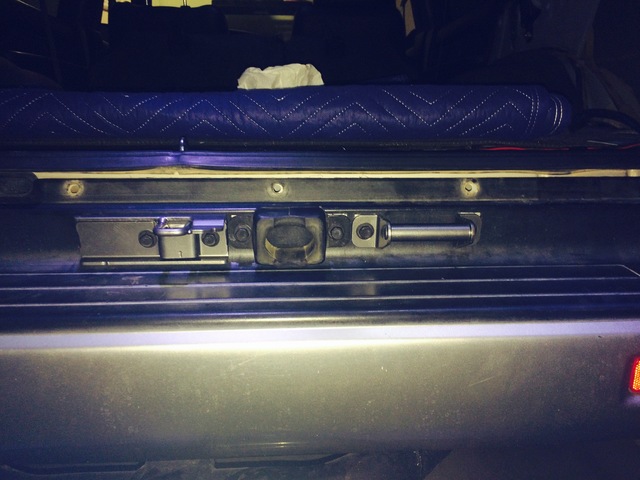
Got some more pics I'll post later. Right now I've got all the latching hardware in place. I need to cut some slots in the bumper cover, and put everything back together.
The only other snag now is that the screws that hold the release handle in place come in contact with the finisher panel above the license plate. It can be latched, but if it's closed hard enough, it's a problem (I nicked the paint on a soft close on accident). Surely not a problem on pre-facelift models mainly because the rear hatch is different.
The door switch harness is also different. I haven't seen a Nissan switch that looks like it fits there, and the Nissan part number says the switch I've got is the one. Of course, I have a solution for that already.
-
Darn, could've helped you a few weeks ago if the R200 one is inclusive. Me and a buddy just bought ours. Good luck!
-
Ha, yeah, there's some good articulation right thar.
-
 1
1
-
-
If you guys are looking for SFD flex pics, KR has this little gem on his website. Obviously rear sway bar is disconnected.

-Kyle
Of course, the SFD has nothing to do with rear flexing. Though, it's got the PHB drop.
-
So am I reading this correctly, and that the only attachment points are the 4 blind nuts on the outside sheet metal? If so, and that actually holds, this project may be simple enough for me to attack as well.
Thanks,
There will end up being 15 blind nuts total:
4x 10mm for the upper mount
4x 10mm for the lower mount
6x 8mm for the three pieces on the bumper (latch, bumpstop, support bar)
1x 6mm for the door switch
These are OE bolt diameters, too (except maybe that 6mm...haven't checked...but it's not a structural item so it's unimportant).
-
So the reason the wheel doesn't fit is because the older Pathfinder wheels have a shorter center bore. The newer wheel's bore is about 2-3" taller, so it won't clear the lip meant to hook the wheel in place while tightening/loosening the lug nuts. I presume the bores to be the same diameter though...the fit on the current arch looks to be the same.
Here's a pic of the newer style carrier. Has the arch, doesn't have the lip, and is much shorter:

I will just end up cutting off about an 1" of the entire arch and plasti-dipping it.
Also, guess I never noticed, but the newer carriers don't center the wheel on the rear. I like the offset look, but the centered carrier has more frame space for mounting things.
-
 1
1
-
-
I figured it out. The older wheels have a shorter hub mounting flange and tall center caps. I'll put more details on the other post to not cloud this one up...
-
No worries, happy to help, there's plenty of additional stuff just not scanned due to how gigantic these brochures are.
But the swing away can support alot of weight (on a factory delivered swing away cars) I've sat on my tire rack closed and it felt as solid as it could be. All 250lbs of me on top and it was barely breaking a sweat. So I'm guessing they had designed the latches with people climbing on these optional ladders in mind.
Plus I've had my friends sit on the swing away fully open and again, it's not an issue, but they were around 160lbs. I'm not sure how my fat self would do in that case. Lol
The only thing I see being an issue with this entire thing is potentially blocking the licence plate, but I guess that happens when people put bikes on the back and they don't get pulled or ticketed? Maybe I'm over thinking it. Lol
-Kyle
Kyle, speaking of which...I mounted my tire carrier last night. Hung from it while open, no issues! Would you mind popping over to http://www.nissanpathfinders.net/forum/topic/40367-r50-tire-carrier-mod-lets-settle-this/?p=759162 though? For whatever reason, I can't get the damn OE wheel on it! Is there a trick? I can only presume the older wheels (this carrier was from a 98) had a shorter and wider center bore.
-
Yeah, that one looks like a death trap to me!
-
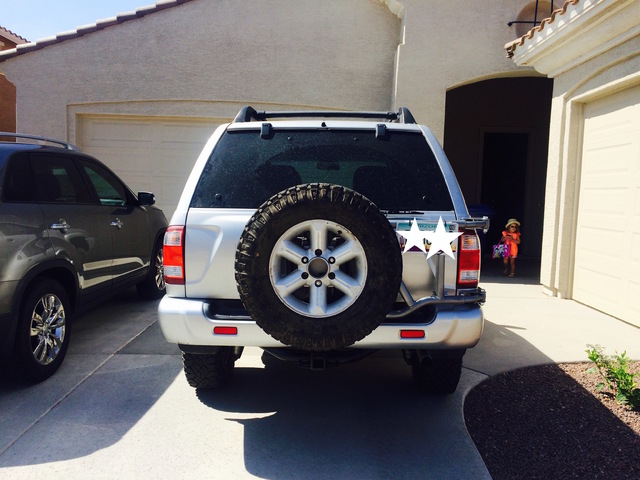
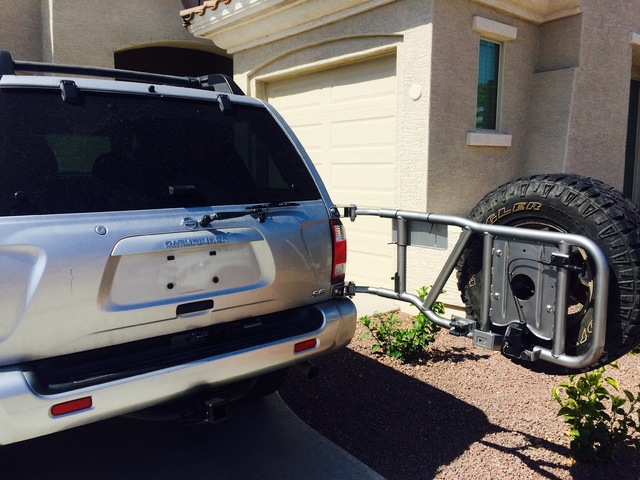
This project is real now.

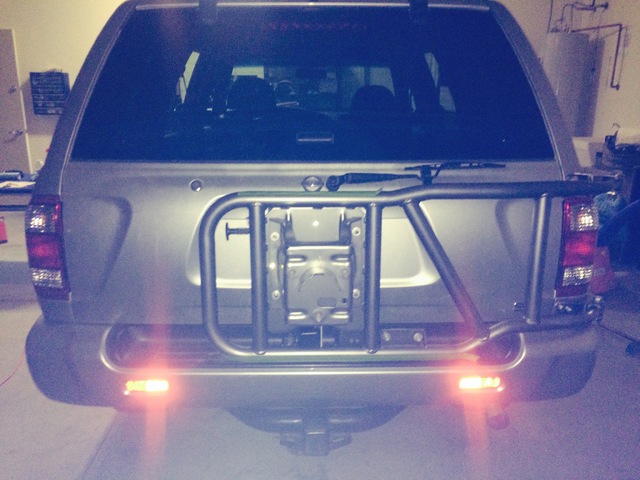
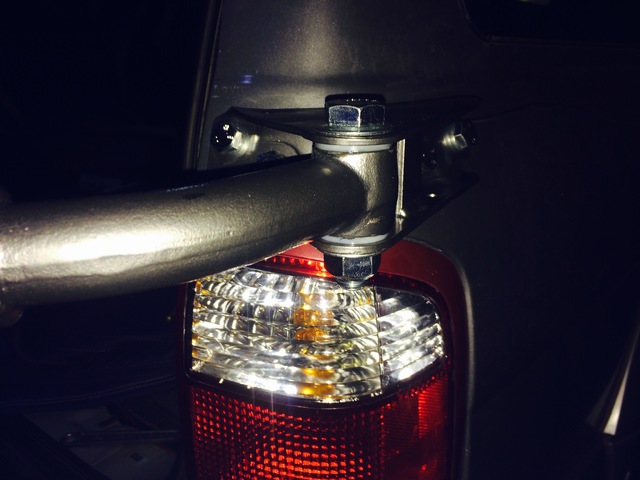
And then I ran into a problem...my g-d OE rim doesn't even fit!!
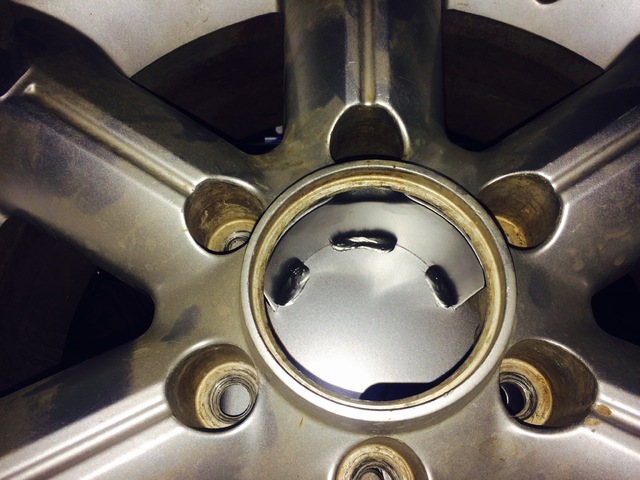
So before I get to the wheel not fitting...
I didn't do any reinforcement, and don't plan to. I gave it three "oh please don't fail" moments where I hung onto the very end of the fully-opened carrier, feet off the ground. I weigh 240 lbs (unfortunately). Nothing bad happened. The truck just acknowledged my weight (and silently screamed, "now get off!").
I ended up using 10mm x 1.5 blind nuts with a bead of silicone adhesive on the shoulders before collapsing them.
Re-using the OE hinge pieces wasn't an option. Ended up creating sleeves from the broken bushings, got 5/8" bolts (hinge pin is 16mm), nylon washers, and a PTLN nut. Packed with silicone grease, it should be free of noise and maintenance (but can be taken apart if needed).
I need to get some sort of insulator between the brackets and the quarter panel. OE uses about a 1/16" adhesive-backed rubber pad and some presumably similar washers for each bolt. I could only get one set of the rubber pads (they're going on my buddy's carrier); the washers were like $3 ea (x8, no way). I bought some adhesive-backed neoprene sheet to cut something to shape...but it ended up being too thick to compress. I'm just going to get some rubber washers and be done with it.
I still need to remove the bumper, then drill and attach the latch and support parts. I made a template for drilling holes, so that should be pretty quick.
Now...about the wheel. I can't figure it out. I tried put it on at different angles, tipping it back to clear a lip at the top of the arch, lifting it up to clear the sides of the arches...it just doesn't fit through the center bore and will interfere with the top two wheel studs at any angle I try. OE wheels! I even tried it with the other carrier I have...same thing. Is there some trick I'm missing?
I'll get some better pictures in daylight.
-
Neat! Having seen those, it doesn't even seem like there's a need to have a step go over the window. I mean, at top rung, your waist should be well above the roof line. That's actually really clever. And the best part is that while closed, the latching brackets and what-not of teh tire carrier are supporting the carrier frame, so you shouldn't need any more reinforcement.
Very clever. Thanks for posting that!
-
Hey Prattage, welcome to the R50 club!
The triangulation I mentioned earlier shouldn't be confused with the 4-link (really 5, counting the panhard) setup. Triangulation in this case is undesired. But yes, to some degree, multi-link setups should keep things centered, but it depends on the angles of the links relative to each other, and how well those angle oppose each other. In our case, you would see some side-to-side without the PHB, but it could get pretty dangerous (imagine it oscillating back and forth as it attempts to keep correcting itself...death2 wobble!). It's an integral part of our suspension to say the least, and it's common on nearly all spring-based solid axles front or rear (Jeeps, Land Rovers, LandCruisers, 4Runners, etc.)
Some custom built 4x4 suspensions can get away with not having PHBs because their links often cross over each other (like an X shape) and have longer arms, while others simply move the upper links somewhere atop the diff hump. This essentially makes two very large triangles. (By contrast, we have two really small triangles and a PHB.)
-
Ha, I think that's where he's having the problem: his original studs are either snapping or seized.
-
Stumbled across this gem when looking for advice on what breaker rating to put on the batteries:
http://www.outbackcrossing.com.au/FourWheelDrive/Basic_Dual_Battery_System.shtml
-
Well, welcome back! That's a great re-intro. Glad the rollover was something you walked away from, and good luck with all the new projects!


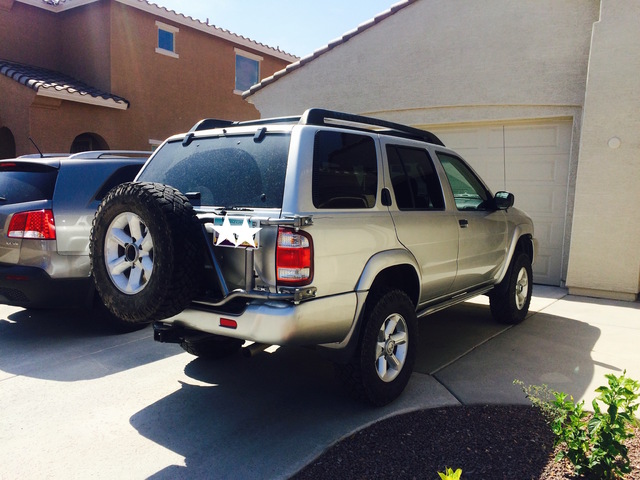

Located Nissan Terrano
in New People Start Here!
Posted
The internet doesn't seem to think so highly of him, unfortunately.