- Sign In Changes: You now need to sign in using the email address associated with your account, combined with your current password. Using your display name and password is no longer supported.
- If you are currently trying to register, are not receiving the validation email, and are using an Outlook, Hotmail or Yahoo domain email address, please change your email address to something other than those (or temporary email providers). These domains are known to have problems delivering emails from the community.

DCgabel
-
Posts
96 -
Joined
-
Last visited
Content Type
Profiles
Forums
Calendar
Everything posted by DCgabel
-
I did, i left the stock spring on the front. The rear coils youll have to replace because they will be too small. I used 3" wj cherokee coils.
-
They just clip right on the door itself. You need to unmount the window pane to pop the piece on. Trickiest part was getting the window back on the mount.
-
SIGNALS WERE TO HIGH. SO I HAD TO MOVE THEM LOWER. ILL GET AN UPDATED PICTURE SOON.
-
Fun? It was simple actually took three seconds. Two small flat head bolts on the top and some plastic pops in the bottom. Then the whole thing pulls right off. Granted i had to give it a good tug. (Just a tip unclip the Foggies and signals before pulling it off to avoid pulling the wire right out of them, sensible, yes but hey first time i pulled the bumper off i almost did that very thing) Four bolts. Made some clips that bolt on to the factory mounts on the top and for the bottom i welded on some clips to bolt the bottom of the bumper on. Took a while to measure everything up to make sure it was all level but it was worth it. Ill try to get pictures soon. sorry i havent yet
-
I used a 1/8" steel C-channel. As for the resevours i just nothced around them because i wanted the bumper to sit tight to the front and not stick out like the regular TJM or Rhino bumpers. For the brackets. i cut up some Steel angle and they bolt right on to the factory bumper mounts on the top and on the bottom i had to cut out the factory rad support because it was crap condition and welded in piece of metal tubing, i forget how thick but its at the least a 1/8" thick. BUt i welded some brackets that have the bumper bolt on to as well. All together four grade eight bolt fasten the front on to it. Ill try to get some pictures up sometime.
-
Do they make your pathy sound pretty nice??
-
You forgot one more in Canada..Soon going to be two.
-
http://i1137.photobu.../IMG_0054-2.jpg Looks much better now.
-
Yup thats about what i paid.
-
This is true. I wont lie im embarrassed to say how much the new piece cost but i couldnt stand looking at it, so i went through with it.
-
I didnt want to go higher than that because then id have to replace a lot more parts and start trimming my wheel wells and i didnt want to do that.
-
I dont have an AC lift no. So yes the SFD only gave me 4.5 inch of lift. But from stok tire size to the 32s it gave me an extra two inch of high.
-
I made the SFD myself. i purchased some 2x4 quarter inch steel and cut it into lengths i needed and then bought some three inch Cherokee springs and RS5000 Rancho shocks for the rear. I basically replicated what KRfabs has for the SFD. i did buy the steering wheel link and the sway bar link from KRfabs though.
-
Trust me i gave it as much clearance as i could without having to relocate the coolant reservoir and i didnt want to do that.
-
The ems light were just for fun. Frowned upon but just something different The EMS light are just for fun.
-
K, so i used some C-channel steel and welded it up to fit around the front. Not a big fan of the way it looks and i am still tinkering around with it as of right now. But this is how far i am. My original idea was to replicate the TJM Bullbar. I have pipe that still needs to be bent up and welded on. More coming..
-
Photo Shoot
-
Still working on fixing the trims. More is coming because im still in the middle of the process.
-
K so i finally got sick of seeing those nasty rusted window trims every time i go for a drive in my pathy. So first things first, is popping the interior door panel off. Its only held in by several snap clips on the inside and three Philips screws, one of which is hidden under the window switch. Remove the switch by simply tugging on the piece gently till it finally pops up. After taking the three screws out and popping the snaps. Disconnect the switch and panel lift right off. You should only need two long shank flat head screw drivers and a Philips screw driver to do this. After doing this raise the window just above the lowest position it can go to access the screws that hold the window pane in. There are two screws holding it on. (I have a clear plastic cover on my door i know some pathys dont but i just made a little cut in it to get at the screws Oh and you should take off your window visors before you start, you cant take the window out without wrecking things if you dont.
-
Thinking about doing my timing belt on my pathy for the first time. any pointers?
-
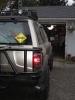
custom roof rack, front and rear bumper and rock sliders
DCgabel replied to pathyboy12's topic in 96-2004 R50 Pathfinders
Hey man just wondering if you got any photos of the brackets on your front bumper.