
- Sign In Changes: You now need to sign in using the email address associated with your account, combined with your current password. Using your display name and password is no longer supported.
- If you are currently trying to register, are not receiving the validation email, and are using an Outlook, Hotmail or Yahoo domain email address, please change your email address to something other than those (or temporary email providers). These domains are known to have problems delivering emails from the community.
Leaderboard
Popular Content
Showing content with the highest reputation on 06/23/2023 in all areas
-
Had some front end sloppiness that I tracked down to being a control arm bushing so I did the deed and switched to polyurethane. I wanted to switch to polyurethane because, from what I've read, it resists oil better than rubber (I have leaky valve covers) and last longer than rubber in general. Secondly, I was under the impression that I wouldn't need a press to install the bushings. Presently I couldn't source any bare control arms for polyurethane bushings to pop into so I headed off to the place that has the cheapest control arms: The salvage yard. Removing the control arms in salvage was extremely easy, but removing the rubber bushings was a 2 hour job involving big hammers, chisel punches and a sawzall. I cleaned up the scars from the bushing extraction and coated them with the some converter for cosmetic purposes. I wanted to try using grease zerks because some people say that poly bushings can be squeaky. There's not really any A+ location to put a grease zerk on the control arm but here's where I put it. https://phx02pap004files.storage.live.com/y4mCsBnRSxIAaQql9jtePmOGF76hCX6b2E1lucWNL-WBvwec_G-4cds7LfuoGyIxzkB4az2k3n340mGrNzQhnQX4lfFHSVxt4wXDh8l9R24E-5Z6KBFnZYxSDYbRi7xAnFuFrEu1hCdumPlTyDiwM_PlcFxJOSPykNyaBhBHRpeOEn3FcUeFs5oDzDqSz51ueNL?width=660&height=495&cropmode=none So the bushings I went with were from 4x4parts.com. There's two purchases required need to have both types of front control arm bushings. The website shows grease packets, but I didn't get any for some reason. 4x4 Parts - Pathfinder Front Lower Control Arm Front Bushings SPPE3R5099 - Your #1 Source for Nissan Aftermarket Parts! 4x4 Parts - Pathfinder Front Lower Control Arm Rear Bushings SPPER50559 - Your #1 Source for Nissan Aftermarket Parts! So about that grease zerk; I didn't center the hole perfectly, so I had to dremel out a notch in the bushing to make room for the threaded part of the zerk. Also, I was wrong about bushings not needed to be pressed in. A couple years ago when I installed the rear trailing arm bushings from 4x4 parts.com, they popped in by hand and didn't have a metal portion. The front bushings do have metal and require some coercion to fit. I had to bust out the dynafile and ever so lightly chamfer the control arm inner diameter and chamfer the metal on the bushing in order to drive the bushing in with a mallet. https://phx02pap004files.storage.live.com/y4mRzLIK_Gl6MXmKLZRCVLJC5oRKuF4wkzyyKjii1btt1kddA1i5bDt8E7FY0tV0mGQvzTYHCzaKsMvjp2rvR8WP14DXJjForyi0494Eh45TaVTxKEO3McJR3qpTNgvcqF_C82hMHkt2LViLTYwe4KcQL5zBoawfwRLk5ZOlpcjQa0li2LPwIoRvCDcwvpU4Wh2?width=660&height=495&cropmode=none The other bushing type goes on the rear portion of the control arms and it's an easy fit if you grease it all up beforehand. I drilled a hole through to the center for a grease passageway. After drilling through, the bushing material closed up the hole behind the removed drill bit like some sort of sphincter, but grease can pass through it though. The grease I used is a silicone grease that ace carries. I've read somewhere that silicone grease is best to use with poly bushings. https://phx02pap004files.storage.live.com/y4mYdkisbPP6QPEO02nVK2riVNQFQE74ATk7z8VBGzSTLKByWVIRRSARxSR35btyAUawKvXItVVEd2WU8m9W37FtISbp0V8iOobIeK3tdV3eabI73MIqWs8Os-6aECaYq_V4aJXBAEb0lCIfBsnkIqSywds8QdPfiM4d4Ptkzlu364nGgF4mwklEt8n7JltYZUR?width=660&height=495&cropmode=none https://phx02pap004files.storage.live.com/y4m4KuWN8K8aM8LuLes2G6btbky2hr6D170crIXTTawheoD-KSaybTiVwQNvEYt9wMLW2wJtyonIjZ-pHCShXYutKAjoOKTKfSl8uv3mYMDdZPbht3o9gdmffb3uUj-S5mEcgb4fEruaq-7ge2W1GQyp1_eDEcxobZPECv8L2iI5R7uEgzstShmbponBrJCH5Bz?width=660&height=495&cropmode=none When I pulled salvage control arms, I nabbed the brackets. I drilled and tapped the brackets for grease. https://phx02pap004files.storage.live.com/y4m3-0brWzz6yoz7EWzPA7_0DTpfIk4T9CWyB57vZ3v7Iah499KjZGHQy1gSNomBijM8W0otqg7j7AoFMG5045x4v26aGkp5NLK-JPc3xBLQvIGfm0JEAa7YBEWQF4V1xBbL5xLi1y1kLUDJum6mEHkQvjPLJMCLtRJkDlFFe030y_T4RNedTZq4ZdDKMxtGryW?width=660&height=495&cropmode=none After prepping the new arms, I removed the old arms. Definitely split and cracked rubber bushings in those. Installation of the new arms was straight forward. I just made sure to add a step where articulate the arm downward to have a good connection to the grease zerk. I then grease it with the grease gun then tilt the arm upward (tucking away the zerk) to connect to the ball joint. I hooked up all the hardware and tighted the ball joint nuts to spec but left the bolts the secure the arms to the subframe loose. FSM says to install bushings this way. Not sure if it's really needed for poly bushings, but better safe than sorry. https://phx02pap004files.storage.live.com/y4mswUGMccd01SuqaAk_WqQZ6883jOkiqbV2ph6bmIAdcVWIQvr24CDNe7_pg0sTziKYn1BTGYGs7ahA4D_a2zvAGQUQRmSzNjQM4b6eXuTF2njHoaO3kKwyqPk0Ly2I5kY75R1X7wnlWzASFXgdoZCiS-DQzKLTgnd_yO0XB5em6fAIzCHX5d93_WWtWstPy5_?width=660&height=495&cropmode=none https://phx02pap004files.storage.live.com/y4mV2kzpthVsitI6QAojThbgVi_zC_66GZ07L_0jUISoEXCQWTNg4MDZxuoNVBriCS7xB6QRfbdVeiDNJjN5WohpbHibFI_3zQhp6TMKcHsERknNuXBr0JYofHdac9ZkLbEG3h7dP9wjoIg7_hh0o2U3GXnilOuHh6SC_9me-IvirHSj1a_uH-peBJzT7p2HF4N?width=660&height=495&cropmode=none After that, we set the vehicle down under it's own weight and torque the bolts to spec. Then we give the rearmost bushings another charge of grease. https://phx02pap004files.storage.live.com/y4mV2kzpthVsitI6QAojThbgVi_zC_66GZ07L_0jUISoEXCQWTNg4MDZxuoNVBriCS7xB6QRfbdVeiDNJjN5WohpbHibFI_3zQhp6TMKcHsERknNuXBr0JYofHdac9ZkLbEG3h7dP9wjoIg7_hh0o2U3GXnilOuHh6SC_9me-IvirHSj1a_uH-peBJzT7p2HF4N?width=660&height=495&cropmode=none https://youtu.be/ECBZiT2BjGc I've driven the vehicle around for a couple weeks and wheeled it on rocks, mud and creek water today. Everything feels tight and quiet. No squeaks or pops yet. The ride doesn't feel any harsher, but with 33" tires, I may have never felt a difference anyway.1 point
-
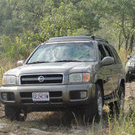
Update Pt2 Way back in April 2021 I ordered a Lokka and finally received it in December. Due to work killing us slowly with overtime, I just started working with in in June. I wanted to go the route that @PathyDude17went by getting a front 4.636 diff and a rear 4.636 lsd diff to pair with the Lokka. Rear diff I did some homework on NPORA and FSM about choosing and removing the diff, so I set out to the junkyard with tools and found a 2001 Xterra with the orange "LSD oil only" sticker. Door jam said HG46 so I started wrenching. Never bothered checking backlash or runout on the ring gear, but I couldn't see or feel any issues with it. Install went pretty smooth. I of course used a new gasket, and lsd additive. One thing i noticed is that there doesn't seem to be any torque spec for the brake line where it attaches to the drum, so I just went by feel on that. Front diff I found a 2000 QX4 that had the HG46 indicated on the firewall plate so I grabbed it from salvage. Removal is pretty easy if you know how to crack loose the driveshaft nuts and remove cv axles. The front diff, I verified runout and backlash before I started getting too far into the lokka install. Installing the lokka wasn't too awful, it was just time consuming and the printed instructions aren't worded very well. Thankfully Tyler has his install video on YouTube to show us how it's done in normal english with good visuals. I went ahead and ordered the associated items from the links on his YouTube channel and found the punches very handy. I ended up not using most of the oil seals from the parts order because I didn't see any evidence of oil leakage on the donor vehicle and removing the seals was going to be a time consuming pain. I stupidly put my house up for sale on the market while I had my pathfinder on jack stands, oil on the driveway and diff parts on my work bench, so I really had to kick things in gear and get this put back together before people started showing up to check out the home. From what I remember, there were some diff parts that were particularly tough to separate that Tyler didn't have trouble with and a part or two that came off really easy where Tyler had to get creative to remove. I suppose no two diffs are the exact same. I did have to shim mine to get it into tolerance. My gap was too large so I cut up some .005" shim stock with scissors to make some spacers to get the unit in spec. The hardest part about the diff was installing into the subframe, that was definitely a two person job without using a trans jack. With the Lokka in the diff and the diff in the Pathfinder, the unit seemed to perform as expected by turning wheels and driveshaft by hand in the various scenarios. With the humble house being turned into a public showroom, I would have to wait to test it on the trails for a couple weeks while I waited for life to settle for a bit. Results: The HG46 diff set made a noticeable difference in acceleration. Acceleration wise, it felt like i went back to my 31.6" tires from my 32.87" tires When I was rushing to get the Pathfinder put together and moved for house selling, I did notice the LSD stiffness was about 50-60 ft lbs by feel. How I figure that is by having the rear axle on jack stands, tires on, torque wrench set to 100 ftlbs (lug nut specs), I could get about halfway (my super calibrated arms) to 100 ftlbs on the lugnut before the lsd would give in and let the wheel slip. Obviously, i'm measuring a couple inches out by pulling on the lug nuts and not the center of the axle, and the torque wrench angle plays a factor and my arms aren't a measuring device but a weak speculative data point is still a data point. It has only rained once since I swapped diffs so I don't have much wet street experience, but I did take it around the neighborhood when it did rain. wheel slippage didn't occur on gentle driving. I did intentionally stomp the gas for a turn and both tires lit up to my delight. Offroad, the lsd has exceeded my expections. I usually don't dare driving 2wd on Ozarks river rock because I sunk my tacoma pretty good doing that before, but I figured I'd see what the lsd would do. I could feel the rear tires slightly slipping and digging. All it takes is one tire to become the one wheel wonder for a single rotation and you're sunk. The back tires worked in unison and we kept chugging forward. Further on the trail, I kept it in 2wd and cleared some familiar spots that are prone to back wheel spin, but none of that happened. With the star of the project being the Lokka, I drove deeper into the trail to find the tricky stuff. There's a spot where you flex out and 3 wheel it that requires momentum if you're working from bottom to top of trail. Lokka crawled at the slowest possible speeds without issue. I made efforts to climb to rock steps. I had mixed success with that. Video shows the lokka working, but the driver needs more IQ/effort and the tires need less air pressure. Descending trails with lokka is normal unless you stab the throttle while turning, then the lokka lets you know it's there by resisting the steering wheel inputs. Climbing trails with lokka is different because there's times it tells you it's in charge depending on the terrain, steering angle and throttle input. Turning radius can be increase at times with the Lokka. I found that using 2wd is more rewarding with the LSD because it has easy steering, However, the Lokka will let you get the highlight moments of wheeling that you're going to remember the rest of the year. Hopefully after some real estate transactions, I can go back to the trails with 20 psi in the tires and more time to get a better feel. Also, I have tons of detailed photos of the Lokka install, included shim installation. If there isn't one already, anyone want a post with tons of photos for a Lokka install walkthrough?1 point