All Activity
- Yesterday
-
Definitely. With the enlisting of the old man we’ll get it done.
-
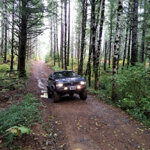
And here's what they look like with a bed resting on them when the in-tank fuel temp sensor is throwing codes and emission tests are due soon...
- 1 reply
-
- 1
-

-
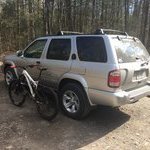
General topic, maybe off-topic, but still PF love! I've been hoarding LE wheels (9 of them so far) for a while and finally got around to slapping a set of them on my 98 Frontier. Had a shop in town strip them down, repair all scrapes and curb rashes, then powder coat them in "wet charcoal with satin finish". The results came out great so I thought I'd share the journey. Started out with 17x7 4Runner wheels shown below. Tires were old (Fall 2016, installed early 2017) with only 4,100 miles and tons of tread left, but showing their age. I started a new job at the beginning of April which has me commuting again, so it was time to change them. TownDawg helped me visualize (a la Photoshop) what the LEs would look like on it... And with a little bit more drop (only 1" in the pic above)... Truck's been undergoing a slow restoration for a while (body, paint, and glass done 2022, new tint and interior around the corner) so the plan was to get a set repaired and put new tires on them. All the ones I had have varying issues, but fortunately no major ones. As much as I like the factory silver on the T4Rs and the LEs (both similar color as the original wheels), the color has always been out of place in my opinion. And for what it was going to cost to refinish each wheel (5 of them), it was actually more expensive to go with a factory finish than a powder coat ($275/ea vs $225/ea). So, bought 5 new tires and took my 5 crustiest wheels to the shop to scope color options. Was looking specifically for something that keyed off of the inset of the grille. Found a pretty good match... The results... I also stripped down a set of center caps so they could be paint matched...not too bad! Cut new adhesive for the emblems as best as I could... Installed... Just the right amount of stick-out, no spacers... Kinda gray, kinda charcoal, kinda black...depends on the light I suppose. But they came out great! New lugs and lock nuts seal the deal. LEs are 17x8 and the 235/55R17 tire is supposed to be about 27.2" diameter, but according to GPS speed it's much closer to a 26" (stock size). 27.4" tires should have offset the H233B w/ 3.9 gears (stock 3.7) according to my calculator, but I still needed to use the 18-tooth speedo pinion gear (stock 17) I had previously installed. Speedo's spot on now.
- 1 reply
-
- 1
-
-
Been eyeing this for a while but can never find any good completed pics. So, pics please!
-
93 Nissan Terrano R3M TD27 Auto Trans Service
Drifter2090 replied to Drifter2090's topic in 90-95 WD21 Pathfinders
Perfect thanks so much for the info, I will give this method a try! Maybe I should measure how much actually comes out and try to refill the same amount. Think I won't bother with the filter either then. Did you notice any difference in trans performance? -
If neither CV spins when the driveshaft spins, something is very wrong with the front diff. That said, it's an open diff, so if one hub is locked, it'll spin up the CV on the other side rather than doing anything useful. The diffs are also hell for stout on these, and surrounded by weaker components, so, unlikely failure. The fuel gauge knowing about the outside temperature is weird. Not sure which way to send you on that one. I'd probably check under the access plate in the back first (under the rear carpet), see if there's a bunch of mud around the wiring connections that's shorting them out when it's wet or something.
-
 Teesetz changed their profile photo
 -
lol right? I stopped asking my self similar questions when I found this is how they spell optional throughout the instructions.
-
Nice find! It's been too long since I built a model kit. Funny that the box lists the engine specs like they're something special. I'm also wondering what mistranslation led to it having a "fog roof."
- Last week
-
 Cadencarp joined the community
 -
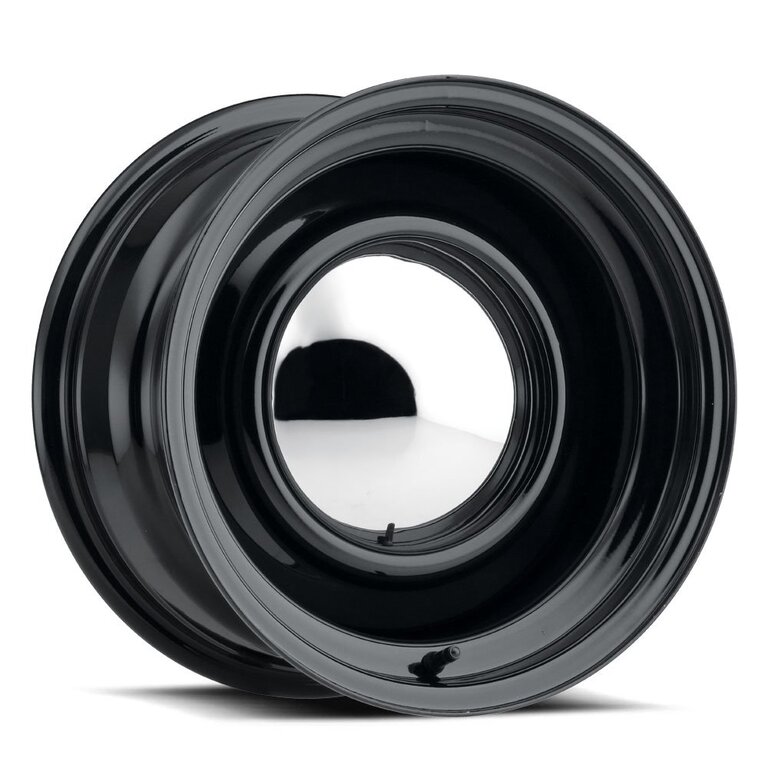
Anyone have a source for smoothie wheels for our trucks?
-
Oh, and I only replaced the parts that were broken. I think I re-tapped a few threads also, just in case.
-
Interesting. I never looked closely enough, but that seems like it. That's what my cats looked like. I intended to replace them, but the kit I bought was total @!*% and effectively non-returnable. Lost a few hundred bucks in the process and just slapped my OEMs back on. Maybe one day when I'm not sour about the purchase I'll try replacing them again.
-
@hawairish so I figured out why you couldn’t find the ring gasket and wire mesh gasket. In the attached photo is the inside of the cat looking from the outlet. Where the honeycomb starts is where mesh gasket and ring gasket are weirdly enough. That would suggest the entire honeycomb structure is pressed into the cat body from the inlet. Also might mean back in the day you could get the cat actually rebuilt instead of replacing the whole thing. No idea why you would need a gasket though in that location still. The photo below is the inlet side of my cat. Some chunks missing and melted, what do you think, doneski? Sent from my iPhone using Tapatalk
-

Transfer Case Module replacement
Slartibartfast replied to pathy200086's topic in 96-2004 R50 Pathfinders
Yeah, I think that's the same knob that's on the US trucks with the all-mode. Anyone here with the all-mode box want to check the numbers on your module? Long shot that the US-spec computer would be the same. -
Transfer Case Module replacement
pathy200086 replied to pathy200086's topic in 96-2004 R50 Pathfinders
I have considered converting my vehicle to a manual transfer, but the amount of work involved is overwhelming. Unfortunately, I am not skilled enough to do it myself and there are no shops near me that would take on the task. I am hoping to find the right transfer case module, but it seems like a long shot. It might be best to cut my losses and replace my vehicle, even though I really don't want to. It's starting to look like one of those 'if all the stars align' situations -
Transfer Case Module replacement
pathy200086 replied to pathy200086's topic in 96-2004 R50 Pathfinders
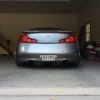
yeah this is the 4WD Knob that's currently on my R50 sorry for the quality picture I grabbed this off google https://photos.app.goo.gl/R3LXPNDLNDSL6i4G8 -
You are very welcome. Chris.
-
dsuguitan05 joined the community
-
Transfer Case Module replacement
Slartibartfast replied to pathy200086's topic in 96-2004 R50 Pathfinders
I have no idea what fits what, but I did a little more poking around. I found a whole lot of modules that start with 33084, for a bunch of different vehicles and transmissions, but none with your full PN. Looks like 33084 says what it's for, and the rest of the part number says what it fits. I couldn't find any transfer modules listed for an '00 R50, or any year R50 that I searched, which is weird. But yeah, given how many flavors there are of this thing, I'm guessing the numbers do need to match up. IMO you've got two options at this point, and both involve scouring wrecking yards. Option one, find the same-ish year R50, same engine, same transmission, same transfer case, and hope it's got the same module in it. Option two, find an R50 with the TX10A manual transfer, and grab that, the shift linkage, the center console, probably the trans tunnel plate too if they're built that way, and convert yours to a transfer case that doesn't need no stinkin' computer. I don't know for sure that having that module gone wouldn't take something else out, but if it drives around as-is, and everything else seems to work, then hopefully it won't mind. I am still assuming I know what transfer case you've got. Does the knob have an "auto" position? I haven't heard of any other transfers being used on these, but Nissan does seem to enjoy changing weird things for no apparent reason. -
He answered it all, thank you.
-
-
MiloR50 joined the community
-
Oddly with duck duck go browser the search bar never came up, works fine with chrome. But thank you for the response, it was what I wanted.
-
Transfer Case Module replacement
pathy200086 replied to pathy200086's topic in 96-2004 R50 Pathfinders
Yeah I'm really surprised I didn't kill the engine, I heard the VG33E is pretty reliable I didn't really believe it until that day -
Transfer Case Module replacement
pathy200086 replied to pathy200086's topic in 96-2004 R50 Pathfinders
Do you happen to know if the transfer case control module for the R50 Pathfinder is the same for all Pathfinders that are equipped with the VG33E engine? I have come across many transfer case control modules online, but the first five numbers on the part number are the same, while the last five numbers are different on most of them. They do mention that these modules are for 2005 models and up, so I am assuming they are meant for the VQ35DE engine and might not be compatible with mine. -
Okay so I'm just starting to get into it and before I go breaking any of the cat mounting studs I wanted to ask you. If you break one of the studs, you can't use the two nut method to extract them, so how did you extract the broken stud? Also, are you saying you extracted and replaced all of the studs, even if they didn't break? I was just planning to replace only the bolts and nuts if none of the studs break. Got the driver side resonator off, here’s what the outlet side of the Bank 2 cat looks like: I think that is slag meaning melted sections of honeycomb. No telling what the inlet looks like.
-
Hey there TexasJim, this topic has been covered quite a bit in the past, the search feature on this site is very helpful as well. Now with that said here is a link to a thread that will give you some insight on the subject. Chris.