pathybuilder Posted March 24, 2012 Share Posted March 24, 2012 Mine smoked a bit, when I put the wrap on, even when I first ran them without the wrap, they smoked a bit, I think it was just the coating on the headers getting warm for the first time. Link to comment Share on other sites More sharing options...
adamzan Posted March 25, 2012 Share Posted March 25, 2012 Looks real good, I guess maybe I'm not as good at explaining things as I think I am... The Y-pipe isn't long enough to fit onto both headers? I seem to recall that same problem. Somebody on here might give me $%^T for saying or trying this, but I loosened the manifold nuts off, so that the headers have some slack in them, put the Y-pipe on, then the last thing I did was tighten up all hardware. The manifold nuts sucked the header in fine and it hasn't leaked. You might want to try the same, could save you the cost of the shop doing it. I wouldn't go crazy on the manifold nuts, they do have a torque spec (don't recall it offhand) I think that is actually what you are supposed to do. Get everything set in and then tighten it down to spec. The smoke is the 2 dollar rattle can paint pacesetter uses burning off. Link to comment Share on other sites More sharing options...
94 Pathy Posted March 29, 2012 Author Share Posted March 29, 2012 Sweet guys! I'll loosen & get the Y-pipe on & retorque the studs. That would save some more @ the shop also. Will take pics & post as soon as I get it done. Hoping this next Tues morning. Link to comment Share on other sites More sharing options...
94 Pathy Posted April 3, 2012 Author Share Posted April 3, 2012 loosening the headers worked. Yes, make sure to put everything together before tightening things down. I also got the intermediate pipe on & O2 sensor in. Needed to wire up part of the old O2 wiring to the new since I was about 8-10 inches too short. Worked & ready for the shop. Will let ya know & take pics when all done. I want to Thank everyone that has helped with imput on this project. I just need to get things paid up & look into some 33's. Link to comment Share on other sites More sharing options...
pathybuilder Posted April 3, 2012 Share Posted April 3, 2012 Glad to hear that it worked out for you Link to comment Share on other sites More sharing options...
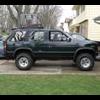
94 Pathy Posted April 3, 2012 Author Share Posted April 3, 2012 Well, yes & no.... Exhaust is done, but I need to move some fuel & brake lines away from the passenger's side header more. They didn't weld the front bumper for me cause the dip@!*% there said that I only have 1 bolt on each side holding the bumper to the frame & just putting a few spot welds to the bumper mounts & the bracket won't hold. Ummmmm, welds would hold alot better then bolts......Whatever! I need to see if some of you Bodylift guys have3 any ideas/pics of mounts & brackets you've used & made to mount your front bumpers up after a 3" bodylift. Thanks in advance for the help. I'll try & get some pics taken once I get her all cleaned up. Might slap my swampers on it to see how it looks also. Link to comment Share on other sites More sharing options...
Precise1 Posted April 4, 2012 Share Posted April 4, 2012 Make sure the wires are well secured also. I had one ground out on the header and it was not fun limping home 15 miles with a completely dead dash display and a tranny in limp mode!! If you use the included 'brackets' to mount the stock front bumper, you now have the front impact resistance of a gerbil holding a twist tie. Your best bet is to get an aftermarket bumper that actualy works. Seriously! I tell all pathy owners who want to keep them in good shape, put real bumpers on it!! B Link to comment Share on other sites More sharing options...
94 Pathy Posted April 6, 2012 Author Share Posted April 6, 2012 Yeah, I'm gunna have to find some kind of aftermarket bumper. Very tight budget with looking into getting a house. Trying to figure if I can make a JEEP Cherokee bumper from JcWhitney or something work? I have to CAREFULLY bend a few fuel & brake lines away from the passenger's side header so they don't touch &/or get too hot. Have the exhaust done. Sounds good. Can tell the horsies, but not so much the fuel economy. Oh well, need to work on a cold-air intake. Front bumper is REALLY bugging me. Link to comment Share on other sites More sharing options...
94 Pathy Posted April 6, 2012 Author Share Posted April 6, 2012 Olympic 4X4 Products has a Heavy-duty Rock Bumper that is 57" wide. Front & Rear. Front with hitch is 240.99 Front w/out hitch is 219.99 Rear with hitch is 240.99 Rear w/out hitch is 191.99 Info says they are suppose to be for '55-'06 Wranglers & CJ's. Do you think they'll work? Yes, I know I'll have to get the mounting brackets adjusted. I'm gunna see if I can order them with the brackets, but not welded in. I'll have someone weld them in when installing them. Link to comment Share on other sites More sharing options...
Recommended Posts
Create an account or sign in to comment
You need to be a member in order to leave a comment
Create an account
Sign up for a new account in our community. It's easy!
Register a new accountSign in
Already have an account? Sign in here.
Sign In Now