- Sign In Changes: You now need to sign in using the email address associated with your account, combined with your current password. Using your display name and password is no longer supported.
- If you are currently trying to register, are not receiving the validation email, and are using an Outlook, Hotmail or Yahoo domain email address, please change your email address to something other than those (or temporary email providers). These domains are known to have problems delivering emails from the community.

PathyGig12
-
Posts
413 -
Joined
-
Last visited
-
Days Won
30
Content Type
Profiles
Forums
Calendar
Everything posted by PathyGig12
-
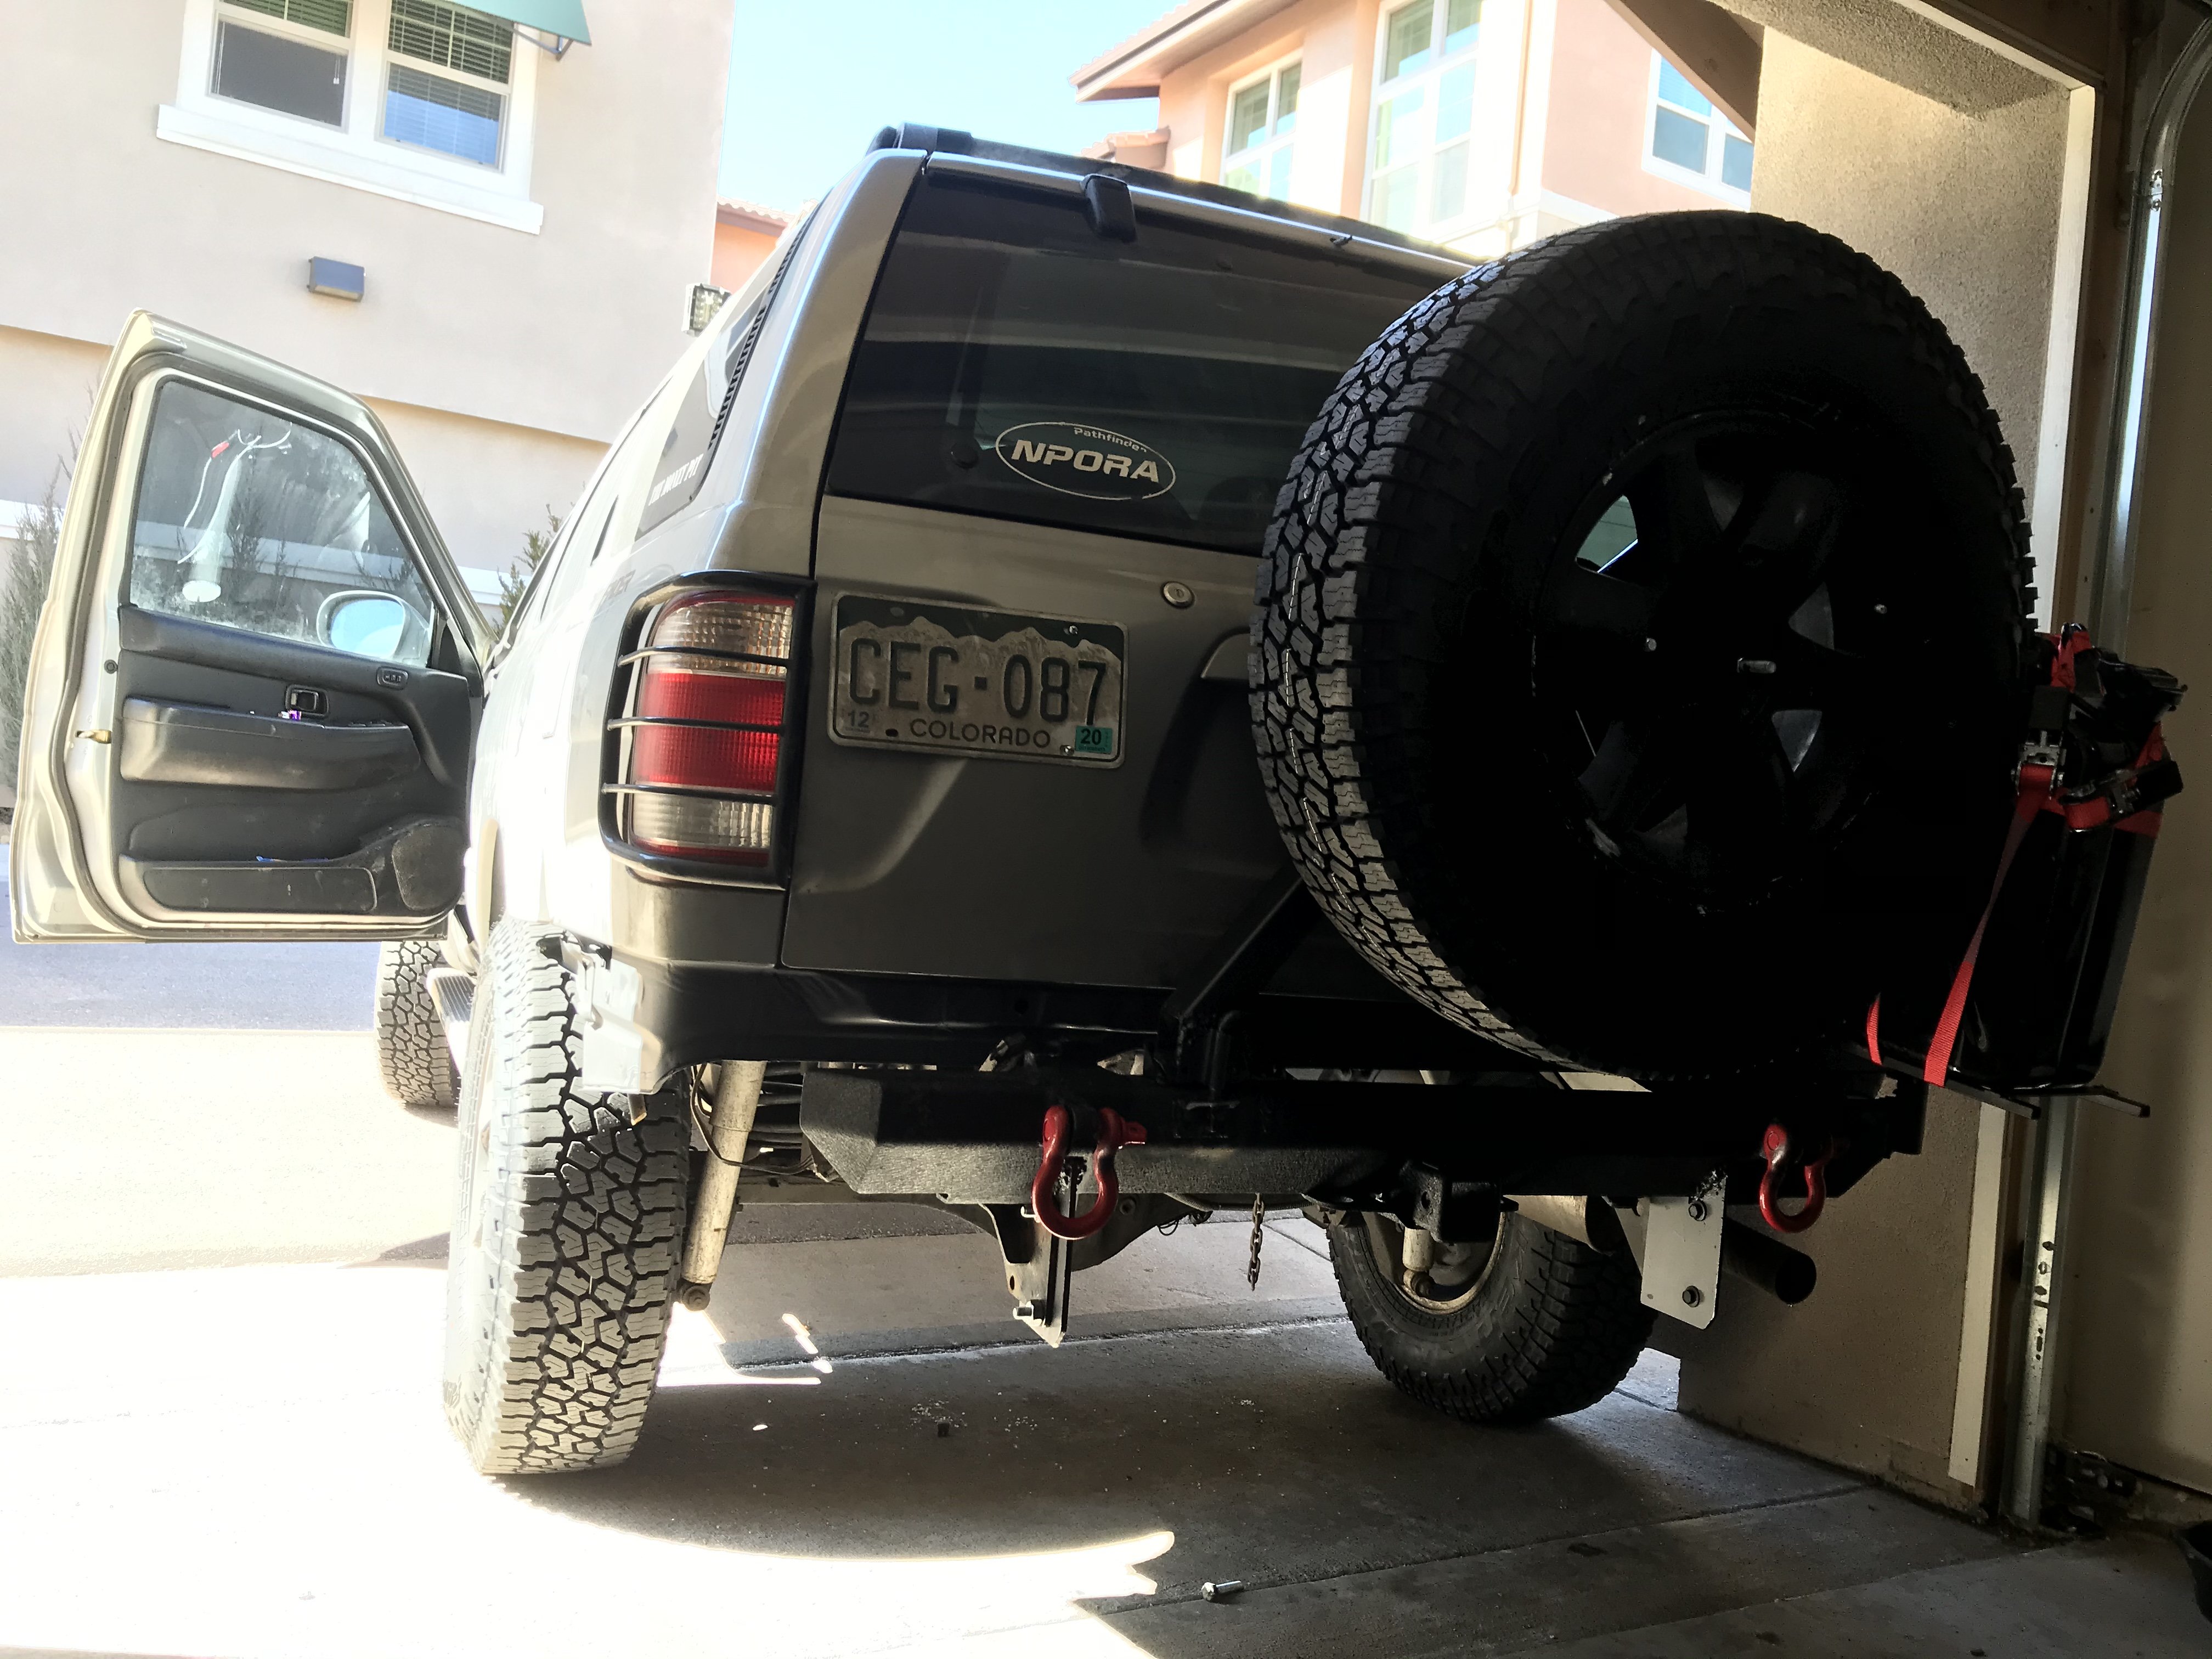
I actually like his as well, but I think I would leave the stock bumper cover on and just mount a steel bumper behind it to mount the tire carrier gate onto. I was looking online and found a very similar looking tubing bumper, but made for Jeeps. It has the exact dimensions I would need, just has to be modified to fit to the body mounting points that the pathfinder has to offer. I would have to get a shop to weld some tubing onto it that could pass through the bumper cover and then attach to the body behind it. this is the one I’m looking at currently. It’s interesting because the cut out would even fit stylistically with the OEM nissan hitch if the bumper was mounted upside down https://www.ebay.com/itm/Smittybilt-3-Inch-Rear-Double-Tube-Bumper-without-Hitch-Black-JB44-R/174136885099?pageci=2a8e8d33-6819-4f22-bf32-e345392387fb&epid=75039509
-
You might be on to something actually... I went and took another look behind the bumper cover and I’m thinking it might be interesting to try and go THROUGH it, with the support arms mounted to the body like you said. That way I still keep the stock looks mostly intact, but have a sturdier mounting point. Hmmmmm
-
Good question. The design is by no means finalized and I’m open to a rethink, but this is what I came up with as a good was of maintaining the original aesthetics and the OEM hitch assembly. I like the look of the rear bumper cover and don’t really like how the truck looks with it removed/replaced. I’ve yet to see a perfectly seamless aftermarket attempt, although hawairish’s comes very close Im also thinking about the amount of steel that would have to go into it if I did it any other way. This option allows me to use a piece that is relatively thin for the cross beam, whereas going under the bumper cover to weld directly to the body would mean more steel to get it out far enough to clear the back hatch of the truck. I’ve done some measurements and the way I’m doing it won’t compromise the departure angle a single bit because the cross piece will be riding along the flat top of the hitch “step” which will be level with the tops of the support arms. So the departure angle will be no worse than it currently is with the hitch. As for leveraging against the hitch, I agree it would be nice to have a more solid mounting option, but the truth is this is exactly the type of force the hitch is designed to take from trailers and what not. Its tongue weight is rated for 500lbs, where as this whole carrier plus tire would be applying around 200 max, so it should be safe. To back it up I could always look for reinforcement options as well, I have a few ideas already. also worth mentioning that I don’t tow much at all, I just want the hitch so that I can use the recovery shackle and so that I have the option to pull a motorcycle trailer or small Uhaul if necessary (moving, etc)
-
Does anyone know what a decent price would be to have a shop fabricate a rear swing gate tire carrier? I would supply all the tubing, just need them to weld it together into a basic gate and then weld it to a hinge pin. Thus is my rough idea. The blue is the long piece of 2x4 steel tubing, the red represents the tubing that will be attached to the sides of the OEM hitch assembly either by using longer bolts to replace the standard or by welding it on, or both. The tubing will stick out a few inches to support the long piece that runs parallel to the bumper cover. The green is the hinge pin assembly (ordered one through Comp4x4), and the yellow is the gate with tire and jerry can not sure what the final shape will be for the gate but probably closer to a triangle Only question is whether the price of welding the gate together will be reasonable or if I should just rent a welding rig and teach myself. I’ll call the shop to ask but I’d first like to get an idea of what’s fair
-
Valve Train Noise w/ Castrol EDGE 10w30
PathyGig12 replied to onespiritbrain's topic in 96-2004 R50 Pathfinders
Ummmm... so I thought the correct oil was 10w-40? I’ve been using Mobil 1 high mileage full synthetic 10w-40 for the 5 years that I’ve had the truck and I don’t think I’ve had any issues but now I’m worried. I think I’ll switch to 5w-30 next time I change it -
Feels like my build has been on hold for a while. I hate slowing down because if I don’t keep on it, I’ll end up settling and the truck isn’t getting any younger Been super preoccupied with fixing the 4runner up because it’s an old bastard that refuses to work properly. Turns out having 340K miles brings out the @!*%tiest and hardest to solve problems....who knew? lmao Apparently it’s having a fuel issue where it’s dumping too much into bank 1 and causing a super rich condition, but it’s also having an issue with the O2 sensor circuit so the fuel trim data is not updating fast enough during cold starts, which means the ecu is plugging in the -40 % stored fuel trim value at stop lights when you try to get on the gas, and it’s bogging because of too much air while cutting fuel. So it’s a sort of serious problem in and of itself, but its only causing drivability issues because of how it’s being handled by the rest of the air/fuel system. So now I’ve got to trace the wiring harness through the engine to see where it’s messed up and hopefully get it working properly before I can tackle the actual fuel issue, which is most likely the fuel pressure regulator. I’ve got brand new injectors in the truck, so I doubt they are leaking, but who knows? I’ve changed more sensors than I care to think about, including the the O2 sensor itself, so I’ve narrowed it down to basically those two possibilities. Dammit, I’m Toyota ranting again. My bad. Anyway, once I sort out the 4runner, I’m going to have more time and money to put towards my truck but I’m trying to prioritize the next mods carefully. My list is long and the price tag comes out to around 3K if I were to do everything I want, so I’ll have to pace myself and knock out the more important stuff first. I think the next logical step will be a rear tire carrier, but I’m going to go the custom route on this one because I can’t seem to find any WD21 carriers online or in the junkyards. There was one on eBay about a month ago going for less than 200, and I’m kicking myself for not snagging it because it disappeared super quickly. Oh well. My current plan is to weld/bolt steel tubing sections to the sides of the OEM hitch so that they stick out maybe 5 inches from the bumper cover and the weld a 5 foot piece of tubing across the top of them plus the flat top of the hitch itself, and then install one of the generic swing gates they sell for jeeps on top of the tubing. This way I can keep the hitch accessible for towing and recovery, and also don’t have to mess around with the drilling into the pillar to fit the WD21 carrier. I figure all told it’ll be less than 500 bucks in steel and labor, which is reasonable. After the install I’m tempted to also upgrade to the nrc9446 springs because I heard they offer an additional 1/2 inch of lift over the 9447s that I have right now, which would make sure I don’t get a bunch of take under the weight of all the steel. And while I’m in there, I want to put on the 26inch bilsteins as well. In the mean time, I’d like to get the front end sorted out in terms of new CVs, new ball joints, end links, tie rods, and control arms. Everything can be/needs to be done at the same time so I can tighten up the steering and handling and make sure the CVs are ready for the trails because one of them has a busted boot and I don’t trust it anymore. If the price is reasonable, then I’ll have a shop do it for me to save me some headache, but otherwise I can also try it myself. Just nervous when it comes to things like ball joints and CVs because of all the horror stories involving rusted bolts, hammers, pickle forks, and clearance issues lol So yeah, more updates soon hopefully
-
02_Pathy's build/shenanigans thread
PathyGig12 replied to 02_Pathy's topic in 96-2004 R50 Pathfinders
Yikes man, that kind of job is probably my biggest nightmare when it comes to the pathy -
Yeah mine does this every few months. It’ll come on for a few days and then disappear again. Absolutely nothing wrong as far as I can tell
-
Extra pic
-
Technically neither, it’s tribal land because it was on a reservation. My girlfriend was raised there and most of their roads are unpaved so we came across lots of mud Haha I wish it was an off-road park though. I keep trying to get her to agree to a Moab detour on the way home but no luck so far. I really need to test the rigs capabilities, and waiting for Colorado to thaw is just awful
-
The mudders got their first taste of mud in New Mexico visiting the SO’s family Wired up some fog lights to the front brush guard a couple days ago and I’m glad I did because we hit some mean fog in the way into ABQ
-
Thanks man, that’s exactly that I was thinking it had to be I found that section of the tube on amazon for 30 bucks. It’s just the part that goes on the throttle body, no resonator or anything else, but if I can chop the old one off then I can reuse the old resonator and stuff with the new one, so I might buy it Here’s the link https://www.amazon.com/gp/aw/d/B07BFJHKKG/ref=ox_sc_saved_image_1?smid=A1S7U7MWBIEECH&psc=1
-
Can anyone tell me why the intake tube wouldn’t come off of the throttle body? I loosened the metal band a LOT and took off all the hoses near by and lifted the airbox so that there was room to pull back on the tube but there was no way to wiggle it off. The confusing thing is that it spins freely on the throttle body so I know it’s not just baked on. To do the job I had to undo the upper plenum and fold it back onto the intake tube side with it still attached but it made everything more difficult and I’d love to figure out what’s keeping it on the throttle body so that I can take it off in the future Am I missing a hard to see clamp or something?
-
I can finally report that the power valve screws are done turns out none of them were missing or loose, but I locktited them anyway to be safe. Even though the job seemed like a waste of 4 hours, at least now I have peace of mind. Going to be taking a long road trip soon, so I’m glad I know for sure that they won’t be falling out when I had it running in the garage to confirm that I put everything back together properly, I noticed a faint squealing and it turned out to be an idler pulley not putting enough tension on one of the serpentine belts, so I tightened it up and the squeaking stopped. Very happy I caught it before it shredded a belt because that same thing happened a few months back on the other belt
-
Fair enough I think they’re a love it or hate it sort of thing. I was just tired of boring black rockers with “LED light bar” written on them There were also very few switch panels that were the correct width to fit the spot I chose, and I kind of like the plastic covers of these ones
-
Warn hubs just went on
-
Don’t judge my wiring job! It’s still a little rough for now. I was also trying to be as un-invasive as possible, so it’s not a super clean install. Just functional and not an eye sore
-
Random parking lot picture I’ll be sure to post some more when the rock lights go on
-
Its been a little while since my last update. Just got the warn manual hubs in the mail today, so I'm looking forward to installing them. I'm planning to tackle the power valve screws at the same time. I've been busy this past week with thanksgiving travelling so I haven't had a chance yet. On tuesday I finished doing the injectors and valve cover gaskets on my girlfriends 4runner. I'm still not done though, I found a crack in the passenger side cover so I'm going to replace it as soon as the part comes in. The damn thing is also starting to hesitate when you give it more than a light suggestion of throttle as you're starting off from a stop light, so I also have to look into that. Maybe TPS, but I'm not sure what could have changed since I never messed with it during the disassembly or reassembly. Anyway, Ill stop there so I dont get bashed for talking toyota lol On the pathy I installed a hitch mounted shackle which has already seen some use pulling people out of the snow. I picked up a smittybuilt trail jack (HiLift) and mounted it to the front brushguard in a spot thats not really noticeable but also keeps it easily accessible, rather than having to take it off the roof and fumble around risking damage. I also put on a set of rear facing light pods and I have a set of rock lights that I'll be installing along the running boards in the near future. To keep the dash clean, I've been wiring everything to a single switch panel mounted just forward of the dome lights (where the sunglasses holder used to be). So far, the main light bar, undercarriage camera monitor, and rear facing lights are all wired up, and once the rock lights go on, I can finish the job by closing off some open space that is leaving the wires exposed because the switch panel doesn't cover the entire hole. There's a fifth switch thats separate from the others and I've been brainstorming ideas on what to do with it. Yes I could just get some yellow fogs and mount those to the brush guard down low, but what fun is that?? Its also got a push button "ignition" style switch next to it, so my mind immediately jumps to having some sort of crazy contraption wired up to a two stage system where you have to first toggle the switch to arm and then push the button to activate. I have no idea what contraption would be cool enough to warrant a system like that, but I don't think surface to air missiles are a legal vehicle customization, so I'll have to skip that one.......for now. I ordered a wavian 5 gallon jerry can yesterday and was playing around with the idea of mounting it to an aluminum plate, and then attaching the assembly to the truck with some sort of hinged mechanism where the spare tire usually goes (underneath the truck). I'll be getting a full sized spare soon and likely a swinging carrier to mount it on, so the space would be unused. Maybe the switches could be wired to a door solenoid that catches the edge plate and holds it, and when its activated the solenoid could release the gate and allow access to the jerry can? I'd have to measure how much room there is in the spare tire well of course, and then find a solenoid with a strong bolt that is normally extended rather than retracted so that turning the truck off doesnt dump the jerry can. But I think it would be possible. The main thing I'm trying to avoid is having a big ugly gas can sticking straight up on the roof. Oh yeah and I've also got an NPORA sticker coming in the mail next week, so thats pretty sweet. The rig is starting to come together now, and its really exciting. My girl is getting mad that I cant stop staring at it through the window whenever we go out to eat haha. Thanks a lot guys, I blame all of you for this obsession
-
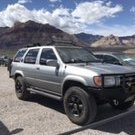
Denver got hit hard. Pathy didn’t seem to mind though. I’m surprised how well the mudders did
-
Summit racing has the set. https://www.summitracing.com/parts/mah-ms19386?seid=srese1&gclid=EAIaIQobChMI8vbFxafy5QIVBffjBx1PkwP_EAQYAiABEgJUvfD_BwE So if I buy them, is that all the parts I’ll need besides the screws (if any are missing)? Also are the screws I linked ok?
-
Cool. I can’t order from Rockauto because I’m in Colorado and the tax changes make it so they won’t ship here anymore but I can try to find the full set on a different site. I think I saw the felpro set on eBay
-
Something like this maybe? https://www.amazon.com/Machine-Finish-Phillips-M3-0-5-Threaded/dp/B00F33TPDW/ref=mp_s_a_1_3?qid=1574023336&refinements=p_n_feature_fourteen_browse-bin%3A11434052011&s=industrial&sr=1-3
-
Hey rain goat, I’m trying to source the gaskets but I can’t find any online place selling the last one you mentioned (14033-4w00A) The closest one I can find is this one (14032-4W00A) https://www.nissanparts.cc/oem-parts/nissan-plenum-gasket-140324w00a?c=bD0yJm49U2VhcmNoIFJlc3VsdHM%3D Do you think you could grab me a link? Or is the dealership the only option? The other ones were easy, but no one seems to have this one. I’m also wondering why you suggest getting the screws from an Altima and removing the washers instead of just buying the correct screw size from a hardware store? You listed them at m3 0.50 10mm right? Or maybe the shop will have them on hand?
-
Just gave the video a watch and it looks pretty easy to me. I think it’s worth giving it a shot myself. Biggest thing for me will be taking pictures of how everything is laid out before touching anything so I can always check if I put it back together correctly. It’ll also give me practice taking apart engines for when I get up the courage to replace the valve cover gaskets and injectors on my girlfriends 4runner. That’s going to be a nightmare job
