
- Sign In Changes: You now need to sign in using the email address associated with your account, combined with your current password. Using your display name and password is no longer supported.
- If you are currently trying to register, are not receiving the validation email, and are using an Outlook, Hotmail or Yahoo domain email address, please change your email address to something other than those (or temporary email providers). These domains are known to have problems delivering emails from the community.


snosnk
-
Posts
164 -
Joined
-
Last visited
Content Type
Profiles
Forums
Calendar
Everything posted by snosnk
-
I use QuakerState 10w-30 in the summer, and 5w-30 in the winter. Synthetic in the drivetain. 138k on a '96, the only leak is the front diff seal.
-
I'll bet the clunk you hear is your struts topping out. When your front tire falls into a hole the springs will push your strut to full extension. Thus the clucnk. Just slow down a little when you hit a bump.
-
Not quite will power, but close.. If ya look in the end of the "tool", you'll see a rubber boot that grips the insulator on the plug. Most plug sockets have them.
-
The long tool is for cylinders 1-5 and the short one for #6. There should be a bar about a foot long that has a couple of bends in it too. Using these tools will get that nasty #6 out a 1/4 turn at a time. I changed my plugs last night in about 30 minutes.
-
Run the wires down the channel that your luggage racks attach to. Then cover them with 1" wide carpet trim. Just drill the holes a little bigger in the trim to fit the tie down bolts. You'll also have to trim the end cap at the back of the channel to get the wires under it. It takes a torx tip to get the screws out of the end cap and they are kind of a bugger to get back in. To hide the wires on the rack, I used spiral wind wire loom. Then drilled holes to ziptie the wires to the back of the rack. I put a quick disconnect on mine so I could take them off in short order. Unplug the wires and take off the luggage rack. If you open your rear hatch, youll see at the top left, a wire loom for your third brake light. I fished the wires down through that loom and into the inner rear fender well (where your amps are). I ran a fused power lead to a small distribution block in the rear fender, then to a relay. I also ran a couple of extra switch legs for other aux lighting to the area under the stereo. I've allready used one for backup lights. More pics here These pics are of a couple of projects (daylighters, backup lights and relays to hold on the low beams while the high beams are on) so I hope they are not too confusing. Most of them are named very descriptively but neither ie or mozilla display the full names.
-
Those are the factory "luggage rack" cross bars. Now I just need two more lights and a basket. Then maybe the "Mickey Mouse" remarks will stop.
-
This is what I did. are pics as good as words? More here
-
So how goes the project, Pathmaker?
-
Or for a look, something like this..
-
I know what ya'all mean by blue oval, if it were choice, I think a bowtie would do nicely. But for what it cost, cant beat it. I think it will become the trailer queen as I have 81 Ford 2 wheel drive for a tow rig. Found these in my driveway on Sunday Morning. Now I just need a set of 16 inch rims to mount them on.
-
My GF's brother moved to Alaska and his wife sold me his truck for 200$. Needs some work but I have a new desert crawler for CHEEEP. F250 4x4, V8 (? ci), 3 different sized tires. Non functional power steering. I figure a little TLC and about $1000 she ought to be road worthy, not to mention a good project for the boy and I.
-
or you can make one of these and use a cherry picker to lift the trans from the inside. Did a pilot bushing and CAP Sensor in about 4 hrs using this.
-
Bought OME spings and shocks for my pathy from them. Pretty good guys to deal with. Had the springs in 4 days, the shocks in 5 (due to UPS not dropping them off). Would deal with them again.
-
Every Place I went told me that there is NO raod hazard warranty with the BFG's. (just got new BFG AT/TA 31x10.5)
-
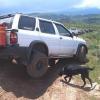
Sliders and NEW Bumper of to the powder coaters
snosnk replied to snosnk's topic in 96-2004 R50 Pathfinders
The other pieces behind my bumper and sliders are sliders for a full size GMC. See the rest of it here Heres some more pics of the bumper installed. A bit muddy tho. -
Sliders and NEW Bumper of to the powder coaters
snosnk replied to snosnk's topic in 96-2004 R50 Pathfinders
poor camera, poor light, no room, here goes nuttin. More misc pics here -
Sliders and NEW Bumper of to the powder coaters
snosnk replied to snosnk's topic in 96-2004 R50 Pathfinders
Fresh from the powder coaters. Have em installed but havent got any good pics. -
Sliders and NEW Bumper of to the powder coaters
snosnk replied to snosnk's topic in 96-2004 R50 Pathfinders
XPLORx4: I wish I had the tools and know how to build something like this. But, alas, I dont. So I'll just keep goin to Steve. I dont know exactly what it cost as most of it was trade work. I'll check with him to see what he would charge for such a thing. Herm: Not yet, but once he sees some demand I'm sure he will make one. He has jigs for Tacoma bumpers and sliders and I think sheeps as well. When it gets to that point he can have my Pathy for as long as he needs to create the templates. -
Sliders and NEW Bumper of to the powder coaters
snosnk replied to snosnk's topic in 96-2004 R50 Pathfinders
This bumper is totaly custom. The original hitch was removed as it was hanging way to low. We did use some of the mounting bracket that was part of the original hitch, but just where it bolted to the frame. The tire carrier does use the factory latch, but the tire wont clear the ball on the reciver hitch. Will be raising the spare tire this weekend to make up the difference and to increase the departure angle. The corners are gusseted to the mount for extra support. The hitch is also gusseted behind using 1 inch solid round to the mounts. I will take some better pictures once it comes back from the powder coaters. This is all beyond me so I had Steve Egan at CBI Offroad Fabrication create this one off bumper just for my Pathfinder. I'm sure he could repeat it and would be willing to let him use my Pathy for fit if any of you are interested in a new bumper. XPLORx4: Check out CBI Offroad Fab. Steve does some fine work and could integrate a tire carrier into this bumper. He uses some pretty cool bearing hinges on his tire carriers. I think he said something about tapered roller bearings. Might not quote me on that as I'm not really sure. -
Sliders and NEW Bumper of to the powder coaters
snosnk replied to snosnk's topic in 96-2004 R50 Pathfinders
Sure is. Just right for a cleavis. A little better view -
Just a teaser photo of my new bumper.... Finished Sunday, off to the powder coaters today for a fresh coat of white. -bounce-
-
I've always been a little lazy Wow, it took almost a year, but now I'm a Regular.
-
I wouldnt recommecd this, but when i did mine I put a cheater bar on the wrench, then wedged it against bottom of the frame (unibody?). Then just bump the starter a couple of times. Came right loose. Good luck
-
The bottom bracket for the can isnt quite wide enuf so the can rocks back and forth, but it doesnt rattle. Will be fixing that soon. I used some foam water pipe insulation behind the can on the verticle bar on the tire carrier to keep the rattles down.
-
I took some more pics this afternoon. Hope these help a little. 1. The tab that holds the bottom of the can. 2. Same tab, diferent angle 3. Top can Bracket 4. Gap between jack and tire. wasnt there with factory spare. 5. CB Ant. Mount 6. Can see jack mount a little better here Whatcha all think?? (Other than a little rusty, will repaint this spring)