

hawairish
-
Posts
2,547 -
Joined
-
Last visited
-
Days Won
272
Content Type
Profiles
Forums
Calendar
Posts posted by hawairish
-
-
14 hours ago, Rota said:
Hey all, the rivnut tool that is commonly recommended in these threads has been discontinued by the manufacturer. Anyone have one still lying around that they'd be willing to sell? Or is there another tool that has been used successfully?
Any similar tool will do...tons of options on Amazon still varying from $30 and up. Seeing a Beetro 14" unit that's at the low price range and has the essential metric sizes. Most kits come with both SAE and metric sizes, which is a plus if you have other uses. Mine still sees occasional use so I'm keeping it around.
-
 2
2
-
-
Got everything back together today. Cylinder 3 misfire. It's just dumping fuel...probably something stupid like I didn't fully clip in the coil, but I was too exhausted to troubleshoot any further.
-
1
-
-
Also had the engine torn down to change out the thermostats, gaskets on the rear water pipe, knock sensor, rebuild the fuel injectors, PCV, valve cover gaskets, etc.
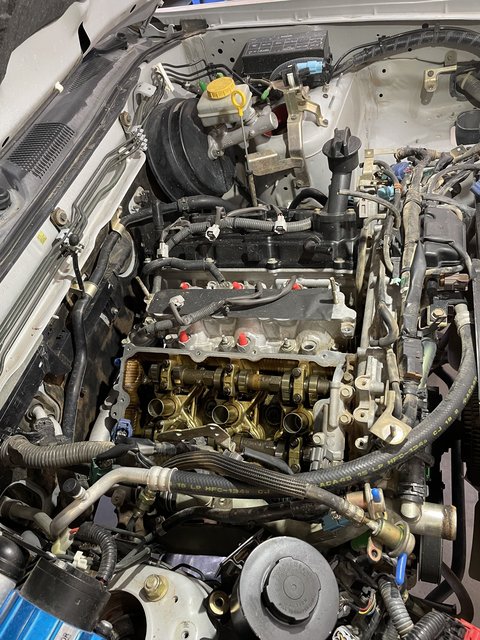
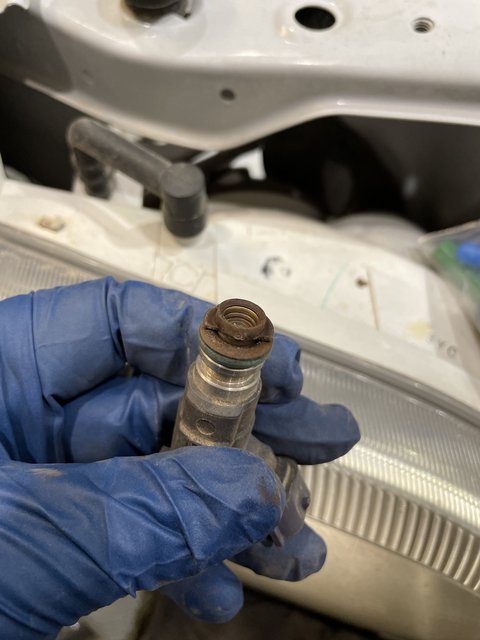
If you're going to rebuild them, get a kit with o-rings, pintle caps, and filters. Also get a filter removal tool; I was unable to remove a filter without one. Carb and choke cleaner with one of those pulse controllers off Amazon worked well to clean them, but it was a little on the messy side.
And while not a Pathfinder, I tore down my Frontier on Sunday and got it to the body and paint shop. Time to bring it back to life!


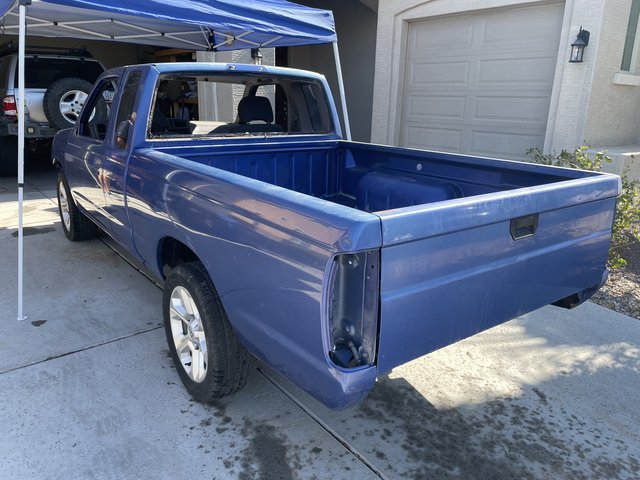
These pics are of the "good" side. The hood, roof, and passenger bedside are really bad. Paint shop will also do a spray-in bedliner (had a drop-in). Should have it back in a month, then will put new windshields, lenses, and rear bumper on. Btw, driving it without windshields is a blast. Driving without mirrors...not so much.
-
4
-
-
Bulk update for the past weeks of "What did I do..." Truck's still apart, coming up on a month now, but it's pretty close to being back together. Maybe all done this weekend.
Here's how things were looking...
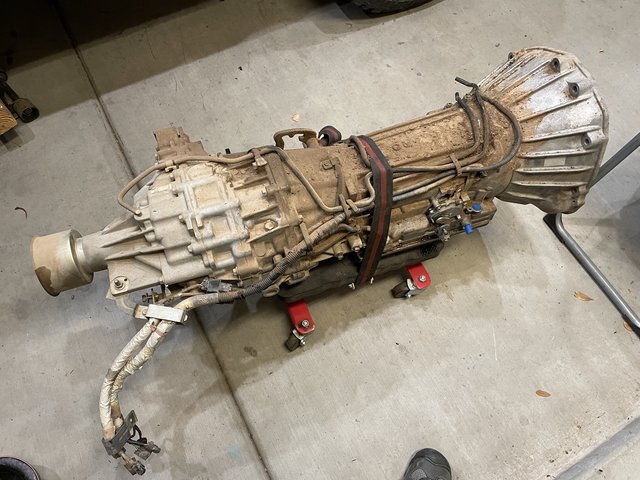
Transmission was nasty. I bought myself a pressure washer at some point and zapped this clean. I can't believe don't have a pic of the cleaned unit with the 4:1 case installed. I did do this, though...
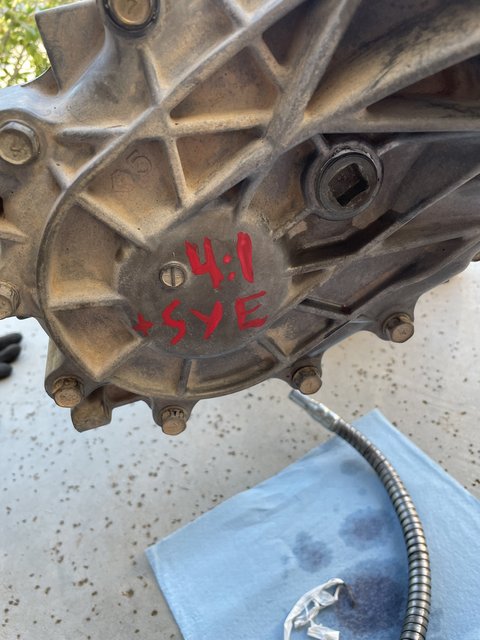
Maybe it'll make for a nice junkyard find one day!
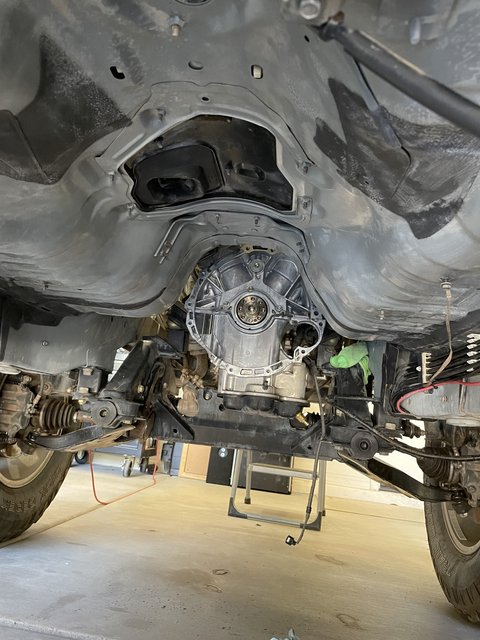
Cleaned out the underbelly! What a mess. Was loaded with Sedona red clay. You can't see it, but I also sheared a flex plate bolt at the 6 o'clock position. That sucked to extract. I had intentions to replace the RMS, but like many people have discovered, it's not the seal, but the stupid gasket strip of the seal bracket. After reading up on what all it actually entailed, I said screw it. Cleaned up the area and laid down some gasket maker all over it. Should be fine/I'll regret it some other day. I did pull down the lower oil pan to clean up all the oil build-up over the years. Everything's way cleaner now.
Once I had the transmission attached, I changed out the motor mounts. Almost didn't because of how terrible access is on the passenger side, but I'm glad I did...
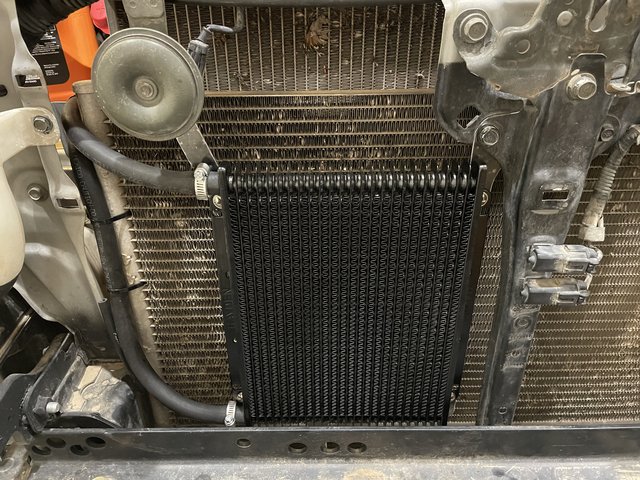
Installed a transmission cooler...
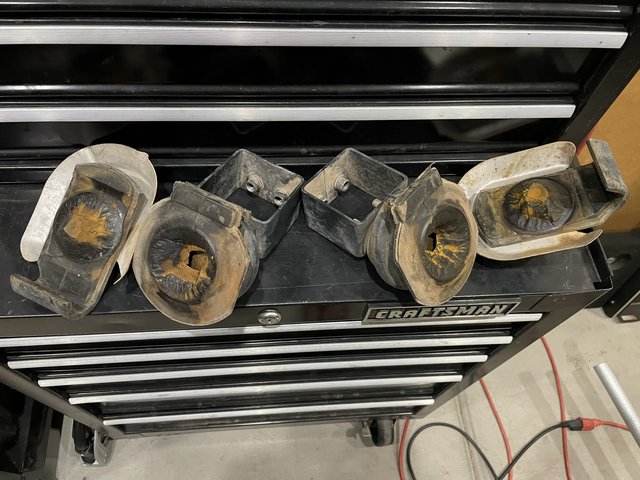
Ran into a snag with some crappy catalytic converters off ebay last weeked...they absolutely do not fit the truck. After numerous failed fitment attempts, I eventually built a jig with the OE assemblies and fitted the new stuff into the jig to see how bad was and maybe if it could be reworked...nope. It's terribly misaligned, practically every component of it. The amount of incompetency feels deliberate.
OE units jigged up:
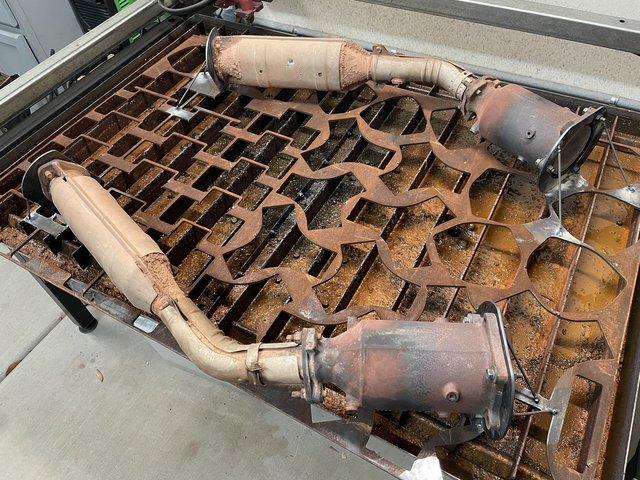
New units on the jigs. Holy gaps/alignment/crap!

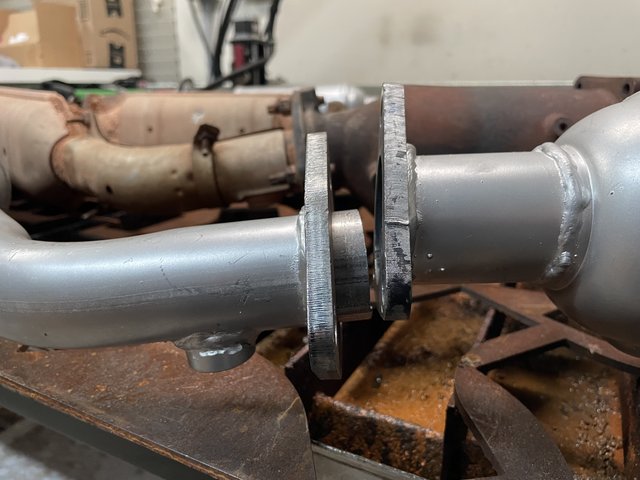
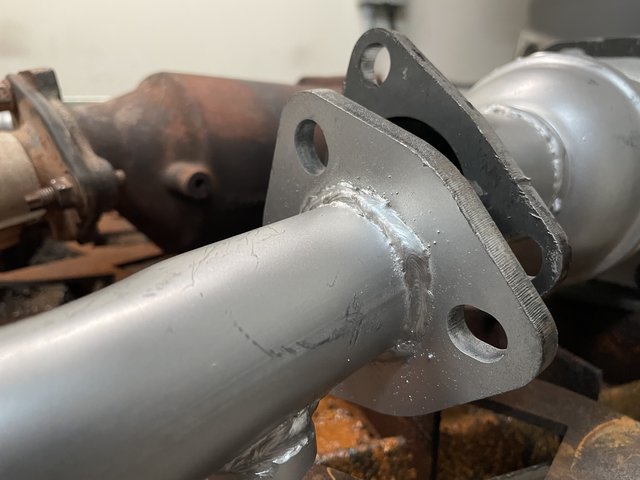
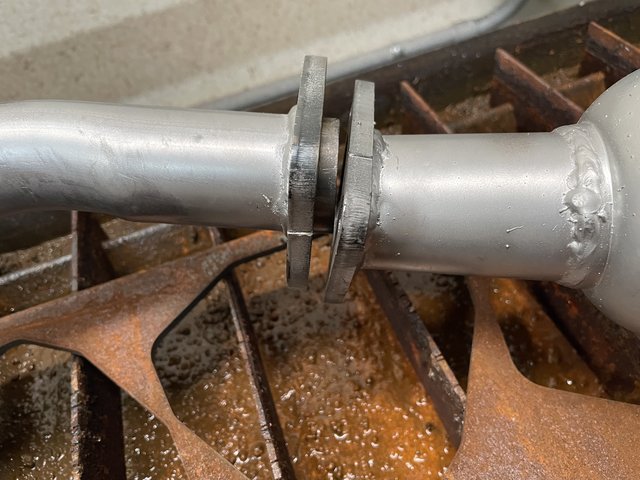
Since the upper cats weren't marked L/R, I tried every combination and rotation possible. What you see is the "best" combination, and also the only one that was close to being feasible.
At this point, I'm just planning to clean up the OE units and put them back on. I'm past the return date, so these are a loss likely. Not even worth the effort to rework; the catalytic honeycombs are probably crap anyway. The OE units are probably still fine, but this main overhaul was just to totally refresh everything, since I kept throwing a P0430 (catalytic converter efficiency) over the years. The upstream O2 sensors were the original sensors, and judging by their condition, it may be the real cause of the code.
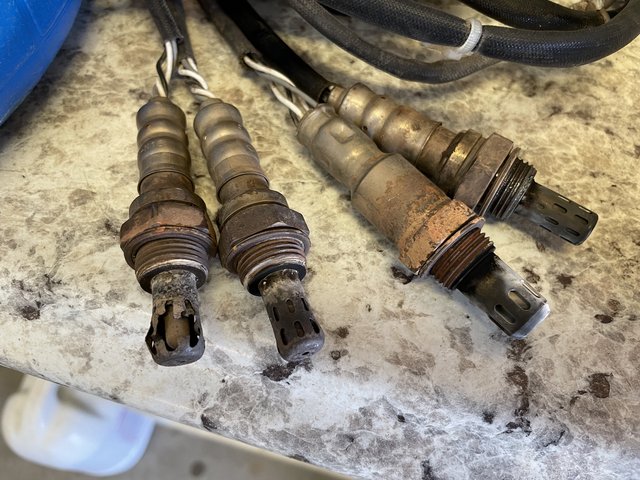
L to R: LH & RH upstream (both OE), LH & RH downstream (both aftermarket).
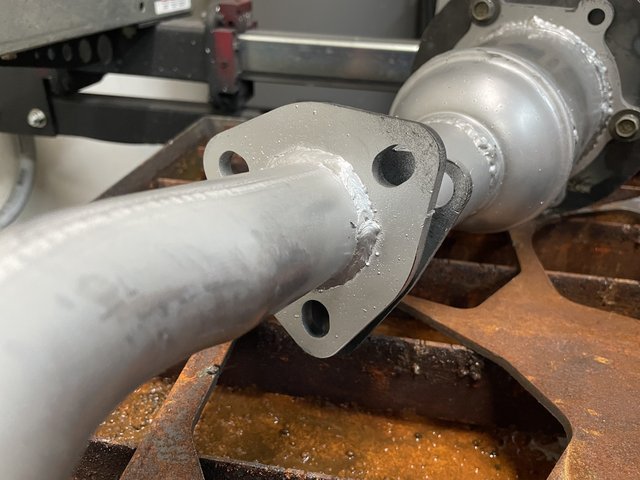
I don't blame the previous owner for never changing them. They're such a pain. The heat shields alone probably added an hour to the job, because they block the sensor hex. I still need to get the cats and a new exhaust on...hopefully no surprises there.
The other day I also realized that t-case shifter arm is different between an R50 and a WD22 Xterra, which is what my donor t-case came from. The Xterra arm is longer, which prevented shifting into 2H. Swapping the arms was a bit of a pain...the pins that hold the arm onto the shaft are wedged in place. Took penetrant, heat, and a hammer and punch to get it out. I was able to get them swapped tonight, so shifting operations are back to normal.
-
5
-
-
Pulled the transmission and t-case down tonight. Part of an overhaul on the truck that started on Saturday. Valve covers and up, fuel injector service, new plugs, main seal, coolant system (including rear crossover pipe and stuff). Also swapping in a 4:1 t-case and changing the motor mounts. Dangerously close to proceeding with the SAS at this point…
-
3
-
-
@SpecialWarr Hijack accepted.
So, as long as the WD21 differential is also an LSD unit, then you should be able to swap the side gears over. You'll likely want to bring over the spider gears as well, but can omit the thrust block (if one). This would basically make your WD21 diff support 33-splines. If we're not talking LSD diffs, then no, the side gears can't be swapped, but the entire diff might be able to if the WD21 gears use 12mm bolts...I think it was tied to the use of 11 attachment studs on the housing vs. 9 studs. I'm not sure what the cut-off was between 11- and 9-stud, might've been 1989 or maybe didn't exist on WD21 and was only a D21. I'm honestly not sure.
FWIW, I've had no problems finding replacement H233B parts from RockAuto. In fact, pretty much the only thing I get OEM are the gaskets (38320-T3322). Not that there are many parts to replace in these diffs, but I've used National 32306C (pinion bearing & race), 32308C (pinion bearing & race), and 710195 (pinion seal) before. Can't seem to find any differential carrier bearings I've purchased, but OE p/n is 38440-60000 which cross-refs to National KC11445Y. Needless to say, these parts seem readily available so not sure what that mechanic is smoking.
As for "what else"...probably not much more. There are oil seals at the ends of the axle tube that can be changed. Only way to replace the grease seals are to tear down the axle shafts. Beyond that, new gasket and fluid.
-
 1
1
-
-
-
Dis some FB BS.
-
1
-
-
This smells like some Facebook bull@!*%. Don’t bring that @!*% here.
-
2
-
-
8 hours ago, gamellott said:
Just gonna say, I spent way too much time trying to overthink the parts catalog at Rock Auto regarding the inner/outer Disk/Drum differences and the different verbiage between manufacturers". I think the best way to figure it out and not be confused is to stick to one manufacturer. That being said, I believe the online catalog at Rock Auto is superior to others. And no, I am not getting paid to say this

Ha, I'm the same way. In fact, I just put in an order for disc brake parts today and was bouncing back and forth one some options. Since both my R50 and D22 now have WD21 rear discs, I also always have to compare what's available for two trucks...needless to say, there aren't as many ceramic pad options for a 95 WD21 as there are for an 04 R50.
4 hours ago, Slartibartfast said:The Rockauto system is usually pretty good. Nissanpartsdeal is my usual go-to for identifying parts and year ranges and whatnot. I ordered most of what I used from RA, but they didn't have the lock washers, so I bought those through Partsouq.
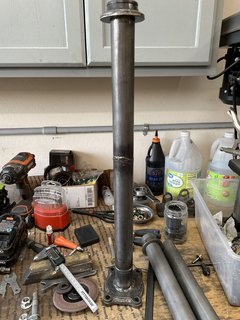
I like those CNC'd sockets. Mine is not nearly that nice. I cut some strap steel to fit the splines, then welded them to a pipe to keep them in formation. I tried welding a bolt to it to use with the torque wrench, but, yeah, that didn't hold up so well. A sacrificial 1/2" drive socket would've been better, but by that point I think I had realized that my torque wrench didn't even go that high, so I welded on some rebar handles called that good enough.
RA and NPD are my go-tos as well for parts lookups, except I've noticed the RA listings are getting a bit sloppy. Not their fault, though, because that data comes from the manufacturers. It's just that when you own an 04 R50, it's flooded with parts for an 04 Pathfinder Armada as well as a bunch of D40 Frontier, N40 Xterra, and R51 Pathfinders parts for some dumb reason (bunch of Dana and M226 axle parts). It's even trickled to the local stores when they as for my truck's info...Me: "2004 Pathfinder", them: "V6 or V8?", me: "There wasn't a V8 Pathfinder." Stupid Armada BS.
I'm coming around to using more sacrificial sockets for stuff like this. It's hard to cut small squares with the plasma table. The black impact sockets and adapters from Harbor Freight has been pretty useful for that sort of stuff.
-
1
-
-
Alright, so yeah, now this is coming back to me. That single taper H233B setup was actually identical to my 98 Frontier's H190 setup. Same bearing cage, bearing, shims, seal, etc. But, I guess I also thought there was a range of W/D21 drums that had the newer bearing cage like the R50, but seemingly that was limited to the wider axles (R50, D22, WD22).
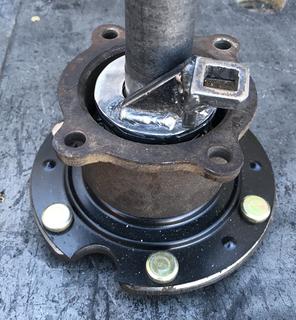
And yeah, that recessed axle nut in the bearing cage is absurd. I once bought a spanner that I thought would work, but wasn't even close. I've made a couple tools using my plasma table to do that work, but I sold one and Towndawg has the other for his disc brake swap. I made them to accept 1/2" ratchets/breakers in order to hit those torque specs, but in more recent efforts, have just resorted to hammer and punch.
This was one of them. Wasn't a fan of the design, but worked:
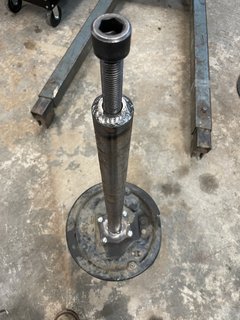
I liked this one better because it gave me some wings to smack with a hammer:
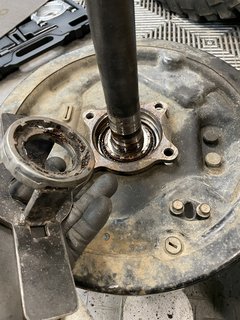
When I first started getting into the axle shaft tear downs, I just went out and bought a floor press (was cheaper than outsourcing the work) and it's been a wonderful shop addition ever since (most recently used for a t-case upgrade). I just needed to make some tools to tear things down. This was one of my later setups using some scrap; just bolt onto the bearing cup and suspend in the floor press:
Towndawg stepped it up and made one with a turn screw...no press required for disassembly.
Looking at the FSM for my Frontier, though (and largely assuming that process hadn't changed for the single-taper design since '92), it shows use of a tool similar to Towndawg's for pulling the bearing w/o a press, but then shows just using a drift to reinstall the bearings (both outer and inner races). I've never done this job on my Frontier to confirm, and now that it has an H233B with discs under it, I won't have to.
@gamellott Since the H190 bearing setup appears to be identical to your H233B setup (according to NissanPartsDeal.com, every part from the axle lock nut to the seal on a '92 is a VIN match to my '98), let me know if I can get you some pics from my H190 to confirm anything for you.
-
2
-
-
Though…shouldn’t they only then differ by the bearing and bearing cup, which would be shallower, but otherwise be the same process. Pretty sure the grease seal is the same for practically everything, down to the H190 (which I think uses the same single bearing…I’ll have to crossref that).
-
1
-
-
My bad, forgot the older drums used the single tapers and thrust blocks, unlike everything after (including Frontier and Xterra) using dual bearings.
-
1
-
-
Bearing setup is identical. The axle shaft assemblies only differ by the brake backing plate, one for drums, one for discs.
-
8 hours ago, MY1PATH said:
I got tired of the clowns on Facebook telling me to check AutoZone so I reached out to Amayama this weekend. They previously had it at $36 for shipping alone. With that fixed, I placed an order.
Partsouq UAE is my favorite but they did not have it this time. That's where I got my 16t speedo for the 3.70 differential...
Nice. Partsouq is where I got an 18t speedo pinion for my D22. They’ve been super reliable for other purchases. Hope Amayama works out! -
I've had good results with Amayama overall. They've been able to get some totally obscure stuff for me, and at great prices, but I've had to cancel an order or two due to just being tired of waiting.
-
On 2/13/2022 at 9:39 AM, The_Oregonian said:
Thanks for taking the time to post this @hawairish. I may be hitting the pause button, and looking for a fabricator.. The mounts are a good idea - I have the factory side steps kicking around..
May need to check if yours are the aluminum ones, though. I think there were two styles that had steel frames, and one with aluminum. My buddy's 02 SE had aluminum ones.
-
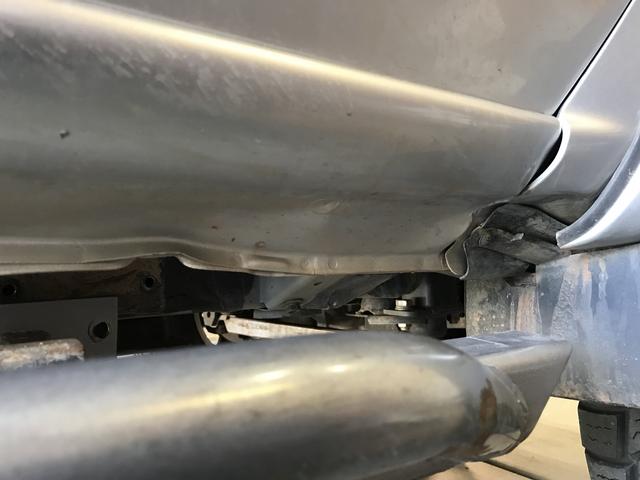
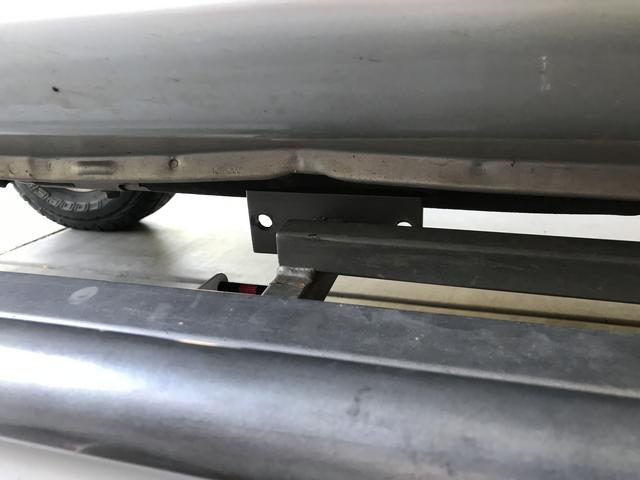
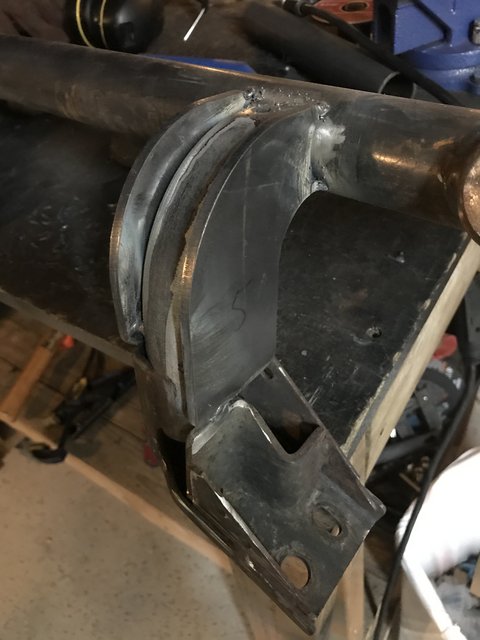
Some supporting pics...
Sliders aren't attached here, just resting on jacks before I changed the mounts, but you can see how badly they jammed up into the pinch seam and rocker panel.
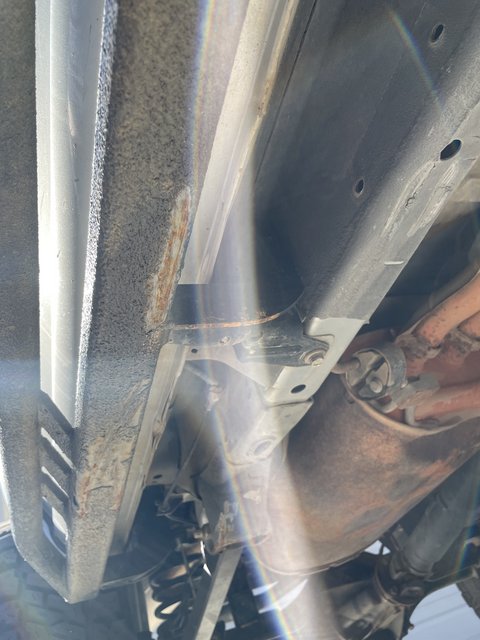
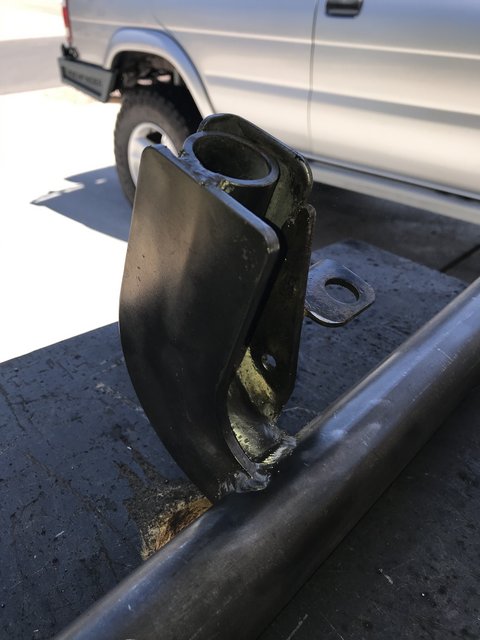
Front leg:
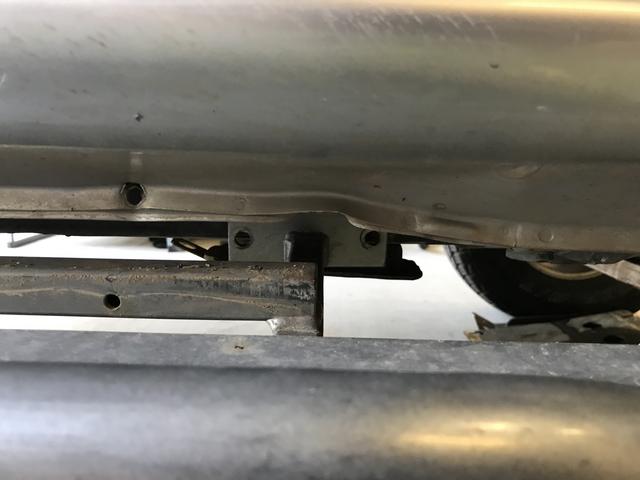
Rear leg:
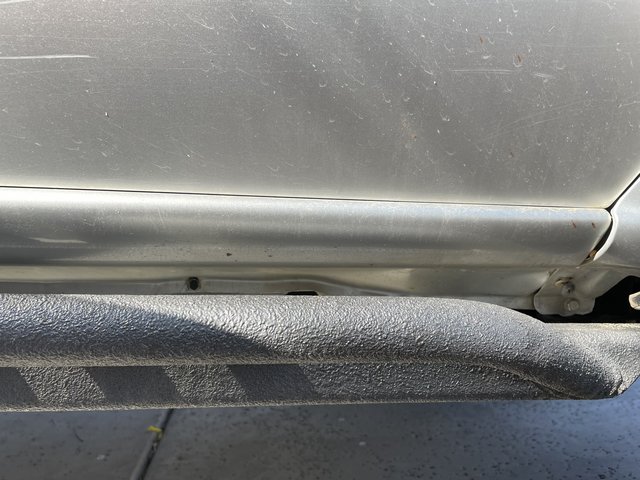
There's just nothing to prevent them from shifting upward except the pinch seam.
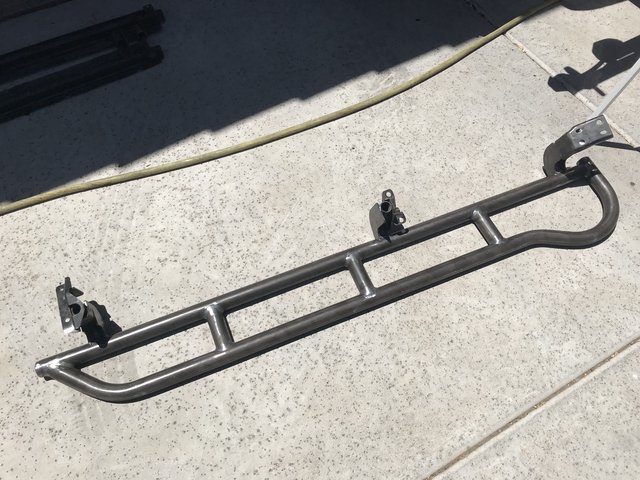
How it sits today with my QX4 mounts, but you can see the lack of a gap at the door corner and further back. Doesn't hinder the door, though, but does rub just enough.
The slider bodies are stout enough, though. No complaints there; just the mounting style I disliked. Shot of reinforced OE mounts and trail abuse since (my muffler has taken a beating):
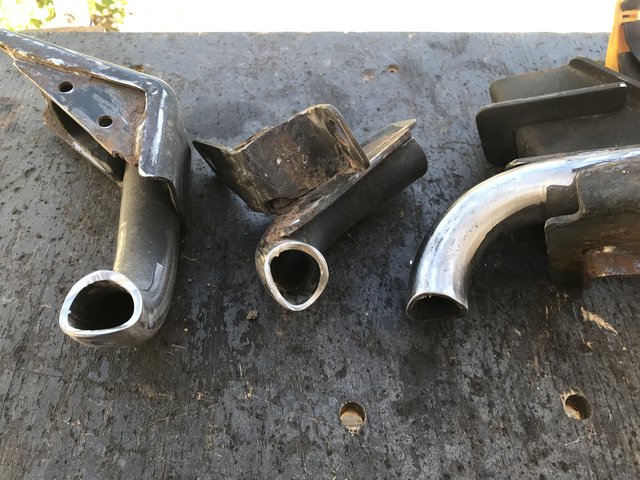
Here's basically how I had converted OE step rail mounts for use on mine and R50JR's sliders. I really liked the results. Just chopped off the legs and cut side plates to stiffen them up.
-
2
-
-
I use amayama.com (Japan) and partsouq.com (UAE) to get scarce or oddball items. International shipping has been very reasonable. PS stuff gets to my door super quick.
Amayama appears to have both the assembly (32702-33G18) and pinion only (32703-31G18) available. The former looks to be about $40 shipped. The thing about Amayama is that you pay up front and they'll try to acquire the part through their network (they are a broker)...it may take days, weeks, or months, or never happen at all. The pinion appears to fall under that latter grouping, it price wise is about the same. The assembly appears to be available and can ship quicker.
-
My truck had them when I bought it used, and eventually I landed on a rock hard enough to push the slider into the rocker panel and shift it upwards. There’s basically no gap anymore where the corner of the door meets on the hinge side.
Generally speaking, I was never a fan of the use of large self-tapping bolts and drilling into the pinch weld seam to mount them, but any other approach would require specific mounts. This was generic enough.
I eventually chopped off the mounts from OE QX4 side steps, plated them up, and welded them to the sliders to mount on OE spots. I did something similar for R50JR’s truck with Trail Gear sliders and R50 steps. They’re a little different in drop height; my sliders still tuck up pretty high, which I prefer.
-
@fleurysI pulled a bleeder screw off my old 04 drums with OE Akebono cylinders; Nissan says it uses the same bleeder. I measure it as M7x1.0mm x 30mm (total length, 10mm of thread), 8mm hex head. If that's all true, Dorman 12708 (32mm, 2-pack) or 484-149.1 (34mm, 1-pack) seems to be the answer.
-
1
-
-
On 1/13/2022 at 12:02 PM, bertrenolds said:
Are you guys making these still? Also have you thought about doing 3" engine spacers and then dropping the transfercase/tranny 1" with spacers?
Not regularly, no. Personal projects have been consuming most of our time, but we've been talking about making a few more soon to clear out inventory.
No, we've not discussed that approach. I've read of others doing it, but not interested in going that route, either.
-
1
-
-
The OME springs are very popular and are a great spring that yields 2”. Ran them for several years, zero complaints. Same is true for the front springs. The ride is superb when paired with their struts and shocks, but they’re on the pricey side. The LRs are a great solution for more lift and load handling, but the OMEs are perfect otherwise.
-
3
-
-
Some people think the UK version of The Office was better than the US version, but I think they both sucked.
My only complaint about what I saw: it was neither funny nor serious, and just wasn't entertaining. I love a good roast and tangent/witty thoughts to hammer a point, but this was only drab monologue. Some people only get a first impression.
-
1
-

R50 Tire Carrier Mod: Let's settle this!
in 96-2004 R50 Pathfinders
Posted
Coarse stepped ones. The two larger ones have sizes that are basically perfect for the rivnuts, though I rely on calipers to confirm the diameters. You want the hole to be the same size or a hair smaller; too large and the rivnut will likely spin.