- Sign In Changes: You now need to sign in using the email address associated with your account, combined with your current password. Using your display name and password is no longer supported.
- If you are currently trying to register, are not receiving the validation email, and are using an Outlook, Hotmail or Yahoo domain email address, please change your email address to something other than those (or temporary email providers). These domains are known to have problems delivering emails from the community.
Leaderboard


Popular Content
Showing content with the highest reputation on 09/25/2019 in Posts
-
1) Remove all the relevant fender liner screws to gain access to the backside of the fender/metal. (maybe only for front wheels) There are a bunch of plastic tabs that snap the fender into the vehicle body. I've been told you could try to slide the fender (I think towards front of vehicle) to disengage and leave all the snaps in the body, but I couldn't get that to work. 2) Use a heat gun to warm up the backside of the plastic tabs, this'll hopefully help keep the tabs or your fender flare from breaking. 3) With slow, strong, even pressure, start at one end and pull away from the vehicle. They should pop out one by one. Once you get one out, you'll see how it's all attached. 4) I continued to warm everything up as I popped the fender flares off.2 points
-
Taking what I learned from the last SAS build, I decided that I wanted to Straight axle swap the 12" green pathfinder. So far I picked up the axles, links, heims, and started to build the cradle. The end goal is to make it street-able, so I won't be cutting corners to save as much money as possible like I did on the last SAS. Hopefully will be picking up a set of coilovers and a set of air shocks tomorrow. Here are some pictures of the progress. Here's the front axle, out of a 00 F350 Here's the rear axle, out of a 02 f350 Here's the metal that will become the cradles sides and the motor mounts Here's the little plasma cutter I got on amazon for 190$+-. It cuts 1/4 pretty well I'd say. Only down side is that having a smaller compressor, I have to stop frequently and let it fill up. Drilling Holes for the 4 link This is what is inside the cradle sides before getting welded and trimmed up. Here's the finished product before paint. Once the sides are on, Ill tie them together.1 point
-
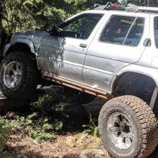
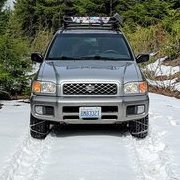
Here is mine1 point
-
#r50obsessed #NISSANNORTHAMERICA #infinitinorthamerica Sent from my SM-S737TL using Tapatalk1 point
-
Nice R50 bro. Sent from my SM-S737TL using Tapatalk1 point
-
Also here is my rig:1 point
-
I used a superstrut bar and held it to the rack via u bolts and used that to mount the side lights and used auxbeam tube clamp mounts for the front and back pods on the rack Sent from my SM-G960U using Tapatalk1 point