- Sign In Changes: You now need to sign in using the email address associated with your account, combined with your current password. Using your display name and password is no longer supported.
- If you are currently trying to register, are not receiving the validation email, and are using an Outlook, Hotmail or Yahoo domain email address, please change your email address to something other than those (or temporary email providers). These domains are known to have problems delivering emails from the community.
Leaderboard


Popular Content
Showing content with the highest reputation on 08/02/2019 in Posts
-
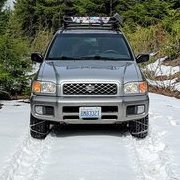
#Replacement of spark plugs and wires. In preparation for an upcoming camping trip with some friends, I swapped out my sparkplugs and wires. Nothing crazy, but a little peace of mind, although that didn't help much... #WABDR Went out and did sections 2-4 of the WABDR route, from Packwood to Ardenvoir, WA. Loaded up with firewood and gear: Right off the bat- some awesome views: Day 1 I had a pretty major failure at approximately 1500hrs that ended up burning just about exactly 24 hrs. My front drivers strut top nut popped off allowing the strut to drop down into the wheel well. This issue exhibited itself as the wheel camber going bananas. After failing to get it lined up again just to limp it down the mountain I removed the entire strut assembly, carefully, as now nothing was compressing my spring. We loaded all of my stuff into the other vehicles and made camp nearby for the night. The following morning we began our game plan to get down off the mountain and into the closest town of Naches to look for a replacement. Without phone service we couldn't call/check for parts ahead of time. We burned hours following dead-end roads that fell just barely short of hitting the highway in the valley. At this point I was able to get a message off to a few forum members and @TowndawgR50 was able to locate and reserve the strut parts I needed in Yakima. The group decided to stop trying to shortcut and just backtrack the way we came which ended up working way easier... Down in Yakima I rebuilt the front strut using a rental spring compressor and back up the mountain we went. Reinstallation was a breeze thanks to all the tools we brought, and we headed off to camp just north of Ellensburg. The strut worked great for the rest of the trip! The reason for my failure is multi-faceted, I'll try to explain below (TLDR at bottom): CAUSE: A while back I upgraded to OME HD springs, I didn't want to mess with compressing them myself so I hired a shop to rebuild them with the new KYB strut, top hat, and strut bearing. Here is issue one- the shop built them incorrectly probably due to not being familiar with the OEM vs aftermarket. The stock top hat includes a tubular portion that extends downward. The chamfered strut piston extends into this tube and pokes out the top- that's where you put your top hat nut. The piston also has a shoulder and the shoulder sits on the tubular portion thereby taking up weight. The aftermarket top hats do not have this cylinder attached, they provide it as a separate piece. The shop did not install this piece which then allowed the strut piston to push up further than normal with more threads. More weight and stress during operation was put on just the little chamfered hole in the top hat which eventually sheared off allowing the piston to push up further into the hole. Although the top hat nut was orignally torqued (supported by the chamfered hole), once the chamfer was sheared, the piston was now free to extend upwards another 1" leaving free space between the top nut and the top hat. Articulating the strut caused the piston to move up and down in the hole and exposed threads acted as a saw enlarging the hole. REPAIR 1: At this point I notice the clunking and check. What the heck! I look in the box of leftover strut parts from the shop (It had my old top hats, the new bearings?, and some other stuff in it...) and found the 1" metal spacers. At the time I didn't know the chamfered hole was sheared so I thought this was the natural state- that I had just forgotten to torque the top nut down after loading the strut with vehicle weight. I removed the top nut and see the galled up threads, just really bad. Only thing I can think of is that the metal spacer is supposed to go on top before the nut so I do just that. I attempt to torque down the top nut, but it's cross threaded from the galled up threads... Major mistake- I gave it more elbow grease and basically friction welded the nut on. Amateur hour. At this point the top nuts on basically both struts are cross threaded, stuck, and not fully seated. I get out a grinder and cut the nuts off, further damaging the threaded piston a bit more. I use a die to clean up the threads and put new top nuts on. At this point I'm able to get it torqued down to spec, albeit on questionable threads. I also wasn't sure if the top hat hole was always oblong or not. FFW the strut explodes and I rebuild it in an O'Reilly parking lot. This time I rebuilt the strut myself. I figure the 1" metal spacer goes on top, so I install everything together and the there's not enough piston sticking through the top hat to put the spacer on?? In fact, there's enough thread for me to just seat the top hat nut without the spacer... Weird! Later I realize this is because the chamfer still exists and is keeping the strut from pushing up as far as I was used to seeing. I torque the top hat nut and move on. ORDERING NEW PARTS: After the trail rebuild I figured that strut was good now, but I wanted to fix the passenger side which I knew also had the issue. I ordered a new front passenger strut and a spring compressor with the plan to re-use the old top hats that I had left over from the shop rebuild. REPAIR 2: I had the parts to rebuild the passenger side, but first I wanted to start by disassembling and inspecting the trail-repaired drivers side. I disassembled it and found that the strut was dead! Leaking oil everywhere. I was able to return it thankfully and quickly ordered a replacement strut. I needed to understand the 1" metal spacer deal more, I didn't feel like it was right. After pinging some forum members, @RainGoat was able to provide me with a copy-paste he had saved with some information that settled it for me. I was able to identify the differences noted in the CAUSE section where the stock top hat has the tube built in and the aftermarket one with it separate. I rebuilt the struts with this new knowledge and have had no issues since. You live and you learn. I've not rebuilt these damn things so many times I could do it blindfolded. #Replacement of front/rear suspension While I was rebuilding the front I also swapped in new ball joints, tie rod ends, and A-arm assembly that includes the bushings. In the rear I installed new NRC9449 Land Rover springs with Bilstein 5125s. This set-up is the same lift as the NRC9447 springs, but with a higher spring rate to compensate for load a bit more. While installing the rear suspension I discovered a cross threaded lug nut. OF COURSE. Was it me? Was it the shop that recently put my tires on? After my ugga-dugga experience with the struts I've been super careful to avoid cross threading... Anyway, I replace the stud and nut, and also put eyes on the rear brakes that'll be a project for another day. How about some fun pics? More from WABDR: Diagnosing a weird clunking on the 4Runner, turned out to be something easy- a missing washer in his caliper assembly that he never had since buying the car. We were able to identify it since we had two of the same model to compare. Recent trip to the beach: Most recently I pulled my front fender flares off to clean beneath and found a nice hidden pile of dirt, but no rust!5 points
-
On a serious note- Look at how absolutely terrifying this spring compressor in that reference photo is...the threaded rods look distorted and ready to break and kill someone. This new compressor we have been using is very robust and uses a single "acme" style threaded rod that is contained in a hardened case. No back and forth from one side to the other trying to make an even compression of the spring. Its safer, easier and has much more travel per rotation due to the coarse acme thread. Best design Ive seen to date4 points
-
Wow, what an update! For what it’s worth-to other forum members, the strut simply is more complicated than it looks at the outset. I had the incalculable benefit of immediate advice from@hawairish &@TowndawgR50 (who also did the whole project with me). Also, BTW, that spring compressor in the photos was advised by@hawairish, relayed to me via@TowndawgR50. I think there are now 4 of us who have used one with LR & ARB OME HD springs & everybody loves them. Even a novice like me can use it safely. Another important point is to line up the notches on the struts - the ARB OME struts don’t have the notches so it helps to have an OEM to compare to while doing it (shops have definitely been known to screw this up). Here’s a posting I cut & pasted from the forum: The notches on the bottom spring seat and the top spring seat must be aligned as shown. Note that the side of the strut shown in the photo is the inboard (engine-facing) side. When reinstalling the struts, orient the "L" or "R" on the strut insulator (aka "top hat") so that the "L" lines up with the notches for the left strut, and the "R" lines up with the notches for the right strut. (I can’t recall who posted this so if you let me know, I’ll edit in the credit) Compressors - You can get them for as low as $84 without the plastic spring protectors but for $10 I figured why not. eBay gave me a 2wk expected delivery but it actually showed up 4 business days later. https://www.ebay.com/itm/MacPherson-Interchangable-Fork-Strut-Coil-Spring-Compressor-Extractor-Tool-Set-/2735181308823 points
-
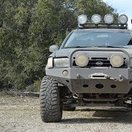
Thank you! It was actually bone stock when I bought it. Was used by as a Mall Crawler. It was throwing a code for a camshaft position sensor and the guy who owned it before me took it to the dealer and they quoted him 1300 to replace both sensor and solenoids which is why he was selling it since he couldn't get it smogged with the code. He wanted 2200, I offered 1600 we agreed on 1800. 10 minutes and a $80 sensor from O'reillys later and the code was gone. All other mods were done by me. Probably put in 3000 in maintenance and mods including lift, wheels tires, etc but it runs like a dream, knock on wood.1 point
-
Pic of the pack. Sent from my SM-N950U using Tapatalk1 point
-
1 point
-
pismo beach visit1 point
-
Good question and something I never addressed. If you scroll back you'll see the pics I took of the long junkyard Yakima bars I got. The basket is mounted to the factory rails, which on my model are a bit higher than some others. The cross bars then fit underneath and mount straight to the roof rails, the length is long so they extend out enough to mount the kayak. Works well and I can remove the bars if I want, but I've just been leaving them.1 point
.thumb.jpg.5f3374d0ea9f01d58f63dc0cc281e8ca.jpg)