skulptr Posted August 21, 2010 Share Posted August 21, 2010 so my plan is to pull the rear bumper cover, replace the flimsy steel brace under neath with a chunk of 3/8 channel iron (have tones of it layin around) and replace the bumper cover. then trim holes for a hinge one one side and latch on the other, so it looks all pretty. i got the idea from fukinitupagain, again. but instead of using tube bending, using a triangular shaped frame. anyone have any idea's on hinges, i've come across a few online, but don't know anyone with any personal experience with them. one is from rockstomper.com hinge 1 a few options from comp4x4.com hinge 2 ployperformance.com hinge 3 they all look like essentially the same thing, but the price tag just keeps getting bigger and bigger. finding a latch to hold it together is a little more tricky. was looking at toggle clamps from carrlane.com, but i want something that i can lock up. carrlane.com latches latches 1 any input would be great, the latch is really baffling me... Link to comment Share on other sites More sharing options...
Northernpathy Posted August 21, 2010 Share Posted August 21, 2010 (edited) I bought my hinge from comp4x4 and bought a standard spring latch for $15. Has worked well for me. Hinge was well made and heavy duty. I have stood on top of my tire carrier and it still swung very smoothly. Big difference with the comp4x4 one is that it has two zerk/grease fittings so that you grease directly into both bearings. Not between them just onto the shaft like the other ones. My build thread here. Edited August 21, 2010 by Northernpathy Link to comment Share on other sites More sharing options...
skulptr Posted August 21, 2010 Author Share Posted August 21, 2010 (edited) thanks for that northern, thats the exact thing i was thinkin about doin. i also have one of those 5 gal steel gas can's, have you come up with a mount for yours yet? i'm thinkin of mounting the tire lower, to reduce obstruction of the rear view, plus i have the stock step hitch, sits lower than yours Edited August 22, 2010 by skulptr Link to comment Share on other sites More sharing options...
Northernpathy Posted August 22, 2010 Share Posted August 22, 2010 Oh I have already thought of how I am going to mount my jerry cans but am too lazy to install them right now. I plan on installing them on both sides of the tire carrier with the back of the jerry can to the tire. Hard to explain, but the jerry can will sit the same way this one is mounted: Naturally it will not be mounted in the same position (just the first picture I found), but I think you get the idea. I have mine mounted that high to make sure the connections on my rear bumper were clear and easy to access. Plus I left a few more inches in case I put a larger tire back there. All depends on your setup. Link to comment Share on other sites More sharing options...
skulptr Posted August 22, 2010 Author Share Posted August 22, 2010 how is the hinge set up? i have really bad luck with thieves, so with my luck someone would jack this right off my truck the first week at best, if i don't find a locking latch, or if it just slips into the sleeve. does it slide up from underneath and get bolted down? Link to comment Share on other sites More sharing options...
Northernpathy Posted August 22, 2010 Share Posted August 22, 2010 also how is the hinge set up? i have really bad luck with thieves, so with my luck someone would jack this right off my truck, if i don't find a locking latch, or if it just slips into the sleeve. does it slide up from underneath and get bolted down? Well the one I got from comp4x4 can be installed in two different ways. -You can just weld the shaft to the bumper. Not coming off unless someone opens up the hinge assembly, which I seriously doubt they would bother with. -Buy the sleeve that the shaft slides/fits into. Weld the sleeve to the bumper, then drop the shaft into the sleeve. It stays it place with pressure and a locking pin. On their website, they recommend welding it into sleeve once in place, but I didn't bother, as it ain't coming out due to the very tight fit. I bought the sleeve, as it would let me take the carrier off the truck if needed in the future (with some work mind you). Doubt anyone would be able to steal it without a lot of work pulling the small locking pin out then trying to pull the shaft/carrier out of the sleeve. Would be easier for someone to just steal your spare tire and jerry cans then to bother trying to take the entire, very heavy, carrier assembly. They would also have no use for a custom carrier by taking it off your truck. Put a locking nut on the spare tire, and a lock to hold down the jerry cans and you should be good. Naturally if someone really wants it, no matter what you do, they will eventually get it. Only thing I am a bit worried about would be if someone unlocked the carrier while I am parked, then it flips open while I drive down the road. Though that is possible with pretty much all carriers, including the stock pathy ones. Link to comment Share on other sites More sharing options...
Northernpathy Posted August 22, 2010 Share Posted August 22, 2010 (edited) Here is their assembly/install video: http://www.youtube.com/watch?v=1bQXOuktVQk http://www.comp4x4.com/tire_carrier_hinge_kit_1000.html Edited August 22, 2010 by Northernpathy Link to comment Share on other sites More sharing options...
skulptr Posted August 22, 2010 Author Share Posted August 22, 2010 which length did you get? course i guess that also is dependant on the thickness of your bumper too. Link to comment Share on other sites More sharing options...
Northernpathy Posted August 22, 2010 Share Posted August 22, 2010 Yeah the length of your sleeve is dependent on the thickness of your bumper. My bumper is 6inches, so they sold me a 6.5inch sleeve (you need it slightly longer so that you have something to weld to on both ends). All of the hinge assemblies are the same length. So if you have a bumper that is higher than 4inches tall, you pretty much need a sleeve unless you have designed your bumper in such a way that the sleeve isn't needed. Link to comment Share on other sites More sharing options...
skulptr Posted September 17, 2010 Author Share Posted September 17, 2010 well my build finally went down last night. so here goes. i did essentially the exact same thing as northernpathy, except that my bumper is only 4x4, and i used 1.5x2.5 for the main arm. was all that was available. i also bought some 3x1.5 scrap and made 2 spacers so the bumper stuck out a little farther. picked up my bumper 4" x 4" pre cut at 64" for $20 bought the carrier hinge from comp4x4 on monday, had it by wednesday! used a 1 5/8" hole saw (no plasma for me, and acetylene cut isnt my thing) when i drilled these, i marked center on the bumper, than went 2.5 from the end of the bumper, center punched it, and had fun drillin. i welded around the top and inside the bumper on the bottom where the sleeve passes through. the first pic is with the roller pin they pre drilled, the second is without it. i liked how it sat without it, so thats what i went with. Link to comment Share on other sites More sharing options...
skulptr Posted September 17, 2010 Author Share Posted September 17, 2010 (edited) i used 1.5x2.5 for the main arm since its all my steel scrap yard had available. pre cut at the yard at 58" its perfect length. unfortunately i didnt notice how off square their band saw cuts, so it is a little on the high side. but have no fear, there is a fix. went with a 16" tall main support from 1.5x3 (found enough in their scrap bin for this), then 2 support arms from some 1x1 i had layin around i used 2 6" tall pieces of 1.5x2.5 tubing, welded them together, then to the back of a 10" diameter plate. i had no intention of using a plate this big, but i found it out in the back 40 at the farm, and just couldnt let it go to waste. if anyones tried cutting a circle with acetylene, you'd rather just use a pre cut plate too. the studs i used are just front studs i picked up at napa. the fronts are almost a half inch shorter than the rears. i drilled 1/2" holes, they pounded in nicely, but i still gave them a little weld on the back, just to be safe. and of course i spent the $6 a piece on lug nuts, thinkin if i screw one up on my truck, i have 3 nice spares! the plate is centered over the nissan emblem, i was tryin to make as little of it cover the rear window as possible, but not sit so low i cant tow anything or have it lookin goofy. i have fitted a full size 31x10.5 on a 15x8 stock toyota rim i was given. see, i said there was a fix, that bar leveled right out under weight on todays to-do list, i have to relocate my license plate, get a latch of some kind, and paint it. i will also have to either dremel a little of the drivers side license plate light off, or take it off all together. the carrier hits it, but just BARELY. enough that when my stereo is turned up even slightly you can hear it vibrate. i will also post pic's of the rear view, since it was pitch black out by the time i finished Edited September 17, 2010 by skulptr Link to comment Share on other sites More sharing options...
Pezzy Posted September 17, 2010 Share Posted September 17, 2010 Link to comment Share on other sites More sharing options...
Northernpathy Posted September 17, 2010 Share Posted September 17, 2010 Looks good. My arm leveled out once I put weight on it as well. Is all good. Design looks well laid out. Where ever did you get the idea of how to put it together. lol Can't wait to see it finished up and ready for the trail! Link to comment Share on other sites More sharing options...
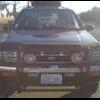
skulptr Posted September 17, 2010 Author Share Posted September 17, 2010 as promised pictures of my rear view. out the back window in the driveway and on the freeway plus i finally got er painted, but i have to get a spring latch online, since not a single place around here carries what i'm looking for. and my last little touch, the nissan emblem in the middle, since i wont be using a tire cover sorry for the crappy pictures, my phone doesnt do too well with oncoming sunlight. and make sure there's no cats around where you paint. i painted my bumper, went inside for lunch, and came back to this :headwall: Link to comment Share on other sites More sharing options...
Northernpathy Posted September 18, 2010 Share Posted September 18, 2010 Looks like you might have enough space to fit the plate on the bumper under the tire and above the hitch. Would keep it safe while on the trail. Might try a farmers supply store to find a spring latch. Or a place where they sell fencing supplies. Link to comment Share on other sites More sharing options...
skulptr Posted September 18, 2010 Author Share Posted September 18, 2010 i live in farm country, and still nothing. i went to every farm supply, hardware surplus, and fencing store in the county, and no dice Link to comment Share on other sites More sharing options...
Recommended Posts
Create an account or sign in to comment
You need to be a member in order to leave a comment
Create an account
Sign up for a new account in our community. It's easy!
Register a new accountSign in
Already have an account? Sign in here.
Sign In Now