
Dbot
-
Posts
96 -
Joined
-
Last visited
-
Days Won
13
Content Type
Profiles
Forums
Calendar
Posts posted by Dbot
-
-
6 minutes ago, jjmwilkinson said:
Aren't those SE wheels? At least that's what came on my SE, the LE wheels are the ones with all 6 spokes the same size and has a small center cap that doesn't cover the lugnuts like the SE wheels.
Sent from my SM-G973U using Tapatalk
I think the 17” LE wheels (that don’t fit Warn hubs) are 2002 - 2004 wheels for LE models. The 16” wheels in question were for LE and SE models prior to 2002.
My 01 LE has those 16” wheels but I’ve seen them in SE models too
-
 2
2
-
-
On 5/23/2020 at 4:13 PM, R50JR said:

Mine
Sent from my Pathfinder
I was soooo close to buying those since I have LE wheels. Read a couple reviews somewhere that complained about how it was a frustrating experience to get those warranty replacements in case they broke. I went ahead and ordered new Warn 29091 hubs. 1 of 2 things will happen in the next few days: I'll fix the 29091 junkyard hubs (2 attempts made) and return the new ones that are being shipped to me or I'll fail to fix the old junkyard hubs and use the new ones. Might try to wait a year and see if I can do a warranty claim on the old junkyard hubs with my new receipt
 and throw those on my other R50.
I also learned that ARB is getting behind on their OME coils. At least for the OME 2928 Front HD coils. Bilsteinlifts.com says "Looks like part is on a big backorder now due to covid, about 8-12 weeks, let us know if you want to cancel". I refuse to let that get in the way of this lift since I've already arranged childcare and took off from my night job for this. I went ahead and cancelled that order and grabbed a pair from Ebay. Ebay 2928 coils should arrive next monday or sooner. Either way, I'm starting this project this friday and expect to have it done by the following friday.
-
1
-
-
1 hour ago, RainGoat said:
Since I’ve got the ATX14A, I’ve been following this topic for years. I would say there’s general consensus on the above. The real question is what happens if you run it in AWD with the front hubs unlocked. Some predict disaster while others think it will only be warning lights. We are still awaiting the day someone makes this mistake & can let us know. I believe one person reported warning lights only but I would want something more solid to know for sure.I know we’e talking about the auto Transfer case but I once put my other r50 into 4hi on its manual case without cv axles and it made an awful clicking noise. Only rolled a few feet like that and never put it back in 4hi until the axles were put back in. I can’t imagine what kind of awful noises the auto case will do
-
5 hours ago, BamaQX402 said:
I was looking at your list of parts, namely wheels, your link shows those have 4" of back spacing. I've yet to order a set (I was gonna get 15s) but from what info I've been gathering, we need 3.75" to clear the lower spring perch on the struts. Will 4" clear or are you planning to use wheel spacers?
So those wheels clear the strut by quite a bit. I don’t have a picture yet but I’ll post one when I put those steelies back on. The downside is that they don’t tuck in the the rear when flexed and rub. I’m going to hope my upcoming lift will change the geometry to let the tuck but I won’t hold my breath
-
1
-
-
5 hours ago, Preacher said:
I got the old hubs off as the new ones were being delivered. Got the delivery and they were the WRONG ones. I'm was kinda peeved at that. I sent them back and I'm going to just replace the bearings and races in the ones that are on the truck. Saw a vid and it didn't seem to hard. That being said, any advice on replacing the bearings would be appreciated.
My biggest issue for my wheel bearings was that I didn't have the spindle nut socket. I followed some dude's youtube video where he used a screw driver to tap loose the spindle nut that was set to about 5 or 6 foot pounds. When I put everything back together, I found out that I needed that socket to torque it to something like 70 foot pounds or something (pretighten). Somehow in my metro area of like 200k+ no retailer had the socket needed for Nissans so I had to overnight one from Summit. So do yourself a favor and make sure you have one before you start removing stuff.
https://www.amazon.com/Sunex-10202-Wheel-Spindle-Wrench/dp/B002GT454K
-
I'll be sure to test it out on the highway once I get everything installed. I pulled my junkyard Warn 29091 hubs out of the gallon of degreaser they've been soaking in for a couple days and started reassembling them. Looks like one of them has a pawl that's escaped the hub body. Some sort of ring, snap ring or spring is not where it supposed to be. Looks like I'm going to have to figure out how to tear into the other one to see how all the components stack and snap together in order to identify what's wrong with the other one. Hopefully it's something simple that I can fix. Otherwise I'm going to have to play a game of 21 questions when my wife intercepts a brand new set of hubs in the mail. I've got some time to work on them since Bilsteinlifts.com STILL hasn't shipped my OME HD coils yet.
-
2
-
-
4 hours ago, BamaQX402 said:
I did a write up on replacing rear bushings, you will have to remove the locating tabs inside the front pocket for the lowers, I tried to grind the 1st one with a dremel, that took a long time, then just used a small chisel/hammer on the remaining 3, quick & easy.
I still have to do my panhard, swaybar, shocks, & I have the 9447s on the way to complete the rear, then on to the front!
I've yet to order front lift, but am planning to use the same set-up!
I'll be sure to look up the write up. I was kind of hoping somebody had one somewhere.
@PathyGig12 Thanks for the advice! That will save me tons of headache. I'll heed your advice and wait to install the spacer. Would running 2wd with hubs unlocked damage our Auto transfer case? I sometimes go places that require a couple hours of steady driving on the interstate
-
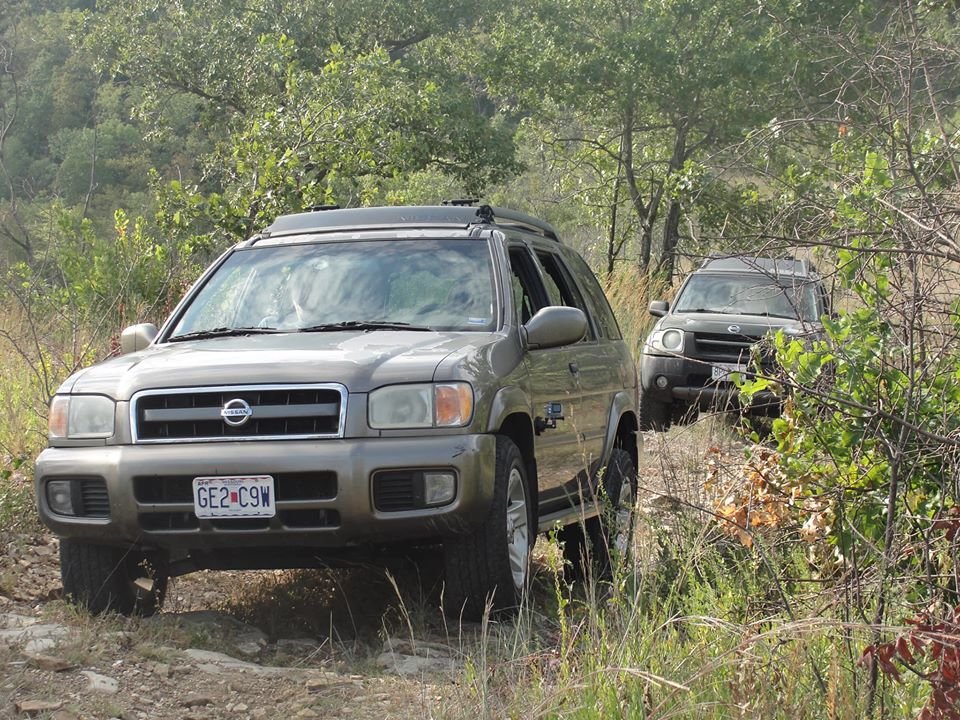
2002 4x4 Auto LE
I've owned it for about a year and I'm behind on lifting. I had always wanted to build up something beyond stock for over a decade and now is that time. I had always assumed I'd start with the lift then make a build page, but I'm gonna start this now since I have about half the parts in my garage and the remaining parts are in the mail right now. This will give me some opportunity to take feedback and suggestions from you all more knowledgeable folk before I start turning wrenches in a week or two.
About this vehicle, I picked it up last April when I needed something to replace my high mileage Altima with a slipping cvt. With my wife out of work at the time, I only had limited funds and for whatever reason vehicle prices were stupidly high at that time of year so I ended up with this 02 for $1500.00. The exterior is riddled with flaking paint, rust spots, dents, scuffs and scratches. The inside had grime, torn leather and lots of broken plastic. The death sway was very noticeable and I couldn't hear it's exhaust leak over the whiny pulley but there was no check engine light, water damage and the strut towers looked good. It was good enough to get around town for pizza deliveries by night and get me to my day job. Throughout 2019 I gradually spent dozens of hours and hundreds of dollars fixing it up. It and it's 2001 R50 companion can be found on Instagram as @dospaths where I document the endless repairs.
So the fun stuff:
- Jeg's 16x8 steelies 555-681034 https://www.jegs.com/i/JEGS/555/681034/10002/-1?trk_msg=F4DEA4K0TBPKT67FKEGNHFHHLC&trk_contact=QLBQ2TEVQI0OU4FL6Q069HD5DS&trk_module=tra&trk_sid=HU0HF1BKBUHB8U969NPQKH3I9C&utm_source=listrak&utm_medium=email&utm_term=Product&utm_campaign=Transactional&utm_content=Shipping+Confirmation
- General Grabber AT2 265 70r 16 (used - but free)
- 100mm - 108mm hub centric rings https://www.amazon.com/gp/product/B07N97VFY8/ref=ppx_yo_dt_b_asin_title_o01_s00?ie=UTF8&psc=1
- 4x4 Parts Polyurethane split bushing kit for rear trailing arms https://www.4x4parts.com/i-18981266-complete-split-design-trailing-arm-bushing-kit.html
- Bilstein 5100 shocks https://www.amazon.com/gp/product/B00BYNJ7KG/ref=ppx_yo_dt_b_asin_title_o03_s00?ie=UTF8&psc=1
- Camber Adjust bolts https://www.amazon.com/gp/product/B000CB2GOU/ref=ppx_yo_dt_b_asin_title_o02_s00?ie=UTF8&psc=1
- NRC9449.c8 coils https://www.lrdirect.com/NRC9449-supplied-by-britpart-branded-britpart.html
- OME heavy duty coils https://www.bilsteinlifts.com/shop/nissan/nissan-pathfinder/front-5-inch-ome-heavy-duty-lift-coils-for-1996-2004-r50-nissan-pathfinder/
- Strut bearings https://www.nissanpartsdeal.com/parts/nissan-bearing-strut~54325-5v000.html
- 1" SFcreation front spacers https://sfcreation.com/products/front-spacers
- Possibly Warn 29091 hubs
Most of the above parts are in the garage. The rest (coils and shocks) are in the mail. The Warn hubs are from a salvage yard and were in rough grimey shape. They are diassembled and sitting in a jar of degreaser for the next couple of days. If they look ok when it's down to just the bare metal, I'll order a service kit from Warn to rebuild them. If not, I'll be checking out the Mile Marker hubs online.
My tenative plans are to start with the trailing arm bushings. I've been tagging the bolts with WD-40 about every other day and I'm going to borrow a heavy duty 120v impact gun for that. I'll use the sawzall to remove the existing bushings and assuming the trailing arms are oem or oem equivalent, they split bushings will fit right in those diameters.\
After that, I'll pull the shocks and coils out then put in the 9449s (hopefully without spring compressor), then put in the Bilstein 5100s. Any tips or advice for coil and shock installation (orientation etc) is welcome.
After getting warmed up on the rear, I'll do the struts next. I'll install the OME HD coils and the new strut bearings. Now, I know somebody on here will advise to not use a 1" spacer with those coils but I'm also open to the collective group opinion on that considering I'll be using manual hubs. So I'll either install the spacer with the struts or leave it out for a few months before revisiting the strut to put it in once the coils have worn in. Any installation advice is welcome too.
Install manual hubs.
I'll then put in camber adjust bolts and find a shop that understands what I've done and get an alignment.
-
1
-
I don't think you'll find any reasonably priced valve covers online. If you do, please let us know your source. If you don't find any replacements, 2001 R50's have aluminum valve covers. Something to consider if you don't mind foolin' around in a junk yard. Another option is to try using RTV silicone around the spark plug seals. It's not a guarantee but it might just work.
-
 1
1
-
-
I’m assuming your water pump replacement involved removing those two black steel covers from the aluminum timing chain cover? (You left the aluminum timing chain cover on). You don’t have to lift the engine out but you do have to remove that timing chain cover, which involves removing anything that’s in its way like the oil filter and pulleys. You’ll need a pulley wrench for the crankshaft pulley. I’d suggest getting a new crankshaft seal for the front timing chain cover and double check your o rings that fit in the inside of the timing chain cover. You may need to remove some plumbing and wires that cross in front of the cover but leave the AC pipe. Take your time removing the cover so you don’t damage it. There are some bolts the are vertically aligned that hold it in around that oil filter so don’t forget those. It’s easier with two people pulling it off. When it’s off expect to spend and hour or so cleaning the old rtv silicone off the mating surfaces. When it’s off, you can see everything and should be able to access the mia gasket. Just don’t touch the cam phasers or sprockets with any screwdrivers or magnets. Haynes and Chilton manuals are surprisingly accurate and detailed for this project if you find YouTube or FSM lacking
-
1
-
-
Looking for anything that can confirm the possibility of putting a 2004 auto trans in my 2001 auto Pathfinder.
the 2001 date of manufacture is April ‘00. It’s the LE model 4x4 with the shift level in the center console. Salvage yard has a lower mileage, clean wrecked unit. It’s a 2004 SE 4x4. Price is very reasonable on it. I don’t know about the compatibility between those years other than the flex plate might need to be swapped. As far as that goes, that’s the only differences I’m aware of. Anybody know for sure or know any resources to check on this?
-
Thanks for the help. I didn’t even consider those suggestions. After driving it around 20 miles those issues and codes went away. If it comes back, I’ll start with those ideas
-
List of suspects:
Alternator diode
main timing chain off a link or two
Bank 1 (us passenger) cam phaser messed
bank 1 (us passenger) timing chain stretched
Bought it with a broken timing secondary timing chain and broken secondary timing chain tensioner (both on bank 2). Replaced those broken components. When I first pulled off the timing chain cover it was so sludgy and crusty I couldn’t see timing marks on anything other than the key on the crankshaft. In my mission to find the timing marks on cam sprockets (so I can find top dead center) I removed the 4 hex bolts on the bank 1 cam phaser and turns the engine by hand. Later i found the timing marks under sludge. As for realigning the cam phaser, it appeared to only reattach in 90 degree increments to the cam sprocket. With trial and error I got it to the position where it didn’t crash the pistons with the valves when I turned the engine. This is suspect because the issue is a new code that the vehicle didn’t have before I started working on it and it’s on the bank 1 side where this phaser is. And factory service manual says to not mess with those.
the other possibility is maybe it’s off 1 tooth on the cam sprocket. My timing method goes like:
turn crank sprocket where shaft key is lined up with the 10:00 timing mark on block. Drape the main chain over the top of the upper sprockets, aligning colored links with the timing marks on upper sprockets. Center the the upper cam sprockets where they are symmetrical with their timing marks. Pulled chain over water pump ,
and pulled chain under crank sprocket . I put tension on the driver’s side (US) when doing this. Then installed the tensioner on the passenger side after chain was in place. The crank sprocket had a timing mark on it BUT THE CHAIN did not have a special link for the sprocket alignment . When the chain installed without the tensioner there is enough slack in the chain for the chain to jump forward or backward one chain link on the sprocket. Since jumping one link is a possibility, I wanted to mention that.
the secondary timing chain that I didn’t replace is one bank 1. I could visually see it had a bit more slack than the brand new chain I put on bank 2. But again, this code didn’t show up until after I tore everything down.
The alternator got quite a bit of power steering fluid dumped on it during disassembly. Maybe a bad diode letting non smooth current into the system that the cam position sensor is picking up?
i swapped the cam position the sensors with my other 3.5l r50 and it had no effect on the issue.
Engine seems to start ok but idles kind of rough. Usually about 750 rpm. Engine seems to handle revs ok in the driveway. Occasionally it stalls after a minute of two of idling. But it starts back up easy. Haven’t got the drive it yet because I don’t want to have it stall on me without license plates. Engine has a ticking noise too.
anybody got any gut feelings on this? Also looking for other things I can check before I resort to replacing the other chains and bank 1 cam phaser so let me know if you have any ideas.
thanks much.
-
I replaced 1 of the 3 timing chains. The drivers side secondary timing chain was replaced because it was broken. The other chains got used again. I did fill the engine with oil and crank it over (no fuel) for a minute until that tensioner stopped slapping. After it tightened up under oil pressure, it turned over by hand really smooth so I put it all together. (Which it’s not running rough so maybe it’s not fixed)
-
2001 pathfinder
Bought it real cheap for a fixer upper.
I ended up having a broken secondary timing chain on the drivers side (US)
[[[[[[[[[[[[context]]]]]]]]]]]]]]]
tore into the engine and replaced the broken secondary timing chain. From memory, the cam sprockets up top were lined up with the lighter colored links on the secondary chain as the Haynes book says to do. The primary timing chain had two yellow links. Those lined up with the marks on the intake cam sprocket marks. I had those yellow links centered summetrically. The crank sprocket shaft key lined up with the Mark next to it on the rear timing cover. However the book said there should be a lighter colored link on the main timing chain that lines up with a mark on the cam sprocket. There was no apparent link down there. The only apparent special links were the two yellow links up top. So my fear was “what if I’m off by one link on the crank sprocket?”. I pulled the drivers side (us) of the timing chain as tight as I could because normal engine operation would be pulling that side of the chain and connected the chain to the crank sprocket. Then I installed the main tensioner.
[[[[[[[[[[[[[question]]]]]]]]]]]]]]So I’m theory, I have it timed up but when I turn engine by hand or electric starter, the chain has varying tightness as it goes around. This varying tightness is enough to completely compress the primary tensioner and relax it. (There is little to no oil In the engine therefore no oil pressure) This has me worried. Is that normal? I just assumed the tension would be constant.
heres a video of it in action
And it even does it by hand too
-
Thanks! Somehow that thread didn’t show up in my search, I’ll give it a read. I certainly plan on replacing iacv gasket and and power valve screws first thing if i buy it
-
1
-
-
I have the opportunity to buy a 2001 with vq35 however the motor is bad with bad compression in two cylinders. The salvage yard has a 2004 SE auto with real low mileage because of a wreck. I want this engine for the ‘01 body if possible.
I think the throttle is electronic on ‘03 and ‘04 whereas ‘01 and ‘02 have regular throttle cables if I’m not mistaken. (I plan on using the ‘01 intake with cables to prevent issues). That’s the only difference as far as I’m aware of. Salvage yard computer system says the ‘04 engine is NOT compatible with a ‘01 body. (I won’t get any warranty if I try it).
Could I put the ‘04 SE auto 4x4 engine into a ‘01 SE auto 4x4 if I use the ‘01 intake and plenum on top of the engine?
02 build by Dbot
in 96-2004 R50 Pathfinders
Posted
I couldn't find your write up on bushings. Is it on another site?