
Dbot
-
Posts
96 -
Joined
-
Last visited
-
Days Won
13
Content Type
Profiles
Forums
Calendar
Posts posted by Dbot
-
-
The transmission would be the easy part. If it’s 2wd to 2wd you’re good and 4wd to 4wd you’re good. Just swap the main bell housing... you don’t even need to put a new trans in there unless you want to. But as far as electronics go, I have a feeling that’s gonna be a can of worms judging by my experiences. Power window switches change from year to year so I can’t imagine what kind of hidden surprises exist with climate control, seats, air bags etc.
-
Sort of. I've wheeled on stock wheels and highway tires before. 90 percent of the time I was in 2wd. I'd stick to dry stuff and stay off really loose stuff like deep sand. If you do that, I think you'll find the traction a non-issue and your main obstacle will just be ground clearance for big rocks. If mods are your thing, the right lift, tires and a limited slip should outperform most stock 4wd rigs.
-
 1
1
-
-
That’s odd that you had to drive the hub onto the spindle. I remember to had to tap it with a small hammer a few times to center it but then i could shove the hub all the way back by hand. Maybe 5 pounds of shoving force was needed once it was centered. Got any panhard bracket pics?
-
In addition to camber. Eventually brake line length becomes and issue and the panhard bar geometry becomes an issue in the rear. From what I’ve heard, 2.5” is good to align. I did 2.0” aligned with one camber bolt on each strut. You could get even more adjustment (in theory) with another camber bolt so maybe you could go 3.0 inches
-
8 hours ago, RainGoat said:
Also, it’s worth noting that there are slight differences between the 2001 & 2002-4 grill emblems which may translate into a different mount.
True. After fumbling around in the junk yard last summer, I can confirm there are 3 face lift grill logos.
- 99.5 -2001 SE grill emblem. Same style as 99.5 - 2001 LE emblem but has a different curved profile on the back side of the emblem. You could make it work with a small amount of creativity
- 99.5 - 2001 LE grill emblem. Same as above except curved profiled on the backside
- 2002+ grill emblem. noticeably different outline and the backside curved profile doesn't match either of the above.
However, R50 buttercup on here has a 02+ emblem on a 99.5-2001 grill from what I've seen.
-
2
-
On 8/24/2020 at 5:03 PM, 01Pathmaker said:
Well, about 30mins ago I got an email from the ebay seller I ordered my new OME 2923's from, that were supposed to be "in stock" and listed as "last one". Surprise! They claim the warehouse guy noticed a manufacture defect and when they tried to have another set drop shipped, they were told they're on national backorder and won't ship until lare September (duh!). So I replied to get a refund, punched up 4x4parts (AC), and that's when things got crazy. I called them, asked if they had HD fronts springs for my 2001 Pathfinder, he answered with "yeah, we usually keep a couple on hand", then he wasn't terribly happy when I asked him to physically check, but begrudgingly he did. After about 6-7mins on hold, he came back and said "we've got 'em, I hand my own hands on them", so I ordered them on the spot. I almost choked on the $54.90 UPS ground shipping charge, but either way I was forced to eat it, since my backup plan was to have him look for MD's, then lastly their 2" springs. Now the waiting game begins and we'll see what actually arrives...
Same exact thing happened to me. One listing on eBay for OME coils (No image on listing). I bought them, they contacted me the next day and said they were damaged and refunded me. Listing removed and about a day later another seller had the that part number listed (also with no actual product image). I wonder if it’s like the sisterhood of traveling coils that the sellers dump off on other sellers. But yeah, I went with AC coils and I love them
-
1
-
-
These dipsticks suck. One thing I’ve done to remove doubt is put a bubble level on my running board and use a jack and wheel choks to set the vehicle level in my driveway since it has some rake. Then I do my readings. I’ve ran overfilled by a quart for a year without issues. I’ve driven a week about quart low with no issues so adjusting fluid levels may not help any issues
-
1
-
-
I’ve wondered if the valve cover thing is a supply/demand issue. I see many more of the fwd cars with 3.5 engines on the road than I see r50s around here so it would make sense for those to be on the market. But as to your question, I haven’t heard of anyone using a fwd/Z/g35 VQ valve cover.
-
I don’t recall if it’s necessary to replace the bolt but I’ll throw in my experience. I removed it and replaced it on my 01 about 6 months ago. Put about 5k miles on it since then and haven’t had any known issues with it so far. Hopefully somebody has the actual answer to your question
-
Mine does that sometimes. Previous owner messed around with the automatic shifter and it's shift cables. Its slightly misaligned. When it happens to me, I gently press forward on the shifter and that seems to register that it's in park then it will start like normal. I think I've read there is also a switch in the center console for automatics that can fail which does what you're experiencing too.
-
23 hours ago, Preacher said:
I have this issue with both of my front seats and would love to be able to fix it. Could you do a write up one day?
X2 on writeup
This truck is looking killer by the way
-
Could the panhard bar bushings be worn?
also, if the trailing arm bushings weren’t installed correctly, I believe it’s possible to get the death sway again really fast
-
When I tried out these wheels and tires on stock suspension, the tires would rub in the back if the suspension was compressed. At stock height, it looked as if just flexing would cause it to rub but it looks like with the lift, this must change the geometry to where I can tuck the rear tire at flex now.
-
1
-
-
19 hours ago, BamaQX402 said:
I took advise here to order my OME springs from Desert Rat, they were out as well but were expected a shipment this week, and only allotted 3 pairs, 1of which is mine! I'm still waiting on damn poly panhard bushings

When I installed my manual hubs I didn't have any noise for a couple of weeks, then every few miles it sounded like the passenger side was riding on the rumble strip on the side of the road, it would last a few hundred yards and quit. I locked them back and it stopped??
Since then, I unlocked them to check, and the noise was pretty much constant so I locked them back in. I'm thinking/hoping wheel bearing or axle, which I have new to install once my last parts come. You're looking good! I'm excited, trying to be patient waiting on parts.
I feel ya on the coils. Sounds like you’re one of the lucky few that can get them before July. As for your vibration goes, I hope it’s an easy fix. Sounds like it could be that cv bearing that sits in your spindle. I had a trailblazer that did the rumble strip thing intermittently and it was a bearing that supported one of the cv axle ends. Is your cv axle snap ring still in place? Also, there is a thrust washer sandwiched between your cv axle and the backside of the spindle. It rides right next to that bearing I mentioned. Make sure you don’t lose that whenever you do any cv axle swapping. I almost lost mine once when I didn’t know it existed.
-
7 hours ago, RainGoat said:
Interesting note on the Warn hubs - did you do that? If so, pictures please.
I think you’ll find the running boards useful over time, especially with kids, women or a roof rack. They are fairly stout & provide some measure of protection. Personally, while I don’t care for the “nerf bar” look of the tubular ones, I think those low profile ones give the truck a more finished look than when they’re off. They were well styled to fit the trucks aesthetics.The chrome could use some spit shine but I haven't gotten that far yet. I've been soaking them in degreaser since my earliest post on this build so the grit is kinda settling on the metal.
As for the hi-lift jack, sadly I didn't get any pictures of it on the trail as I was in business mode trying to prevent further damage. I used it to winch me up muddy hill with the rocks my tires were caught on and one more time winched from my 10:00 to pivot the front of the rig to the left on mud. The trail went downhill on mud and hooked left but gravity and mud wanted me to go straight down toward trees so the hi-lift fixed corrected my course of action. I had 2x5' sections of tow chain, 1x10' section of tow chain, 1 tow strap with hooks and 2 recovery straps to get creative. The kicker is that this was a harbor freight jack and we had no idea that would hold up.
-
1
-
-
1 week update:
So I finally got around to getting the alignment fixed. I gave the shop guy 4 camber bolts to work with and he only needed 2. The tires a little quieter now they aren't riding on the outside corner of the tread.
Something I've noticed is that at highway speeds, I can hear a noise from what I think is the transfer case when the hubs are unlocked. The noise is similar to a worn out bearing or something. It's very faint and can't be heard unless passengers are quiet and the music is low/off. I can't hear it below 55 mph though. No 4x4 warning lights yet.
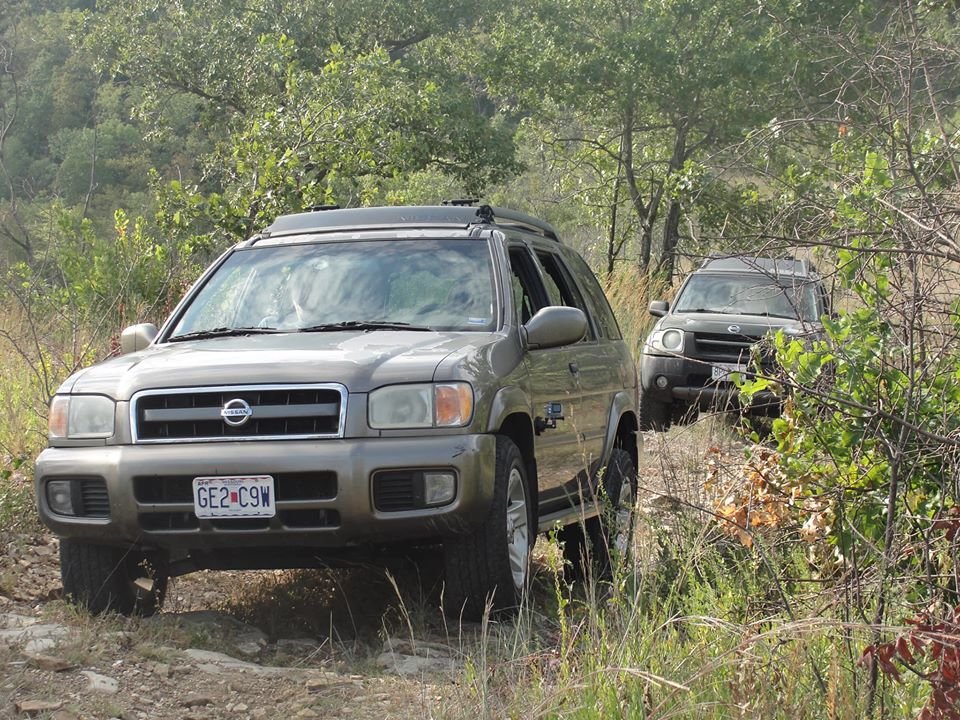
So I took it wheeling on some moderate stuff nearby in Missouri. With the bigger tires and more ground clearance it took some of the excitement out of the easy stuff as it wasn't much different than driving a car down a dirt road. Struts didn't top out much and never dragged anything over rocks. I got a bit ambitious and tried to go up a steep, off camber hill with sloppy mud, peppered with embedded rocks and tight trees on either side. I almost made it to the top but ultimately got the tires hung on rocks and it crab walked about 6 inches sideways into a tree. I used a hi-lift jack as a winch to pull the rest of the way up. So the silver lining of that trip was, that I found the limits of the tires on mud... That's burned into my memory. I also found no issues with the suspension components and the cv axles held up on rocks just fine. Also, I carried an adult passenger, two kids and a bit of weight consisting of tools, spare cv axle, chains, coolers and drinks. The NRC9449s didn't even show they were doing double duty.
I can now compare this ride to a stock xterra with the same exact tires and say this r50 is now superior as it sits higher therefore giving me about the same approach, departure and breakover angles. The r50 articulates better but the slightly longer wheelbase makes turns between tight trees a bit trickier when inches matter. The offset of the new wheels makes more vehicle to squeeze between trees but several times, the wide tires made an effective bumper which kept the tree an inch away from my fender flares as the tires stick out now.
In a few days, I'm going to take it to an offroad park to get a better feel for it as there is more diverse difficulty and the density of the terrain is much better.
-
4
-
-
Man that thing is clean. So I don’t think I’ve even seen a chrome roof rack on a Q. Is that aftermarket or some Limited edition ‘03 specific stuff? Also, where does that cabin temp sensor live? I’ve always wonder where exactly the climate control bases it’s decisions from
-
Alas the post I've been striving to get to:
Finished product below.
So yesterday, I drove it around a bit and by the end of the night I noticed a slight pop/clunk in the rear end that is repeatable by 1) coasting 2)getting back on the throttle instantly. I crawled underneath to triple check my trailing arm bushing bolts and found nothing. Driveshaft felt just as secure as my 01 parked next to it. I noticed I had a worn out rear sway link so I replaced it to find that it didn't fix the noise. Perhaps the noise was always there but not noticed by myself as the old rubber bushing clunk was much louder and more noticeable. I guess I'll have to keep an ear out for it to see if it gets any worse.
Also, driving yesterday, the Service Engine Soon light came on. Its a code for the evap system. I had disconnected a hose (reconnected when finished) above the drive strut and zip tied an extended diff breather hose to the fuel filler hose as well. I also blasted the undercarriage and wheel wells really well at a car wash too. So I supposed I either messed up a hose or got water on something that should stay dry.
So about the Warn hubs, there was no need to replace the factory studs despite Warn providing replacement studs. Installation was very easy and straightforward. I also noticed on my other Warn hubs from the junkyard, that the gold color on the lockout knob is some sort of transparent amber coating. Soaking the cap in acetone for a night turns that coating to jelly that wipes off with your finger exposing a brushed steel look. I've seen some discussions around the internet about how many people dislike the gold color so I though I'd mention that.
So some visual geometry notes I've made about this configuration: The back driver's side wheel protrudes a bit further than the passenger likely due to the panhard bar setup. Not a big deal but you can see it if you go looking for it. Also, the AC coils give some noticeable positive camber. Due to having 26 hours of dad duty this weekend and a limited number of shops that want to mess with non factory suspension, I'll have to wait until some weekday after work to get it aligned with the camber adjustment bolts.
I left my running boards on initially because they serve as a decent reference point for height mesaurements but after seeing my 5'2" wife and four year old comically struggle to get in the new height I've decided to keep them on as "disposable rock sliders." If something happens to them on the trail... oh well.
Below are some old vs new measurements:
As far as ride quality goes, it is now starting to fell a little truck like. It's very startling when the struts slam. I think they top out really easy with the AC coils. I just know my wife is going to accuse me of messing up the front.
The transfer case light hasn't come on yet and I've done about 20 miles of interstate driving so far so hopefully the automatic transfer case doesn't mind unlocked hubs.
I can't wait to actually get it on the trail later this month.
Lastly, you can't have an excessively long post without a special thanks. So special thanks to PathyDude17 for answering weeks of questions
-
2
-
-
As of today, it's driveable.
For the struts, I rented two pairs of spring compressors from O'reilly and Autozone. They were identical other than the color of their plastic case. Compressing the OEM coil seemed easy enough other than the jack screw rods invading the same physical space as the strut coil cap. Upon removing the coil, it was apparent the gas struts were shot. Compressible by hand with about 5 lbs or less force. It didn't really want to rebound. Later during the reassembly, the gas strut rod kept sagging down until I held it up and put the nut on top. It's weird because I haven't felt or seen any signs of bad front suspension behavior on the vehicle. I assumed the struts were good since my '01 R50 nose dives with brake pedal use whereas the '02 doesn't. Since it rides ok as far as my tastes go, and I really don't want to wait for KYBs to ship from Rock Auto, I just moved on to the reassembly stage.
Compressing the AC coils by hand sucks. The coil is slightly tapered but when it's being compressed, the taper becomes exaggerated which changes the geometry of the jack screw rods on the compressors. They push into the strut foot and/or cap depending on how they are oriented. You have to use a set and compress it, then when you run out of room, Use the other pair of compressors on different coil sections to continuing compressing. Repeat this a few times until you have the spring squished enough with enough cap clearance. Then when you start decompressing, you have to play musical chairs with the compressors at different spots just to get them off the spring. Half of the time, there's not enough clearance to fit a socket on the rod so you have to use an open end wrench. So for the second strut, I paid a local shop to swap the coil for me. I set masking tape sections on the components so all they had to do was align the tape when they reassemble. New oem strut bearings were also installed during reassembly and the orange triangular gaskets were reused. Once I reinstalled the struts on the vehicle, I put the wheels back on the front and back before I tightened the 3 top strut bolts.
With the vehicle being supported by it's tires and wheels, I used a ruler to measure rear end height, took the rear wheels off, then used a jack to lift the back up to the previously measured height using the diff as the jack point. At this point, I used my torque wrench and tightened all the trailing arm bolts, panhard bolt and sway bar link bracket bolts. The lift is definitely noticeable in the rear. Old suspension yeilded 14.8" at the bottom of the hitch vs 19.4" now. Back end of running board height: 11.8" vs 16.0". Somehow I failed to record the original front running board height but with the lift, it's now 15". I'm curious how much of that I'll lose when everything settles in.
So I drove it around town a bit and the rear end feels amazing. I've become so accustomed to death sway that I now have to relearn how to drive without anticipating sway over road irregularities. I also don't hear the thump in the rear end where the bushings shift under torque load changes at a low speeds. The coils are great too since now I can cross intersections at full speed without kissing the bump stops when the whole family is in the car and I have no complaints about the Bilsteins. I don't feel any harshness or bumpiness from the AC coils yet. The front feels a bit funny, but I suspect that's because my camber is off until I get it aligned tomorrow. Once it's aligned, I'm going to throw on the steelies and my Warn hubs.
Additionally, I extended the rear diff breather hose from 16" to 5'. It now routes up and over to the fuel door area.
-
1
-
-
On 5/24/2020 at 11:19 PM, BamaQX402 said:
I did order my springs from Desert Rat!
I'm gonna go ahead and order strut bearings and bellows. I ordered 1 set of camber bolts, will 1 per side work with OME HD springs + 1" spacer, or will I need all 4?
My panhard bushings are backordered ;'(
So suspension is temp back-burnered.
I was getting the code for right vvt-solenoid, replaced it, now getting code for the left, ordered it. When I did my power valve screws I didn't have a thinwall deep 12mm to get the lower intake off, if I go back in to replace pcv & water valve do I need another new set of manifold gaskets, or am I safe to reuse the set I just replaced?
I did install a rear spoiler and replaced a cracked taillight in between working on sis-n-laws pathfinders overheating problem. Great learning experience

I'll throw in my personal anecdote on the intake manifold gaskets: I reused the upper intake manifold gasket on mine when I did my power valve screws last september. 222k and no CEL or engine performance changes
-
AC coils arrive tomorrow so I pulled my struts out to help myself tomorrow. On one of these struts, that orange gasket that sits on top is cracked. I really don't want to wait for the dealership or another vendor to special order it, so I'm wondering what substitute I can use there. I was thinking about cutting my own out of some material.
I'm thinking about rubber from a mud flap or inner tube. Fel-Pro makes sheets of gasket material but I don't know which one to choose https://www.autozone.com/sealants-glues-adhesives-and-tape/gasket-material/fel-pro-3075-gasket-material/67682_0_0?cmpid=PLA:US:EN:AD:NL:1000000:IEN:71700000043798118&msclkid=c4e81f142360158358b141c321e14e81&gclid=COny6NHE5OkCFRSyZQodZiYNGQ&gclsrc=ds
I'm hoping you all had some suggestions.
Thanks guys
-
Day 3
Installed last trailing arm. All trailing arms bolts are hand tight. I supported the axle with the jack, and started unbolting the first shock. It compressed really easy and took several seconds to fully expand as it lay on the ground. So it turns out on this 02 model, the lower shock mount stud on the axle is about the diameter of the rubber bushing on the 5100 shock. I added a metal washer on the stud mount, sprayed some silicone lube on the stud and pushed the shock onto the stud, put more silicone lube and the original washer and nut back on. For the top mount, I wasn't happy with the extra slop from the 11mm-ish bolt sitting inside the 12.xxmm metal sleeve. So I went to the hardware store and bought some 1/2 diameter bolts that are only threaded at the end. This bolt is the perfect diameter to fit that provided metal sleeve. This did require expanding the shock mount tabs on the body. I took a 1/2" drill bit to the sheet metal to open the holes up a bit more. Some rust converter coating was sprayed on the exposed metal to help mitigate new rust. I stacked some washers to fill the gaps in the shock mount thickness and used a healthy dose of silicone lube here too.
Swapping in the9447 coils was pretty uneventful other than working around having *just enough* brake line slack to work with. Getting the panhard bar back in was a doozy because lifting straight up on the diff wasn't lining up the bar hole with the body mount hole. I could get it almost lined up by using the jack to compress the passenger size but the newly installed 9447 coils seemed a bit too stick and actually did not let it flex out. I lifted the entire back end off the jack stands by jacking up the passenger drum brake and the bump stops still didn't touch anything. So i resorted to pulling laterally with ratchet straps on the axle but that was only good for almost pulling it off jack stands. Ultimately resorted to having an anchor vehicle attach to the receiver hitch to act as a brace as another vehicle on the other side acted as an anchor for the hi lift jack winch. This did the trick and got the bolt back in. I think I'm going to take a day off until Tuesday where I'll see about deconstructing the struts so their ready to rebuild when i get the AC coils on Wednesday.
-
1
-
-
On day 2, I got the other 3 trailing arms out. The rubber bushings were cracked and split which obviously explains the death sway it's been having. The lower trailing arm bolts were much more stuck than the others. Those bolts came out with a sawzall. BamaQX402 was right about the locating tabs on the body end of the lower trailing arm. Filed those down with a belt sander, wiped with acetone and hit it with rust converter before greasing. Getting bolt holes to line up was a bit of a tedious endeavor but a jack and ratchet strap will eventually get it right. Tomorrow, I'll see about removing the old shocks and coils to put in the replacements. Hopefully the Bilstein 5100 bushings don't give me any trouble. If everything goes into place, I'll rest the weight of the vehicle on it's axle and tighten those trailing arm bolts. Then I'll wait until Wednesday to install the AC coils and Warn hubs.
-
1
-
-
Dinner time update:
So I’m apparently not getting OME HD coils for the front. I ordered through Bilsteinlifts.com because their website said they had 2 in stock. After a few days of nothing shipping I reached out them and a few days later they said ARB is backlogged through July. I spent a few days calling vendors who claimed to have stock to find out by phone they don’t actually have any on hand. Ultimately switched to 2” AC lift coils since those are actually in stock. Should get those Wednesday.
Anyway, today I started working on the trailing arm bushings This morning and I still haven’t finished. I chose the upper driver side trailing arm to start with. I removed the sway link that’s in the way and started hammering away with the corded impact gun. Trailing arm bolt wouldn’t even budge despite several days worth of WD-40 being applied. Used an extra longer breaker bar with a wrench on the the back side of the bolt/nut to get it. Once removed, I gouged the rubber bits and put it in the vice to meet the sawzall. Started sawing with a precise cut. Flipped it 180 and started on the next precision cut. It suddenly started vibrating really bad and I cut into the trailing arm itself. I made an effort to punch out the bushing with the two cuts but it wouldn’t come out. Must be rusted together or something.
Thankfully, I plan ahead sometimes and I had a set of trailing arms https://www.amazon.com/gp/aw/d/B00H9EL176?psc=1&ref=ppx_pop_mob_b_asin_title
I measured the bushing sizes old vs new to see the inner diameter is 49.xx mm and the poly bushings have a diameter of 50.xx mm. Since our diameters are good, I ran the trailing arms to my nearby truck tuning shop and had the dude press out the rubber bushings from the new arms. I don’t think the dude had the right equipment because it slightly warped on of the cylinders but he got them out. I ran it home and cleaned up the inner bores with a wire brush, acetone and a coat a rust converter. Bushings push right in by hand. Feels like about 10 lbs of force is needed to squeeze them in. I put the included grease where it goes and installed the first trailing arm, using the provided new bolts. I left the nuts and bolts loose for the tightening that happens when it’s sitting level. And I ran out of daycare time so that’s all I have. Hopefully I’ll knock out the other three and get the rear lift installed tomorrow.
-
1
-
Transmission issue
in 96-2004 R50 Pathfinders
Posted
I’ve read in the factory service manual that the transmission uses 3rd gear as limp mode. But I think there is supposed to be a light in the dash to accompany it though. I would assume towing would yield higher temps than 150f. Maybe the temp should be checked at the trans cooler line where it feeds into the radiator?