

Sjackson2
-
Posts
418 -
Joined
-
Last visited
-
Days Won
1
Content Type
Profiles
Forums
Calendar
Posts posted by Sjackson2
-
-
Any idea on a weight for the springs and spacers? I’m guessing less than ten pounds? I’m trying to convince my wife to let me spend more money on parts after I just spent a bunch lol
-
How much you think shipping would be to AZ? I’d be interested in the moog springs and spacers
-
Just now, Jack9909 said:
Nah it's in line with the flywheel, when you take it off you can see the teeth the starter uses, pretty neat inspecting through where it goes
Sent from my Moto G (5S) Plus using Tapatalk
perfect! Thanks man. im not having any problems, but the rig has quite a few miles and im always down for cleaing or replacing anything i can
-
1 hour ago, Jack9909 said:
Yup, sorry I'm not much of a describer lol but yeah brake clean and wipe it all off with a rag. That little green connector in the picture near the oil pan.
might be a stupid question but do you have to drain the tranny first?
-
1 hour ago, Jack9909 said:
I'll add a pic to this post but it's on the bottom of the bell housing with a little metal cover, and a big weird push connector and one 10mm bolt holding it all on, my engine seemed to rev up and down sluggishly before and when I took it out it had a bunch of shavings on it and a little bb sized chunk of metal, hope it's nothing major but I assume all that crud was messing up the reading, haven't been able to drive much as I'm waiting for the rain to pass to finish welding my exhaust together. Weather is absolutely awful in virginia right now grr
In recent news, attempting to make a y pipe and putting a little cherry bomb turbo on the truck, gotta give the tiger a good roar lol
Ah ok...so pretty easy to get to then. What did you clean it with? Just some brake parts cleaner? Im gonna have to give that a go
-
On 10/15/2014 at 7:07 PM, Beatup96 said:
Guns and fat mallards...
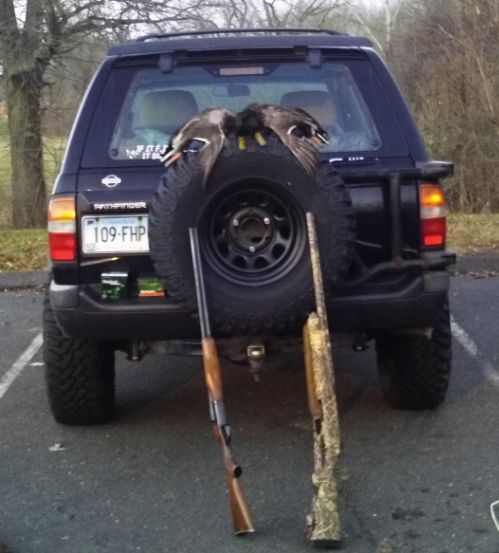
Next to stock cousin...

Fresh AC coils....
Wow! Sick looking ride bud.
-
 1
1
-
-
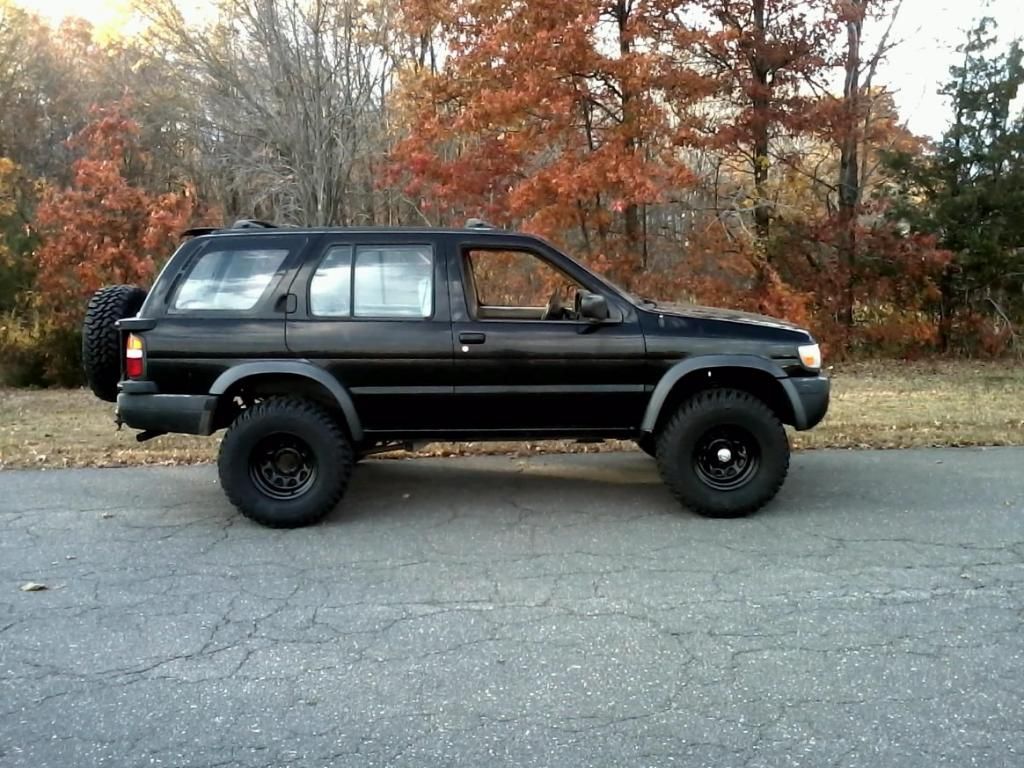
4 hours ago, 03TroutFinder said:
Replaced the roof mounted off road lights and completed fabrication/mounting for new rear bumper!


Sent from my SAMSUNG-SM-G930A using Tapatalk
Dammit!! I need to learn to weld so I can have cool @!*% like this!!!
-
2
-
-
That front bumper looks siiiick!!! How much did you pay for it?
-
Finally got rid of the stupid horns on the hatch today!!
After
-
1
-
-
Interesting. Did you have to do any buffing or blending of the clear coat afterwards? I have some pretty bad clear coat oxidation on my hood that would be nice to fix
-
17 hours ago, Bax03SE said:
I did this project in the summer, but just now decided to post it. Like many, my 03 had some rust creeping out from behind the fender flares in the back. Just like an iceberg, what you see on the surface is usually just a little taste of what’s lurking underneath. I decided the best course of action was to cut out all the bad metal and rebuild that section with fiberglass. I used fiberglass cloth and resin for the basic structural repair, then finished it off with tiger hair and body filler. Since this was a small project I decided to try 2k clear coat in a can for the first time, and I was very pleased with the results. It laid down nicely and was easier than getting out my compressor and spray gun. I lined the portion of the paint that is hidden under the flare with bedliner to help protect it in the future, so that’s why the paint at the edge of the wheel well looks a little rough in places. It isn’t visible with the flare back on.


Sent from my iPhone using Tapatalk
That looks really good. What did you paint it with?
-
1 hour ago, joshrichard said:
A little bit of an update, I thought those two bolts were what connected the catalytic converts, but after closer look they were just resonators so I decided to just cut out
Both resonators and weld in pipe in between. That sound mixed with the flow master muffler I already have made the truck sound very good. I’m really happy with the sound of the truck now, I would try to get a video but it’s so hard to get a video of the sound of an exhaust.Ya it usually comes out sounding tinny and crappy. my 01 qx4 actually does have cats where those resonators are. thinking about taking some measurements and having a shop make me some test pipes to delete them
-
1
-
-
3 hours ago, Jack9909 said:
Past week I've bled brakes, changed out master cylinder (no change oof), replaced starter and now I'm currently monkeying in a cherry bomb "muffler" because priorities lol. These trucks are fun to work on.
 Oh and also cleaned my crankshaft position sensor since I had to unplug and move the harness out of the way to get the starter wiggled out, woke up the engine noticeably, I like how easy it is to take those out!
got any pics of cleaning the crank sensor? It really made that much of a difference?
-
1
-
-
On 2/27/2019 at 4:44 PM, Mrelcocko said:
With so much rain here in the south(east TN) this past month I haven't had a chance to wash the old gal. Being OCD like I am, has been driving me crazy. The last 3 days with clear skies and highs in the 60's that all came to an end. This is February isn't it? Lol clean machine. #r50obsessed

Sent from my SM-S737TL using Tapatalk
What led light are you running in the grille there?
-
1 hour ago, 01Pathmaker said:
Replaced both drive belts, oil change, new plugs & boots, replaced IACV, removed ECM to send out to Circuit Board Medics. Maybe while she's laid up I'll do the suspension overhaul too.
The iacv fry your ecu?
-
1
-
-
Just a heads up....on the 3.5 both sensors are on the tube behind the intake manifold. Just replace my etc sensor. 19mm deep socket and it come right out
-
dont know if this helps http://car-part.com/cgi-bin/search.cgi
-
What did you end up paying for it?
-
its really not a bad job. if i werent doing all the other stuff the power valves themselves would have taken me less than an hour
-
replaced both front o2 sensors(passenger side was a huge pain in the ass) the etc sensor, and did the loctite on the powervalves. i posted a thread with pics in the r50 forum
-
4
-
-
1 hour ago, Bax03SE said:
Nice work! How were the power valve screws before you took them out? Did anything seem loose?
No none of them were loose. They didn’t take a ton of torque to remove...but they were in there snug. I do like the extra feeling of security from having them done though
-
and I finished the whole thing off with a lovely whiskey sour. I’ll put everything back together tomorrow
-
2
-
 2
2
-
-
power valves all loctite’d and ready to go
-
1
-
-
here’s what I ended up having to do to replace it. When I had the swivel in the middle of the two extensions it was too long and hit the ac line and I couldn’t get it over the sensor. When I put the swivel on the socket itself....it swiveled too much and dropped so I couldn’t get it over the sensor. I ended up wrapping it with several wraps of electrical tape to remove some of the flopiness, but still allow it to flex enough that I could get it over the sensor. It was a huge pain in my ass and my hand is shredded but I got it done!!!
The etc sensor was a pain to reach and getting the harness off kind Of sucked, but once it was off I removed the sensor with a 19mm deep socket and it was good to go


Coil springs and spacers, free
in 96-2004 R50 Pathfinders
Posted · Edited by Sjackson2
Ah screw it. Better to ask forgiveness than permission. I’ll take the moogs and the spacers