Jump to content

trekterrano

Members
  • Posts

    9
  • Joined

  • Last visited

  • Days Won

    2

trekterrano last won the day on December 27 2019

trekterrano had the most liked content!

Previous Fields

  • Your Pathfinder Info
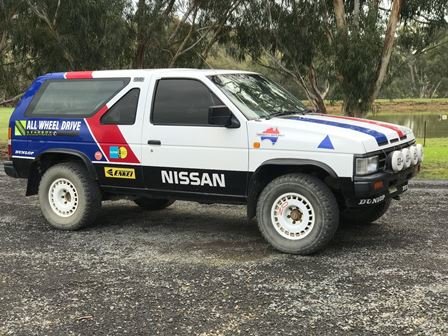
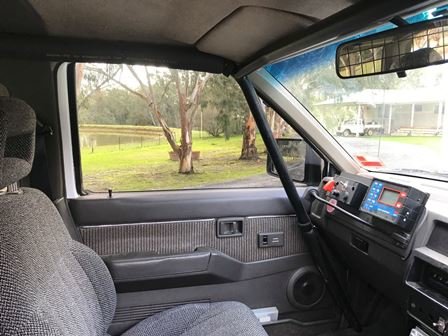
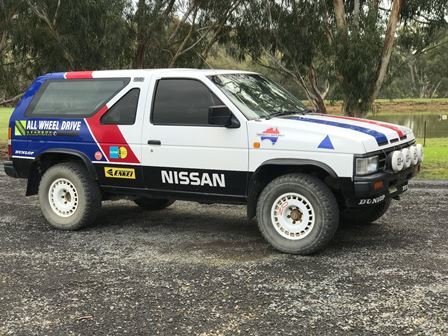
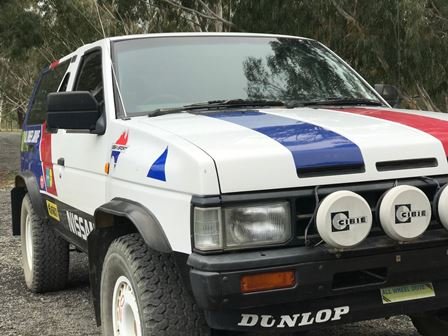
    1987 Terrano VG30 - with rally mods, cage, upgraded suspension, lights etc.
  • Mechanical Skill Level
    Skilled/Experienced Mechanic
  • Your Age
    45+
  • What do you consider yourself?
    Weekend Warrior
  • Model
    Other/Unknown
  • Year
    1987

Profile Information

  • Location
    Australia
  • Country
    Australia

Recent Profile Visitors

1,287 profile views

trekterrano's Achievements

NPORA Newbie

NPORA Newbie (1/5)

12

Reputation

  1. Thanks for the various messages and inputs over the last while, the inputs have assisted - have now finally got the terrano running, going through checks and ready for engineering (have to have half cage and change from 5 seat to 2 seat engineered for registration here in Oz).

    While all seems to be progressing OK, a couple of items have arisen that I would appreciate any thoughts/suggestions from the ‘brains trust”. 

    The terrano has been converted to redline Weber as the throttle body was totally unserviceable and getting a repair or replacement was impossible. It is a Vg30i and auto.

    1. With the Weber conversion (and removal of the associated sensors etc) the auto kick down seems to have gone “missing”. I checked the manuals and the kick down switch seems to activate on the accelerator pedal but i wondered whether it also had some interaction with the TB sensors that’s re no loner in place? 

    2. The cooling system has been checked over and, the steel heater pipes under the intake and rear of engine have been found severely wanting and been sorted to fix pin hole leaks, but it seems to still lose cooling fluid after running. No apparent leaks anywhere and new gaskets on the intake manifold. The engine was completely rebuilt so new Welch plugs and the like, so cant seem to see where any coolant could be leaking/losing from. 

    Has anyone seen similar or have any experience with the Weber conversion/auto box and covered any needed “tricks” to sensors/wiring that may be needed?

    We are hopefully going to be clear to run again this year in the charity rally late August but these couple of last issues are causing a bit of a hiccup

    Any thoughts/inputs appreciated 

    Cheers from “down under” 

    Ian

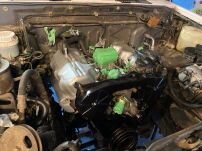
  2. Hi all - has been quite a while between posts/updates. Some health issues (heart) had put all on hold for quite a while. Am getting back to the build and, after the completion of the engine overhaul, got all back in and am closing out on some final areas. As part of this, I am removing most of the anti pollution gear, trying to simplify the vacuum lines and also fitting the Redline Weber kit. That has all progressed reasonably well apart from some connections not being clear as to what goes where and what can be deleted/capped. I made various sketches and notes when I dismantled but am no finding that some of the component markings have been lost in cleaning and handling.  In working through the pollution gear, I have been using the other excellent write ups on the forum although ones specific to the VG30i are few and far between.

    So, with all of that, I was hoping to get some advice/clarity on the following - numbers reference in the pic - tried uploading the pic but am getting message saying I can t upload. Hopefully this link will work - goes to same pic in shared dropbox file. https://1drv.ms/u/s!ArhBM0TeWGIago8uxSJwDKmMOe_snQ?e=achdZt :

    1.  Is a vacuum line under left side of carbie. I believe this goes up to the purge connector on the canister but, if not, is this OK to cap or should it connect to somewhere else?

    2. I believe this is a loop connection to the AB valve on the air cleaner. Can this be capped when I remove the AB valve or  something else?

    3. I wasn't sure on what this one was, whether vacuum or coolant (currently radiator/coolant is dry so wanted to sort before filling up fluids). If coolant, where is this leading to for connection? If vacuum, OK to cap?


    If the pipe from 1 in the pic doesn't go t the purge connection on the canister, where does the purge line connect? As the TBI has been swapped to the weber, very limited vacuum line connections now. 


    And the really strange one, underneath the front (drivers side here in Oz) are the metal fuel lines that come up the filter and return and, while they are all OK, in the same group is another steel line that departs this group and then goes across the front cross member to about mid way with right angle bend and then an end that looks like a flared end but a few mm back from the end of the [pipe, suggesting a rubber pipe connects to the pipe. The breather line from the fuel tank is connected and is connected to the cannister already so doesn't appear to be mixed with that. Am hoping to get a pic of this one on this coming weekend as well as try chasing it back along the length of the terrano underneath.


    Sorry for the long list of questions but i am really hopeful that some sage advice will be forthcoming and avoid me contemplating putting a match to it from frustration ?


    Thanks in advance to all             


  3. Very likely it - was in use for some years, well fitted out, full cage, LSD, seats etc. The OZ wheels look good on it but I am trying to replace the 4 with 6 matching of something else as cant get the oz in 15 6 stud any more. Want to have 6 matching as we always run with 2 spares minimum as our events are 7 days - 3 on, one rest, 3 on and cover 3k pls kms in the week.
  4. Every possibility - i bought it from Vic and the prior owner had used as both tow and chase vehicle for a number of years. The engine was a little tired (more than let on) when I bought it, but it is getting back to healthy.
  5. I could only get the two pix in due to the 20kb limit. several others to add. will try later
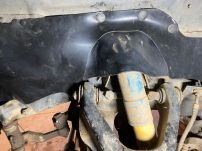
  6. Hi All, a long time between posts but the Terrano is actually progressing. This years event (was to be held later this month) - has been cancelled due to Covd, sow e are now aiming for a March/April short run and August next year as the big one - fingers crossed all be a bit better by then. See www.trek4kidz.com to see what we do - my wife and i are car240 In between work, Covid and other "challenges, i removed the engine and stripped it for a full, bottom up, rebuild. The strip down found a couple of burnt valves, some other smaller items abut minimal bore wear or other issues. That progressed and, in between, did a bit of port cleaning and tidying up and started re assembling. Can't say the removal of the engine was fun, between my not so thin hands and tight spaces, it was definitely a challenge. Added a set of aircraft ring spanners to the toolkit which helped a treat. Extra long double enders which made some of the bell housing bolts a lot easier. Dropped the front diff/trasnaxle, front cross member etc and then engine out, all single handed. The rebuild went ok apart from one snapped exhaust stud (appears to have been that way for quite a long time-well before my ownership) that I has asked my machinist to replace and he missed it completely, as I did when i picked up the completed parts. The thread on the head side wasn't great and I ended up using the next size up exhaust stud (10mm) and turning down the manifold side and re tapping that to the original 8mm and then drill and tap a new 10mm in the head. All done, secure and all studs secure. In the process of aiming to rebuild, i found the throttlebody assembly to be junked and trying to get a replacement was proving a real challenge "down under" so, after reading up on the weber kit, decided to invest in that and am in the process of fitting that as well. As the terrano has to go through a complete blue slip/full registration inspection, will be interesting to see the outcome. Generally no tests for exhaust emissions so hopefully will be OK. Got the engine back in and aligned (it is an auto) with thrust plate/torque convertor no issue and then had to try and refit the diff/front transaxle. Now that is a job that is challenging to do single handed while on stands. Purchased an adjustable gearbox mount for my floor jack and that ended up working a treat. Used the adjustable leveler (normally front to back but used sideways) tilt the transaxle rear bar mounts to go up between the torsion rods enough to fit and then level out above the rods.Back bolts in and then re position jacks, add a few ratchet straps in a few different directions and then crank, adjust, tilt and repeat about 27 times and finally all lined up and secured. So now I am down to refitting the rest of the engine bay kit, drive shafts and peripherals and then hopefully fire it all up and run it in. A long and slow path but, with the quality of the rebuild, parts used etc., am expecting a pretty good "from new" run.... As well as the general rebuild, have been working on fitting an oil filter relocation unit with heat shield, extractors (not as expected so going back to that again at a later stage), new inner front splash guards (the old ones were half gone one on the passenger side and split in multiple places on the drivers side. Also found the coil pack mount pretty much rusted through so fabricated a new one of those while adding a new pack at the same time.. Have been sourcing most om spares from RockAuto and finding cost, freight and very, very quick delivery to be a great end result.The range is very good and so far, everything has arrived as needed/expected. One a side note, I have been trying to source some more (2) of the OZRacing 15" 6x139.7 rims (we always carry two spares) to no outcome. OzRacing don't supply that size any more and no one seems to have anything like it unfortunately. So, I am now looking to replace all rims with 6 of the same and have been looking at options. I can find plenty of the 6x139.7 and similar offset, but the center bore seems to be the issue. From what i can see, the Hardtop has a 100.3mm center bore while other later nissans (pathfinders and the like) are around the 106mm. From what I udnerstand of the center bore size, it is so the wheel centers on the hub more precisely. Does anyone have any experience in running larger center bore (than the 100.3 standard) without issues? Any advice/past experience would be greatly appreciated. Cheers all
  7. Thanks for the replies and suggested options. I finally successfully pulled the engine out today so very happy to make that step forward. I ended up dropping the front cross member which came out very easily (suspect the prior owner may have had it out at some point as the bolts were tight but easy to undo). I had already disconnected the front diff/axle assembly so when i dropped the front cross member, i was able to lower the diff at the same time (one large workshop trolly jack under the front diff and another standard one under the front cross member) so all came down ok.(That diff/axle assy is heavy!!). Once the diff and cross member were out of the way, i was able to get to the bolts on the flywheel/torque converter a lot easier and was a bit surprised/shocked to find them only finger tight, so likely a disaster waiting to happen if I hadn’t addressed that i suspect. I then made sure all areas disconnected and also made a temporary cross member to bolt into the mounting points where the back mounts of the front diff are so to support the front of the gearbox when i removed the engine. Looked to connect the engine hoist and had to try and find some places to connect chains. Apart from one location with convenient nuts on a brackets on the rear passenger side of the block, there wasn’t too much that was jumping out. Connected chains using the aircon and power steering brackets and then a strap around the drivers side manifold secured back to the front of the engine. i had an engine leveller on my hoist so as i raised the engine, i found that the height of the terrano was too high so I wouldn’t be able to clear the top radiator cross member with the sump. I dropped the sump as well as the oil pick while raised and still in the engine bay so as to get as much clearance as possible as i was limited by the height in my garage and the lift of my engine hoist. i probably didn’t put the engine hoist leveller close enough to the block so lost some span - next time the leveller will be really down tight to the engine so as to make the lift back in a bit easier. I will likely also look to either make some connectors/plates for engine hoisting or at least sort something that is easier to manage. I had also had stands under the front half of the body raised up so as to give me enough room to work underneath while prepping the removal but this also meant the whole body’s higher than needed for clearance for the engine removal. So, a bit of judicious jacking with extra blocks and lowering the axle stands to then lower the overall height to remove the engine followed. A bit challenging and added a bit of a heart stopper when one of the blocks on the jack decided to pop out and drop the body on to the stands - a bit unexpected but at least the stands where in the right place/height so no damage thankfully. So, back to the hoist, lift and seperate the bellhousing no issue and move a bit forward then lift. Now the clearance was tight even with the sump/oil pickup gone. The rear spacing plate got rotated to sort that and then the engine leveller adjusted to drop the front down and raise the back for clearance. Tight squeeze with the top of the engine hoist jib just fouling the garage roof crossmember so very fiddle and back and forth, twist and then finally out clear. Brought it out and mounted on a portable engine stand to start the strip down and rebuild. Engine bay clean and some general maintenance while all out. Might also replace the torque converter at the same time - seems a logical thing to do while I have the engine out. Thoughts? So, my findings from my way of removing the engine: The Nissan engineers had no clue as to post assembly engine removal work and should be sentenced to working on removing and re installing the Terrano V6 auto 4wd repeatedly as punishment. Purchase of some aviation ring spanners was a great assistance. The 14mm spanner was particularly useful to get to the two bell housing bolts at the top of the bellhousing and was worth the price of the set by itself. Aviation spanners are around 3 times as long a standard ring spanners- extra leverage as well as a lot easier to access some fiddly bolts. Swivel connectors for socket drives and a couple of extension swivel bars assisted in breaking the set of some of the bolts. In looking at potential re assembly, i am considering connecting the diff to the front cross member and make a jig that will help balance it to raise the whole thing up once the engine is back in. Hopefully the option to mount the diff/front axle and the cross member will work but that is a new chapter worry once the engine is overhauled. So, for now, engine removal done, start of the clean up and prepping for overhaul. All of the work to date and todays efforts to remove the engine were all single handed, so a bit challenging on that front as well, but generally ok. Won’t be a quick workflow moving forward but finally looking to getting it done and getting the beast back on the road and prepped for the 2020 trek rally Will update as things resolve. Cheers all.
  8. Hi All. A while since I intro'd myself and the 1987 Hardbody V6 auto trek terrano. I was intending to start down the path of getting the engine out for a rebuild and then the plans went off track due to other commitments and it is only now back on the list of things to do. Having started on the engine removal over the last while and now having worked through the manual for the "how to's", I am down to trying to get the torque converter disconnected from the flywheel via the (supposed) access area between the sump and the bellhousing. Only issue is the V6 4wd/auto has a stupidly large rear sump pan that completely shrouds the bellhousing with maybe 5mm/3/8" space between. I have dropped the front diff, all needed ancillaries, exhaust connections etc. and am now trying to see options to make some space. In looking at the main challenge, the dropped front diff sits between the sump and front cross member so it is a challenge to raise the engine even slightly to try and drop the sump so as to get to the torque converter bolts through the access area. In looking at the options, I was considering one of any of the following : 1. Disconnect the torsion bars and drop the front diff completely out to clear the sump - drop the sump to access the torque converter bolts. 2. Drop the middle span of the front cross member which would seem to then allow the front diff to drop and give space to more easily drop the sump and then access the torque converter bolts. This looks like a minimum number of bolts etc., on the front cross member and potentially less challenges but not 100% sure of any issues that this may bring up as well. 3. Remove the diff rear cross member from the diff, drop the diff, etc etc (have already tried to undo the three nuts holding this cross member on to not much success - even considered cutting the heads/connections off the cross member and then replace/repair afterwards) 4. Take a large flame and.......... At present, it looks like the final torque converter bolts are the last items to disconnect before undoing the engine mounts and lifting the engine out. So close, but.... I am used to getting engines in and out with far less hassle in the past but not having had a 4WD before was expecting a "bit" more work. but this is getting to the point where it seems each step forward hits another blocker. In reading all of the various online stories, takes of woe etc, it seems the v6/auto hardbody wasn't exactly designed in such a way to make this job straightforward, so any suggestions, ideas would be greatly appreciated. Thanks in advance on any words of wisdom Cheers Ian
  9. Apologies, you are correct - VG30I rather than my I typo. Re the rims, they are OZ Racing rims, imported by the guy who owned this before me. I tried to source another one (i normally run with 2 spares ) but the Australian distributor said they couldn't source any more - so have sourced 16" genuine Nissan steel rims, so that looks like the direction now. My ride for the rallies up to now has been a 71 240Z - see below - so the Terrano will certainly be a different beast. Re the VG35 - thanks a lot for the suggestions. Will investigate the local options. I build all my own so the engine swap and upgrade shouldn't create too many challenges hopefully. Much appreciated - will see how it goes
  10. Hi all - apologies for the loooong delay in updating. Some pix uploaded . Am now in the process of looking to replace, upgrade the VG30e engine (has a decent bottom end knock) and looking at either a straight swap (can get a warranted low KM engine at decent price) or possibly go to the VG35e but not sure of what issues I may run in to with that direction. Any input/suggestions very well received. Am not sure what equivalent pathfinder model I should/could be looking at for either the VG30e or VG35e engines as Pathfidner is a LOT better recognised than Terrano back from 1987 ? Thanks in advance of any advice Cheers Ian
  11. Hi All Just purchased my Nissan terrano - 1987 VG30 model. Have been involved in charity car rallies for a number of years (as well as full on rallying prior) and after this years event running my classic 1971 datsun 240z decided that I needed to retire the zed and go with a different vehicle. Got this one with a lot of the mods already completed so looking forward to enjoying the new style of comp. We raise funds for the The Starlight Foundation here in oz and typically raise a couple of hundred thousand each year from the entrants. Looking forward to learning more through the forum. Cheers all
×
×
  • Create New...