

tmorgan4
-
Posts
914 -
Joined
-
Last visited
-
Days Won
1
Content Type
Profiles
Forums
Calendar
Posts posted by tmorgan4
-
-
I have the stock swaybar however I can't find the mounts. They'd be easier to ship from across the country, though. I'm in Fort Collins if it's worth the drive.
-
That is the company my springs came from. No idea why they wouldn't have me in their system. When I called they had specs for the OEM Pathfinder springs so I just told them I wanted a 160 lb/in rate for 6" lift over stock and they made them no problem.
-
David...sorry you never heard back from me! I hope they're willing to tell you the specs. You could even try telling them that you're me and you were trying to figure out what you ordered a while back.
-
Props for doing all the homework and figuring this out on your own!!!
-
Another set I'm making. Anyone else need a set while I'm at it????


And I'm going to be working on an extended panhard in a few days when some parts arrive.

-
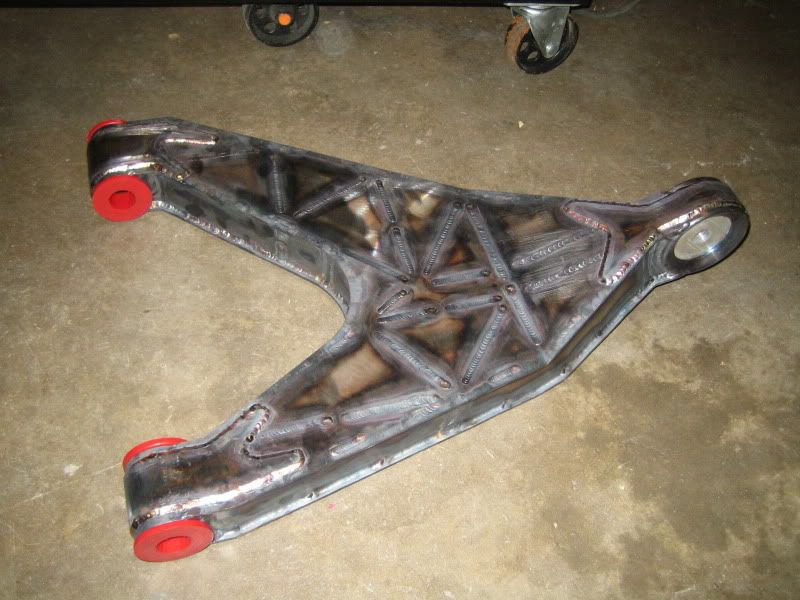
Thanks! I think it would be REALLY cool to build a long travel IFS R50, but I'm afraid no one would want to pay for it. This stuff adds up so quickly it's ridiculous. By the time you're done buying $150 uniballs, chromoly plate, bushings, getting everything laser cut and machining a jig to build it in you're talking a lot of $$$! If anyone is interested...I'll be glad to talk with them.

I finally picked up a 14 bolt for the Pathfinder today. I need to get it cleaned up and it's going in very soon!
-
Thanks! I really do appreciate all the comments. Hopefully I'll get back to working on the Pathfinder again soon.
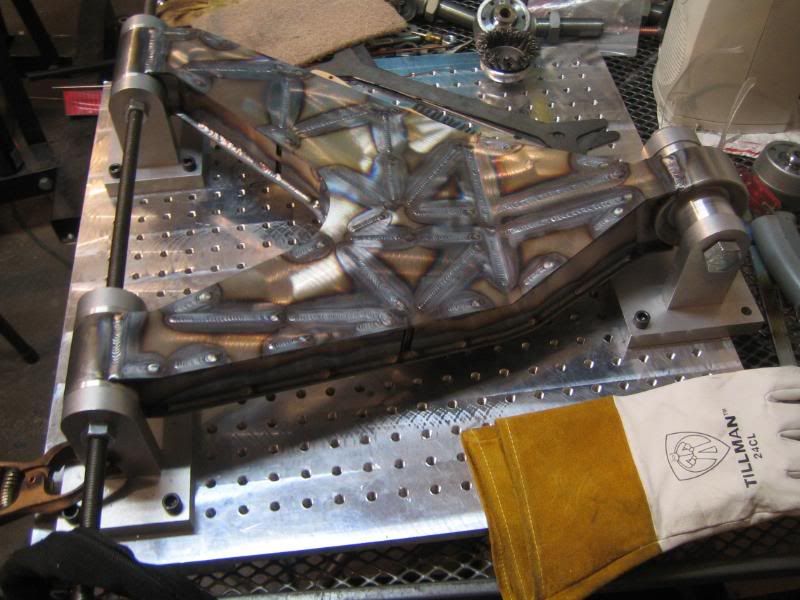
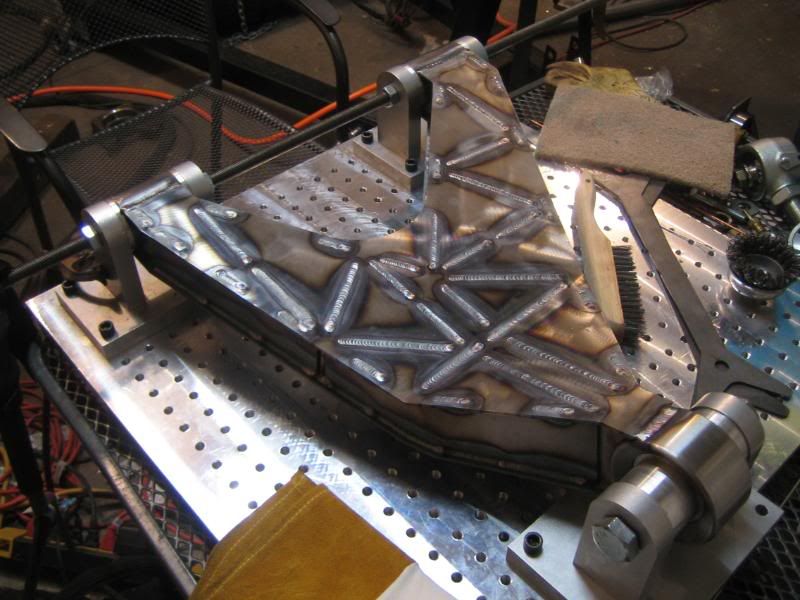
One arm finished. I completely underestimated the amount of time it would take to weld. I'm going to try and keep track on the next arm but I'm thinking it took at least 10 hours. Probably more.
-
Thanks guys!!
Has you friend tried All Pro Offroad, ICON Vehicle Development, Toytec Lifts and some others ? All these guys (and others) make some form of long-travel kit for the Tacoma and FJ Cruiser...
Oh yeah...he used to have a really cool '07 Tacoma with the Total Chaos long travel kit but sold it for some stupid reason. We just wanted to try something different this time around and the spindles for these trucks are notoriously weak and no aftermarket 4x4 compatible spindles are available. I've never really liked the way the uniball connects on the Total Chaos and Camburg arms since they have to use an adapter to bolt up where the ball joint was. This kit will eliminate that. And I like doing this stuff anyway...when it turns out right.
Wow
nice project!
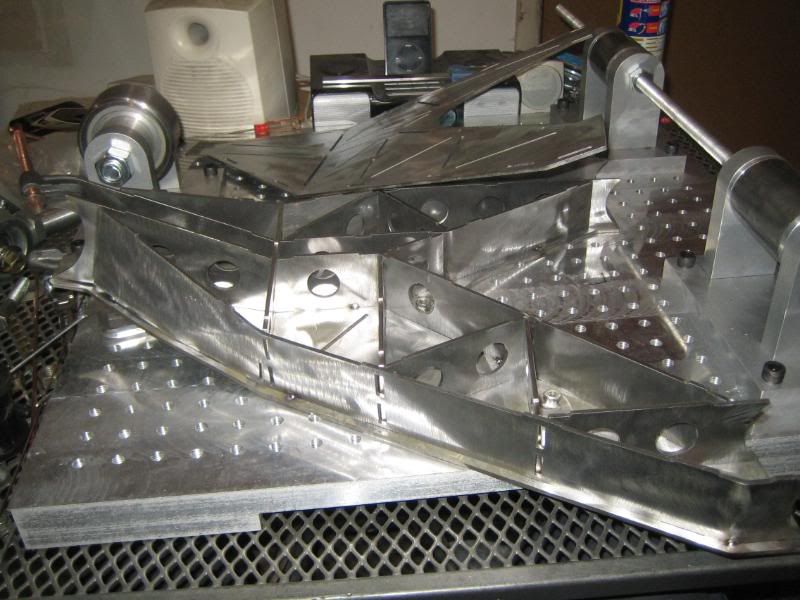
Did you make your table also? I like the setup!
Thanks! Yep we machined the table. It's a cast aluminum jig plate that we were fortunate to have a hookup on drilling all 484 holes on a CNC mill. They were all tapped by hand...though.
 It's actually supposed to be 24 holes wide and long but by the time the material got squared up we ended up with a 22 x 22. That explains the fixture hanging off the side of the table but it works fine as is.
 -
Unfortunately I haven't made any progress with the Pathfinder because I'm still waiting on my rear suspension parts, so in the mean time I'm working on building my friend a long travel kit for his 2009 Tacoma. I'm building upper and lower arms plus spindles since nobody makes an upgraded 4x4 version. I can't wait to see it finished!!!
-
Unfortunately I don't have any sponsors.

It's funny how I either have money or time but never both. I've been working way overtime the past few weeks to try and get enough money to order everything to finish the rear suspension. But...it doesn't seem to leave me with any time to actually work on it so it's a definite trade off. I hope I don't have to sink a bunch of $$$ into my F250 but the snow and cold weather has made a misfire a lot more apparent. My power steering/hydroboost pump went out last week. Now it's puking coolant...I'm about to trade it in on a different one if the problems continue!
Nothing huge to report as far as progress goes. Just working on a lot of the little odds and ends I've been putting off for awhile.
- Exhaust manifold flanges replaced with V-bands (will make building my exhaust easier later...one finished, one in progress)
- Trying to get my power steering pump mounted which is really proving to be a lot of work. I've got a template finished but I'll either cut it by hand (if I find the time!) or have it laser cut and hope it fits the first time around.
- Starting to think about getting the radiator mounted. The engine isn't too far off from running again.
- 4 of the 6 cage plates (there will be more later) are welded in solid. I can't build the supports until I get seats mounted.
Trying to work on things that don't cost a ton of money until I get all my rear suspension parts.
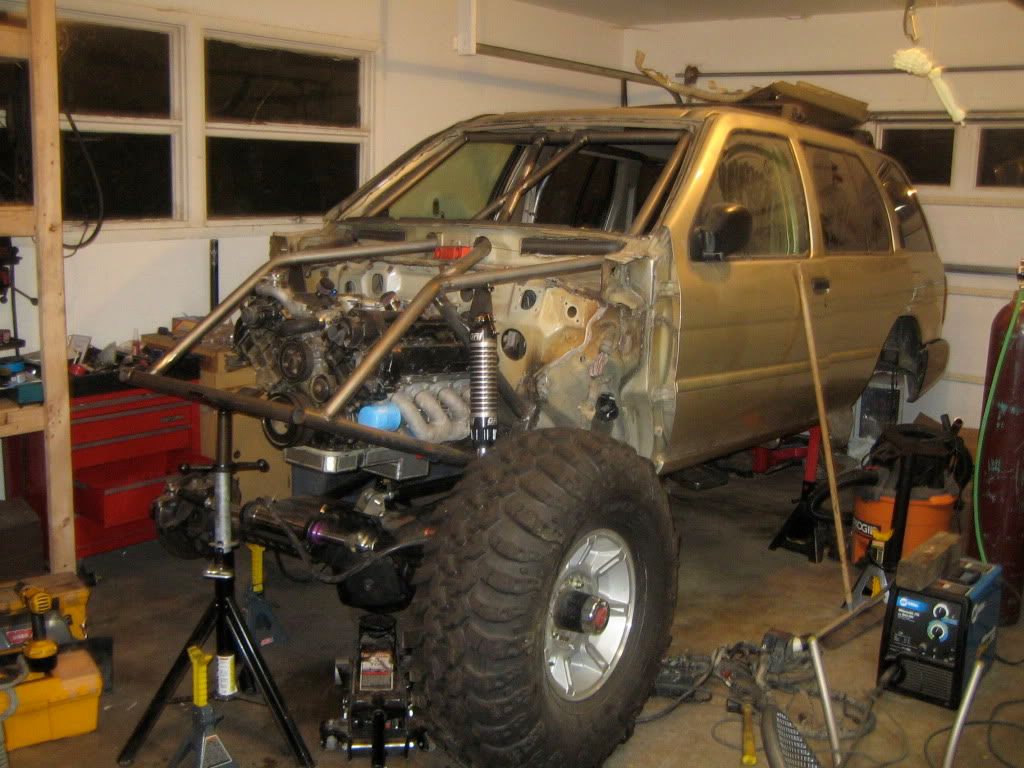
Since I don't really have a whole lot of new pictures, here's a few showing how it's sitting now. :-)
Thanks for looking.
-
What do you need to do with it? Edrawings lets you look at most files but you can't measure or modify anything in the free version.
-
Haha....You think this is Pirate worthy Steven? I always have good intentions of keeping threads updated on multiple sites but somehow that kind of dwindles away as projects go on! The Nissan section is starting to get a little more traffic so I just might have to.
I have actually gone back over MIG welds before with a TIG torch to add some more heat when all I had was a 110V MIG. I may actually have to try it again but it's a long process since the dirty MIG welds really contaminate the tungsten quickly. All the welds I'm ashamed of are tucked far up underneath the dash or under the cowl and probably won't ever be seen but I'd probably sleep better at night if they looked a little better!
-
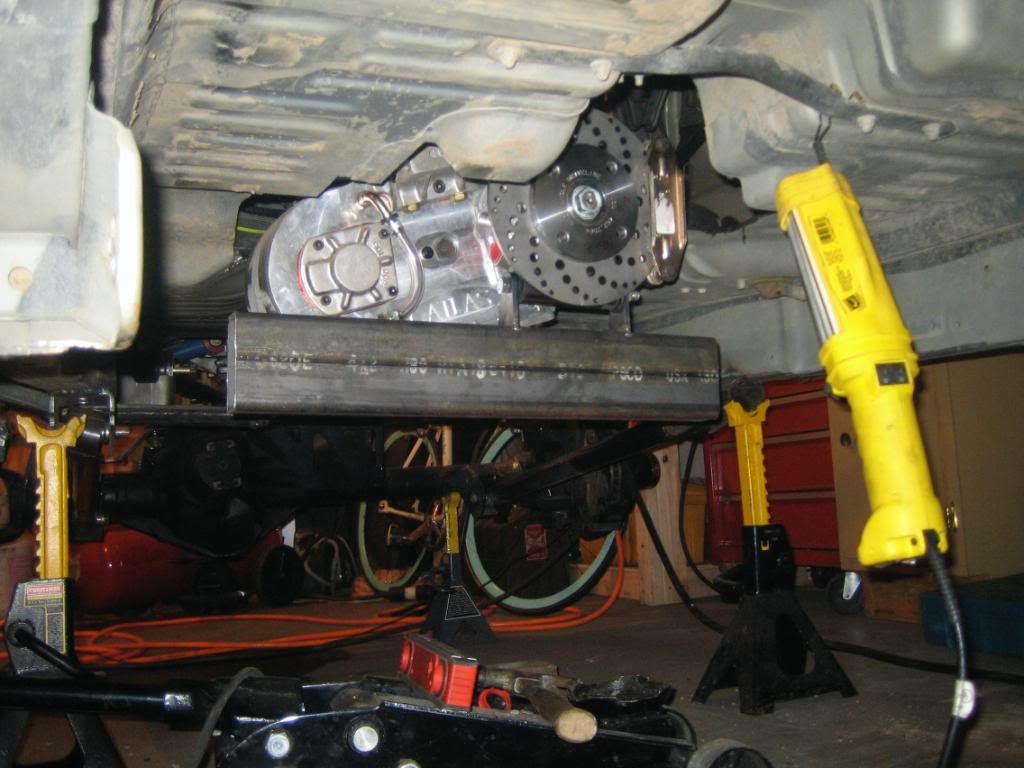
Nice writeup! And nice Stak....the machined cases on those look nicer than my Atlas!
-
Finally got my shock mounts laser cut and tacked in. About time I can set it on the tires again!
The tubes up front always look funny in pictures but I swear it looks better in person!!!
-
I have 2 good OEM CVs that I'd sell for $50 apiece + shipping too.
-
How much do you have to spend?
-
Yup, I just nut in my pants & that thing doesn't even have the engine in or running, tranny, axles attatched or rims/tires. I'm gonna have one of those tantric Sting sex orgasms when that b!tch is finished. Thanks Tyler
Haha...thanks Boston. The transmission is in and mounted as well as my Atlas! The front axle is almost attached...just need to build the last upper link (parts finally showed up today!) and get my shock mounts laser cut. I'm picking up a rear axle on Friday. It's really getting there.....
Wow, nice work. you just keep taking it to the next level. I love that interior cage. I really need to get a bender one day. I want to do a thru dsh style cage also. Oh I want that V8 too.Thanks! I wish I had the patience to do a website like yours. I can't count how many times I've been to your site since I got my license and got interested in 4-wheeling. Maybe I should be blaming you....

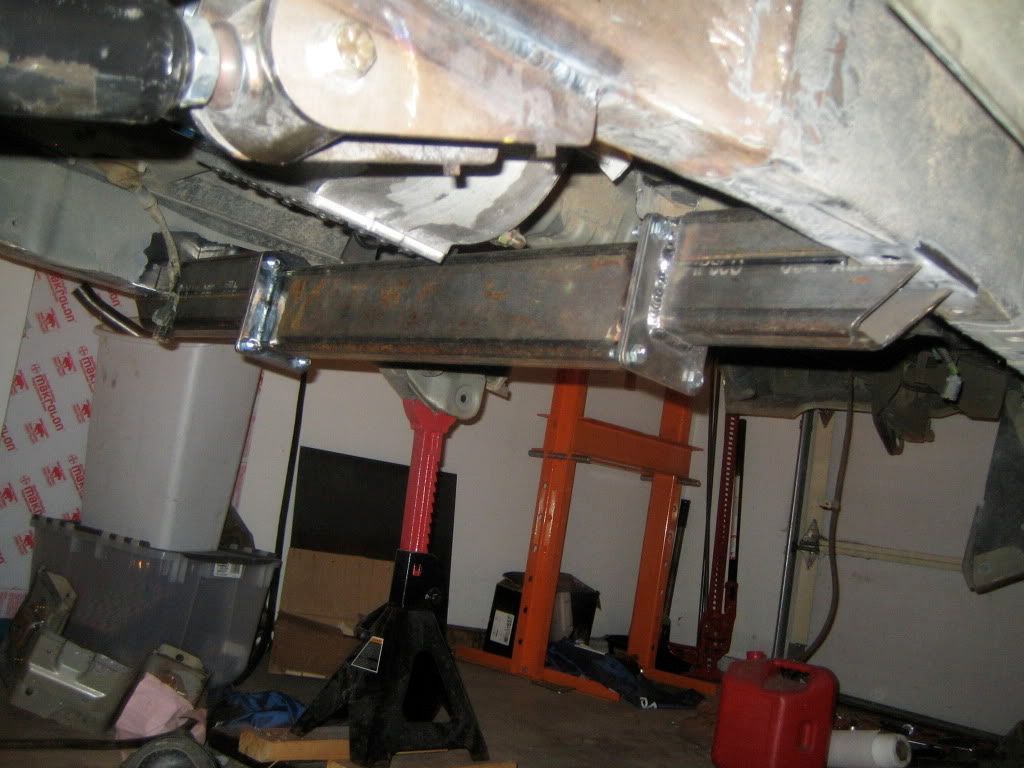
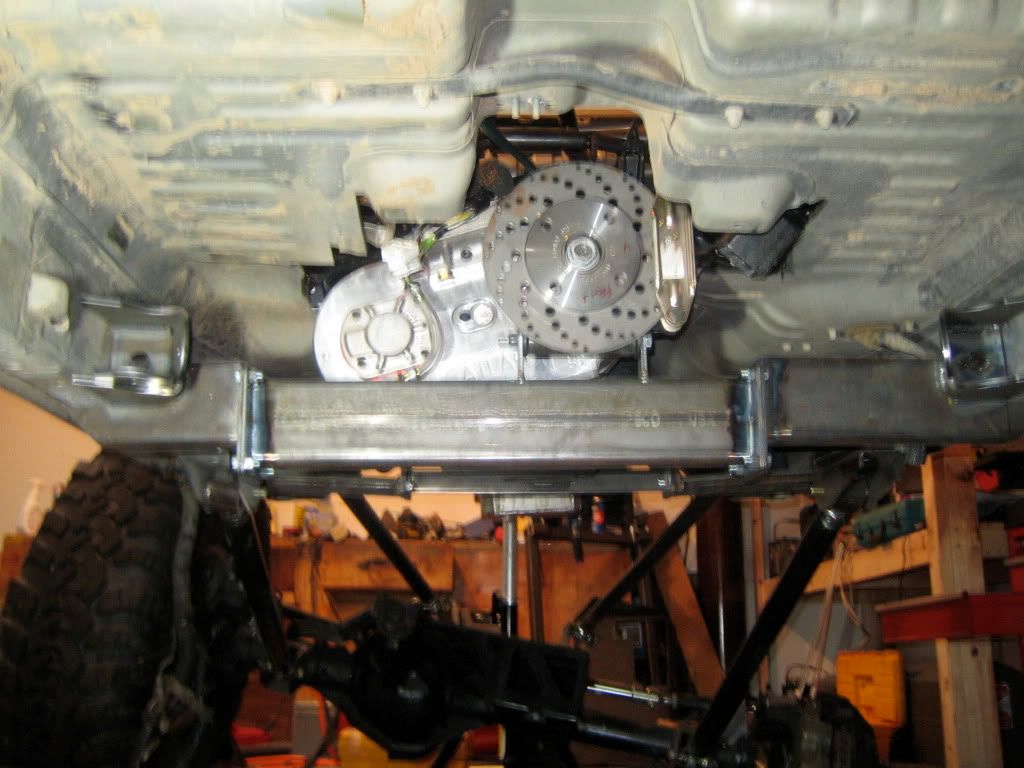
I went a little crazy cutting my floor to fit the Atlas. I decided there is no reason to have a $4k transfer case dragging over the rocks so my floor is cheaper to replace. I've been thinking of doing new seats anyway (safety issue with the cage) so I really had no good reason not to. The 2x4 tube is the start of the Atlas support/4 link crossmember.
-
About due for a new update....right???

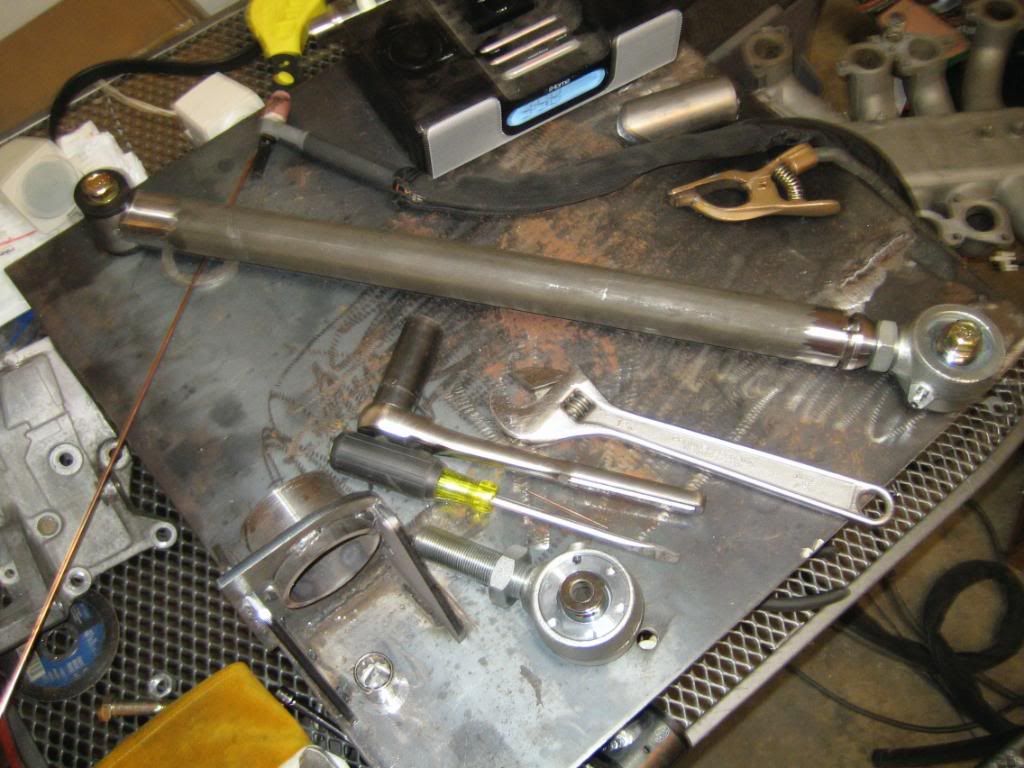
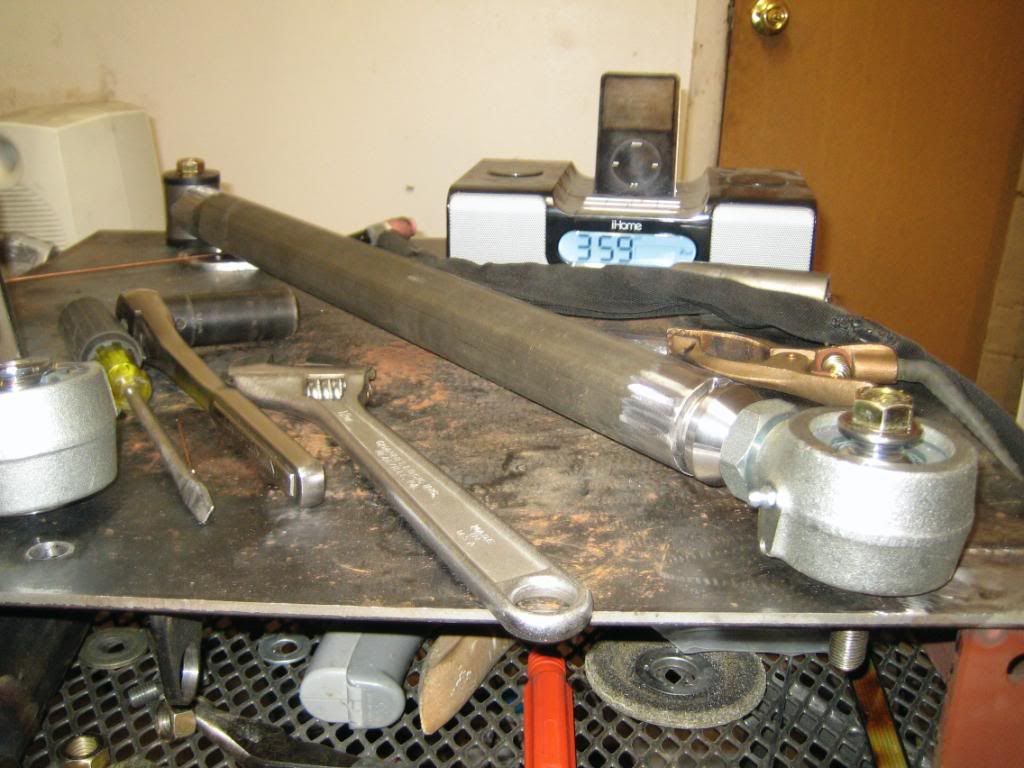
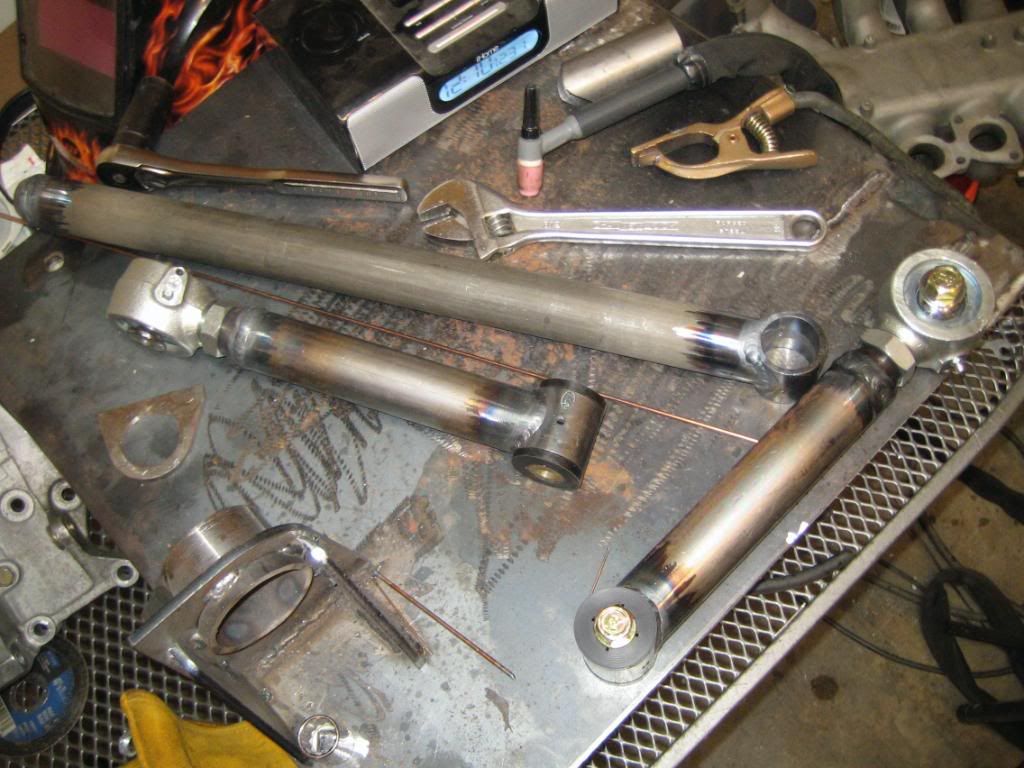
I'm almost finished with the first set of HD suspension links. I had Ballistic fabrication make custom joints for this application (my favorite flex joints on the market) and they came out great. The body of the joint is forged 4140 and I had them made with a large 1.0" shank. They should last for a very long time (they can be tightened and greased) but they're fully rebuildable for about $15 a joint if they wear out years down the road. The length is adjustable from stock to about 2 inches longer for those that are lifted and want to re-center the axle in the wheel well. With big tires one of the first places they hit in the rear is the front side of the fender right under the rear door. These can fix that issue.
 The links with bushings on both ends won't be adjustable length wise (unless requested) since the bushings don't use a shank. I can put in an adjuster but for the $$$ you can go with flex joints.
 The other side of the links uses a grease-able (complete with zerk fitting!) poly bushing with a zinc coated sleeve for corrosion resistance. I can build these links with flex joints on both ends, bushings on both ends, or one of each like these shown in the pictures. If you aren't sure what you want, talk to me and I'll give you my best advice on which route to go.
The uppers are 1.75x.120" DOM and the lowers are 1.75x.250" DOM. Much stronger than stock. I'm TIG welding all of them.
There are TWO minor modifications that need to be done to install these. One involves grinding a small tab off the inside of the two lower link mounts. This can be done with an angle grinder or a dremel in a matter of minutes.
The second modification requires bending the flange on the gas tank (that contacts the stock arms after longer shocks are added!) out of the way since these links are made of larger tube than stock. This can be done with vise grips in a few seconds.
These are much easier to install than poly bushings since you have complete links ready to go! I will ship them complete with bushings pressed in, lengths adjusted, greased, and ready to bolt in. No need to pull the stock links out one at a time, torch the bushings out, and press new ones in. I'll do all the hard work for you.
I can sell a set with poly bushings installed on both ends for the same price or cheaper than Nissan OEM links (if you were to buy 4 complete links from a dealer). The price with flex joints will be a little bit more.
Any feedback is appreciated! Likes, dislikes, and suggestions are all welcome.
-
My guess would be the lower balljoint.
-
Dean...I just went through my parts stash and I'm afraid I probably got rid of the fans too.
 I even had 2 of them since the one on the VH was identical! Sorry for getting your hopes up!!!
 -
Dean I will go look on my lunch break. I'm 99% sure I don't have any of the factory fan shroud. I broke the lower portion a few years ago and probably got rid of it. I take it yours must be broken too if you're looking for a new one!
For some reason I am thinking I still have the fan and clutch assembly. I'll run over on my lunch break and check for you in a few minutes. Send me your address just in case I find it and I'll send it out today so you can have it by Friday.
Tyler
-
I bet I've got my old one laying around if you want another OEM part. $20 + shipping and it's yours! (If I can find it)
-
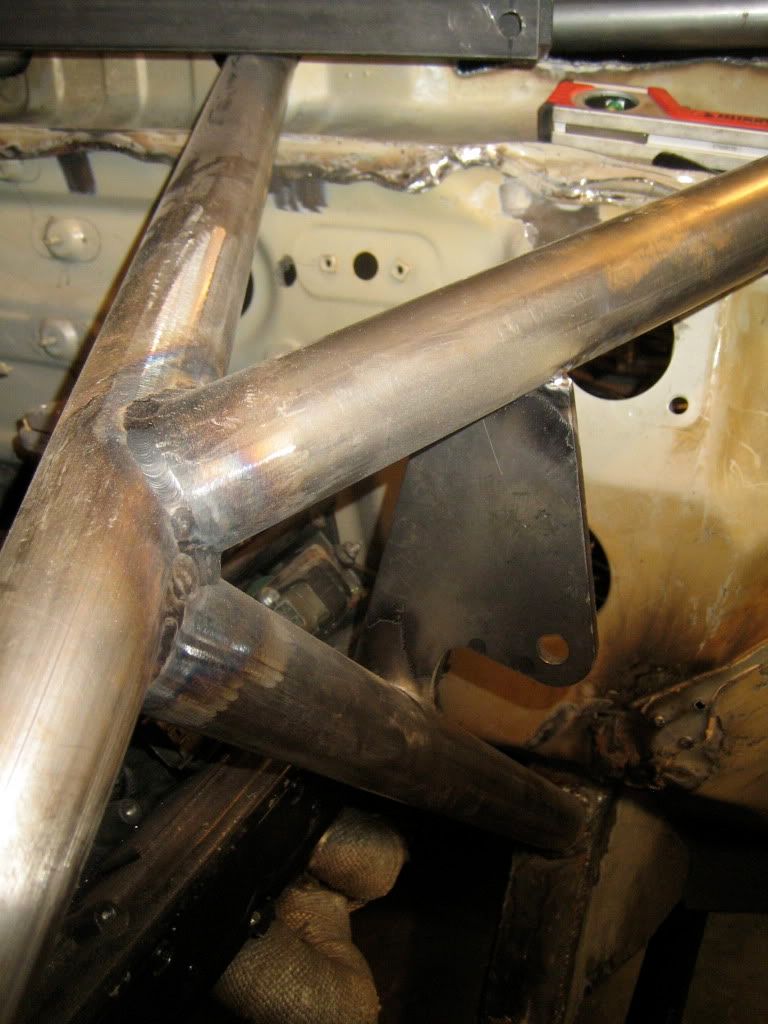
I appreciate all the positive comments! It's far from finished but it's nice to finally start putting it back together.
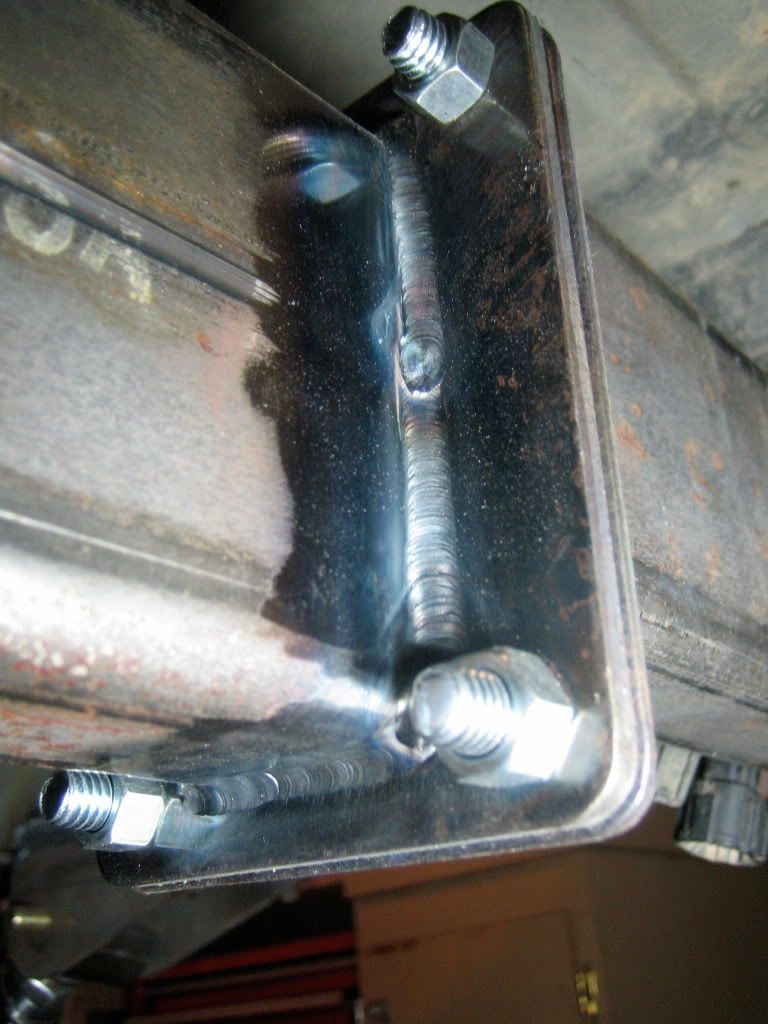
I think the only weld you can really see in the pictures is one that I did with my TIG. I'm starting to get the hang of it after a year and really do prefer to use it when I can. I am FAR from a good MIG welder...I don't get how anyone can lay down nice looking welds with them! As much as I would love to say that all the welds on the cage look great I'd be lying out my a$$. There are a few that I'm not very proud of but since they're all in very hard to reach spots they aren't very visible either.

I really do hope to be able to drive it on the street when it's finished. It will really come down to whether or not I can still get it insured. I finally bought an F250 a month ago so I can tow it if need be (like when I go to Moab) but I don't want to have to load up a trailer to go to a trail 45 minutes away from my house.
More updates will be posted soon!
-
About time for another update.
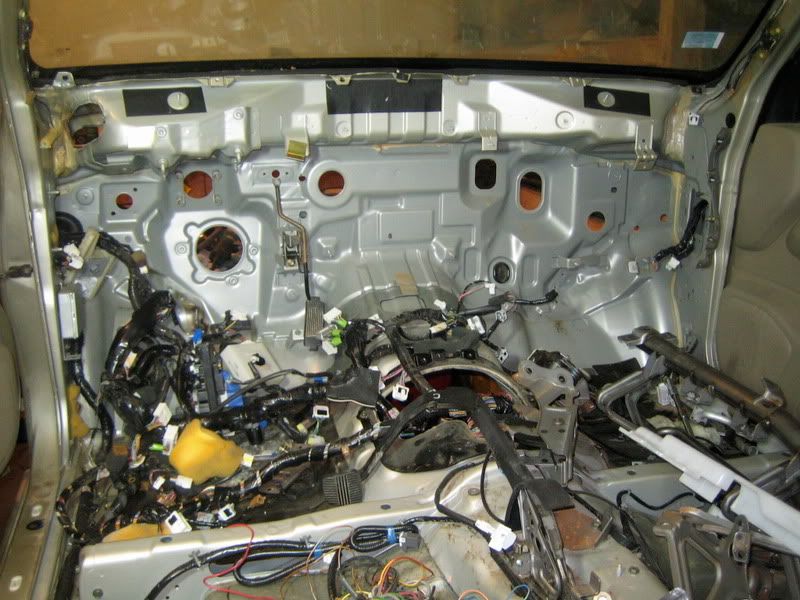
I started working on it again after a few months of it sitting and I'm finally making progress. Seems like I've been taking 2 steps forward and 3 back with every step so it was finally good to start putting things back together. I've almost run out of things to cut off. I ended up cutting the frame rails off from the firewall forward. Why not start fresh...right?
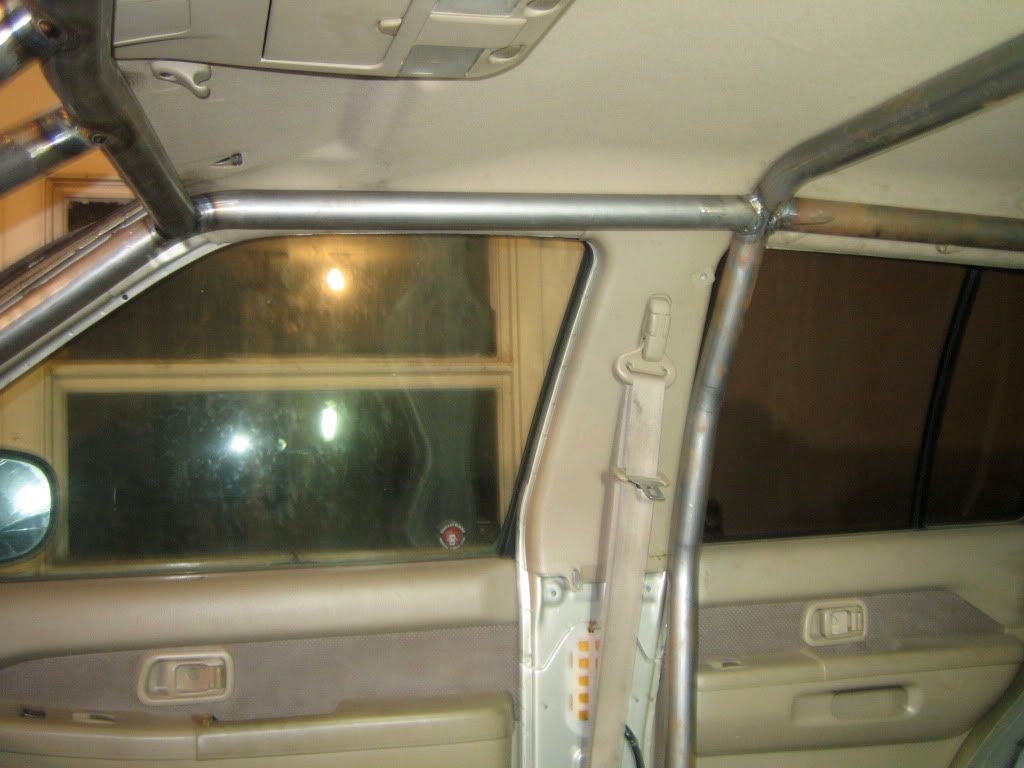
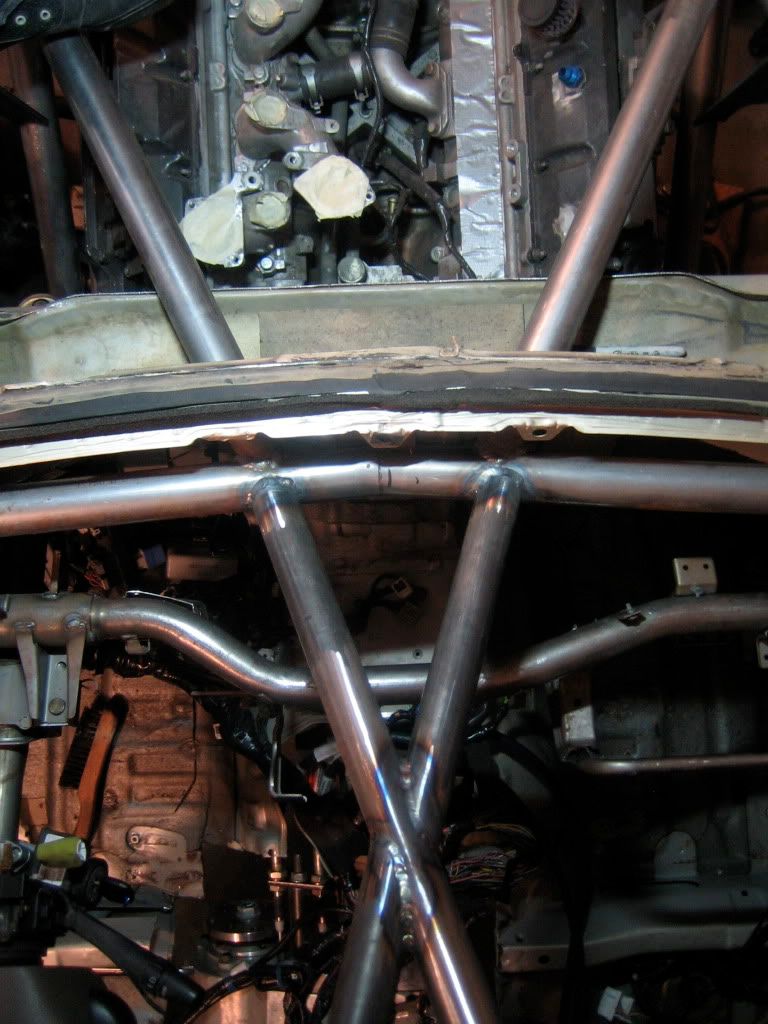
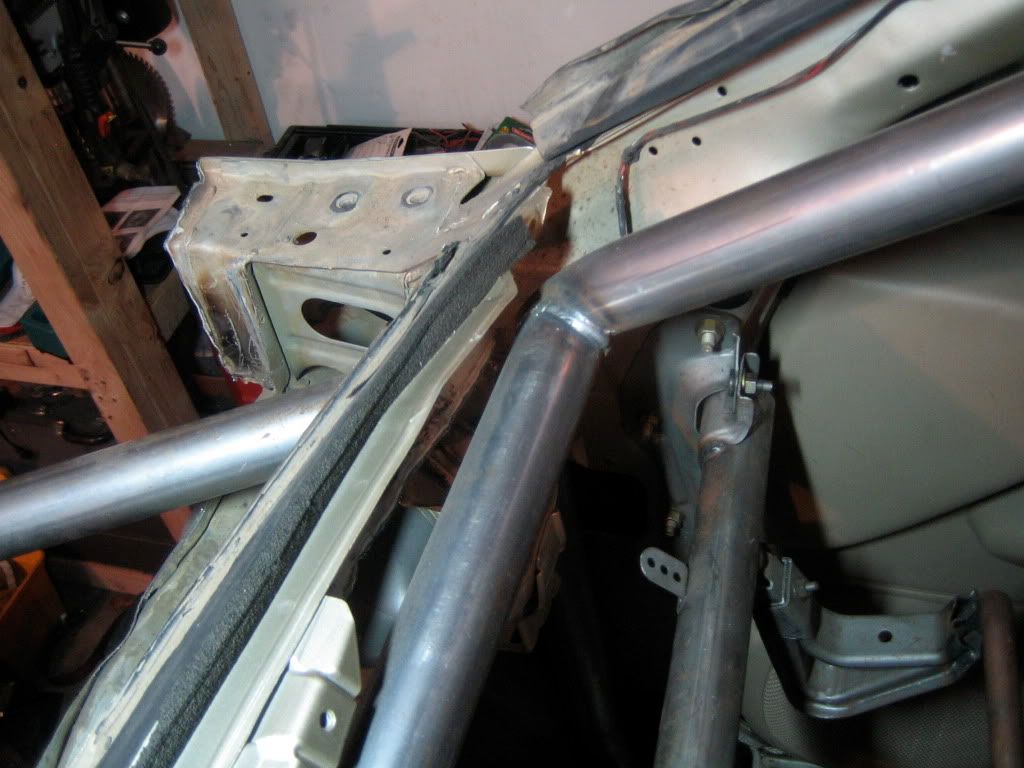
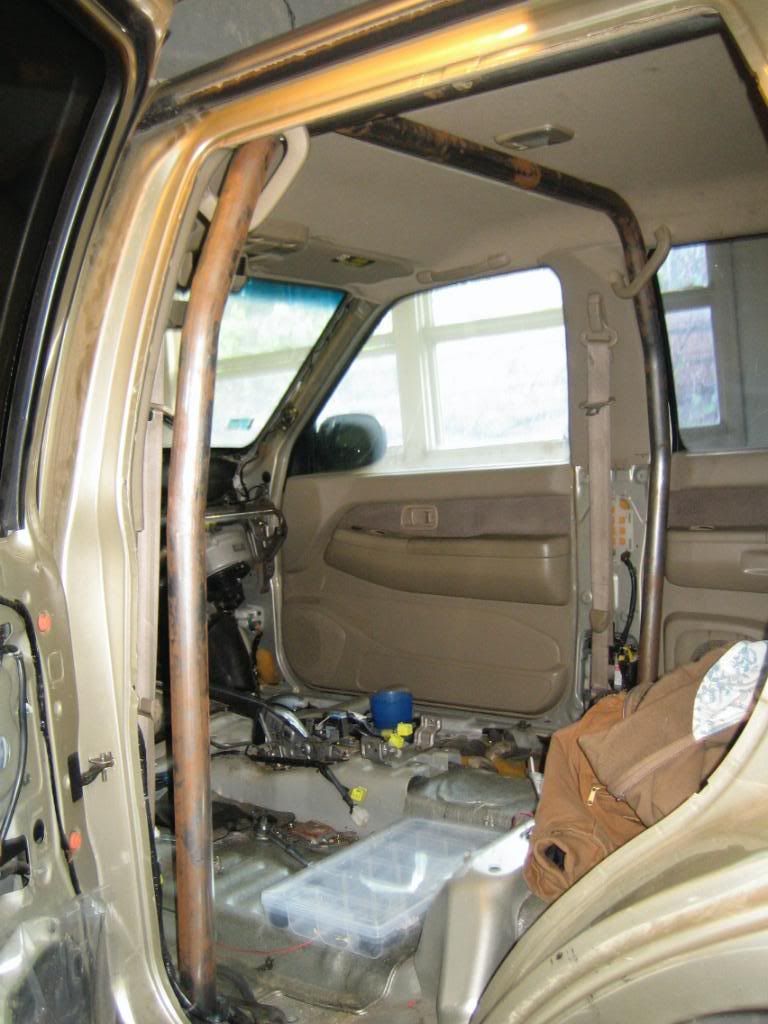
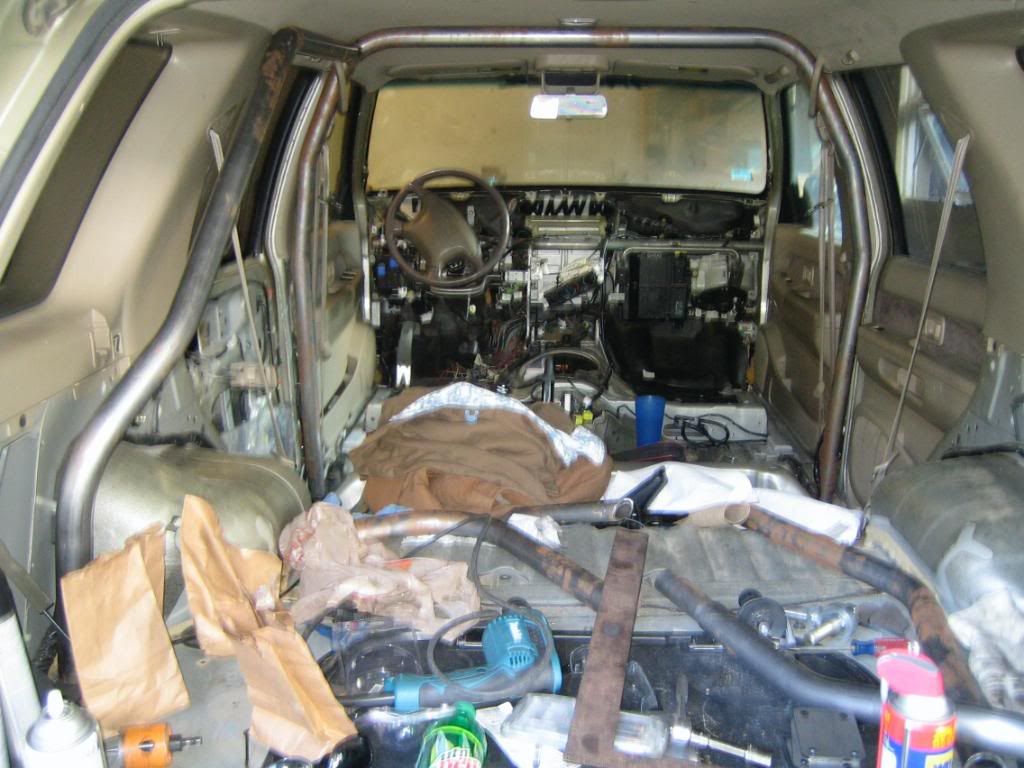
I removed the entire interior, dash, and everything from the firewall to build a cage.
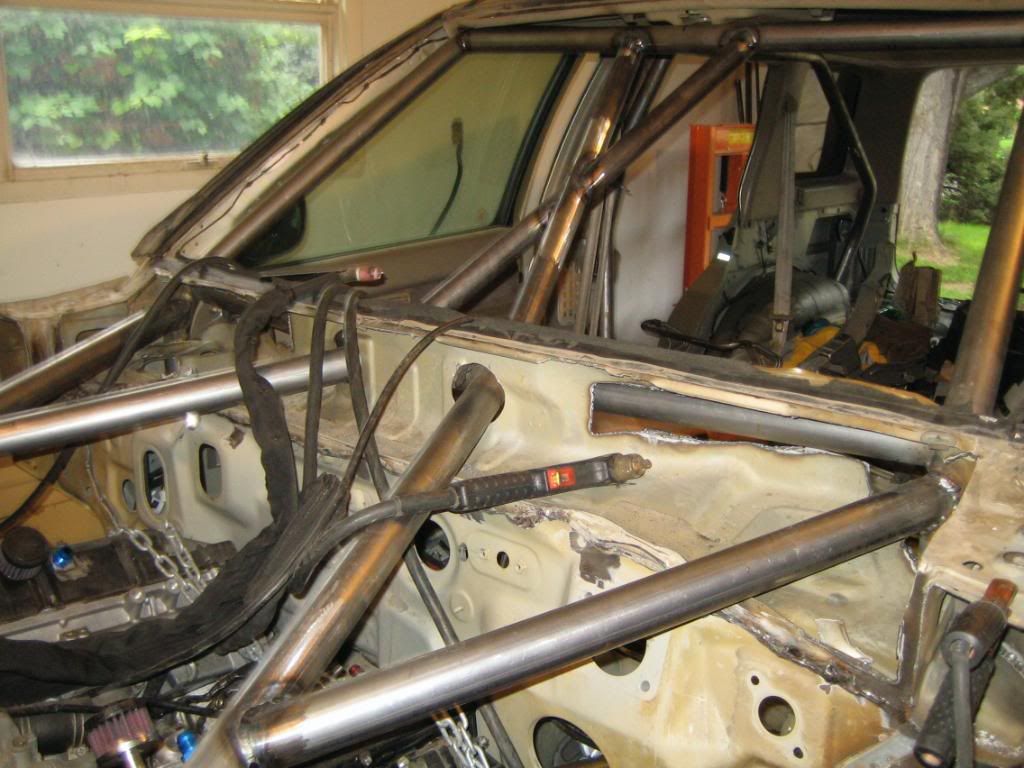
Started off building the main b-pillar hoop a few months back and let it sit so it got a little surface rust. My goal going into this cage was to make a very tight fitting cage that I don't have to worry about hitting my head on. Too many cages I see have bars a few inches from peoples heads and it's not what I wanted. The entire cage has to be pressed into the body of the car to get floor plates under the tubes. I used a socket and a jack to lift the tubes from underneath and hammer a plate in.
I've gained a lot more respect for people who build cages for a living. It's much more difficult and physically demanding than I had ever expected.
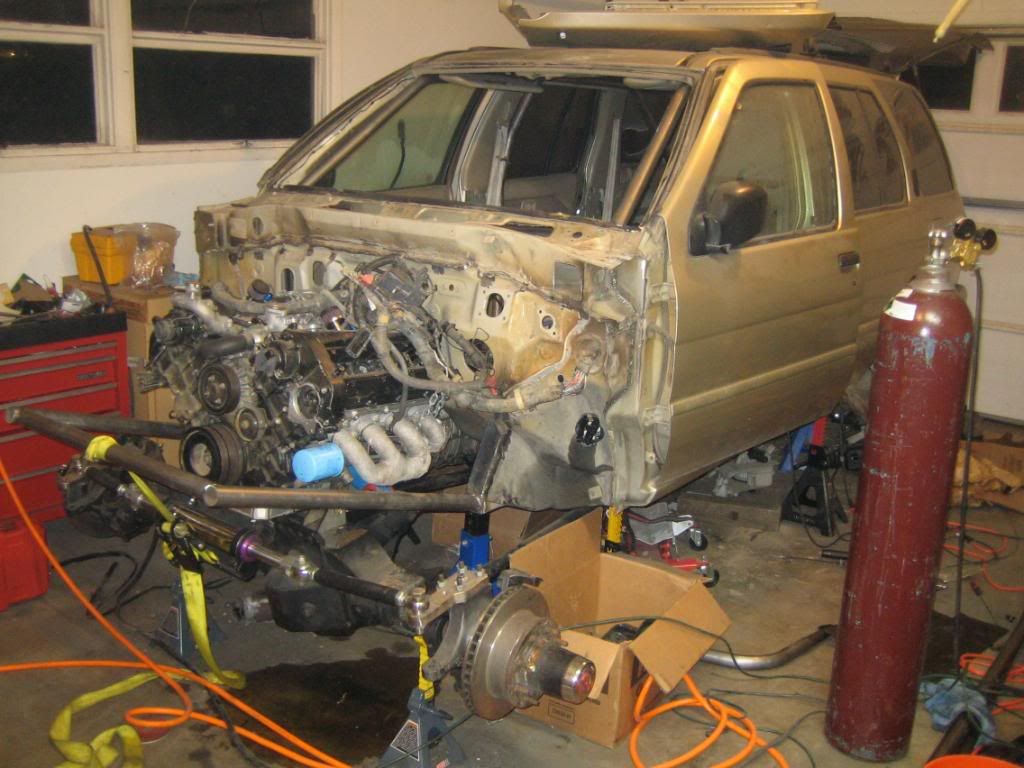
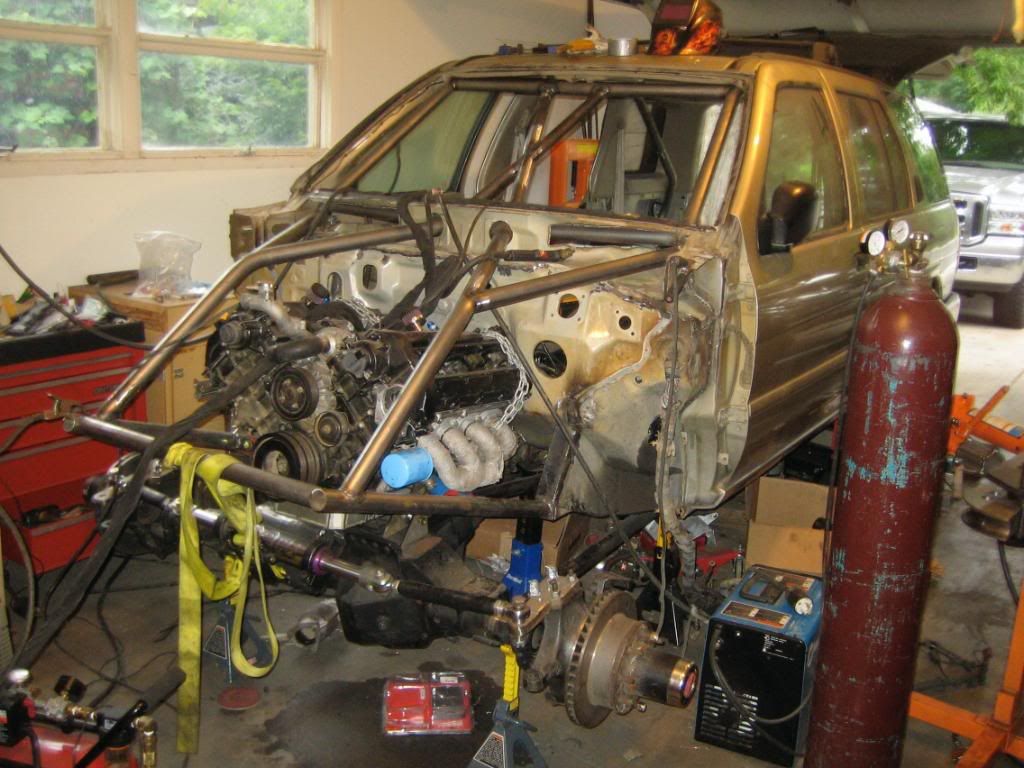
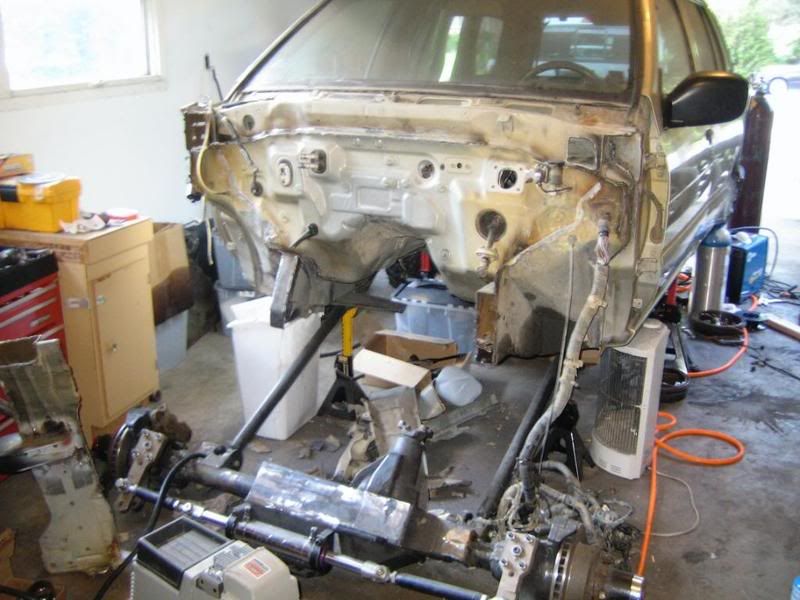
The 3-link with a panhard bar got cut off and I'm almost done with the triangulated 4-link. The front end is close to rolling...just need a few more tubes and and the shock mounts. I'm really hoping to have the entire car as a 'roller' here in the next month or so.
Thanks for looking! (And sorry to the folks that I've blown off lately! I've been a little selfish lately and I've been working on this non-stop. I'll be getting back to people soon).
-
 1
1
-
VH45 Swap & SAS Update (Merged Threads)
in Solid Axle Swaps, Hardcore Custom Fab
Posted · Edited by tmorgan4
Thanks for the bump! I didn't realize that the last pictures I posted were so old. A lot has changed since then! The plan is to make it look stock....well.....as stock as possible. I've already got the stock fenders and hood bolted up and it looks GREAT.
No pictures right now because my garage is a mess but I finally have a rear axle. I trussed and rebuilt a 14 bolt and it's in place with a dual triangulated 4-link. Been working on rear shock mounts (practically the rear half of the cage) for past couple days. I have cut out the driver's side wheel well and I'm dreading the sheetmetal work ahead. I have a second set of ORI "struts" on order so I want to be able to bolt them up when they arrive in a few weeks!!!
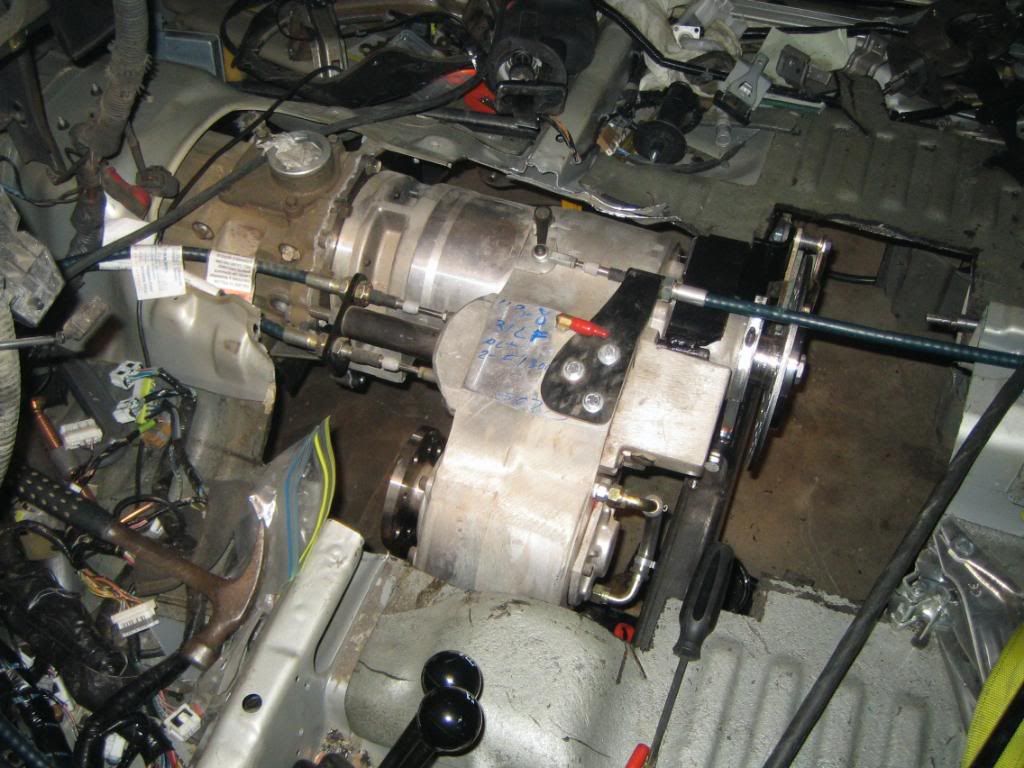
Recently I've gotten a lot of little stuff finished that I've been dreading. Both headers have V-band flanges welded on, power steering pump bracket is finished, orbital steering valve is connected to the factory steering column under the dash, and a few more bars have been added to the cage.
I'm having a dilemma as to whether I'm going to have rear seats or not. I was planning on it but I just put the rear seat back in and my head (I'm 6'0") is too close to the cage for comfort. The last thing I want to do is knock one of my friends out when we're trying to have fun four wheeling.
A lot of thinking has been put into the front end as well. I decided my 22x14 Fluidyne radiator wasn't as big as I'd like and it's easier to fit a bigger radiator now before the front end was built. I got a 31x19 Ron Davis and it's enormous...almost too big. I'm trying to make it fit.
A few more things are getting re-done for about the 5th time (my transmission crossmember) since I really like the way my rear cross member turned out and the current one will lead to a difficult front driveshaft.