
- Sign In Changes: You now need to sign in using the email address associated with your account, combined with your current password. Using your display name and password is no longer supported.
- If you are currently trying to register, are not receiving the validation email, and are using an Outlook, Hotmail or Yahoo domain email address, please change your email address to something other than those (or temporary email providers). These domains are known to have problems delivering emails from the community.
Leaderboard


Popular Content
Showing content with the highest reputation on 12/19/2018 in Posts
-
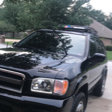
Ok, so I'll get started with the fact I acquired my pathfinder just over a month ago. It's a 1990 SE 5speed with 282,000 miles. It belonged to an elderly couple who lived down the road from me, he passed away last year and she no longer drives. They also had a 1995 King cab 4x4 pickup with a 5speed that I also picked up. It has 170,000 miles both are straight and no rust. That's the great thing about living on the east side, it's dry and no salt on the roads! So back to the reason I'm submitting this. There are no service records on either vehicle and she did'nt know much about them other than he had the oil changed in them regularly and the pathfinder had a water pump put on a couple of years ago. After getting the pathfinder home and cleaning and inspecting it along with doing some quick research about them I knew the first thing I would tackle was the timing belt, tensioner, seals, AC tensioner, water pump, thermostat, hoses, belts, oil and filter change, fuel filter, plugs, wires, rotor and cap. While I was waiting I also replaced the front sway bar bushings and the tension rod bushings with the energy suspension ones. The info I got here and with youtube and Haynes, Chilton the timing belt was straight forward, just took my time and cleaned everything and straightened out some things that the last guy "Fubar'd" some people have no business owning tools!! I had the engine harness all disconnected along the front of the engine after installing the belt and setting the tension I turned the engine over 5 or 6 revolutions then was going to start it. Well guess what crank and crank and nothing, "F---" had the wife come out and turn the key on so I could hear if the fuel pump was running, it was, check all the fuses, pull the relays check all the grounds.So I check everything then take take the dust covers back of pull number 1 plug line up the cams everything is where it should be, WTF so I start putting things back so I could try cranking it again and when I reconnected the 4 plug connections on the harness on the right valve cove I noticed one of the plugs didn't look like it was all the way seated. So I pushed it all the way in and thought H mmmm, put the battery back in hoped in turned the key and it fired right off and runs like a top. So the moral of the story is never give up!! failure is never an option. Oh and changing the plugs, well #6 wasn't as bad as I thought it was going to be, #4 was a dirty mother It started to come out and wouldn't budge! so I used an old lesson I learned working on radial aircraft engines. After I got it all back together and while it was running and I was bleeding the cooling system I let it run till it was good and warm pulled it back into the shop and #4 came out! i used anti seize on all the plugs when I installed then. The plugs I pulled had been there a while. Thanks the Slartibartfast and all the others that have so generous and contributed to this site and shared their knowledge and experience.2 points
-
I decided to go with the 1.5 spacer in the front, then AC springs in the rear with Bilstein 5100’s. I also got camber bolts in the front with manual hubs and a 1/4 spacer in the front because the tires weren’t comfortably fitting in there for me. Then all of that are sitting on some 260/70/17 Rated E Nitto Crosstek’s that I scored for free. Had to do a tiny amount of replacement fitting for the splash guard but took about 5 minutes. I think it looks awesome in real life!2 points
-
Dual swing out tire carrier is done. I thought about building a full bumper but wanted to keep the factory look of the vehicle as much as possible. I have to figure out what to do to pretty-up the hinge holes in the bumper plastic, but other than that it is done. The latch I had to order from Amazon, works perfectly. I used an axle shaft off my old Pathfinder as the wheel mount. I don't care for the look but I like the nostalgia and it is hidden when the tire is attached. These are the best hinges I have found. Double shear, nice bearings and have the nice lockout feature when open. I didn't get a rear facing shot, but I did get a side shot. I can still use the review mirror and see out of the back due to the tire being offset on the passenger side. The driver side swing-out is going to get some rotopax cans and other goodies when I can afford it. The next items on the to-do list are: -Pull transmission/tcase and drop subframe for oilpan gasket/rear seal/oil soaked clutch <- this is going to be the SUCK...maybe over xmas holidays. -Fix the rear passenger fender extender -Build slid out for fridge -Build sleeping area in the back and storage area -Lights Lights and more lights, need lights For the future: I want to go back to having an off-road trailer and I am going one of two ways: Go all out and build a sleep in (tear drop style) trailer that weighs less than 2500lbs or build a roof top tent trailer that weighs less than 1000lbs. I am leaning towards the tear-drop style sleep in with a spot for the roof top tent on top. This sounds like a good excuse to become proficient at aluminum welding. The rooftop tent weights 125, tires and wheels about 180, axle about 45 , and at least 15 gallons of water 120 so that is a start off weight of 485.2 points
-
Very nice! I just love the black ones !..1 point
-
Wow it looks better than I thought it would!1 point