- Sign In Changes: You now need to sign in using the email address associated with your account, combined with your current password. Using your display name and password is no longer supported.
- If you are currently trying to register, are not receiving the validation email, and are using an Outlook, Hotmail or Yahoo domain email address, please change your email address to something other than those (or temporary email providers). These domains are known to have problems delivering emails from the community.

roy
-
Posts
41 -
Joined
-
Last visited
-
Days Won
1
Content Type
Profiles
Forums
Calendar
Everything posted by roy
-
That was completely city driving. Bet i get better mileage on long cruises.
-
Two Tone Silver Blue, Malaysia.
-
And so i calculated the gas mileage i'm getting. Running all these mods & 33's. 60.87 Liters got me 306KM. That translates to: 14.2 MPG @ 5KM/L Roy.
-
Will get the figures over the weekend ya!
-
You got that right. Its simplicity at its best. Room for tweaking. Even enough room to run a turbo at the right boost pressure. Petrol consumption is good too. Especially considering i'm running 33's. No figures yet. But i can do it over this weekend. But i know for sure the consumption is far better before the mods & power tweaks.
-
The power of the Z24 is nothing to shout about in terms of top speed. But its a very torquey engine. You can climb the steepest hill with just a little bit of throttle without the need of ramming/flooring it. The carburetor has never given me any problems thus far. I guess its about proper servicing & how you handle your right foot on the gas. Many of the Malaysian Pathfinders (Terrano) have been converted to Nissan's SR engine variant. SR20 DET as an example. While these will fly high on the freeways, it will be useless during offroad as u have to rev it very high to get the torque produced by the Z24. But the Z24, if tweaked & tuned well, is more than sufficient.
-
Thanks! Project took about 7 months. Uses torsion bars upfront. & yes, the coils are on the rears. Those bighorns are amazingly quiet with superior qrip on dry & moderate conditions but on wet surface, i surely take it easy. But in mud, it performs well. The studs allow the mud to somewhat self clean so u have thread, not mud stuck in it.
-
As you can see in the photos, many different wheels with various offset were tried to achieve the right setup & look. & The DBA rotors didnt work as they were too large.
-
-
-
-
-
-
-
-
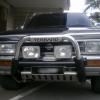
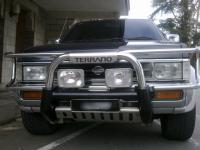
Hi guys. When i started this project, i wanted to document each step with photos in this forum, but upon realising that it has no self upload feature & that i have to upload in an image sharing site, & paste the url.. I always skipped it. Anyway, ive decided that this is worth sharing, & i finally sat down to do it. Details of the project: 1. Snorkel Kit 2. Superpro Bushes All Round 3. New Original Body Bushes All Round (Courtesy of Alkorahil) 4. 4" Body Lift 5. 15x10 33's on Lighweight Alloys 6. MSD Coil 7. Bluefire Sparky Cables 8. Fresh Tranny Oil, Engine Oil, Axle Oil & Transfer Case Oil. 9. New Seals for Engine Oil Pan, Crank Pulley & Tranny. 10. Lightened Crank Pulley 11. 110 Amp Alternator 12. New Belts 13. ProFender Large Strut Absorbers 14. Idle Arm Brace & Panhard Rod Extension 15. Custom Engine Mounts & Gearbox Mounts Made from Steel 16. Air Swirl (Surbo) for Better Air Flow 17. Steel Braided Brake Hoses 18. Ventilated Discs & Overhauled Braking System 19. Anti Roll Bar 20. New 3 Core Radiator 21. New Struts for Rear Glass Hatch & Boot 22.New Radiator Hoses 23. New Ball Joints & Arms All Round 24. New Couplings 25. K&N Air Filter 26. Stainless Steel Screws for Snorkel, Roof Rack & LED Bars 27. Navara Roof Rack 28. White LED Bar on Roof with Custom Bracket 29. Amber LED Bar on Bull Bar 30. New Fan Clutch & Reconditioned Fan Blade 31. New Radiator Expansion Tank 32. Reconditioned Steering Box 33. New Maxxis Bighorn Tires 34. Sunvisor with Vanity Mirrors & Light 35. New Enlarged Exhaust System 36. Powder Coated Brackets & Cargo Hooks 37. New Carpets 38. New Immobilizer, Radio & Siren 39. Rust Proofed Roof 40. New Clutch, Clutch Housing & Bearings 41. New Wheel Bearings 42. PIAA Silicon Wiper Blades 43. Window Visors 44. Body Side Moulding 45. Lamp Guards for Front & Rear 46. TD27 Torsion Bars 47. New Thermostat
-
I guess i have learned to live with this by filling up the tank on regular intervals.. This will go on till my sender unit fails & i have to replace one. Will ensure that i get the right one with fuel level sensor.
-
Thanks to all. I took the advice here & opened up the fuel sending unit. To my amazement, no low fuel warning sensor. Hence, the absence of the wire i was talking about. Guess i have to wait till the sender breaks down to replace it with a unit with sensor. Unless the sensor can be installed seperately. Roy.
-
No, i have not pulled the fuel pump assembly to see the sensor. I was thinking of troubleshooting the wiring first. It would be great if someone knows the colour codes of the wires from the sender. (What colour represents what function). Maybe it did change in '95 onwards. But if so, how do i check if it works? I have driven till the gauge is really low. i.e Below the redline & the light never came on. I dont intend to try this again as i believe driving till the fuel in the tank is so low flushes the gunk & grime up the fuel pump. Can someone confirm that the sensor is tied to the fuel gauge? I find it makes no sense that the low fuel indicator wire has no pin connected to it. How else will the indicator work.
-
Hi guys, Roy here from Malaysia. Nice to find a forum with the WD21's. If there are more forums, do share links with me. Well, i'm having a problem with the low fuel warning indicator. I checked the harness that goes to the instrument cluster & noted that there were 5 wires. I grounded the purple/yellow one & upon turning the ignition, the indicator worked. Then i realised that the harness from the fuel sender unit has only 4 wires. Which one is the low fuel warning indicator? I tried swapping the pins & none made the warning light go off when the vehicle is started. The whitish wire stalled the engine, i assume this is the fuel pump wire. Also, note that there is no pin in the position to connect to the purple/yellow wire that i grounded (on the harness that goes to the instrument cluster) Could this be a manufacturing defect as i never had the fuel warning light before? Please advice guys. Thanks Roy