

Rebel526
-
Posts
68 -
Joined
-
Last visited
Content Type
Profiles
Forums
Calendar
Posts posted by Rebel526
-
-
 Waiting for a reply to this myself
-
Replaced drivers door hinges and bushings. Beat, hammered, cut, and finally got lower ball joint off drivers steering knuckle. Already had it all cleaned up and well greased. Installed the knuckle, rotor/hub assembly, tightened the ball joints and attached the tie rod end. Had to dash to the parts store for a bearing lock nut socket (four prong chevy). Got it home and ground down two of the prongs and shaved the remaining two to fit properly. Torqued the nut, slipped on lock ring.....and realized I was missing the darn little bitty screw for it!!
 Well, I'll get some tomorrow before work or Thursday morning.
 -
Well, I didn't get as far as I wanted to today...Still some good progress though....got one side on the ground


-
Today I will be tightening bolts/nuts all over the front end and bell housing, and installing the cv axles. Hopefully I will have time to assemble the front hubs and install them, and the wheels. I also have to address the exhaust (missing/broken bolts and wrong gaskets where the cross-over bolts on)....
I plan to drain/refill both diffs, tranny, and transfer case before a road test. Unfortunately, that will have to wait till Friday's paycheck

Wish me luck!

-
The one with the hoses, I believe, is the evap/charcoal canister. The other thing is MIA on my 88 Pathy, but I think it's smog related. Dunno if/what can be removed though.....
-
Finally got the Front diff in tonight! WOW, that thing is HEAVY LOL. Probably went about it the hard way
, but the bottom line is...it's IN! Tuesday (my next day off) I'll start double checking and tightening all the bolts and begin to get the CV axles back in  With any luck, I can roll it out of the shop by next weekend and give it a short drive up the street and back
 -
Many thanks to contributors in this thread! I just completed re-wiring my headlights with relays, noticeable difference! I neglected to take before and after pics, but believe me, the difference was clear!
-
Vagabond, that's AWESOME!! Thank you!!


-
Here's where we are....
I swapped out the coolant/block temp sensor, now the eec shows '44', no problems
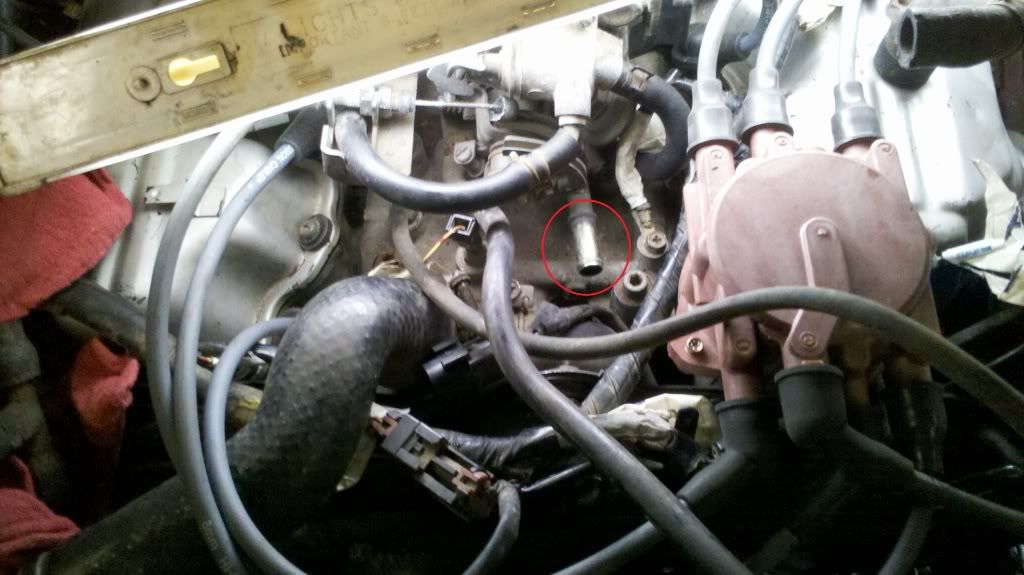
If I block off that large nipple (red circle in above pics) It'll start and run, now idles a little closer to 'normal' (800-1000) after warming up some. At the moment, as you can see in the video link, I just rigged a plug for it. I'll find a more permanent solution to block it if I can't find out where it is supposed to connect to.
I have to finish re-assembling the exhaust, but I'm missing a couple of bolts
and apparently have the wrong flange gasket.I have all new front end parts (ball joints and tie rods) and just waiting on axle shaft bearings to come tomorrow. Once these are in, I can put the front end back together. Then it's just a matter of changing out the fluids in the trans, front & rear diffs, and transfer case....then down the road we go!!
If there's anyone with a VG30E that could take a peak (pics help too
 ) and let me know where that large vacuum nipple should go, or if it's OK to just leave it plugged, please let me know...
 -
-
The one behind the drivers headlight (AIV) that looks like a round canister and actually if I recall correctly has a filter in it should not cause the engine to idle high. I removed all that stuff in the 87 hardbody I had and it ran fine, I believe it was connected to a metal tube that ran up the frame rail from the cat converter and also tied into the port on the drivers side exhaust manifold also.
The one coming off the TB I will have to look in the manual again, I'm sure someone will tell you what it is for before I have a chance to do that, So when you start the engine does it have a high idle and it never comes down? It could be the thermo element is bad, The thermo element contains a wax element inside and is tied into coolant lines, it is designed to push a plunger up against the TB linkage, when cold the wax is solid pushing the TB linkage cam so the idle will be high, as the engine warms up the wax melts causing the plunger to withdraw and letting the idle drop. There is a procedure in the FSM to measure the amount of stroke in the plunger rod to see if it is good or not, but you can usually look at it and tell if it is moving.
Was just thinking, where do you live? have any junkyards around you? you could check out some trucks at the junkyard to see if you can tell where those lines connect to, sometimes it's easier than trying to read the service manual.
Yes, when started, it instantly idles up to 1500-2000 and stays there. I'll look into the thermo element...
Unfortunately, the only 87-90 pathys or HB's I've been able to find in junkyards around here, near Mobile, AL, look to be long-since stripped under the hood

-
Thanks for the welcome
Yeah, washing it made a HUGE difference LOL
-
Thanks
That may help, I'll have to compare it to what's still on the truck an see what's missing & what I have to try to re-route/bypass. Here's what I'm having some issues with:
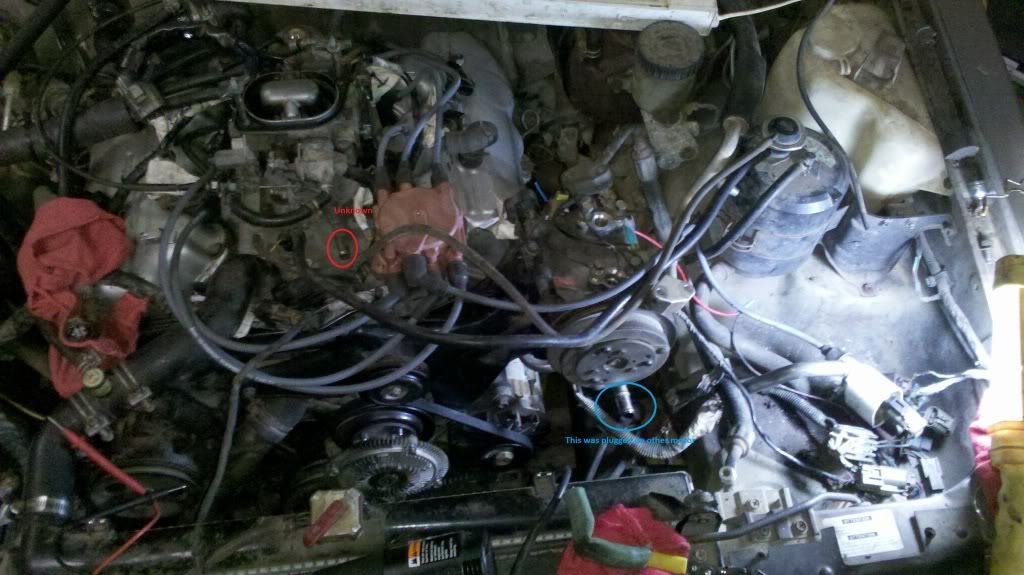
This one REALLY has me stumped:
As you can see in the first pic, the smog device that would normally sit behind the drivers headlight is MIA. Also, there are two small, metal vac nipples below and at the rear of the TB that I can not determine where they should connect to....Believe it or not, the motor will start up and run, though at a VERY high idle, like 1500-2000 rpm. I still have to connect the exhaust pipes to the manifolds, so I've not let it run for long. Also, the ecc is showing coolant temp sensor, so I will be replacing that as well...
-
Thanks
I have a digital copy for an 89 d21, it's very close, but it doesn't have a good vacuum layout
You Rock!
I'm about to head to work, so I'll have to wait till tonight to check it out.
Thank you SO VERY MUCH!
-
Welcome to NPORA, Some trucks have a vacuum line layout under the hood. Best bet for you would be to try and find a FSM from e-bay, they didn't go digital until 1994. I have the FSM for a 87 hardbody and can scan parts if you need them.
Thanks
I have a digital copy for an 89 d21, it's very close, but it doesn't have a good vacuum layout
-
Hello all!
I have an '87 Pathy that I am working to bring back to life. Got it for a song, but it needed a lot of work. So far I have swapped a running motor for a blown one (both VG30i). While I had the motor out I had to take care of a rusted out drivers floor pan.
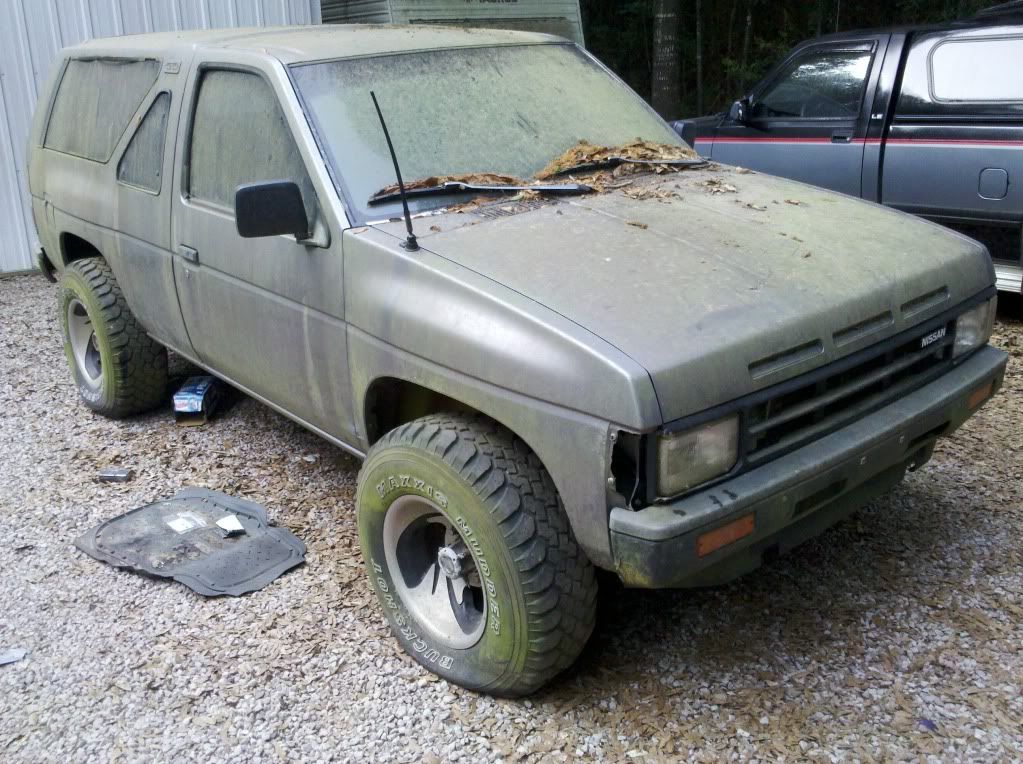
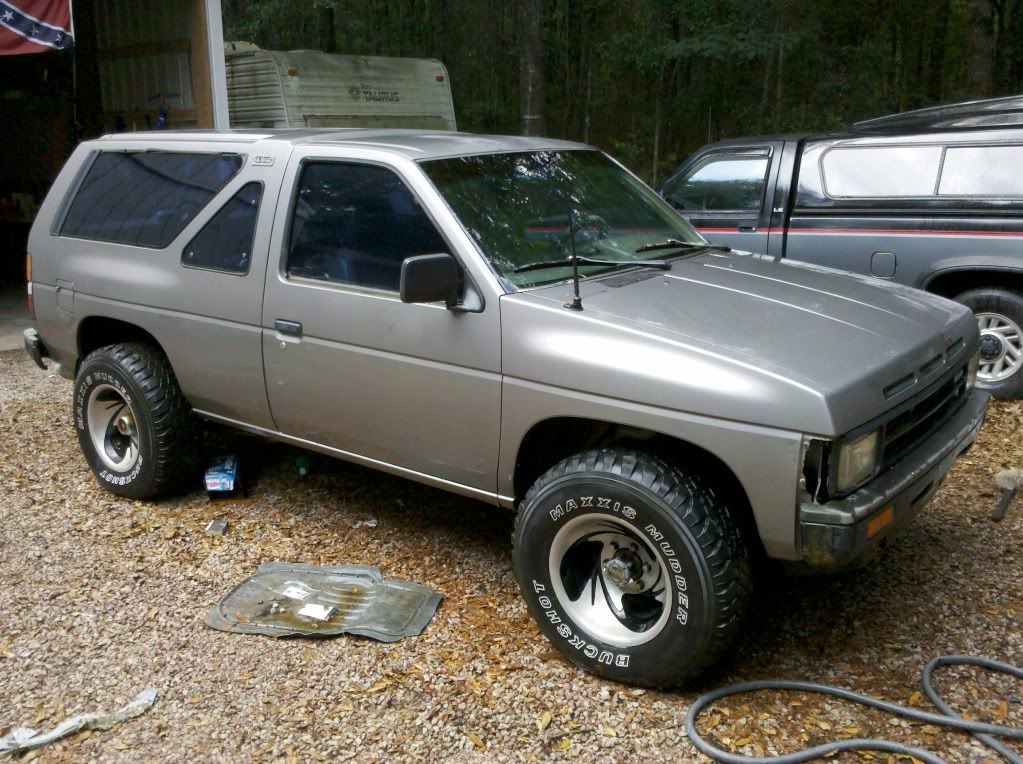
This poor thing had been sitting for 6 years in a guys yard, so, as you can imagine it was not very impressive when it was dropped off in my yard, LOL. In fact, it was GREEN...but after a good wash, I discovered it's true color is silver!
From this:
To this:
Currently, I have the 'new' motor running, though it's running at a VERY high idle, like 1500-2000. I know the vacuum lines aren't right and could use a good vacuum line layout if anyone has one
-
Hey maddoc..
I have an 87 Pathy too! I just had to swap the motor in it and having some issues with vacuum hoses. My Pathy had been sitting for 6 years with a blown motor. The previous owner had started to take things apart to do a swap and then stopped. Basically, I have no way of knowing where all the lines should be. Also, it look like some of the emission parts were removed/bypassed, so that makes it even MORE difficult. I have hunted and hunted and can not find a readable/decent vacuum routing diagram.
Is there any way you could take a few pics of the vacuum routing on yours? One of the main one's I'm missing is the BIG vacuum nipple in front of the TB, facing straight out. Also, there are two small ones on the back of the TB that are not connected to anything....
Thanks in advance!
Entering the home stretch....
in 86.5-89 WD21 Pathfinders
Posted
...Sometimes I feel like it's fighting back!! Got passenger front hub completed and assembled but decided to check brake pedal before I mounted the wheel....glad I did...Master Cylinder is toast! So...ordered a reman. Should have seen all the goo in the MC, YUCK! Started flushing the brake lines....MC should be in tomorrow.