
DCgabel
-
Posts
96 -
Joined
-
Last visited
Content Type
Profiles
Forums
Calendar
Posts posted by DCgabel
-
-
Hello Fellow Npora members,
I have a manual vg33e engine in a 96 R50 that has a significant leak from the oil pans. Now, i know that you can simply buy the gaskets online and replace them but what about the lower pan? I have it leaking out of there too. I was thinking of taking it all apart and just rtv-ing it all back nicely but im just fishing for ideas and what other people have done. Thanks!
-
Those do look good. i managed to make my own for under $100 cdn. A chop saw and welder handy of course.
-
 1
1
-
-
Yes, pictures would potentially help. Check out my thread it may help.
http://www.nissanpathfinders.net/forum/topic/31251-sub-frame-drop/ -
bolts are rusted round. im looking into a full removal and replacement.
 Cant get around it anymore. Cursed canadian winter and the salt they use on the roads.
 -
Maybe this was already covered, but I didnt see it, on Iron Rock Off Road website there is two listing for WJ Coil Springs. One is for the Front pair and one is for the rear pair, now I'm assuming we would need the 3 inch "REAR" WJ Coil Springs for our rear with a 4inch SFD only (not 6 inch total using the AC Lift Coils) I just wanted to make sure I knew the correct ones to look at. Thanks sorry for the "dumb" question.
Yup you got it,
-
about then cambel no problems with that?
You will need to bump the camber out a bit. I just got a full alignment after i was done to be safe just so i didn't potentially make a mistake if i did it myslef.
-
? You didn't want to lift higher because you would have to replace more parts and trim wheel wells? I don't get it. You would be making MORE clearance in the wheel wells if you added a spring lift on top of this.
And more parts to replace? Do you mean Camber alignment bolts and manual hubs?
Or were you really speaking about what you would have to do to go with even larger TIRES?
Just making sure I understand what you were referring to.
The higher you lift the closer the drive shaft will bring the rear tires to the inner rear rocker it will rub if you go to high so you will need to re work the rear to make it work. Plus if i went any higher i would need to do a lot of replacing in the front because the a arms can only go so high when dropping the sub-frame. If you go to high you bind the CV axles.
i have 32" tires on mine right now so i guess it would depend on the size of tire you have on your pathy.
Hope i can clear that up for you. Anymore questions just let me know!
-
Yes, your A arm angle is extreme. And one other possibility is that at full droop your suspension arm goes so low as to bind your CV axles. Do that while moving and they would immediately break. (I'm not sure about that, but it's a possibility you should check in to).
You won't be able to make your camber alignment with 5 inches of lift either without the help of some custom fabrication in the area of the lower strut mount I would think.
If you drop the sub-frame 2.5 inches, you will then have a 2.5 inch suspension lift. That might work out OK. You would be on the edge of obtainable camber angle, but with 2 sets of camber adjustment bolts per side or camber bolts plus some enlarging/relieving of the top strut hole you can probably obtain that.
Not sure of the accuracy of all that I just said, so I would appreciate a second opinion.
Put it this way, you can bind a little depends how much of a risk you want to take, i personally would not but its possible to get away with a little just might eat through boots. Doin some custom work might be in your favor.
Regardless of how much you drop the sub-frame you will need to match that space in the struts either by a bigger spring or a spacer.
But ya if your going with a lift any higher at that point considering a solid front axle swap would not be a bad thought.
-
I was going to ask if you were considering the front spring lift to get a couple more inches, but you would have to get new WJ springs or life with the rake.
i did consider it at the time but i like the height at which it sits right now. Its definitely no crawler but i wasn't trying to go for that. i just like that mild lifted look.
But to answer your question ya, i would have to re-work the rear suspension to level it out again if i installed front lift springs.
-
awesome awesome, thanks guys.
-
So while doing a bit of work to the pathy i found that my oil pan seal has seen better days, SO! i know i could go to the dealership and fork out lots of green for a new one but i was hoping maybe someone knew an online source i could potentially purchase a new one from. its a vg33e on a manual trans.
-
I figured it would be in that but i dont have one, is it possible to get one in PDF? Because that would be conveniently awesome.
-
I'm curious as to how you got the cuts right for the strut tower spacers... The engine blocks and what not are pretty straight forward but the strut spacers are what are holding me back from making my own kit. I can't afford 800$ right now...
Did you weld or just bolt in your subframe and engine blocks?
I used the welded on ones because they were cheaper and i have my own welder.
As for the strut spacers, i knew a guy who took the time to figure out all the angles and made his own. i think he has a thread on NPORA with all the drawings he made for them but im not sure you'd have to look.
-
1
-
-
my think is looking at the wj coils the pigtails are the same top to bottom and when u cut them they fit in the stock isolator so my thing is if u wj lift springs and cut both pigtails off i think they would fit without the adapter just an observation from looking at my setup
You got it. The pig tail at the top did have to be cut off to fit around the coil isolator on the top. And you could cut both pig tails off so they would fit without the adapter but them the 3" would be to shallow and it would have a mad sag in the back, so i guess in theory if you get a spring that could compensate for the amount of coil you would be cutting off then yes it could work. I just used the adapters so i didn't have to mess around with measuring and finding a coil that would work.
I apologize for the lack of info on the rear part of the lift, ive currently been tired up with doing a full engine restore so ive been scarce online.
-
Just wondering the torque specs for the rocker arm bolts on my vg33e. If anyone knows i would love to know, thanks!
-
Do you know where i could find torque specs? i cant find any in the FSW.
-
I have one. Just making sure. Thanks!
-
(1996 Pathfinder LE 3.3l VG33E)
Hello, Just because I'm not a mechanic and everything I've done so far is by teaching myself or from learning from mechanics, i have a question since i'm tackling the task of a full engine rebuild and i'm at the point where I'm putting everything back together now that all the crucial parts have been replaced.
I have the valves heads all back together and I'm at the point where i am ready to bolt the head back down to the block. Is there anything i should be doing to keep everything in order to not mess up my timing? Any input would be appreciated. Thanks!
-
A little update.
So just a heads up to those doing this same job.
Do your best not to miss this bolt. Its on the passenger side head around the back. Its pretty difficult to see.
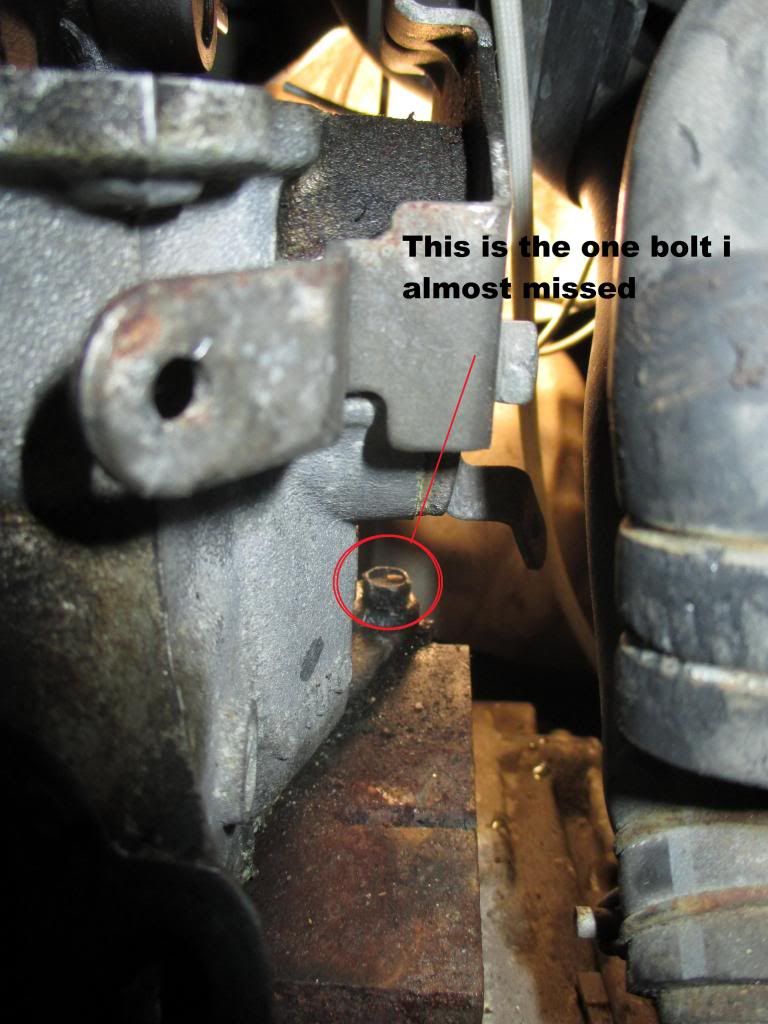
Another if you look at the first page of this forum you'll see the driver side head of my engine. When i took the valve cover off my passenger side i hummed and hawed as to whether i should just take it all apart, clean and replace because it was much dirtier than my driver side. So, i decided to go ahead and take it all apart and clean it since my gasket kit came with new valve stem seals anyway.
-
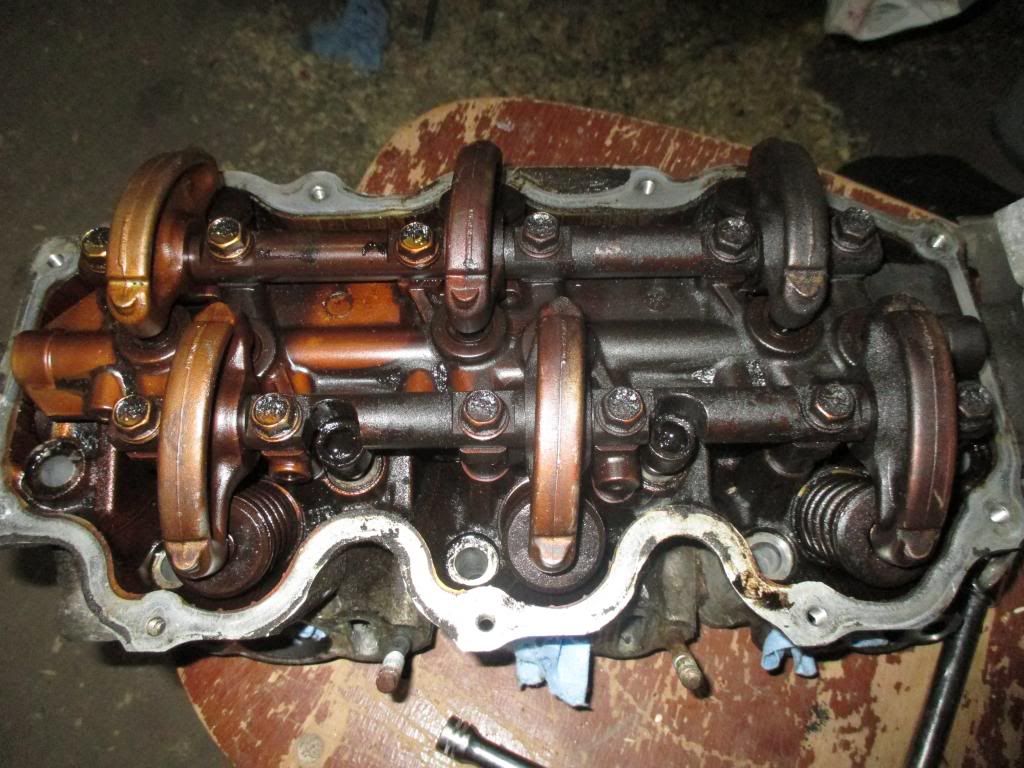
So far so good. so Ive gone a little deeper and decided to redo all the valves too figured why not since I'm here anyways. And just a thought on that. should i be replacing the rocker arm rail bolts? Just curious, would be hating myself if they needed to be replaced after doing all this horse @!*%ack to the engine. Thanks for all the help! Ill have more pictures up tonight on my progress time/motivation permitting.
-
Heads are all off and everything is cleaned up nicely. As for putting the new gasket on should i be doing more than cleaning the surface and putting the new HG on or should i be spraying on copper gasket spray on the new gasket before installing.
-
x2
thats my usual solution...
Nope not really unless they r not rusted badly. mine where right through so water was getting inside my door which is not ideal so replacing was the route that i took unless you have a mechanical engineer friend that can machine or cnc you custom made ones.. my mech eng friend told me that after i bought and install my new ones. Oh well, lesson learned on being hastey.
-
So an update,
I got all my seals and gaskets in the mail finally yesterday so im back at it. All the head bolts are out but the two inner top ones on the passenger side which r caught under the rocker arm rail, they r lose but i cant take them out without remove the rod rail which i dont really want to do just yet. I am trying to take the valve head off the block but its on there nice and firm. Anyone know if i should be tapping it with a sand shot to work it off or is there more because im able to lift the front of the head up but the back seems to be on there pretty good. should i just keep working it out or is there more? the two bolts r not holding it on because they r lose and i can move them up and down when im trying to take the valve head off.
On another thought whats better steel or graphite head gaskets. ive heard good and bad about both cant make up my mind. The kit came with graphite.
-
You have to put oil on the head bolts when they're being installed and even better if you run a tap down the threads to get all the debris out, which there's usually quite a bit. You want the least resistance to get tge truest torque reading. VG33 head bolts are torque to yield so its best to replace them. The torque specifications for the VG33 is also asinine! Tried and true way is to just torque them like a VG30. 22, 43, 47 ft/lbs following the pattern.
Torque to yield. thats what i meant not (shear) shear would be bad. Thanks for the torque specs!
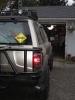
Oil Leaks. R50 (1996)
in 96-2004 R50 Pathfinders
Posted
I just replaced the whole works. Took the old pan off replaced with a new one with new screws. Scraped the old sealant off put new on and replaced the front and rear seals. All in all, new cost totaled approx. $298 CDN. Thats for a new Oil pan both seals and all new bolts. Little pricey but i wanted it done. I found one off a wreckers for $80 but id have to buy new bolts and seals anyways and the pan wasn't the best condition anyways