- Sign In Changes: You now need to sign in using the email address associated with your account, combined with your current password. Using your display name and password is no longer supported.
- If you are currently trying to register, are not receiving the validation email, and are using an Outlook, Hotmail or Yahoo domain email address, please change your email address to something other than those (or temporary email providers). These domains are known to have problems delivering emails from the community.

sumguy67
-
Posts
94 -
Joined
-
Last visited
sumguy67's Achievements
NPORA Regular (2/5)
-1
Reputation
-
This project is still moving forward. Had the option of staying home this summer and working on the truck or spending the summer in the Okanogan valley. Guess which I chose?? HA! I'm glad I did... a LOT of off road vehicles out there. Many are daily drivers for these guys. I've never seen so many lifted trucks.
-
Ya, I had a pretty bad rear frame too. So I cut everything past the rear suspension out and I'm building my own rear frame. It will allow me to raise the rear mounts (no spacers) and raise the fuel tank along with the body 3". Just for safety I'm reinforcing the entire frame around the rear suspension and body mounts. the front portion of the frame doesn't look too bad.
-
I wouldn't worry too much about making them robust with gussets and extra weld. You may warp your frame with all of the extra weld too. The original body mounts are pretty light. And if something is going to give under stress you want it to be the mounts and not the frame. Just some thoughts from my frame design days.......
-
Thanks!!! That makes measuring the rear easy. Anything past a horozontal sway bar is lift (or sag). So I went from a very low rear to a 2" lift over stock. I wonder what new stock springs would get me.... ?
-
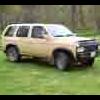
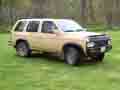
So.... I'm chopping the rear of my Pathy. After removal of the extra stuff the rear raised quite a bit. In comparing to our other truck it looks like it is 2 1/2" higher. That is a lot considering it was sagging to begin with. I'm guessing it went up 3 1/2 - 4". It appears that I may not have to do anything with the springs to get the 2-3" suspension lift I wanted in the rear. New shocks (needed anyway) and go. Just curious what the stock height is? I measured upper to lower bump stop plate to compare (not bumper.... there isn't any). I did search on here but didn't see it. (please excuse my ignorance if it's obvious)
-
...same, controls from drivers door but not at the rear passenger. But I can't do any troubleshooting on it yet. Truck is in pieces.
-
Glad you fixed it AND glad you posted this. I have a similar problem so I'll be looking at that harness now. THANKS!
-
All depends on the application, material and proper installation. Aircraft use rivets.....
-
I like the rivets and then weld... especially on long pieces like rockers. I used body caulking on the underside seems of my rocker repairs then asphalt undercoat spray. What did you use to seal yours up??
-
Isn't the best filler steel? Then a thin coat of regular Bondo to blend out the surfaces. And, as mentioned, Icing if you want it perfect. Steel is not easy in some cases... I know I just rebuilt the corner under the rear door. It ain't pretty... but at least I have a good base of steel and I can hide it with Bondo. Welding in pieces isn't as hard as it may seem. If it's not structural then there is nothing wrong with rivets. (Bondo covered of course) Some body shops are now even using adhesive. And why not, car manufacturers do. And if you don't want to pay for a sheet of body steel (which is usually crap steel) just look around. I did a great body job using the steel cut from the side of a filing cabinet.
-
Just in case anyone is looking for an update.... I'm working on the regular rust removal and body/frame work right now. Decided to work my way forward and save the front body mod (the fun part) until the other body work is done (the crappy part).
-
Well.... rear modification fabrication is done. Added four pics today: http://picasaweb.google.ca/106952140359333266362/TruckMods Finished the rear welding, fabricated a couple of inner side panels and sealed & undercoated under the box area. Would have moved to the front but my grass was starting to look like a hay field so I had to cut it. Still thinking on the rear frame fabrication..... want to make it functional and practical. I'm very happy with the results of the fabrication, even though I was using a stick welder. If you ever use a stick for a project like this do yourself a favor and don't change rod brand half way though. UGH!!! I'm happy about the opportunity to get the rotted steel out too!! As well as undercoating I'm soaking the inner surfaces with a rust guard oil spray.
-
Ahhhh.... good point!! I will be running mud. I have a few good spots at my place. And the creek bed is a tempting place that could (or will) roll me over. HA!
-
Thanks for all of the support. At this time in the project I need a push. HA! I only added three pics last night. http://picasaweb.google.ca/106952140359333266362/TruckMods Today was a day off of the project. It's ok since I have only a little welding to do to hit my Friday deadline. Then on to the front.....
-
If I planned on this as being an off road only I would do just as you suggested. I personally like the rad and fan in back.... just looks cool. But I have a feeling when my wife sees this all done she will be wanting to drive it instead of our other pathy..... and that is ok since it will give me a chance to work on hers!!! HA!