

AK9849cy
-
Posts
479 -
Joined
-
Last visited
-
Days Won
2
Content Type
Profiles
Forums
Calendar
Posts posted by AK9849cy
-
-
you do some amazing work! I wish I could drive mine out there and have you do a sas!
I will be making parts that will work for an sas. Not sure there will ever be a kit though. Everyone has their own dreams when if comes to a modified rig.
However probably what you will see is a finished Xterra down the road. This Pathfinder I am working on is the seed to a few ideas.. The finalized parts will be on the X. As funny as it sounds, the frames are the same for the most part. So the parts being made will work on both.
The goal is to make the parts needed in order to keep the SAS reasonably priced. So if there is a vendor that makes a usable part at a good price.. or a junkyard part can be used... why make it? Spend my time on stuff folks need! This is good in two ways.. I have a full time job and a family.. so why waste the time, and someone can benefit from lower priced parts that are in a competitive market (Jeeps/Toyotas).
There will also be a build list showing the total cost of all parts. This way a person can call up "Rugged Rocks" or "Trail Gear" per say.. and order a list of parts at a known price that work for the build.
While planning an SAS what normally happens to folks is they forget the small stuff.. or discount how much it really cost to modify the rear end after the front... It nickle and dimes someone to death. The focus will be to leave the rear end alone.. thus saving some coin!
For example.. a builder can go out and get a rear differential out of a auto tranny Xterra with 4.90's. Swap out the carrier to the 31 spline pathy unit.. why change spend cash by modding the rear? Leave it alone and concentrate on the front end.. These differentials can be located on car-part.com for a reasonable price!
Another example.. The standard Xterra owner at Gone Moab has a 2 inch body lift, a 3 inch suspension, and 33's. The most reasonable build for a rig of the sort would be to leave the rear end alone, keep the body lift, and mount a front axle under it somehow.. (The same wheels are tires could also be used.)
When it comes to solid axle swaps a body lift is basically a frame lowering kit. They make a ton of sense when a guy is sporting IFS being it raises the wheel wells without changing the suspension geometry. However with a sas the amount of lift is up to you.. 3..5..10.. you name it! So why have the frame lower? Maybe a person likes to get high centered.. however I would like the extra 2 inches of clearance.
This is why the quest for up travel has been my main goal with the Pathy build. If an Xterra owner wants to SAS and leave stuff alone like mentioned above. The frame is 2 inches lower than normal (body lift) so the amount of up travel is limited 2 inches. Thus here I am picking away at the axle mounts etc.. trying to find an extra 1/4 inch here and there to make this feasible. The Pathy build used to incorporate a truss? Well it and the oil pan liked being in the same place.. etc etc etc.. Hope that explains the idea.
-
Tinkering again....
-
I cant recall if it was creek or another X but I know one of the Next Gen X`s was SAS`d and his main priority was to make sure that when it was finished, that all the electronics were still working properly and not throwing codes.
We spent all last winter putting creeks together.. and yes no codes. After is was all figured out it took two weeks to complete the second truck. They were both at Moab last year.
============================================================================================================
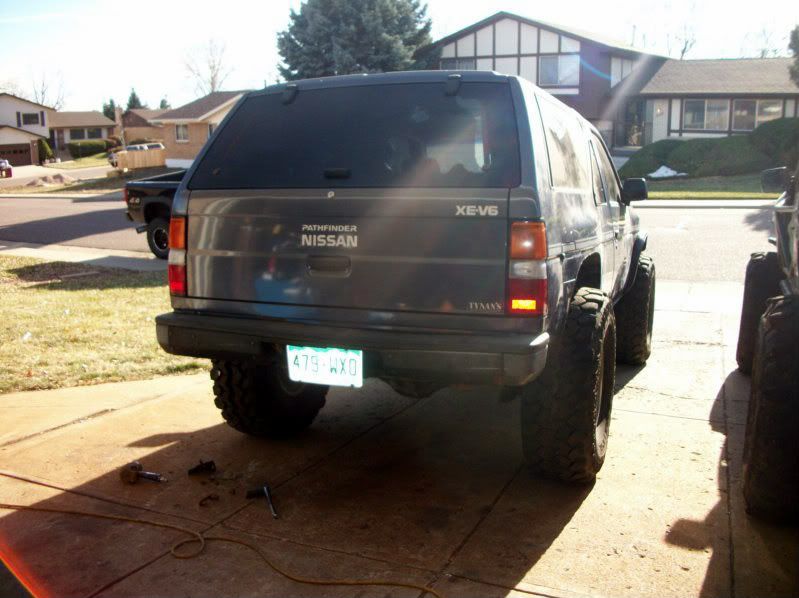
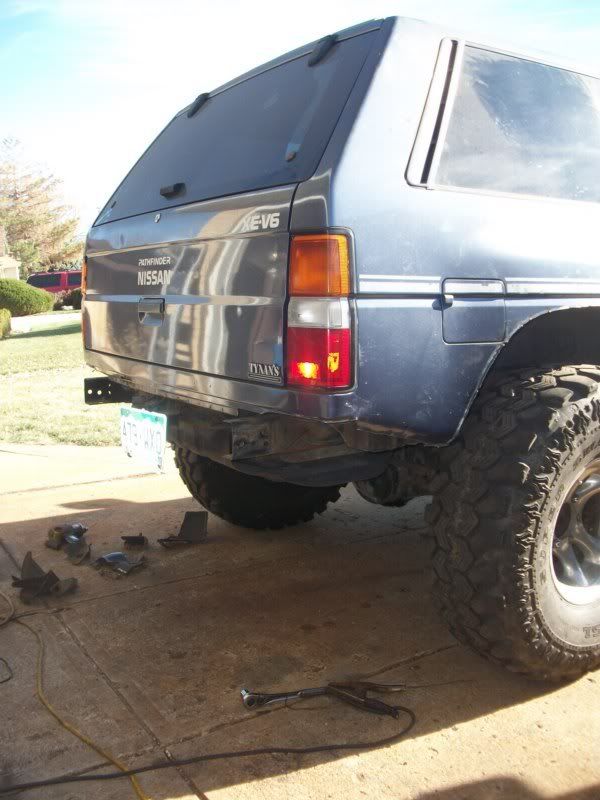
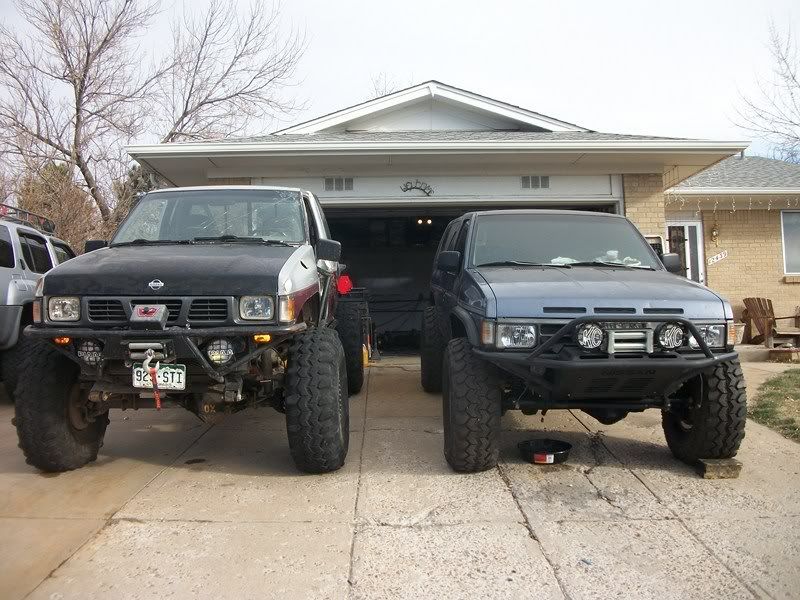
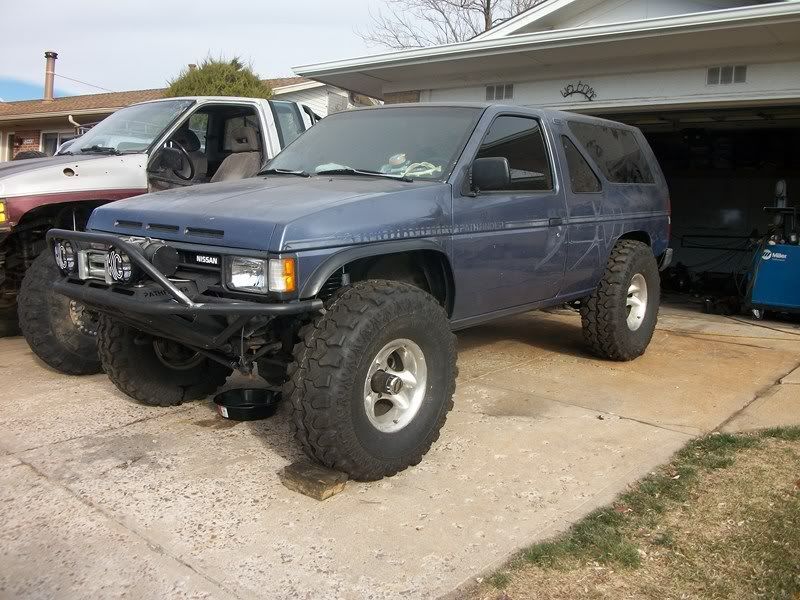
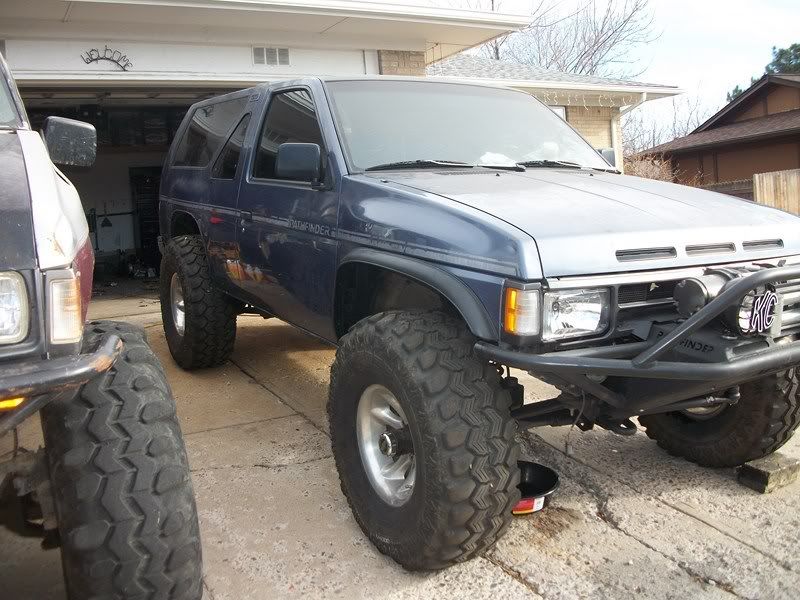
The Pathfinder got pushed out so the garage could be cleaned up..
The rear wheelwell has not been cut out on this side..
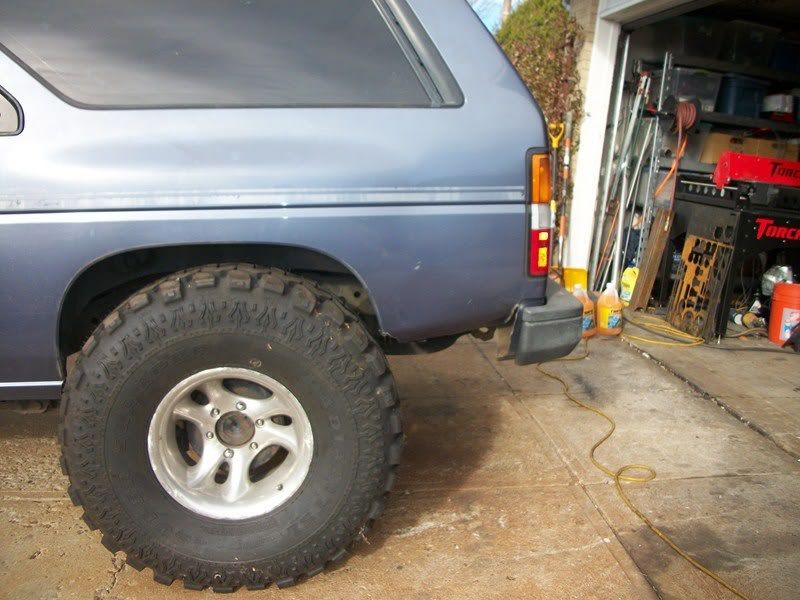
The rear will have a tube bumper with a receiver. The rear of the fenders are getting tucked up to match the profile of the single tube that will wrap around.
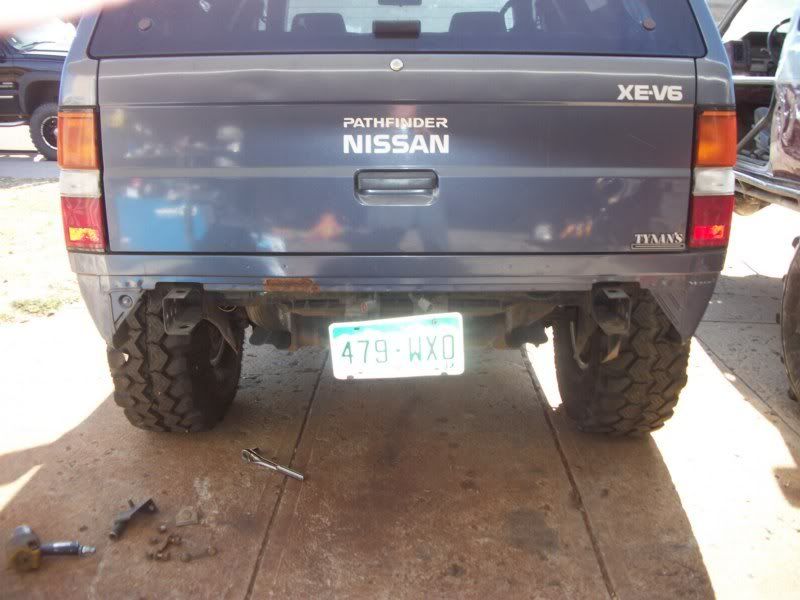
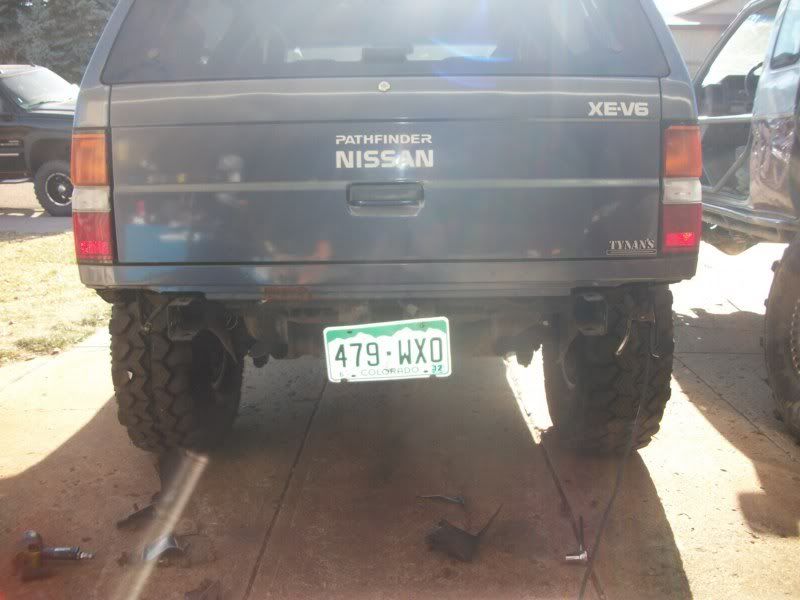
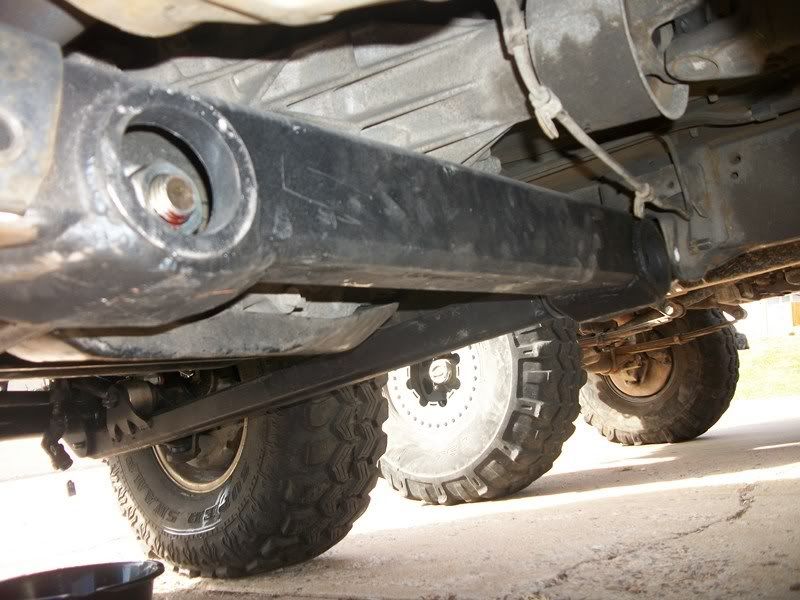
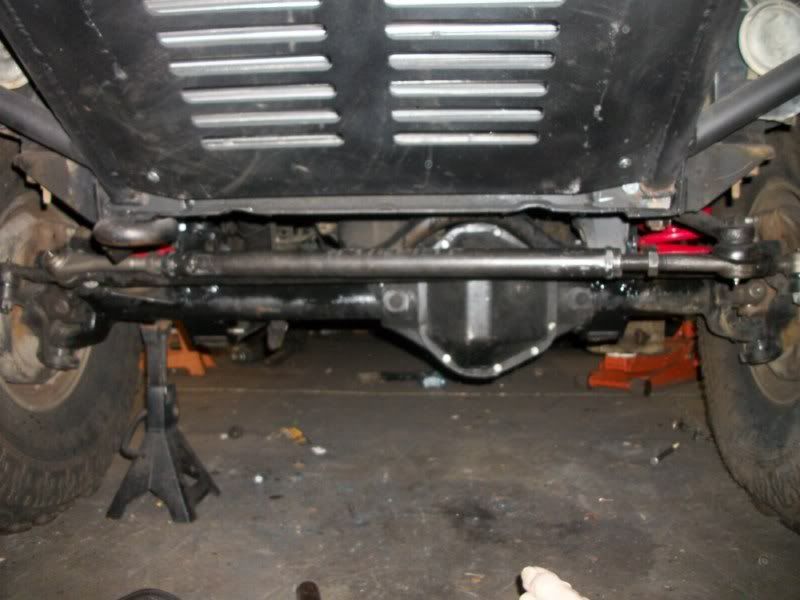
The other side has been cut already... Remember this is setting on stock rear coils..

-
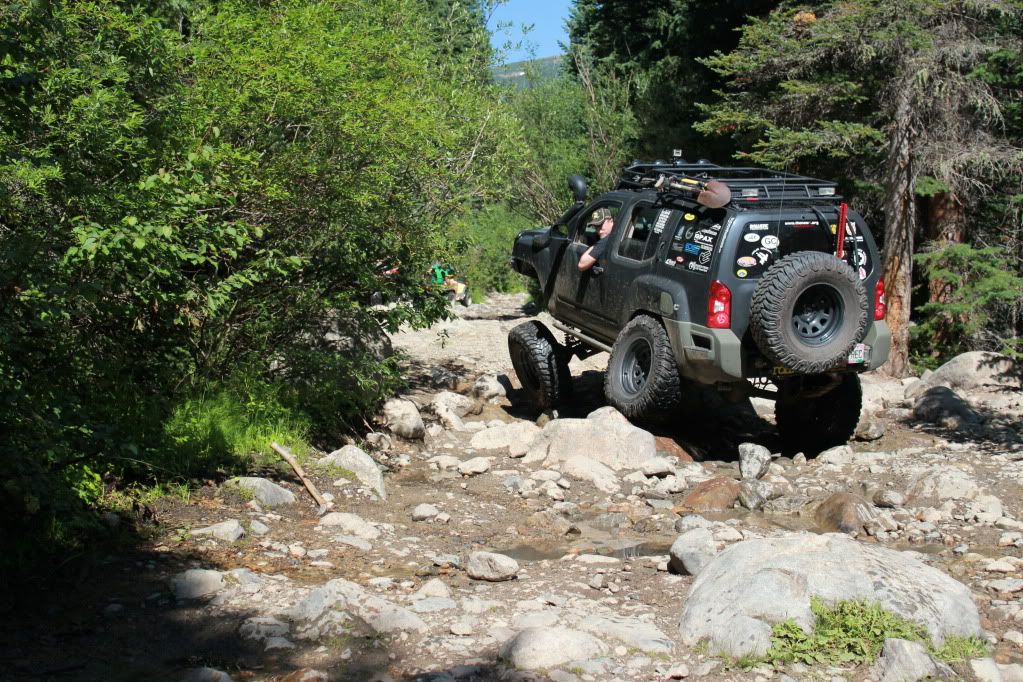
Those are some LONG Radius arms! And I Like how low it sits.
I guess radius arms are the only way to do a low sas.
Trent has a spring under setup on the front of his HB. It gets fairly close for the amount of work. However rigs drive smoother/nicer with a spring/track bar rig.
A 3 link would not need a truss on a steel housing (Spider 9, Diamond axle, etc) where the link mount would be welded on top of the non-cast steel axle housing. The third link still wants to be in the same place as the exhaust. Radius arms tend to go under..
This setup is very much like the Xterra Calmini design. It uses old school springs/shocks instead of coilovers and is not welded directly to cast on the driver side of the differential. It also uses Ford type Radius/Strut Arm Bushing instead of flex joints. With threaded/stud type flex joints the jam nuts always come loose (unless tack welded). Those old Ford bronco radius arms went for years without a problem...
-------------------------------------------------------------------------------------------------------------
We reworked Alpinespirit's calmini setup a few years back. Changed how the arms mount to the axle and replaced the Waggy 44 with a 63 wide hp 44. It does really well now... He drives it daily down about 20 miles of washboard gravel to get to work. Not a problem...
It makes those 36 inch Iroks look like 33's...
======================
We also used radius arms on Creek's next gen... It drives daily to work too.
-
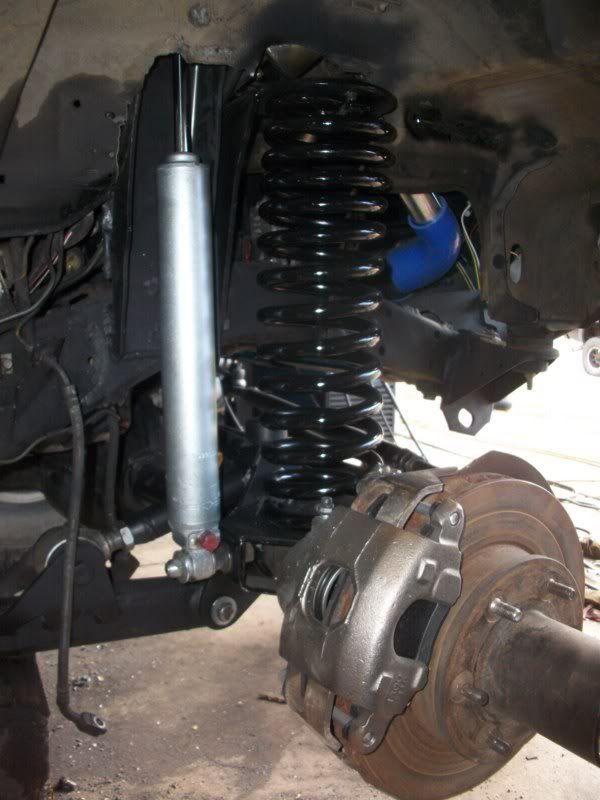
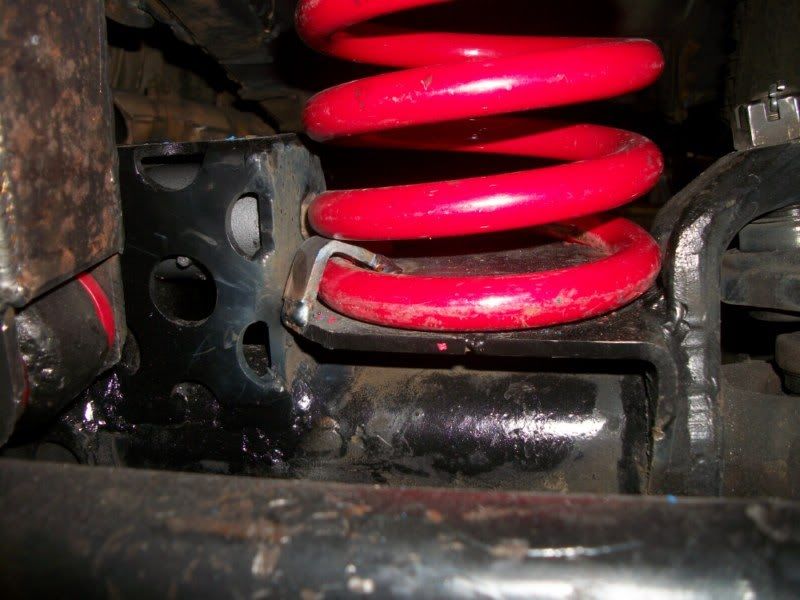
With this style of setup.. the mount for the upper arm is also the bump stop..
This is just inside the spring in the pic...
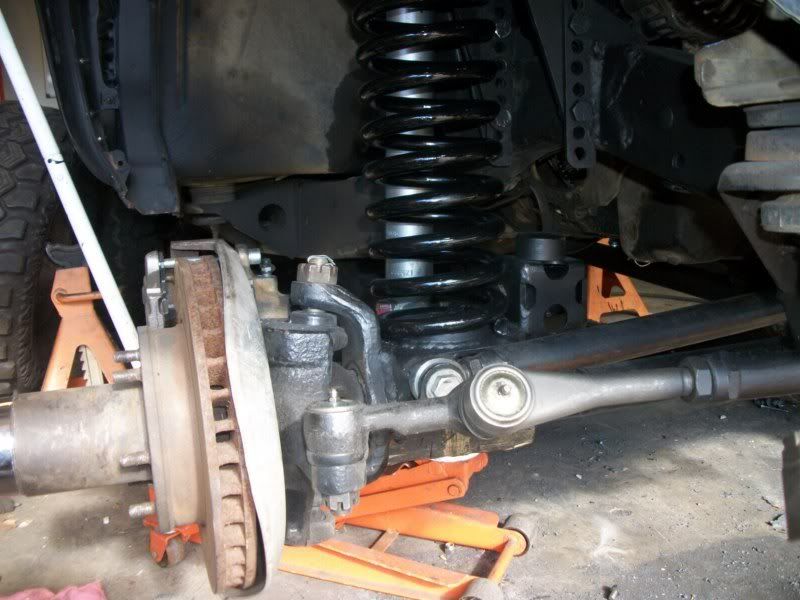
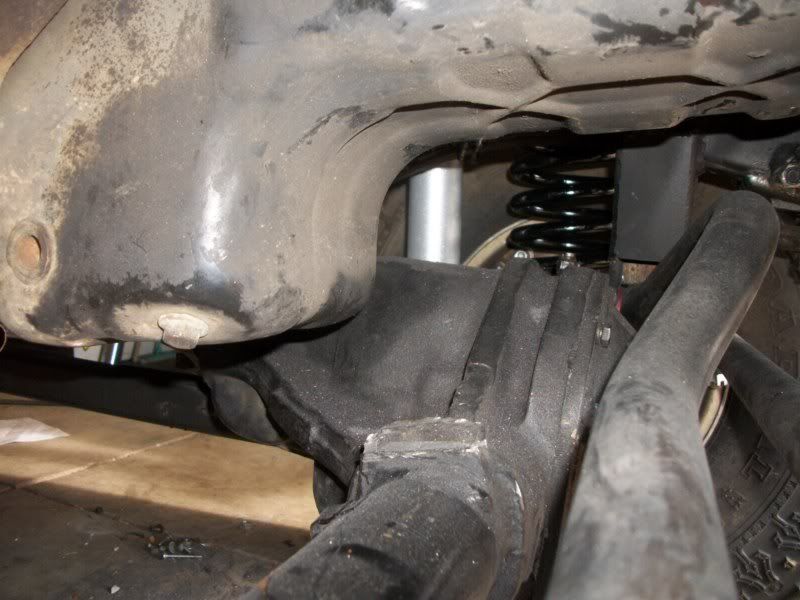
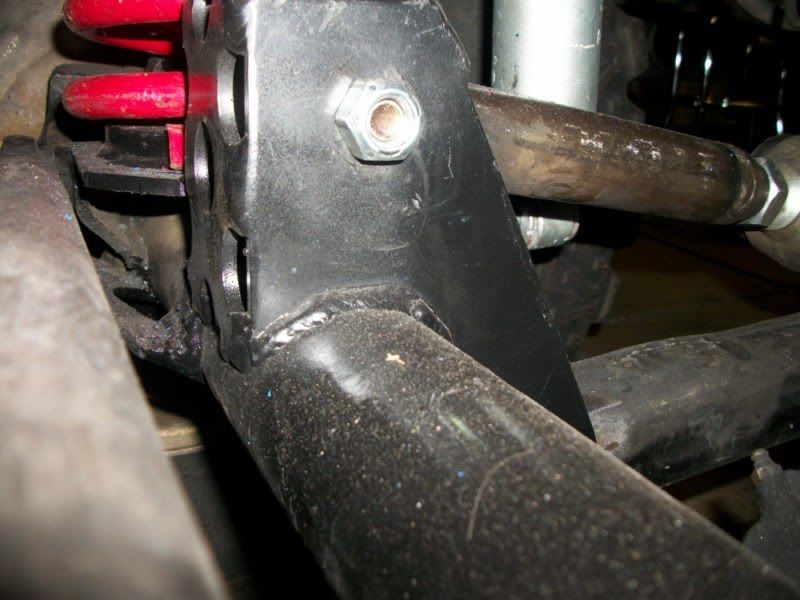
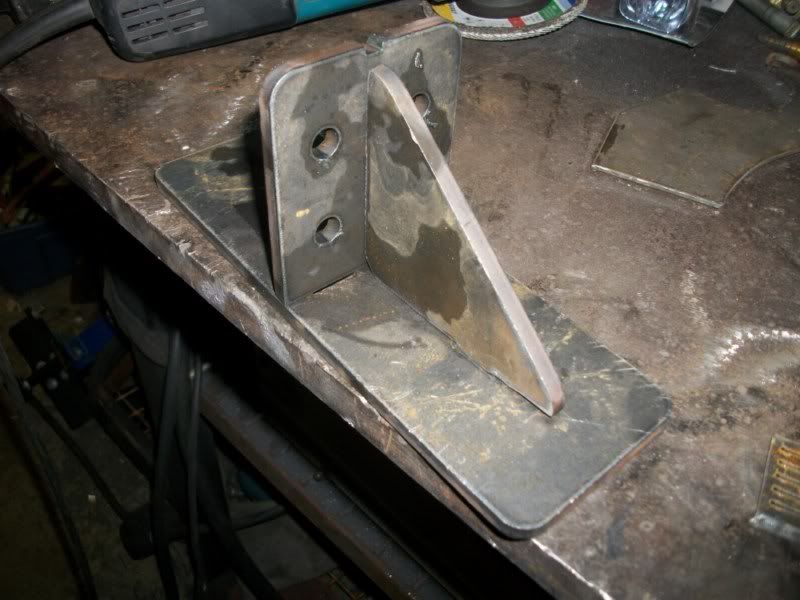
On the housing.. the truss was cut off for more clearance with the oil pan. The bead from the old truss can still be seen.
Taking this out gave around another inch and a half of up-travel. The truss must stay for a 3 link build...
-
Thanks for the link. Yeah, I've never noticed that before. If it's too much of a problem I'll fix it. Do you sell it?
For now they are $50 + the ride. Ends up being $55 to the door...
-
Like the video hints... the rear end tends to wag back and forth. This is noticed the most when speed bumps are hit at a medium speed. Also the more angle on the panhard the more it pulls the axle to the passenger side of the vehicle. Thus the tire sticks out more on the passenger side of the rig...
-
They can be a real bitch.
2-3 hours of banging, prying, slide hammering, dry icing, torching, hydraulics, and then cutting it finally came out of my engine. Hopefully you have better luck as they should just pop out with a slide hammer or bushing puller if you can find one small enough. Mine was just rusted on solid + being press-fit from the factory.
LOL.. Been there! I now weld a 3/4 inch bolt to the bush... then smack downwards on the end of the bolt sticking out with a sledge hammer.. Pops it out like a playing a game of Tiddlywinks...
-
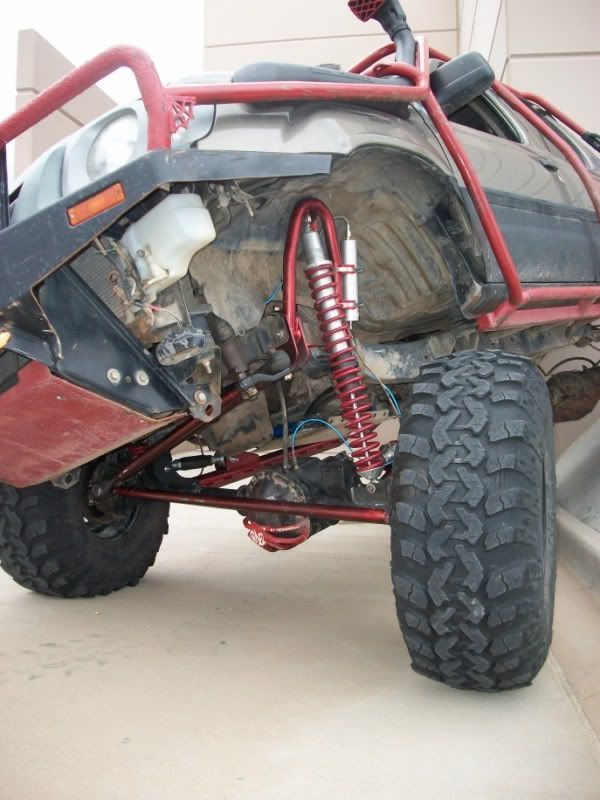
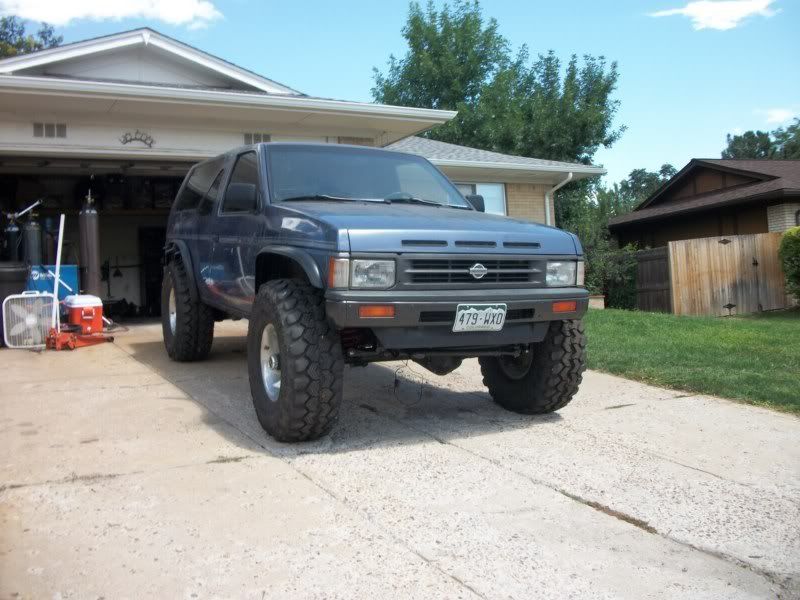
Ok... the front end is back together.. Got an extra 1 1/2 up-travel after tinkering for a week or so.
It has 4 1/2 inches of up-travel and 7 1/2 down-travel for 12 inches total.
Now it needs to be pushed out of the shop so all the crap can be swept/cleaned up off the floor....
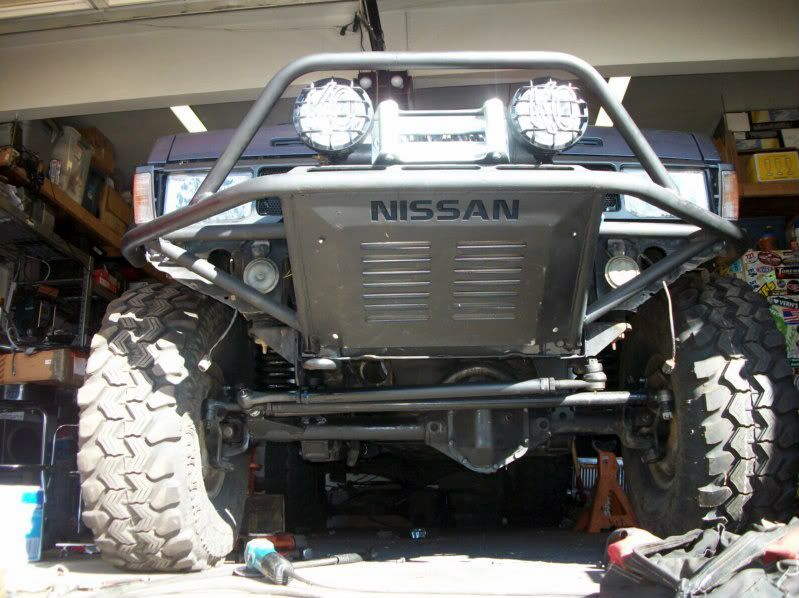
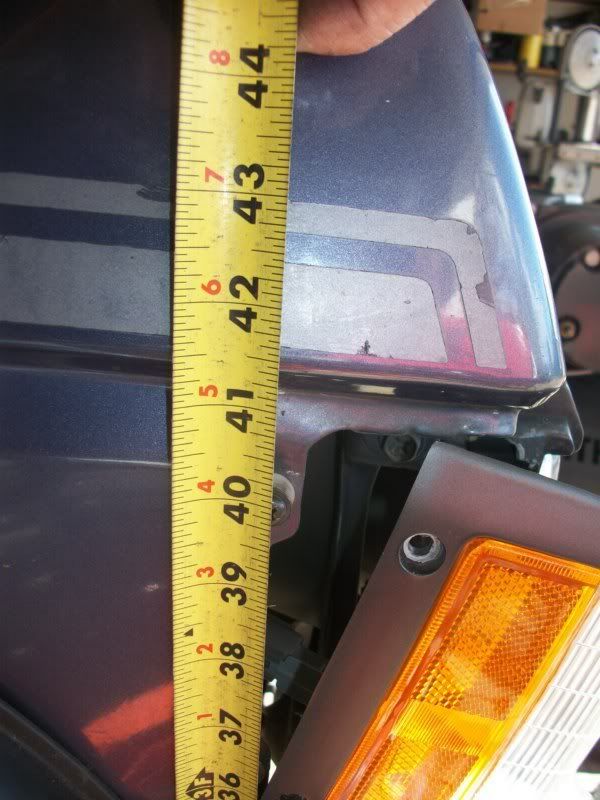
On a new set of 35's this is how high the front fender body line is...
-
Sorry... not enough time to read this whole thread. Maybe someone has brought this up already. However there is a bushing in the crank for the auto tranny. It is a huge mofo (it is probably 1 1/4 inches across and 3/8 an inch thick)that looks like part of the crank itself. It needs to be removed so the manual "much smaller" bushing can be inserted in the crank. The two bushings are totally different animals...
-
Sorry Guys.. haven't had time to get the ebay store running yet.. Just PM me for now! Until the Ebay is up and running they will be $50 plus the ride. They fit in the small $5 flat rate box for the U.S. folks. The ride to Canada is around 13 dollars..
They will be $69 on Ebay..
-
 2
2
-
-
Doesn't work...

Many folks have used a pathy tank back there... The SAS Xterra folks love them....

-
Oh there was progress...
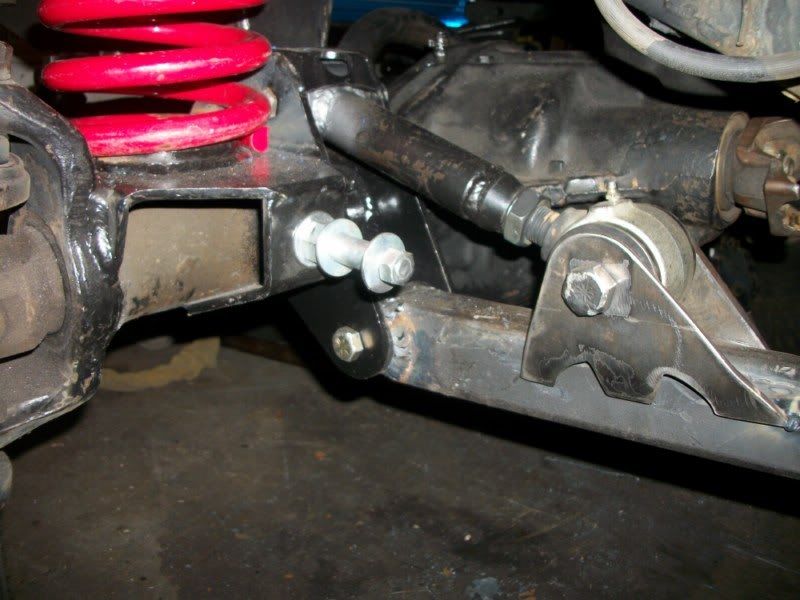
So all the original sas mounts on the front axle was stripped off. Went to another style of mounting setup that gives another 1.5 inches of uptravel.
This pic shows the track bar hiding behind the drag link and tie rod. They are lined up fairly well..
Sorry about the focus..
The new setup drops the mounts down like a Jeep axle. The radius arms were close to hitting the frame so this gave the arms another inch of room to move up...
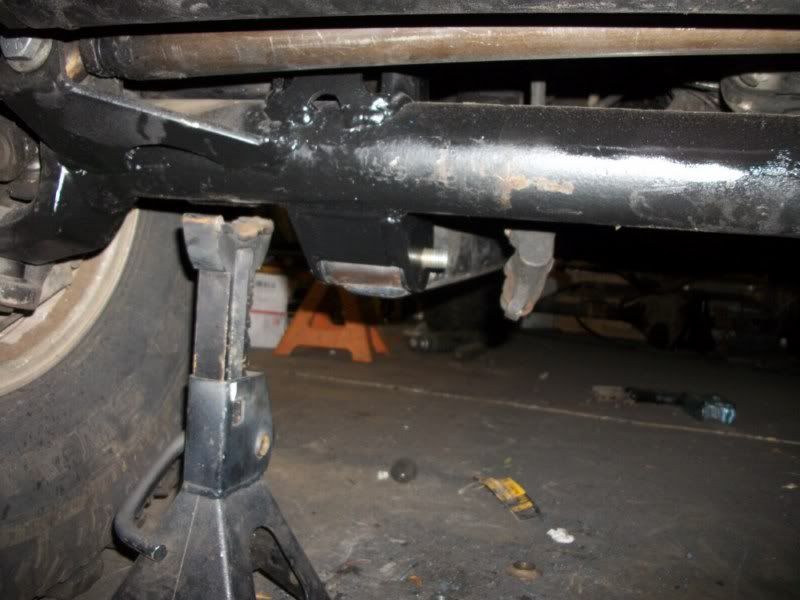
The y-arm is now directly lined up with the radius arm. This one mount takes care of both joints..
Just put this retention strap on this afternoon. This pic shows how tight all this stuff is packed together.
-
Triangulated front... you must be thinking full hydro steering.
My first rig was a 73 620. Love the old bullet nose trucks!
-
The machinist I use will not punch out the block without each individual piston for this same exact reason. The pistons then come home numbered with it's hole made to size.
-
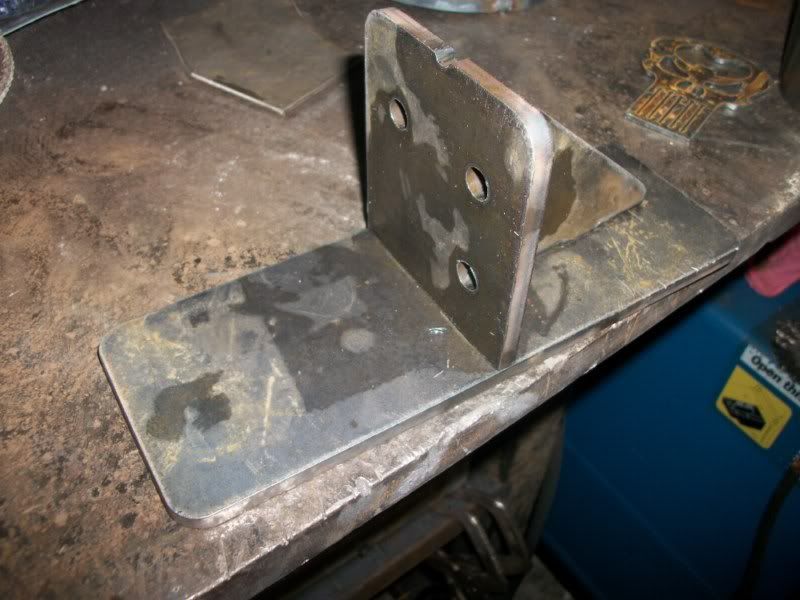
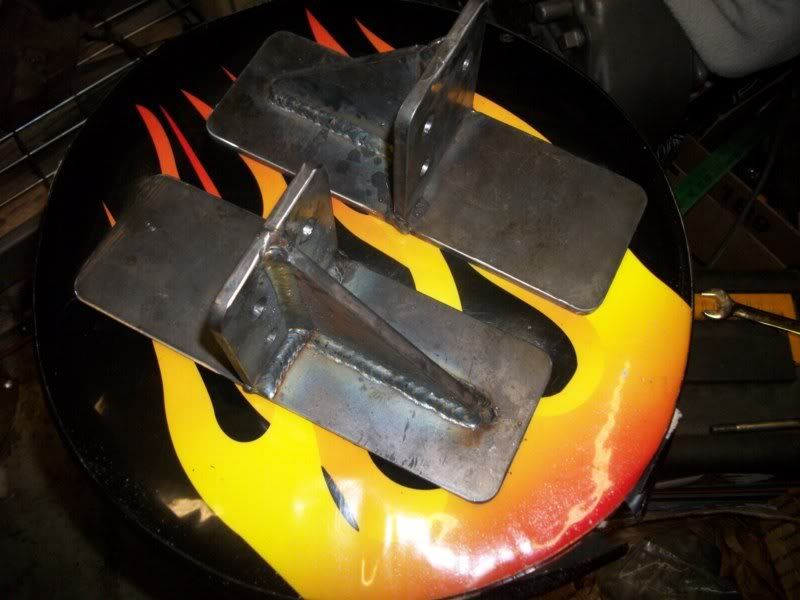
1/4 Inch Plate..

-
-
I want one.
Bare steel.. $15 each or 2 for $25 shipped U.S.
PM me..
-
No, He sent the measurements... have to drill the frame.
Not sure there are any holes in the area that would work. If any of my vehicles still had IFS
 .
. -
I'd try PM'ing AK9849cy, he looks like he has skills.
He doesn't know anything...
.
.
.
.
.
.
.
.
.
.
.
-
Made a new bottle opener..
-
1
-
-
Very, very nice Ryan!
Thanks Kevin! You guys going to be at Moab again next year?
-
Ryan, do you have pictures of your bumper build available? That thing is beast.
I quit taking detailed pics a while back. It was somewhat fun to post up eye candy for folks to enjoy..however for me times have changed. With two kids in multiple activities(hockey, violin, dance, wheeling, etc) the extra time is not there that I once had. The thread is one thing.. then the multitude of questions(pms/emails) start to take time I no longer have.
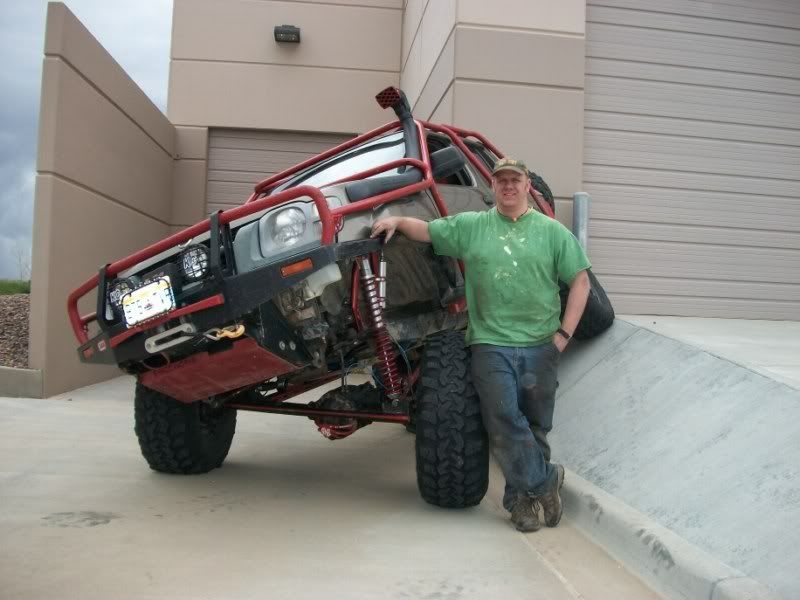
The bumper was built for this build in mind. It relocated the radiator into a 300z type configuration. Thus providing the pathy some room for an intercooler where the radiator once was. The cross member that the radiator once sat on is removed/replaced in order to make it all work together. The bumper partially mounts on the front of the frame this normally covers (unless you are sporting a body lift).
Bumpers are something I have tended to have an eye for.. however I really don't like making them. They take a ton of time to make and folks tend to think they can copy it for 200 bucks. Well the materials may add up to that.. however the thousands of dollars in tools I have in order to make it happen don't. So I end up answering multiple pms for folks to realize the fabbing hobby is not cheap. I know it is a bummer..
With time being a commodity in the upcoming years, you will probably see this pathfinder and our 2000 xterra being built over the next 6 months. Then I will be backing off to a build a few items that folks need, like the pan hard drop bracket or a few items needed for a reasonably priced sas, that do not take a big chunk of my time to complete.
Buy the way, girls ice hockey rules. I have had more fun watching my 8 year old daughter play than can be believed. I grew up without hockey, so when the daughter came home and stated she wanted to learn crossed my eyes a little. She smiles every second she is on the ice... that is all that matters...
-
Different clearances definitely come into play when going with forged pistons. I tend to be the kind that warms up the car before driving anyway. Guess I got into the habit with the diesel tow rig (remote start is a wonderful thing).
MR510 your build is sweet! I went through mine a couple years ago.. then got side tracked when something else came along. The pistons were clayed and took it back apart to smooth out the valve reliefs a bit and put back together. I have another set of heads that need to get cleaned up/ported.. there is a box of Ferrea valves, new schneider springs, new Nissan lifters, cam pulleys, schneider regrinds, etc setting there for later tinkering. I do like seeing 225 horse from yours! It makes mine more likely to happen down the road. Thanks!
Did you ever happen to weigh that VH45? I hear rumors that it is lighter than our cast iron VG's?
I wheel with a Toyota group that runs turbo engines with lower compression ratios. I think with our stock t-case ratios it would totally stink. However if a guy is honestly going to make a habit of wheeling on harder trails lower transfer case ratios become a priority in any case. Over the last 5 years my rig has had the 3.92's from Calmini. It is amazing how it changes the capabilities of a vehicle. The only time they are a detriment is in deep mud.. nice to have a little wheel speed. Thus a tcase doubler (like the one Northwest Fab make for our rigs) is nice. It gives a rig multiple ratios for whatever the trail dishes out.
On that note... most of these rigs are daily drivers on a budget. There are a few of us that could afford something newer but have a thing for the WD21 style. However, I would imagine bang for the buck is king. It is really hard to beat dropping in a low mileage VG33 with the serp accessories. My hardbody when running 37 inch radials gets 18ish. It is however lightened up quite a bit and regeared to 5.38's. But needless to say it surprised me.
My vg30 had about 180k on it and alot of pulling a trailer around for motocross racing, that vg30 was wasted and needed a serious rebuild. But I wanted to do the vg33 upgrade. I picked up a 0 mile vg33 from Felton's all Nissan auto wrecking for $1700 in 2005. No one had done that swap yet but I figured it out. With the lack of time I had to work on it and putting my cash in to a S13/Skyline build, it took about four years. It has about 10k on it now and runs very well. It has stainless headers, 2 1/2 exhaust, adjustable cam gears, puller fans, MSD 6a, Stillen intake. Now I'm gathering all the parts to do the factory supercharger. I have almost everything, and only three more parts to buy. The lower crank shaft pully, the ac compressor clutch, and the supercharger it self. I'll be using a Vi-pec computer and get it tuned.
There are many people running the factory Nissan supercharger getting 8 miles per gallon. Not sure what the problem is.. however they tend to blame it on a bad knock sensor putting it into a de-rated mode. Some put a resister in place of the knock sensor to try to troubleshoot it with mixed results. One of my very close friends just bagged his supercharged V6 for something else. He chased this very problem for 2-3 years.
I have seen a few articles on this online over the last few months and I am trying to put together a build list to do this. From what I can see you are taking a VG 33 blosck and boring it over 1.6mm for the Q piston(93mm out of a Q45 sadan V-8) with a wrist pin of 22mm. Change out the rods to VG30ET( Im assuming pushrods right?) Other than finding the pistons and or haveing some machined, what else do I need to look for. All of the articles and sites I have been on are a year or older. So if there is any other sites out there with info on them I would greatly appriciate it.
For the original post... what are your plans for this build? Wheeler, tow rig, more zip??? I used VG30dett rods.. got new bushings from. HERE
87 twin turbo sas 1 inch lift...
in Solid Axle Swaps, Hardcore Custom Fab
Posted
Thanks fellas... I will just keep plugging.. hopefully some neat stuff can be provided down the road.