
peejay
-
Posts
71 -
Joined
-
Last visited
-
Days Won
4
Content Type
Profiles
Forums
Calendar
Posts posted by peejay
-
-
Excellent info as always, slart, thank you!
-
Well, got the passenger's side valve cover installed, thanks for all you all's help! Ran out of time, so I'll hafta test it tomorrow, if all is well, I'll move on to the driver's side.
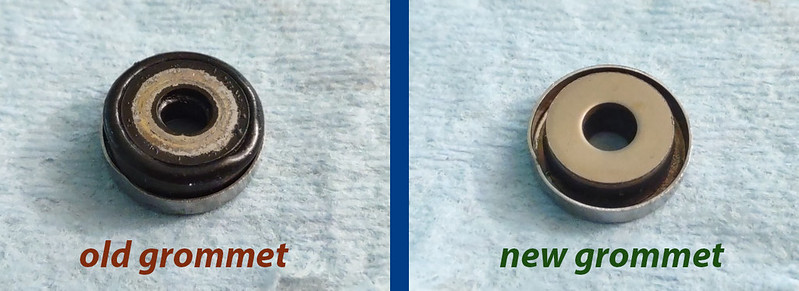
Special thanks to slart, whom I "questioned", about the grommets expanding to fill the cup washers.
How did you all know that they do expand, and I didn't? Well, admittedly, the first time I replaced the gaskets, I did not replace the grommets--I didn't even know they were a replaceable thing! Live and learn!
(Oh, I recommend giving the good folks at belmetric a holler for your fastener needs, their customer service was top notch in helping me find the hardware I wanted!)
-
 1
1
-
-
18 hours ago, Slartibartfast said:
Your best bet is the '90 manual. Free download from cardiagn.com last time I checked, or message me if you can't find it and I'll get you a link. The '94/'95 manual from Nicoclub should be close, but it's for the round-dash trucks, and there are some minor changes on those that can hang you up.
The EF&EC section has a walkthrough for troubleshooting each code. I'd start with the ignition signal, injector circuit (that'll be the misfire), and MAF codes, and see if the knock sensor code goes away on its own once those three are resolved (clear the codes and see if it comes back). If the engine has no idea how much air is coming in, one cylinder isn't firing, and the timing is messed up, it may well be knocking, and annoyingly these don't have separate codes for a bad knock sensor vs actual knocking.
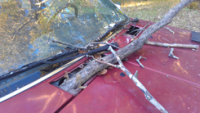
I would also look for any obvious rodent damage. An injector circuit code could be due to a chewed wire, and my '93 had a MAF code when a rat's nest in the air filter got sucked into the MAF.
Slart, would you mind demystifying the knock sensor operation?
It was my understanding that when the sensor senses knock (for whatever "normal" reasons), the sensor sends a signal to the ECU to retard the timing to eliminate the knock. Does this scenario always produce a code/check engine light, letting the driver know that "uh-oh, something is causing knock, better check it out"? Or is the system "supposed" to only trigger a code/light if there is an issue with the knock sensor/circuit? Thanks!
-
(Since the fuel gauge came up as part of this thread...)
For those of us experiencing problems with the fuel gauge (not reading, reading intermittently), do you all recommend to start troubleshooting with the sending unit or the instrument cluster/gauge itself?
-
Agree with Frenchy, the factory service manual will prove invaluable (you "might" be able to find a copy online, post back here if you can't).
In the meantime:
12 = Mass air flow sensor circuit
21 = Ignition signal circuit
34 = Knock sensor circuit
51 = Injector circuit
For the 34/knock sensor circuit, if the knock sensor is in fact faulty, I would recommend relocating it to the top of the intake manifold so that future service/diagnostics are easier. (It's buried underneath the intake manifold and is a pain to get to). There are lots of discussions/writeups detailing how to relocate it.
-
1
-
-
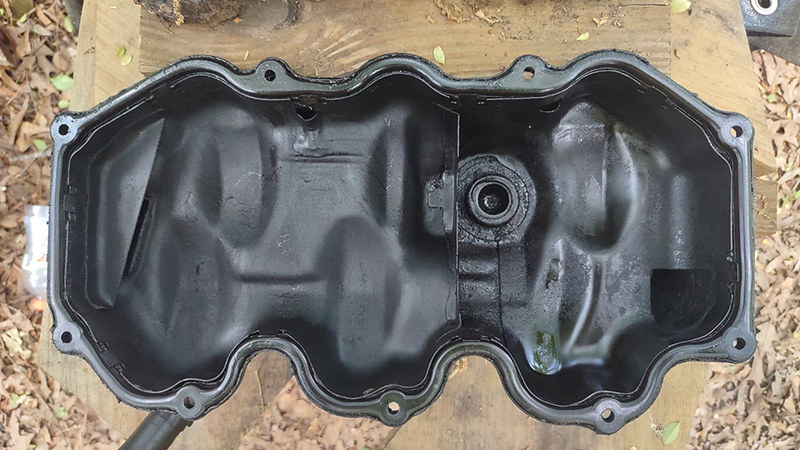
Alright, just about ready to go back on with the gasket, but which side goes toward the cylinder head, flat side or "round" side?
Here's a pic the first time I did it, looks like I had the round side toward the cylinder head, but now I'm questioning myself...thanks!
(Update) It appears there is only one way the gasket(s) can go on, round side down (toward the cylinder head), who knew! (Y'all did!)
-
4 hours ago, adamzan said:
I had to redo it on mine because I over tightened and ruined the gasket. It still leaked so an old friend said to just put a light coat of RTV on the gasket, I know you're not supposed to but it doesn't friggin leak anymore.
I'm going through the hassle of removing the RTV (that I put on previously) right now, won't be doing that again!
-
4 hours ago, adamzan said:
What gears do you have, and not have? IIRC on mine the neutral safety switch (range sensor as nissan calls it) was broken and the tcm didn't know what position the shifter was in. It caused me to have 1-3 and 4 only when a certain amount of throttle was applied. Torque converter lock up didn't work at all. I may be misremembering the gears because this was over a decade ago now.
No torque converter lock up? Did you thank your lucky stars???

-
1 hour ago, Slartibartfast said:
You shouldn't need to pull the covers to do the belt, unless you're doing a cam swap or something. The timing's all outboard.
Excellent!
-
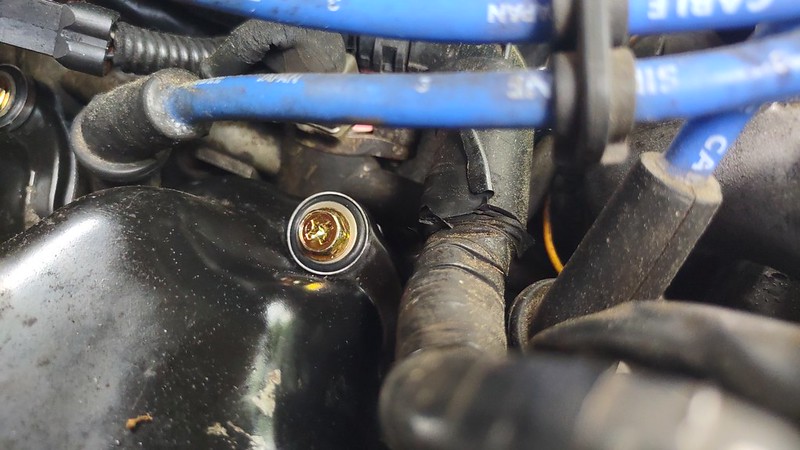
Touché! The JIS thing never even crossed my mind until after removal, like you said, not seized and low torque spec. In hindsight, I'm willing to bet those injector cap screws ARE JIS, they were torqued down, and I wallowed out many of 'em on removal.
Will report back with what Fel-Pro says, but leaning towards aftermarket cushion + cup and roll with it, valve covers shouldn't need to come off again unless I decide to change the timing belt, discussion for another day!
-
14 hours ago, Slartibartfast said:
I hadn't thought about it, but yeah, makes sense they used the Phillips (probably JIS actually) screw heads to prevent overtightening/warping the valve cover.
Aw, Slart, why'd ya hafta open up the JIS can of worms??? That came up in another discussion, the member there said "usually" there is a dimple on the screwhead indicating it's JIS, I didn't see one, but at any rate, the #3 phillips "seems" to be an ok fit...for now!
"One more" question about this, the aftermarket (Fel-Pro) "Washer Assembly" is of a smaller diameter than the OEM "Washer Assembly", and therefore does not entirely fill the OEM "Tray-Rocker Cover" (what I am calling a "cup washer"). Is that cause for concern? (A reviewer of the aftermarket gasket set stated that they did not use the "Tray-Rocker Cover" when using the aftermarket "Washer Assembly", and I don't feel confident in doing that). I would like to find a "cup washer" that fits the aftermarket "Washer Assembly", but probably doesn't exist, and I should probably not worry about it and reuse the OEM "Tray-Rocker Cover", right? Or do you all only use OEM gaskets? At $9 a pop for the "Washer Assembly", methinks no for me!
(Edit: Or, why not place a washer (the same size diameter as the new "Washer Assembly") underneath the new "Washer Assembly", if even that is "required"? What is the "advantage" of the OEM cup-style washer?)
(Edit #2: Seems like from other discussions (jeeps), that "Tray-Rocker Cover" is to limit torque, maybe the "cup" portion of it (as opposed to a flat washer) is just to speed up alignment on the assembly line/keep the "Washer Assembly" from moving around...I've emailed Fel-Pro to see what they recommend.)
-
2 hours ago, level9 said:
Be careful and note torque settings in the FSM - it's very low. There's a reason they were simply Philips heads (cams out when too much torque applied). Overtightening can produce leaks. When I did mine I actually attached a Philips bit head to a torque wrench. Not the kind of job you want to do over - especially the driver side.
Great points! I actually bought a 1/4-inch #3 bit socket just for the task, and yeah, the "bolts" were pretty "loose". I'm just not a fan of screwheads (replaced the injector retainer screws with hex heads). I'll make sure everything has been cleaned thoroughly, go slow, and use a torque wrench.
-
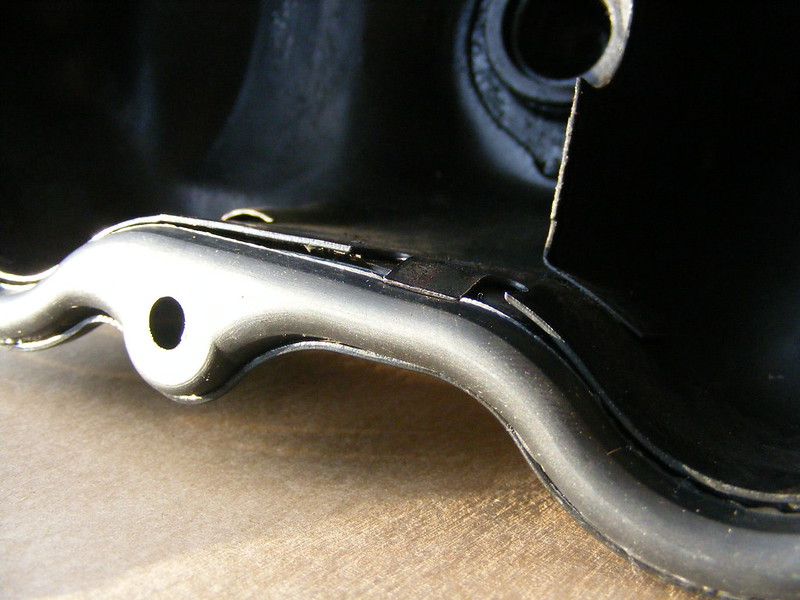
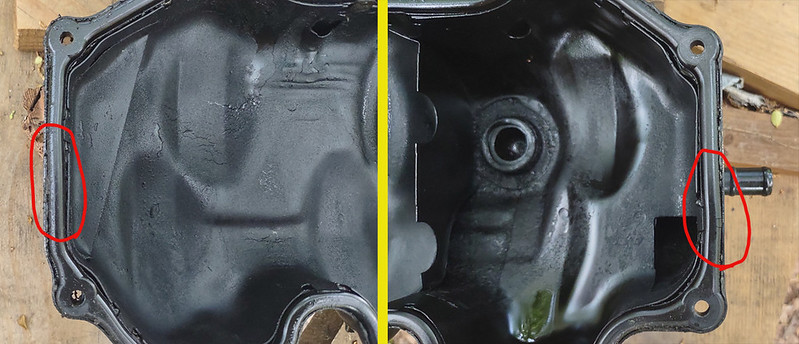
Good eye, slart! Yep, there are slight cracks at various spots along the gasket, normally I wouldn't've thought twice about 'em, but after watching stevexnyc's vids on the subject, it made me go along and actually look for breaks and areas of possible leakage. It looks like I did a crappy job of evenly distributing what I'm guessing is RTV to help hold the gasket in place, this time around I'm gonna clean everything real good and see if the gasket will stay in place without RTV.
Ordered some M6x25mm Allen/hex head screws to ditch the Phillips head ones, so got plenty of time to get things in order while I wait for those to arrive.
-
Sorry it's taken me awhile to get back, thanks for the tips!
I did (i think) run my finger along the edge/use a mirror and flashlight to try and see what is mostly likely seepage. (I have a UV light...somewhere...tried it to find a similar leak on my frontier, but never saw the "bright green spots", so gave up on it, plus I'm too lazy to look for it again!)
I think I'm gonna replace the passenger's side first, see if my approach works before tackling the driver's side.
Are these "bulging areas" of any concern? Should the NEW gasket conform and fill in any gaps?
(I did replace these MANY moons ago, and the last time I drove this thing 3+ years ago, I don't recall them leaking (it's smoking BAD now), but it has been sitting for 3 years!)
-
1
-
-
Greetings, all,
Before I go through the trouble of replacing the valve cover gaskets, Is there a sure-fire way to KNOW beyond a shadow-of-a-doubt that they are leaking?
I've got (some/most of) the tell-tale signs:
- smoke coming from the areas between the valve cover gasket/cylinder head mating surface and exhaust manifolds
- vehicle had been sitting for about 3 years
- i shoulda changed 'em for good measure when i replaced the injectors (aka, the 3-year injector replacement!)
i tried poking around with a flashlight in the dark around the suspect areas, and i could never actually see oil on the manifolds (would i ever be able to?), but my gut is telling me go ahead and replace 'em.
(edit...should i replace the passenger's side one first, if the smoke stops, proceed with confidence to do the driver's side one? or pull my pants up and do 'em both????)
-
14 hours ago, Slartibartfast said:
Well, it's too late for Frenchy's truck, but I figured I'd update this in case anyone else is looking to replace their rag joint/coupler. I've got the Borgeson 000941 mounted to the coupler from my parts car, and it looks like it'll work with minimal bodging.
It doesn't come with the bolt hole inserts that are in the stock donut. Those inserts will fit, but the Borgeson is a little thinner than the stock donut, so they're a little too long. I considered modifying the inserts, but then remembered that I don't own a lathe, and instead bought some M12 washers that'll fit over them. The inserts are 3mm too long, and the washers are 2mm thick, so one washer on either side should clamp the rubber nicely without damaging it.
I'll update when I have it installed. I've got the box pulled from the parts car. Hoping to get around to that project in the next week or three.
Pic(s) or it didn't happen!
-
Update...
FINALLY got the clutch bled ("enough").
A combination of the MityVac, speed bleeder, and old school "two man" method got it done. Ultimately, I think the damper was the culprit, because after "bench bleeding" the master (on-vehicle, using the mityvac), then attempting to use the speed bleeder on the operating cylinder, no fluid ever came out (in hindsight, maybe I didn't pump the pedal enough times, but I felt like I did).
After putting the mityvac on the damper, there were MILLIONS of bubbles coming through that section of tubing. I repeated the mityvac method a few times, think I even did the "two man" method with just me a few times, then moved back to the release cylinder/speed bleeder, which produced no fluid at first, then say around 10-15 pumps the pedal got firmer, firmer, then WEAK as I noticed I had emptied the reservoir!
At that point I just topped off the master, cracked open the speed bleeder and kept pumping until it eventually built up pressure again, THEN I two-man bled the damper again.
Hope to attempt to crank in the next few days and I may eventually do the damper bypass!
-
On 4/5/2024 at 11:59 PM, Slartibartfast said:
I'll bet you could just push the clutch pedal down a little (stick against the seat, adjustable tripod, something like that) so the master can't drain, then take it apart and separate the washer from the banjo on the bench.
You know, hindsight is telling me that I should've started with/suspected the "operating cylinder" all along, in which case I woulda had to drain the old fluid anyway! So guess I'll be draining the new fluid, the pain point is trying to quickly reattach the hydraulic line without crossthreading it!
(Edit)
I need to take a course in Physics. Just took the banjo bolt out, no more/"new" fluid came out! Moving on to removing the crush washer...(gonna put it in the freezer for a few while I contemplate my life choices!)
-
Nissan REALLY wants me to do a powertrain swap!
Update:
Went to put the operating cylinder in, had everything ready so I would lose as little fluid as possible...
Got the banjo bolt off, the lower washer off, pulled the bolt up, and BAM! The upper washer was stuck to the bolt!!! ARRRRRGGHHH!!!
Rather than remove the bolt and lose fluid in order to assess/remove the washer, I decided "Eh, I'll just order a new banjo bolt".
WRONG...guess what is included in the DISCONTINUED list???
So I started with 97-up Frontiers, thinking the parts "should" interchange, well, they do (same part number) which means...DISCONTINUED!
2002-up Frontiers have a different part number, which is available (for now!).
Also looked up the banjo for a '94 300ZX (my thinking, same engine/trans, SURELY that bolt has to be the same/similar/good enough to work?)
So I ordered two new crush washers (had 2 new ones, but they look suspect), and early and late production '94 Z banjo bolts.
Ordered the release cylinder for the Z, too, so when I take the Pathfinder bolt out, I can see if it fits in the Z cylinder.
Stay tuned!
-
On 3/29/2024 at 4:46 AM, Slartibartfast said:
At least you know you won't have to do the master again for a while! Hopefully the slave doesn't fight as hard.
Exactly! Lessons learned from letting this thing sit for 3 years.
-
9 hours ago, Frenchy said:
Do not bother with the damper. Put it on the slave and all will work out
Ok, I'll be patient, slave cylinder and speed bleeder should be here this weekend!
-
You know, I bought some of those for the brakes several years ago, never got around to installing them, no telling where they are now.
Guess I get to try them on the clutch, thanks for the part number, looks like my local NAPA has 'em in stock!
(Would this be beneficial on the damper, too?)
-
(got the m/c installed, then attempted to use the mityvac to "bench" bleed it, wasted a lot of fluid doing that, then wasted a lot of fluid trying to reconnect the line that didn't want to thread in easily!)
raise your hand if you knew that the master cylinder WASN'T the problem???
(gonna bleed the damper next, while waiting on the just-ordered slave cylinder to arrive)
-
Congrats! My wife would prefer me to "consolidate" my WD21 and D22 into something newer.
1992 With Some Codes
in 90-95 WD21 Pathfinders
Posted
Ditto on that.
"Easy button" is disconnect the fuel supply hose from the rail and place the end in a fuel container, pull the fuel pump relay, and run 12V straight to terminal 5 to let the fuel pump do the work for you. Be sure to go back with a new fuel filter, too.