-
Posts
302 -
Joined
-
Last visited
-
Days Won
14
Content Type
Profiles
Forums
Calendar
Posts posted by johann_peralta
-
-
none of those silver bolts are the final bolts... they are only there to hold the place of the gold grade 8 bolts that i will be buying soon. hopefully that clears thing up a little. the bolts will be 9/16" and will be big enough to hold the load. also no the holes arent overcleared... as of this moment the bolts are just the first i could find to maintain the structure together, that being said they arent 9/16" so they do not fill the entire hole up. i can assure you there will be proper bolts with washers in before this car ever moves an inch from the driveway. the last thing i want is to endanger anyones life because of my choises. yes there are cross bracing on the rear portion of the a arm/ control arm. and also in the strut tower... the first testing of this lift will be in my own fenced in backyard. if it isnt safe, it wont be leaving the yard. i hope this cleared thing up, the pictures posted werent that specific so they were slightly misleading...
I don't mean to sound like a dick but I see no additional bracing for load impact/twisting, missing large washers on the lower bolt heads, not even grade 5 hardware (8 minimum or 10.9), and a way over clearance drilled hole on the upper through-bolt that allows entire movement of the structure. Sorry but it freaks me out. Especially getting sold that way possibly to an unsuspecting buyer.
From the looks of it with a torn off lower control arm. I hope I'm missing something but those bolts look way too small to handle that type of load. Also, is there any cross bracing inside of the subframe drop?
It is obvious the OP has much better fabrication skills than I do, so I would assume this has been thought of, hopefully the pictures are just painting a bad image.
I definitely admire the ingenuity and originality of this post, but I would like to hear that it is actually safe as well.-
 1
1
-
-
its being sold with the 12" lift and it also comes with a running and driving spare 97 pathfinder.

Original http://i58.tinypic.com/bhx0zt.jpg
Original http://i59.tinypic.com/317bkba.jpg -
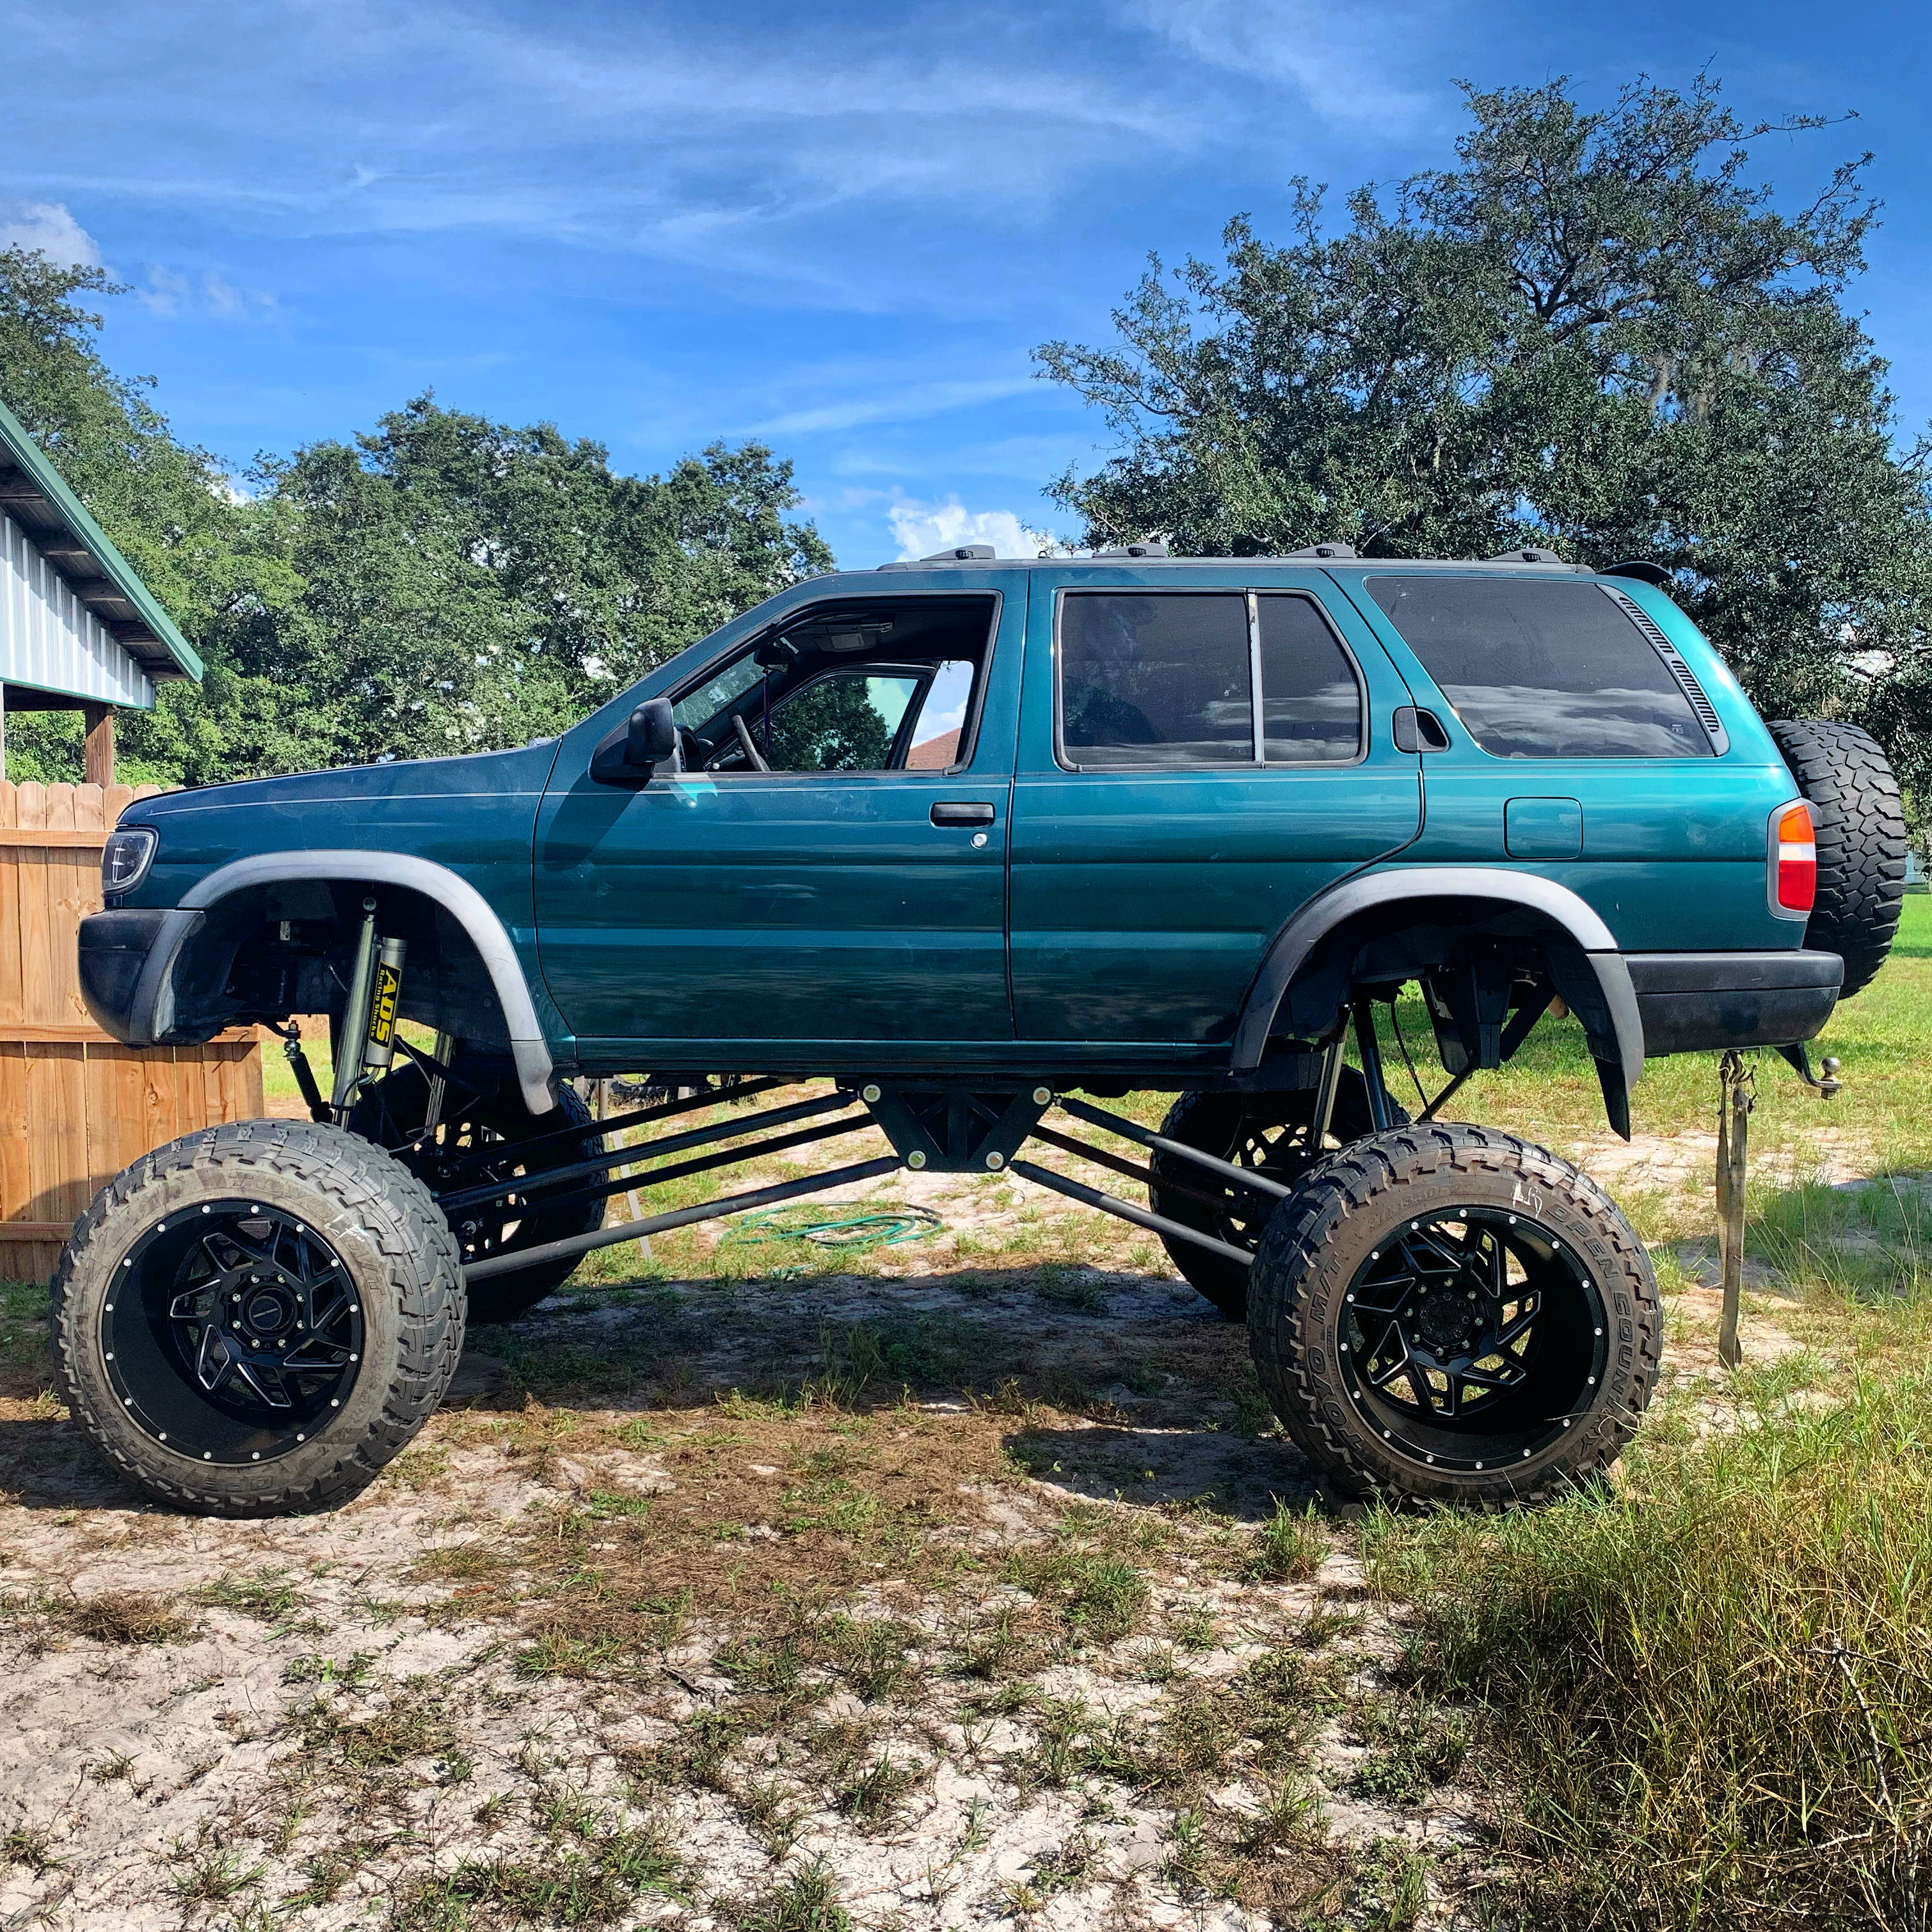
12" lift all finished up! i just finished tonight so the pics arent so greatt... i will post more tomorrow! cv angles are perfectly flat, needs a alignment, vlears the 35s easy and will clear the 37s also! no trimming required.


-
 1
1
-
-
Thanks for the info. So you've basically stacked a 2" SFD with the KrF 4". What's with the 2" tubes, though? Looks like three pieces in there...why not just a .250 wall tube? I would've looked into welding them together, especially with the radius edge on the 4" block.
Yep, secret's out...the KrF links are from Woodward. They're the only supplier of the u-joints I could find in our size (diameter x splines). They are beef supreme...and the most expensive part. But if I'm not mistaken, your lower joint looks like it binds. It's definitely made contact before, but it's surely outside the recommended operating range from Woodward. I had to rotate my rack a few degrees for a smaller SFD to get it within range.
Anyway, stance looks good. Gears next?

right, its 3 pieces of steel, im currently looking into just making it one thicker piece. the lower u-joint used to rub the slightest bit, i got a file and filed off just a hair. now it spins freely. good eye man!
-
more pics please!
Agreed with bushnut!! More pictures please!!


-
 1
1
-
-
left is the top side
-
-
i used grade 8 bolts for everything... the 12 subframe bolts i used, the 6 strut bolts, i bought 10" bolts and the extra length sticks up into the hood area. the rear was just 3" lift coils and a 4" spacer, over all it gave a little more than 9" of lift. but then i added about 350lbs of sound equipment in the trunk so it droops ALOT more now... to date now i have lift coils and 8.5" of spacers. i made strut tower braces on the top and on the bottom to hold things together better. it sounds unstable but i feel just as safe, and it corners well, handles well, and works just as it should.
-
Guess I'll be the guy to say it, but a lot of people here are interested to know how you went about accomplishing this, what kind of problems you ran into, materials, etc. The guys here want to dream a little, so do tell more.
I take it you did a 6" SFD, 1" spacer, with the ACs. I also imagine your rack and pinion probably needed to be rotated significantly, and probably new/modified lines.
Have you re-geared for the 35s?
Right. I'm wondering how/where he got a 6" strut spacer. Did he make it?
Is he confident in the strength of a 6" spacer and the bolts used?
The steering rack would only need to accommodate 3" of lift because it was dropped 6" with the SFD.
Assuming the 1" spacer is inside the top-hat and the AC spring is in there too, that should create gobs of top-out.
That's assuming the 1" spacer isn't stacked on top of the 6" strut spacer! Of course, if he made it anyway, he could have made it 7".
What was done for the rear lift? Which coils did you adapt? How much of the rear lift was accomplished by spacer?
Cool stuff.

i do appologize for the late response, been busy at work lately and haven't had much time. this was a pretty hard thing to get my path up to 9". i began off with a 1.5" spacer in the front. i soon wanter bigger bc we all know bigger is better! jk so then i went to 3" of spacers. kept on wanting bigger but my support rusty car wasn't holding up at all so i bought another identical pathfinder that was rust free. only problem was the motor had too many miles, clutch was slipping and it was 2x4... so i swapped the motor,tranny,clutch,4x4 transfer case, the front end,suspension and pretty much did a 4x4 swap. so then i was left with an ideal pathfinder with no problems. i then wanted bigger so i bought krfabs kit and realized that i needed longer brakelies, diff breather hose, abs brake sensor line. so i was able to get them all at advanced auto parts for pretty cheap. next i lifted the rear with 4x4parts lift coils. so after this i still wanted bigger. i installed rear spacers and then realized i needed a longer break line, longer diff breather hose and longer shocks. i got the break line extension at advanced auto parts for about 17$ and used old brake hoses i had for the diff breather hose. i went to a junkyard i bought two fox shocks that are about 3' at full extension so those did the job and a little extra. so the rear was at 6" now. then i wanted the front higher.so i got ac coils. then i put extra spacers in also. after doing so the angles of my cv axles were so ridiculous that as soon as they got engaged in 4x4 they binded. the only way to solve was either to have less lift or to drop the subframe down more, so out of steel blocks i hand cut out 2 pieces that were 2x2x3, and 4 that were 2x2x6 i slid those above the krfabs kit to drop the subframe. only to realize that now the steering link was 2" short... so for all you guys that have the krfabs kit, on the steering link you can read that it says "woodwardusa" on it... so they sell the steering link (the on needed for a 6" subframe drop is the 201 spline pattern and has to be 7.75") they're link cast about 16$... so i bought the link and it fit perfectly into place and that was all.
it might not all be in order and im sure i forgot something along the way^ but if you guys have any questions ill try my best to answer em.
-
its a home made sfd along with ac coils and spacers
-
How did you manage 9" of lift??!
How does the 3.3L manage all that rotational mass of the 35's?
Looks freakin awesome!!
it donst have have enough power to make a burnout, but it can spin them in the dirt. top speed is right around 75+-
-
How did you manage 9" of lift??!
How does the 3.3L manage all that rotational mass of the 35's?
Looks freakin awesome!!
i made a sfd at home, along with front and rear ac coils, also front and rear spacers.
-
no sir, i am not counting the tire size at all. but you are correct, its a sfd i made at home along with ac coils and spacers.
-
hey, johann peralta from orlando florida. started off with a stock 1997 pathfinder. lifted it 9 inches all in the driveway and slapped some 35s on her. they clear 100% and i have NOT trimmed the fenders or bumpers. i have 4 15" kicker comp cvrs and treat my path like a baby.

-
 3
3
-
-
sorry man computer reposted it
-
-
-
9" of lift 1997 pathfinder 35X12.5X15
-
9 inches of lift 1997 pathfinder 35x12.5x15


12" LIFT!
in 96-2004 R50 Pathfinders
Posted
i totally understand your concerns. i fixed the bolt/washer issues and took it for a test drive in the yard. it held up fine and nothing got bent or thrown out of shape. every new idea has to start somewhere and then improve along the way right i know there are lots of different ways to improve it in a more strurdy way. im completely open to suggestions and helping tips to improve it. im no pro lol