Leaderboard


Popular Content
Showing content with the highest reputation on 12/18/2020 in all areas
-
All your images are really inspiring ? Hit me up on Instagram @darthfinder2 points
-
Finally got around to bedlining the carrier, along with the bumpers and such. Not a fan of the color and will probably re-spray them, but I like the texture and finish. All the brackets and other hardware just received a flat black enamel, but everything is bed lined. Color was supposed to be Battleship Dark Gray, but a little too blue/green for my liking. While I had everything apart, I also drilled holes into the carrier frame about 2" higher than where the tire mount body attaches. The reason is that I plan to make a 1" sq. tube frame that will be sandwiched between the frame and tire mount that serves two purposes: 1) the tube frame will give me mounting points for various things (think fold down tray, telescoping work light mount, jerry can, Hi-Lift jack, etc.), and 2) will also allow me to move the tire mount 2" up and 1" out for a little more clearance if (when) moving up a tire size. I've not constructed anything yet, but eventually.1 point
-
Adding @Astrorami's build link to the thread, since we completed his last weekend. His is the newer style aluminum carrier, which weighed around 36.5 lbs vs. the 58-lb steel carrier. For his, we used a 1.5" x 14" (14.5?", I don't recall already) 14ga steel strip and a bunch of 1/4" and 3/16" rivets, in addition to the rivnuts. I was very pleased with how that turned out; barely any deflection when pushing or lifting the support bracket. Admittedly, we installed the hinge mounts about 1/4" too high, which created some alignment issues with the support bracket, as well as made the lower plastic hinge cover come up over the tail light a little. Overall, pleased with the install despite that issue. The release lever on this model is lower than the older models, so it doesn't contact the valence panel on the liftgate, about a 1/4" gap. We didn't come up with a license plate mount or lighting...the aluminum frame tubing had a larger diameter than the vinyl-coated clamps that I had. Since it was very late (er, very early in the morning), we just cable tied the plate and literally taped a freebie Harbor Freight LED light to it so that he could legally drive it home that night. We also did not wire up the switch for the tire carrier cluster light that looks like a hamburger. Just like my experience, his switch did not match the harness that's there, which seems to confirm that there's some additional pigtail wiring that needs to be grabbed from a donor to avoid having to splice wires. Oh...and I also learned that long ago when I did mine, I flipped the hole opening for the switch...Astrorami gave me grief about it...the hole for the switch body is supposed to be on the right of the screw hole. I had put it on the left, and we did the same on his just because the positioning on the reinforcement template was already set (and because it doesn't really matter...you can just as easily flip the plastic depressor piece on the carrier to make it line up). Lastly, I don't recall finding any set of 5 M12x1.25 locking lug nuts when I looked years ago, but they seem to exist now. McGard 25442: http://www.mcgard.com/product/chrome-cone-seat-wheel-lock-set-m12-x-1-25-thread-size-set-of-5-locks-and-1-key/ (I'm still using the Rugged Ridge 16715.22 single wheel lock.) ... In other news, I removed my carrier from my truck the other day for bedlining, along with my bumpers, sliders, and skids. Here's how my rivnuts have held up over the years: By no means terrible. The overall damage is minimal; the indentations on the side panels are from an accidental too fast/hard opening long ago (lesson learned), but it's also apparent that at some point I dragged the tire while off-roading judging by the 4 rivets at the rear...the top two are pushed in a little (panel is dented from corner of hinge bracket), and the bottom two are bulged out a tiny amount. I never knew I did that, but if that's the extent of carnage, I can totally live with that. Naked truck...1 point
-
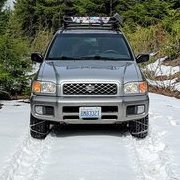
Another mission success! I got this on a little bit ago, but haven't had a chance to post pics. You can find way more pics/info in my build thread here.1 point