
peejay
-
Posts
57 -
Joined
-
Last visited
-
Days Won
2
peejay's Achievements
NPORA Regular (2/5)
4
Reputation
-
KNOW that the valve cover gaskets are leaking?
peejay replied to peejay's topic in 90-95 WD21 Pathfinders
Sorry it's taken me awhile to get back, thanks for the tips! I did (i think) run my finger along the edge/use a mirror and flashlight to try and see what is mostly likely seepage. (I have a UV light...somewhere...tried it to find a similar leak on my frontier, but never saw the "bright green spots", so gave up on it, plus I'm too lazy to look for it again!) I think I'm gonna replace the passenger's side first, see if my approach works before tackling the driver's side. Are these "bulging areas" of any concern? Should the NEW gasket conform and fill in any gaps? (I did replace these MANY moons ago, and the last time I drove this thing 3+ years ago, I don't recall them leaking (it's smoking BAD now), but it has been sitting for 3 years!) -
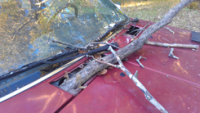
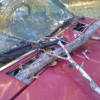
Greetings, all, Before I go through the trouble of replacing the valve cover gaskets, Is there a sure-fire way to KNOW beyond a shadow-of-a-doubt that they are leaking? I've got (some/most of) the tell-tale signs: - smoke coming from the areas between the valve cover gasket/cylinder head mating surface and exhaust manifolds - vehicle had been sitting for about 3 years - i shoulda changed 'em for good measure when i replaced the injectors (aka, the 3-year injector replacement!) i tried poking around with a flashlight in the dark around the suspect areas, and i could never actually see oil on the manifolds (would i ever be able to?), but my gut is telling me go ahead and replace 'em. (edit...should i replace the passenger's side one first, if the smoke stops, proceed with confidence to do the driver's side one? or pull my pants up and do 'em both????)
-
Pic(s) or it didn't happen!
-
Update... FINALLY got the clutch bled ("enough"). A combination of the MityVac, speed bleeder, and old school "two man" method got it done. Ultimately, I think the damper was the culprit, because after "bench bleeding" the master (on-vehicle, using the mityvac), then attempting to use the speed bleeder on the operating cylinder, no fluid ever came out (in hindsight, maybe I didn't pump the pedal enough times, but I felt like I did). After putting the mityvac on the damper, there were MILLIONS of bubbles coming through that section of tubing. I repeated the mityvac method a few times, think I even did the "two man" method with just me a few times, then moved back to the release cylinder/speed bleeder, which produced no fluid at first, then say around 10-15 pumps the pedal got firmer, firmer, then WEAK as I noticed I had emptied the reservoir! At that point I just topped off the master, cracked open the speed bleeder and kept pumping until it eventually built up pressure again, THEN I two-man bled the damper again. Hope to attempt to crank in the next few days and I may eventually do the damper bypass!
-
You know, hindsight is telling me that I should've started with/suspected the "operating cylinder" all along, in which case I woulda had to drain the old fluid anyway! So guess I'll be draining the new fluid, the pain point is trying to quickly reattach the hydraulic line without crossthreading it! (Edit) I need to take a course in Physics. Just took the banjo bolt out, no more/"new" fluid came out! Moving on to removing the crush washer...(gonna put it in the freezer for a few while I contemplate my life choices!)
-
Nissan REALLY wants me to do a powertrain swap! Update: Went to put the operating cylinder in, had everything ready so I would lose as little fluid as possible... Got the banjo bolt off, the lower washer off, pulled the bolt up, and BAM! The upper washer was stuck to the bolt!!! ARRRRRGGHHH!!! Rather than remove the bolt and lose fluid in order to assess/remove the washer, I decided "Eh, I'll just order a new banjo bolt". WRONG...guess what is included in the DISCONTINUED list??? So I started with 97-up Frontiers, thinking the parts "should" interchange, well, they do (same part number) which means...DISCONTINUED! 2002-up Frontiers have a different part number, which is available (for now!). Also looked up the banjo for a '94 300ZX (my thinking, same engine/trans, SURELY that bolt has to be the same/similar/good enough to work?) So I ordered two new crush washers (had 2 new ones, but they look suspect), and early and late production '94 Z banjo bolts. Ordered the release cylinder for the Z, too, so when I take the Pathfinder bolt out, I can see if it fits in the Z cylinder. Stay tuned!
-
Exactly! Lessons learned from letting this thing sit for 3 years.
-
Ok, I'll be patient, slave cylinder and speed bleeder should be here this weekend!
-
You know, I bought some of those for the brakes several years ago, never got around to installing them, no telling where they are now. Guess I get to try them on the clutch, thanks for the part number, looks like my local NAPA has 'em in stock! (Would this be beneficial on the damper, too?)
-
(got the m/c installed, then attempted to use the mityvac to "bench" bleed it, wasted a lot of fluid doing that, then wasted a lot of fluid trying to reconnect the line that didn't want to thread in easily!) raise your hand if you knew that the master cylinder WASN'T the problem??? (gonna bleed the damper next, while waiting on the just-ordered slave cylinder to arrive)
-
Congrats! My wife would prefer me to "consolidate" my WD21 and D22 into something newer.
-
Good to know!
-
That stinks for sure, sorry. You've already got your eyes on another one, though, right???
-
I thought: right-angle blue bung (leftmost, companion switch mounts under dash) was for CC cancel green bung - (middle) ?? Big blue bung (rightmost, companion switch mounts on support bracket on floorboard) was for starting circuit I'll look at the FSM harness layout section again, see if it gives any clues
-
Thanks, Frenchy, that worked! I'll admit, I was nervous about using the switches to force the gum drops into the holes, but nothing else was working! I'm more nervous about working on most things on this truck now than I was 10 years ago when parts were more readily available! Oh, what does the "green gum drop" do, since I don't seem to have a switch that it matches up to...is it some cool feature that I don't have???
