CDN_S4 Posted July 29, 2015 Author Share Posted July 29, 2015 no flex at all? I know the IFS won't do much but the back should provide some decent articulation. Do you have a rear sway bar still? This angle isn't very good either, it's not causing max flex that's for sure. That rear is actually tucked quite a bit compared to normal ride height. And yes, I still have the sway bar, but I will ditch it once I install my extended brake line in the rear. I received it in the mail today from krypton. But I'm dreading installing it unless I need new rear shoes anyway as my bleeder valves are rusted as fskc and I will definitely break something so I will wait until a shop replaces my brakes and has access to replacement parts. Link to comment Share on other sites More sharing options...
hawairish Posted July 29, 2015 Share Posted July 29, 2015 Meh, rear brakes are a piece of cake! If the bleeders are rusted out, might as well replace the wheel cylinders while you're at it...$10/ea US on Rock Auto. Easy to change when doing the pads, and it's the perfect time to do it. I could even make you a how-to video (er, write up). (Donor axle in garage with used genuine Nissan Akebono cylinders, if you want 'em!). Did you get the panhard drop bracket? If not, that might be why. Without it, your the right side of your axle can't articulate, and the truck will resist body roll. I realized my truck is having that problem when I went swap my rear spacers over the weekend. At one point, I could put the jack on the axle under the left spring, and the axle would basically raise evenly. I had to disconnect the panhard bar to remove the right spring, then had to use a ratchet strap to reconnect it. I ordered one up the other night...but looks like it might be a couple weeks before I get it. Link to comment Share on other sites More sharing options...
CDN_S4 Posted July 29, 2015 Author Share Posted July 29, 2015 No I didn't get a panhard drop bracket. The guy who did my SFD said there was no pull on it as it was sitting, but I think what he didn't take into consideration was the flex. I will order krypton's PHD bracket after all. I've never had a vehicle with drum brakes so I have no idea how to do anything with them. But that doesn't mean I'm not willing to learn. A DIY would be great. Also, I don't have a tool to bleed the brakes with. Not sure what the wheel cylinders are you talk of? My entire rear drums are extremely rusted and I wouldn'tind replacing the entire assembly. Sent from my iPhone using Tapatalk Link to comment Share on other sites More sharing options...
hawairish Posted July 29, 2015 Share Posted July 29, 2015 Yeah, the panhard angle matters. It should be flat because a larger angle will essentially triangulate things in a bad way. A small angle isn't terrible, but not efficient either. The strange thing on mine is that my axle appears to sit perfectly centered, whereas I expect it to be more on the driver's side. Must be the SuperPro bushings. My "tool" to bleed brakes is a small box wrench, another person's foot, a short length of clear vinyl tubing, a plastic water bottle, and two cable ties. The tubing, bottle, and cable ties make a catch bottle: drill a hole in the cap, put some tube through the hole, cable tie the tube on each side of the cap to keep the tube from coming out, then twist the cap on the bottle. The vinyl tube ID should be small enough to fit snugly on the bleeder valve's head. Other tools to complete the job: flat screwdriver, channel pliers, quick clamps, a mini-sledge hammer. Not what you were expecting, eh? The latter two are optional, but can come in handy. The wheel cylinder is a dual-headed piston assembly that pushes the tops of the shoes apart and towards the drum wall to apply braking force. The brake line and bleeder valve attach to it. If loosening either causes any damage or snaps off, it'll be the wheel cylinder that needs to be replaced. It just bolts to the backing plate. Changing drums—or brakes for that matter—is one of those things where if you see it once, and you're a pro (sort of). If you're really interested, I'll write something up and toss it in the How-To, assuming there isn't one already there. The toughest part of the job for me is getting my wife to tell me when the pedal feels firm and when it hits the floor when we're bleeding things. Link to comment Share on other sites More sharing options...
jyeager Posted July 29, 2015 Share Posted July 29, 2015 On an old worn setup, it can be hard to get the drums off as the pads will have worn a channel inside the drum creating a lip. Hence hawairish mentioning the sledge hammer. Not sure about our trucks, but most drum systems have a star adjuster to continually take up slack between the shoes and drum. You have a slot in the backing plate you can stick a 'spoon' or flat head screw driver in to and back off the adjuster to pull the shoes away from the drum and thereby let the drum pull off. But I'm never sure which way is looser and which is tighter...big pain sometimes. But I have done a full drum rebuild, including all springs and miscellaneous parts without any prior experience. Key to my success was leaving one side intact to refer to as I put things back together on the other side. There is a drum brake tool you might want to buy for a few bucks at the autoparts store that helps in mounting the springs. Not sure how easy that would be without the tool. New drums about $50 each...steal has gotten expensive. But the rest of the hardware is really inexpensive IMO. And the bottle that hawairish described works out great. That way when pumping the pedal, air doesn't get drawn back in to the brakes. Just start with a little brake fluid in the bottom of the bottle, covering the end of the hose. The bleeder can stay open while the brakes are pumped a couple dozen times (with someone watching the level in the master cylinder to keep it from running dry). Link to comment Share on other sites More sharing options...
jyeager Posted July 29, 2015 Share Posted July 29, 2015 Yeah, the panhard angle matters. It should be flat because a larger angle will essentially triangulate things in a bad way. A small angle isn't terrible, but not efficient either. The strange thing on mine is that my axle appears to sit perfectly centered, whereas I expect it to be more on the driver's side. Must be the SuperPro bushings. My "tool" to bleed brakes is a small box wrench, another person's foot, a short length of clear vinyl tubing, a plastic water bottle, and two cable ties. The tubing, bottle, and cable ties make a catch bottle: drill a hole in the cap, put some tube through the hole, cable tie the tube on each side of the cap to keep the tube from coming out, then twist the cap on the bottle. The vinyl tube ID should be small enough to fit snugly on the bleeder valve's head. Other tools to complete the job: flat screwdriver, channel pliers, quick clamps, a mini-sledge hammer. Not what you were expecting, eh? The latter two are optional, but can come in handy. The wheel cylinder is a dual-headed piston assembly that pushes the tops of the shoes apart and towards the drum wall to apply braking force. The brake line and bleeder valve attach to it. If loosening either causes any damage or snaps off, it'll be the wheel cylinder that needs to be replaced. It just bolts to the backing plate. Changing drums—or brakes for that matter—is one of those things where if you see it once, and you're a pro (sort of). If you're really interested, I'll write something up and toss it in the How-To, assuming there isn't one already there. The toughest part of the job for me is getting my wife to tell me when the pedal feels firm and when it hits the floor when we're bleeding things. With your poly bushings, the lack of articulation could be from the triangulation that takes place between the upper and lower control arms. Probably has nothing to do with the Panhard bar. The PB allows unhindered travel in the direction of articulation, doesn't it? Link to comment Share on other sites More sharing options...
96Pathfinder4x4 Posted July 29, 2015 Share Posted July 29, 2015 (edited) I thought the panhard bar stopped the axle from moving side to side. Allows travel in angles, but not from side to side. Street rods will use adjustable ones. I assume that's when using different axles and tire widths. The drop needs to be the same as the "lift". Edited July 29, 2015 by 96Pathfinder4x4 Link to comment Share on other sites More sharing options...
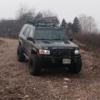
96Pathfinder4x4 Posted July 29, 2015 Share Posted July 29, 2015 Probably the only pic I have of rear flex. Link to comment Share on other sites More sharing options...
CDN_S4 Posted July 29, 2015 Author Share Posted July 29, 2015 I just ordered the krypton PB but I'm not sure it will drop the bracket low enough to be level with the axle. I don't ever recall seeing the PH being level. Maybe that's because I lifted it within a week or so of ownership. Right now with the WJ coils my rear sits really high! It will be about 3-4 weeks before I get the bracket. Sent from my iPhone using Tapatalk Link to comment Share on other sites More sharing options...
hawairish Posted July 29, 2015 Share Posted July 29, 2015 On an old worn setup, it can be hard to get the drums off as the pads will have worn a channel inside the drum creating a lip. Hence hawairish mentioning the sledge hammer. Not sure about our trucks, but most drum systems have a star adjuster to continually take up slack between the shoes and drum. You have a slot in the backing plate you can stick a 'spoon' or flat head screw driver in to and back off the adjuster to pull the shoes away from the drum and thereby let the drum pull off. But I'm never sure which way is looser and which is tighter...big pain sometimes. But I have done a full drum rebuild, including all springs and miscellaneous parts without any prior experience. Key to my success was leaving one side intact to refer to as I put things back together on the other side. There is a drum brake tool you might want to buy for a few bucks at the autoparts store that helps in mounting the springs. Not sure how easy that would be without the tool. New drums about $50 each...steal has gotten expensive. But the rest of the hardware is really inexpensive IMO. And the bottle that hawairish described works out great. That way when pumping the pedal, air doesn't get drawn back in to the brakes. Just start with a little brake fluid in the bottom of the bottle, covering the end of the hose. The bleeder can stay open while the brakes are pumped a couple dozen times (with someone watching the level in the master cylinder to keep it from running dry). Exactly the purpose of the hammer. But yes, there's a rubber plug on the back of the backing plate that provides access to the adjuster. But, it's a pain...you need one screwdriver to release the anti-reverse latch, and another to turn the screw. The FSM shows the direction to push the screw. And leaving one side intact is a great approach, just remember everything is mirrored. The shoes are usually configured for LH/RH pairs, but if necessary, they can be swapped. In my case, when I pulled some good shoes off my donor axle, I had to take the parts that make them LH/RH off. Though I mixed up my adjusters and installed one on the wrong side at one point (doh). Since I needed to pull one shoe off each side of both my truck and donor axle, and then swap parts again (I had re-assembled both the truck and donor already), I ended up taking apart things 6 times. Ugh. Pliers seemed to work best for me on the springs. Those twist caps probably more a challenge than anything...clamping the shoe to the plate freed up a hand to keep the spring pin in place. Yep, I usually lift the bottle up and tuck it between something so there's fluid in the tube to prevent drawing air. And top off the master cylinder before bleeding and after a few pumps. With your poly bushings, the lack of articulation could be from the triangulation that takes place between the upper and lower control arms. Probably has nothing to do with the Panhard bar. The PB allows unhindered travel in the direction of articulation, doesn't it? Nope, it's the panhard. In addition to tracking the axle L/R, it's also the pivot for the axle. At stock height, the axle tube should be at the same height of both panhard mounts, and the panhard level(ish). When you roll left (or right tire droops), the axle is pivoting on the left mount of the panhard; the panhard is then a radius arm (the axle is effectively the radius arm). When you roll right (left tire droop), the axle is pivoting on the right mount of the panhard on the axle; the axle is the radius arm. With lift, you've moved the effective pivot point (an imaginary point on the axle) on the left side to a lower position, but the real pivot point is still the left hand panhard mount above it. In this condition, you've now separated the effective and real pivot points by a gap equal to your rear lift height. This is the triangulation (real left panhard mount, imaginary left axle pivot, real right panhard mount and axle pivot). In order to properly roll left (droop right), those two left points need to be compressed together to shorten the gap to make a single pivot point. A little gap is fine, because the rest of the suspension will allow for movement. Otherwise, you've created a cantilever. The left side isn't as effected because the real pivot point on the right side of the axle still exists and is always the effective pivot. But what happens when you roll right (droop left) is that the axle must shift left to allow left droop (because the panhard bar is the radius arm). It wouldn't shift left if the panhard was already level. My poly bushings are probably restricting left/right movement, but this is supposed to be a primary duty of the panhard. I thought the panhard bar stopped the axle from moving side to side. Allows travel in angles, but not from side to side. Street rods will use adjustable ones. I assume that's when using different axles and tire widths. The drop needs to be the same as the "lift". For the reason above, it does both: prevents side-side movement, and allows for articulation. The drop does need to be about the same as the lift, correct. At little less is fine because under most droop conditions, your truck is compressing on the other side because of the movement allowed by the suspension. Also, the adjustable (or simply longer) panhards shouldn't be used to counter lift. It doesn't correct the triangulation, it just moves the axle to the right (or left, depending on which side the panhard is mounted to the chassis). You drop the panhard because it restores the proper pivot point. Makes the sense? 1 Link to comment Share on other sites More sharing options...
hawairish Posted July 29, 2015 Share Posted July 29, 2015 I just ordered the krypton PB but I'm not sure it will drop the bracket low enough to be level with the axle. I don't ever recall seeing the PH being level. Maybe that's because I lifted it within a week or so of ownership. Right now with the WJ coils my rear sits really high! It will be about 3-4 weeks before I get the bracket. Sent from my iPhone using Tapatalk I hope it doesn't take that long. They told me 1-2 weeks, and I ordered a pair of them. I asked that they deliver before 8/14, and they said it shouldn't be a problem. Hopefully with 3 on backorder, they can make a batch. But any drop well be far better than no drop. Link to comment Share on other sites More sharing options...
hawairish Posted July 29, 2015 Share Posted July 29, 2015 (edited) Here's a good pic to illustrate the point: Ignore the green and blue rods. Those are for lowered vehicles or street cars, and are not good scenarios for us. Purple represents our lifted setup. Red represents the panhard drop bracket in place. You can see how the axle will effectively act like the panhard in this condition. The aforementioned triangle is made by the the purple and red lines. Imagine each black dot as a pivot point, allowing the tire farthest from it to raise or lower. You'll see that pivoting on the left-purple's dot would require the entire triangle to pivot. But if it can't pivot (because the springs and 4-link won't allow it), then it cantilevers the right axle. Pivoting on the right-purple's dot does allow the left axle to droop, but the axle wants to shift left. The red pivot points allow full droop on either side without the axle wanting to shift left or right. EDIT: And going full-circle as to why you're also not seeing flex up front, it's because your rear axle wants to stay flat, almost acting like a giant anti-sway bar for the entire vehicle. Edited July 29, 2015 by hawairish 1 Link to comment Share on other sites More sharing options...
jyeager Posted July 29, 2015 Share Posted July 29, 2015 hawairish, I understand what you are explaining. Thanks. I am guessing that it is true that rubber bushings could hide this issue quite a bit because they might allow enough twisting at the 4 control arms to let the right end of the axle travel that purple arc. (and probably thereby shortening their lifespan a lot) But dropping the PB bracket is definitely always the best thing to do (I installed my drop right off the bat). Link to comment Share on other sites More sharing options...
Megaton Posted July 29, 2015 Share Posted July 29, 2015 Hawairish, would a panhard drop bracket benefit a stock or modest (2-3 in) lift with articulation? Thanks. Link to comment Share on other sites More sharing options...
hawairish Posted July 29, 2015 Share Posted July 29, 2015 (edited) hawairish, I understand what you are explaining. Thanks. I am guessing that it is true that rubber bushings could hide this issue quite a bit because they might allow enough twisting at the 4 control arms to let the right end of the axle travel that purple arc. (and probably thereby shortening their lifespan a lot) But dropping the PB bracket is definitely always the best thing to do (I installed my drop right off the bat). Very likely. Especially worn rubber bushings. The poly bushings are more block-like, whereas the OE rubber has a decent gap between outer sleeve and control arms. That would allow several degrees of movement. Hawairish, would a panhard drop bracket benefit a stock or modest (2-3 in) lift with articulation? Thanks. It would, but it somewhat depends on lift method. Stock springs will obviously flex more than lift springs. Spacers and stock springs may be more flexible together than lift springs alone (for the same lift height), which means it'll probably be easier for the axle to overcome the pivot point gap and articulate better. The lift spring has to be compressed harder (aided by vehicle flex) to close that same gap. But in both cases, the drop bracket eliminates the need for either setup to compress. As 96Pathfinder4x4 mentioned earlier: the drop should match the lift, but if you're not sure how much that really is, it's whatever length drop helps get the PHB level. In my scenario, the weight of the chassis above the lift point was not enough to overcome the amount of lift gained from spacers and spring, so it just cantilevered the axle with it when lifting. I had to disconnect the PHB to make the right side droop, and when I did, I was immediately able to articulate at least another good 6" (mind you, I needed to completely unseat the rear spring to swap my spacers). I had actually been meaning to have a bracket made before making this realization, but it kind of fell by the wayside. I really didn't think it'd be as pronounced as it was, though. I'll have to see if I can get a pic of me jacking it up off center...it didn't look right at all! Edited July 29, 2015 by hawairish Link to comment Share on other sites More sharing options...
Prattage Posted July 30, 2015 Share Posted July 30, 2015 First off love this build. Looks great. I just picked up a r50 yesterday. It is really beat up. But should be fine for a weekend buggy. It runs really well but you would never guess by looking at it lol. I live about 30 minutes south of that b52 crash site. I've never even been lol. But I did see the engine from that plane is at the local snowmobile club it's displayed in their front lawn. I briefly looked at the rear suspension setup on my r50 (its a 99) but I thought I saw a triangulated 4link setup. Why is there even a PHB if it's triangulated? This makes no sense to me. Has anyone tried running without it and see how much the axle moves side to side? Link to comment Share on other sites More sharing options...
Prattage Posted July 30, 2015 Share Posted July 30, 2015 First off love this build. Looks great. I just picked up a r50 yesterday. It is really beat up. But should be fine for a weekend buggy. It runs really well but you would never guess by looking at it lol. I live about 30 minutes south of that b52 crash site. I've never even been lol. But I did see the engine from that plane is at the local snowmobile club it's displayed in their front lawn. I briefly looked at the rear suspension setup on my r50 (its a 99) but I thought I saw a triangulated 4link setup. Why is there even a PHB if it's triangulated? This makes no sense to me. Has anyone tried running without it and see how much the axle moves side to side? Link to comment Share on other sites More sharing options...
hawairish Posted July 30, 2015 Share Posted July 30, 2015 Hey Prattage, welcome to the R50 club! The triangulation I mentioned earlier shouldn't be confused with the 4-link (really 5, counting the panhard) setup. Triangulation in this case is undesired. But yes, to some degree, multi-link setups should keep things centered, but it depends on the angles of the links relative to each other, and how well those angle oppose each other. In our case, you would see some side-to-side without the PHB, but it could get pretty dangerous (imagine it oscillating back and forth as it attempts to keep correcting itself...death2 wobble!). It's an integral part of our suspension to say the least, and it's common on nearly all spring-based solid axles front or rear (Jeeps, Land Rovers, LandCruisers, 4Runners, etc.) Some custom built 4x4 suspensions can get away with not having PHBs because their links often cross over each other (like an X shape) and have longer arms, while others simply move the upper links somewhere atop the diff hump. This essentially makes two very large triangles. (By contrast, we have two really small triangles and a PHB.) Link to comment Share on other sites More sharing options...
Prattage Posted July 30, 2015 Share Posted July 30, 2015 (edited) I have a really good understanding of suspension geometry. That's why I was confused. But like I said I didn't really get a good look at it just saw a 4 link setup. At first I didn't even question the PHB but after thinking about it I was curious why it was there. Then I looked at some images of the stock setup and while it is triangulated. There is little angle on those top bars. And now it makes sense lol Edited July 30, 2015 by Prattage Link to comment Share on other sites More sharing options...
Prattage Posted July 30, 2015 Share Posted July 30, 2015 (edited) So many double posts. I'm on my phone with not so good service so it keeps posting twice. Edited July 30, 2015 by Prattage 1 Link to comment Share on other sites More sharing options...
ferrariowner123 Posted July 30, 2015 Share Posted July 30, 2015 If you guys are looking for SFD flex pics, KR has this little gem on his website. Obviously rear sway bar is disconnected. -Kyle 2 Link to comment Share on other sites More sharing options...
hawairish Posted July 30, 2015 Share Posted July 30, 2015 If you guys are looking for SFD flex pics, KR has this little gem on his website. Obviously rear sway bar is disconnected. -Kyle Of course, the SFD has nothing to do with rear flexing. Though, it's got the PHB drop. Link to comment Share on other sites More sharing options...
ferrariowner123 Posted July 30, 2015 Share Posted July 30, 2015 Yeah..... But... DAMN IT LOOKS COOL! Lol -Kyle Link to comment Share on other sites More sharing options...
hawairish Posted July 30, 2015 Share Posted July 30, 2015 Ha, yeah, there's some good articulation right thar. 1 Link to comment Share on other sites More sharing options...
TeagueAuto Posted July 31, 2015 Share Posted July 31, 2015 Nice build man! now I know exactly what mine will look like when im done, what kind of gas mileage are you getting since the lift? Link to comment Share on other sites More sharing options...
Recommended Posts
Create an account or sign in to comment
You need to be a member in order to leave a comment
Create an account
Sign up for a new account in our community. It's easy!
Register a new accountSign in
Already have an account? Sign in here.
Sign In Now