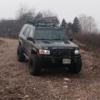
CDN_S4 Posted July 8, 2015 Author Share Posted July 8, 2015 Damn, that looks so good. I kind of wish I didn't have to haul a trailer so I could go for a similar setup. Just use a drop down hitch. I still tow with this. But then again my trailer sits on 31's lol 1 Link to comment Share on other sites More sharing options...
CDN_S4 Posted July 8, 2015 Author Share Posted July 8, 2015 Well, the mounting surfaces on the spacers are identical and symmetrical, so they can logically be mounted to either tower location. That's 4 possible mounting scenarios, assuming the lower mount doesn't contact the body for a particular orientation and the spacers are identical instead of mirrored. If they are mirrored, then there are 8 mounting scenarios. That said, there's a 12.5% to 25% chance of getting it right. Weren't they supposed to be marked? Haha good way of putting it. Yeah that definitely confirms that they are mounted wrong. I believe they are marked # 1&2. That would give the right side, still leaving a chance to be mounted wrong, but upping the odds to 50% Link to comment Share on other sites More sharing options...
TowndawgR50 Posted July 8, 2015 Share Posted July 8, 2015 Ahhhh. Good to know. Still new to the trailer and hauling world. Does this affect the towing characteristics of your truck/trailer? Link to comment Share on other sites More sharing options...
CDN_S4 Posted July 8, 2015 Author Share Posted July 8, 2015 No not really in fact it will improve it as the higher compression spring rated coil will keep the rear from sagging under heavy load. Link to comment Share on other sites More sharing options...
ferrariowner123 Posted July 9, 2015 Share Posted July 9, 2015 (edited) You should track down some of the JDM safari window visors. Complete the look -Kyle Edited July 9, 2015 by ferrariowner123 1 Link to comment Share on other sites More sharing options...
CDN_S4 Posted July 9, 2015 Author Share Posted July 9, 2015 Haha I love the fender flares and front bumper on that one. And of course the spare tire carrier. Why oh why Nissan did you ever stop using that!? But those window visors are not my style. I like mine a lot better. Link to comment Share on other sites More sharing options...
Motofish Posted July 11, 2015 Share Posted July 11, 2015 You should track down some of the JDM safari window visors. Complete the look -Kyle Those have to be the biggest visors ive ever seen! Id agree, not my style, but interesting! 33's All washed up! It's been a while CDN, your truck is looking really good! Ive been following the thread, although i dont have an R50, ive found this thread to be quite captivating... not sure why, maybe its the fabrication. Anyway, kudos on your rig! Link to comment Share on other sites More sharing options...
CDN_S4 Posted July 11, 2015 Author Share Posted July 11, 2015 Thanks motorist! Well it should stay interesting for a little while as I still have lots of big plans Link to comment Share on other sites More sharing options...
hawairish Posted July 11, 2015 Share Posted July 11, 2015 So have you gotten things with the strut towers sorted out? Link to comment Share on other sites More sharing options...
CDN_S4 Posted July 12, 2015 Author Share Posted July 12, 2015 No situation no change. I stare at them and they seem to be right but must be wrong lol. I tried rotating them but no luck. There is only one way they go on. Distances between screws are not equal. I'm stumped Link to comment Share on other sites More sharing options...
hawairish Posted July 12, 2015 Share Posted July 12, 2015 Ha, that's even more confusing. So are the mounting surfaces on the spacers even parallel? Are they in a different orientation to each other? If the answer is no, then they were made wrong. Have you been in touch with KrF through all this? Link to comment Share on other sites More sharing options...
CDN_S4 Posted July 12, 2015 Author Share Posted July 12, 2015 When I line my eye up with the bolt holes as if it were the aights of a gun, all 3 holes align. So they are where they should be. I just don't get it. Even with camber bolts it doesn't angle in enough to straighten the wheel out. I'm at a point where I might have to fabricate custom strut brackets that allow a greater range of movement or simply have the bottom hole further out. Link to comment Share on other sites More sharing options...
hawairish Posted July 12, 2015 Share Posted July 12, 2015 Sounds like the mounting surfaces are oriented correctly, but are they also parallel? If the spacers are made or installed wrong, there's no amount of camber bolts that will fix it. You could just put your 2" spacers back on. You've still got your OME springs on, right? At least until you figure out if you want more lift in the rear. Sucks to have to go this route and keep re-doing things, but sounds like the better route to save yourself from the headache for now. Link to comment Share on other sites More sharing options...
CDN_S4 Posted July 12, 2015 Author Share Posted July 12, 2015 That would be one option. The brackets do seem to be parallel. My guy said he will try to refab the spacers to change the angle on them and push the struts closer to the body. I already ordered the WJ coils for the rear. They will go in next weekend. I think the strut spacers should be straight not on an 80• angle. Just like stacking 2x2" spacers together. But what I'm puzzled by is that these angled spacers seem to work for everyone else. I'm pretty sure I'm on not the only one using lift coils in combination with this kit. Link to comment Share on other sites More sharing options...
ferrariowner123 Posted July 12, 2015 Share Posted July 12, 2015 What exactly is preventing the bracket from being clocked? I'm assuming it's hitting the shock tower? Is there anyway to modify the tower or the bracket to make it fit? And what has KRF said about it, he's usually very helpful with his kits. -Kyle Link to comment Share on other sites More sharing options...
hawairish Posted July 12, 2015 Share Posted July 12, 2015 (edited) Actually, the 80° is about right. Other posts put it closer to 8.5°, I measured about 9°. The angle is based off the angles of the strut mouth surfaces on unibody, and they actually slope about 11° towards the center of the vehicle; this is the result from a 4° decline from front-to-rear and 9° left-to-right...this latter number being the one that corrects camber. Here's how you should think about this image from the other thread (http://www.nissanpathfinders.net/forum/topic/31584-my-pathy-project-lifting/) This: Is really this, when installed: And the coils wouldn't affect this, btw. This is entirely related to the strut spacer, whether it's on wrong, or made wrong. Edited July 12, 2015 by hawairish Link to comment Share on other sites More sharing options...
CDN_S4 Posted July 12, 2015 Author Share Posted July 12, 2015 If THATS how it's supposed to sit then it's wrong on mine. As mine is like the first pic on the passenger side. They point out. By what I gather from your second pic it should in fact point in to make it straight. Link to comment Share on other sites More sharing options...
CDN_S4 Posted July 12, 2015 Author Share Posted July 12, 2015 What exactly is preventing the bracket from being clocked? I'm assuming it's hitting the shock tower? Is there anyway to modify the tower or the bracket to make it fit? And what has KRF said about it, he's usually very helpful with his kits. -Kyle Kyle, it's not that it's hitting anything it's just not allowing the strut to sit inwards enough for the wheels not to be toed in. Krypton said they were on wrong. But they look exactly like in the pics. But if hawairish's above is correct then that means the angle is supposed point in towards the body, not away from it. Then the strut holes would probably sit directly parallel underneath the holes of the body. Right now they are offset to the side but point at the holes if you were to draw a straight line from an angle. It's really hard to describe. As I'm writing this I realize how much it sucks. Lol But I think the answer is to swap sides make the angle point the other way. Link to comment Share on other sites More sharing options...
CDN_S4 Posted July 12, 2015 Author Share Posted July 12, 2015 Some progress at last. I took the spacers out and turns out there were indeed upside down. Now I haven't re-assembled everything yet but I'm fairly confident this is what was wrong with them. 3 Link to comment Share on other sites More sharing options...
96Pathfinder4x4 Posted July 13, 2015 Share Posted July 13, 2015 That will probably fix your uneven stance also. Link to comment Share on other sites More sharing options...
CDN_S4 Posted July 14, 2015 Author Share Posted July 14, 2015 I'm not so sure about that as it was uneven before the SFD too. But I'm hoping you're right. Maybe just messing around with it all in there will help. I'll need to get a new spring compressor tomorrow as I broke one of the 2 that I was using. Scary stuff! Link to comment Share on other sites More sharing options...
hawairish Posted July 14, 2015 Share Posted July 14, 2015 Yeah, might not help too much on the stance. What do you need the spring compressors for? Are you changing out the strut mount bolts? Link to comment Share on other sites More sharing options...
CDN_S4 Posted July 14, 2015 Author Share Posted July 14, 2015 Just to get the whole assembly out. And when I did the driver side I actually took off the strut mount. Seemed easier at the time but probably wasn't lol. But compressed struts will go on a whole lot easier than fully extended HD coils. Makes life easier. Link to comment Share on other sites More sharing options...
hawairish Posted July 14, 2015 Share Posted July 14, 2015 If you say so. Shouldn't be any different than installing struts on a stock truck. You could also install the strut spacers to the truck first, then install the struts. The struts aren't any longer with HD springs than they are with stock springs. But really...we're all just anxious to see this through! Link to comment Share on other sites More sharing options...
CDN_S4 Posted July 14, 2015 Author Share Posted July 14, 2015 Yeah that's what I did, but in order to get the spacer to the strut mount you need to have the strut mount removed from the strut assembly in order to get the bolts in due to the lip that houses the top of the coil. I can't see how I could get this done without a compressor. Also I booked my guy again for Saturday. Plan was for him to fix the strut mounts but since I've already done this (50% at least) we'll do the rear. He will fab up a panhard drop bracket for me as well as cool adapters. I will throw in my air bags and then hopefully be done with this suspension FOREVER!!! Link to comment Share on other sites More sharing options...
Recommended Posts
Create an account or sign in to comment
You need to be a member in order to leave a comment
Create an account
Sign up for a new account in our community. It's easy!
Register a new accountSign in
Already have an account? Sign in here.
Sign In Now