1999R50 Posted December 15, 2010 Share Posted December 15, 2010 (edited) Well. While looking on the net at different Pathys I got inspiration to build my self a rear bumper to match my front one. I also decided to add a tire carrier. Here is where it started I then wanted to remake the trailer hitch mounts so I could easily remove the bumper without too much hassle, but still maintain strength. So I than milled out the sections for the mounts and for the bends I welded in a pillar with a 5/8-11 tapped hole in it to use a shoulder bolt for the bearing surface. I made a piece of 2" round stock 2" long with recesses on either side and pressed in 1.625 OD .625 ID bearings. Now here it is assembled and painted with spray on truck bed liner For those of you who care to know. The material used for the main section is 2x6 .125 wall. It is flared up to 4". I then used 2x4 .1875 wall(because I couldn't get .125 in the time frame I needed) to go down the sides to the wheel wells. The angle I bend it in on either side to suit the profile of the rear of the vehicle was 7.5 degrees(Half of the angle that was needed on the front.) So therefore I slotted .263" down the back of the tubing for the bend. The toggle clamp I used for the tire carrier was provided by Fox. Edited January 17, 2011 by 1999R50 Link to comment Share on other sites More sharing options...
01silvapathy Posted December 16, 2010 Share Posted December 16, 2010 Man that looks awesome, pretty much exactly what I want to build Link to comment Share on other sites More sharing options...
exit34rocker1017 Posted December 16, 2010 Share Posted December 16, 2010 i love how it flows with the truck. thats one of the nicest looking bumpers ive seen. good job! Link to comment Share on other sites More sharing options...
bagndrag Posted December 16, 2010 Share Posted December 16, 2010 that looks clean man hell of a lot better then the stock style Link to comment Share on other sites More sharing options...
OfftourRoadie96 Posted December 16, 2010 Share Posted December 16, 2010 Great Job....so in your best guesstimation, how much money did you happen to spend on this project???? Link to comment Share on other sites More sharing options...
Simon Posted December 16, 2010 Share Posted December 16, 2010 Looks nice, but I've got a couple of questions. What are the bolts for that are sticking out of the bumper? Where does your pin go for your receiver? Link to comment Share on other sites More sharing options...
1999R50 Posted December 16, 2010 Author Share Posted December 16, 2010 (edited) Looks nice, but I've got a couple of questions. What are the bolts for that are sticking out of the bumper? Where does your pin go for your receiver? The pin for the receiver goes behind the bumper. I think it looks nicer that way. The bolts are keeping the tapped holes clean. I put 1.5"x1.5"x 3.5" blocks through the bumper welded all around and welded to the bumper mounts. I then tapped a 5/8-11 tapped hole in each of the(I have them on the front as well). I didn't like how most peoples custom bumpers have the shackle's. So I use 5/8-11 hoist rings. http://www.mcmaster.com/#hoist-rings/=a6dbym The other advantage to the 5/8-11 tapped holes is that you can make adapters to mount anything you want and it is guaranteed to be strong because it is mounted directly to frame. I also use hoist rings for chain. http://www.mcmaster.com/#hoist-rings/=a6dcrd This way you are screwing in the chain directly to the frame through the tapped hole. I found it to be very convenient on the front bumper I made, so I decided to do the same on the back. Edited December 16, 2010 by 1999R50 Link to comment Share on other sites More sharing options...
1999R50 Posted December 16, 2010 Author Share Posted December 16, 2010 (edited) Great Job....so in your best guesstimation, how much money did you happen to spend on this project???? I paid $106 cash for a 24' of 2x6 tubing. I paid $40 for the pieces of 2x4 because I didn't have time to pick up a length because I was in a hurry due to the snow piling up. So $26.5+$40 + the material for the tire carrier, so about $45 or less. $111.5 + a few new longer bolts here and there, $10. 1/2x3 hot rolled for the bumper mounts. $25 Trailer hitch receiver from princess auto $8 2 cans of truck bed liner $25 And the most expensive piece, the toggle clamp. $60 So about $239.5 and 11 hours work Edited December 16, 2010 by 1999R50 1 Link to comment Share on other sites More sharing options...
Northernpathy Posted December 16, 2010 Share Posted December 16, 2010 Looks good. Nice and clean. I am not a fan of the off center tires, but do what works for you! When you building a new front bumper? Link to comment Share on other sites More sharing options...
Pezzy Posted December 17, 2010 Share Posted December 17, 2010 Nice work! Link to comment Share on other sites More sharing options...
couvboy Posted December 17, 2010 Share Posted December 17, 2010 Very slick! Definitely beats putting bigger spares in the trunk Link to comment Share on other sites More sharing options...
Simon Posted December 17, 2010 Share Posted December 17, 2010 The pin for the receiver goes behind the bumper. I think it looks nicer that way. The bolts are keeping the tapped holes clean. I put 1.5"x1.5"x 3.5" blocks through the bumper welded all around and welded to the bumper mounts. I then tapped a 5/8-11 tapped hole in each of the(I have them on the front as well). I didn't like how most peoples custom bumpers have the shackle's. So I use 5/8-11 hoist rings. http://www.mcmaster.com/#hoist-rings/=a6dbym The other advantage to the 5/8-11 tapped holes is that you can make adapters to mount anything you want and it is guaranteed to be strong because it is mounted directly to frame. I also use hoist rings for chain. http://www.mcmaster.com/#hoist-rings/=a6dcrd This way you are screwing in the chain directly to the frame through the tapped hole. I found it to be very convenient on the front bumper I made, so I decided to do the same on the back. Ahh, I figured as much on the pin. Nice work. Link to comment Share on other sites More sharing options...
1999R50 Posted December 17, 2010 Author Share Posted December 17, 2010 (edited) Looks good. Nice and clean. I am not a fan of the off center tires, but do what works for you! When you building a new front bumper? My front bumper has been done for a while. i will post some pics when i get a chance to take some. I also prefer the centered tire at the back. However, with the off center tire you can still see out the back window. Edited December 17, 2010 by 1999R50 Link to comment Share on other sites More sharing options...
tekazgtr1984 Posted December 17, 2010 Share Posted December 17, 2010 (edited) I paid $106 cash for a 24' of 2x6 tubing. I paid $40 for the pieces of 2x4 because I didn't have time to pick up a length because I was in a hurry due to the snow piling up. So $26.5+$40 + the material for the tire carrier, so about $45 or less. $111.5 + a few new longer bolts here and there, $10. 1/2x3 hot rolled for the bumper mounts. $25 Trailer hitch receiver from princess auto $8 2 cans of truck bed liner $25 And the most expensive piece, the toggle clamp. $60 So about $239.5 and 11 hours work A one-of-kind rear bumper for under $250?! Uh, can you say 'score'? Awesome work BTW. Edited December 17, 2010 by tekazgtr1984 Link to comment Share on other sites More sharing options...
Fox Posted December 18, 2010 Share Posted December 18, 2010 The whole thing looks awesome. Can you tell me a little bit more about the hinge, maybe some more pictures? Looks like you designed the whole thing yourself, and I'm wondering if you had to do some milling on it, how hard that was, if the parts were easy to find... I used a bronze bushing & washers with a 1" bolt going through, with the nut welded inside the box tubing. Wondering if that was a good or bad idea, I'm still a rookie at fabing stuff. Hope the latch worked out well. Link to comment Share on other sites More sharing options...
1999R50 Posted December 18, 2010 Author Share Posted December 18, 2010 The whole thing looks awesome. Can you tell me a little bit more about the hinge, maybe some more pictures? Looks like you designed the whole thing yourself, and I'm wondering if you had to do some milling on it, how hard that was, if the parts were easy to find... I used a bronze bushing & washers with a 1" bolt going through, with the nut welded inside the box tubing. Wondering if that was a good or bad idea, I'm still a rookie at fabing stuff. Hope the latch worked out well. This is what the hinge looks like. i turned it up and pressed a bearing in either end. and then welded the piece to the end of the bottom of the tire carrier. Above in the post i spoke of the milling which I had to do. I milled out the sections for the bumper mounts and on the back of where I wanted to bend. I used a 3/8 roughing endmill to do all of it. The reason I put a pillar with the 5/8-11 tapped hole in it for my hinge was because I felt that the wall thickness was not enough to withstand the force of the tire carrier while it was swung out. I felt that it would bend the tubing over time. Did you weld the nut to the bolt? I would be afraid of it coming loose over time if you didn't. Bronze bushing is fine. It wont rust which is nice, and it can take alot of force. It definitely isn't your weakest link. I used the bearings because I wanted it to feel perfectly smooth when I swing it out. The other advantage of the bearings is that when they wear out, in many many years, I can just press them out and replace them. What more did you want pictures of? Link to comment Share on other sites More sharing options...
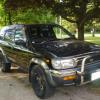
1999R50 Posted December 20, 2010 Author Share Posted December 20, 2010 (edited) Here are the photos of the front Bumper with the bash guard. The white stuff on the bumper is wax. While waxing the truck for the pre-winter preparation, I decided to continue on to the bumper as well. Edited December 20, 2010 by 1999R50 Link to comment Share on other sites More sharing options...
tekazgtr1984 Posted December 21, 2010 Share Posted December 21, 2010 Wax? What an awesome idea! What type of wax did you use? I'd definitely like to learn about more this. Nice front bumper and skid plate BTW. Did you fab them both yourself? Link to comment Share on other sites More sharing options...
1999R50 Posted December 21, 2010 Author Share Posted December 21, 2010 Wax? What an awesome idea! What type of wax did you use? I'd definitely like to learn about more this. Nice front bumper and skid plate BTW. Did you fab them both yourself? The wax is just regular turtle wax. Yes I did. Being my first bumper, it took about 18 hours with the skid plate. Link to comment Share on other sites More sharing options...
teixeira Posted December 21, 2010 Share Posted December 21, 2010 I need to learn how to weld... Link to comment Share on other sites More sharing options...
1999R50 Posted December 21, 2010 Author Share Posted December 21, 2010 I need to learn how to weld... Just start. And if you can't figure it out, ask Google. Link to comment Share on other sites More sharing options...
1999R50 Posted December 21, 2010 Author Share Posted December 21, 2010 If anyone would like to buy either of these bumpers I would be willing to sell them. Shipping would be terrible so it would have to be someone within a few hours of Newmarket. But if you want to drive or get it shipped, by all means. Link to comment Share on other sites More sharing options...
WOT Posted December 31, 2010 Share Posted December 31, 2010 Very nice fab and plan layout. Came out very nice looking and obviously very solid. I wouldnt want to rear-end you lol Do you not think youll get hassled for the plate being blocked? Link to comment Share on other sites More sharing options...
1999R50 Posted January 2, 2011 Author Share Posted January 2, 2011 Very nice fab and plan layout. Came out very nice looking and obviously very solid. I wouldnt want to rear-end you lol Do you not think youll get hassled for the plate being blocked? I have since cable tied the plate to the spare tire. I actually look forward to some cocky civic driver to ride my tail a little to close. Just a tap of the brakes... Link to comment Share on other sites More sharing options...
Recommended Posts
Create an account or sign in to comment
You need to be a member in order to leave a comment
Create an account
Sign up for a new account in our community. It's easy!
Register a new accountSign in
Already have an account? Sign in here.
Sign In Now