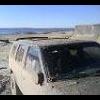
SamTex Posted January 19, 2010 Share Posted January 19, 2010 (edited) I've been doing a lot of work to my truck, basically took it from a parts truck to my daily driver. It was time for a new inspection sticker. I knew it had a few broken manifold studs but figured this didn't really matter since the county I live in is a non emissions county, and the noise sealed up pretty well once the engine was warm. However the day I took it in was a cold one(for Texas) and I had to wait for the car in front of me, so the engine wasn't very warm when the tech got to it. This made it immediately obvious there was a tick coming from the manifolds. Damn, more work, more money. Regardless of emissions, an exhaust leak is a safety issue. Looking for a cheaper way out and seeing as nobody here or anywhere else has installed them, I bought these bottom dollar OBX headers and looked forward to the install. I removed all the exhaust down to the pre cats. I had three broken studs total. Got a hold of a cheap 90 degree Ryobi drill and went to work. That drill made it cake to remove the studs and did a great job cleaning the old gasket material off the heads with a wire brush wheel. Once cleaned up I attempted a test fit. Uh oh, these will not go in without lifting the body off the frame or really making a mess of the firewall. Luckily I had my 3in. body lift sitting in a box ready for install. After I did the body lift, these headers had no problem going in. The quality is just fine IMHO, but these definitely don't make it easy. They are long tubes and all you get are the headers, no cross pipes, h pipes, y pipes or otherwise. I found out the hard way the pass side header comes too far back and down to put a cross pipe back where the stock one goes under the tranny pan and to the y pipe. My nightmare began. I took it to a fella just down the road that has been around forever. I explained what I needed, we got it on the lift, discussed it, and he got to work. To my horror when I got the truck back, it had four exhaust leaks and the cross pipe he made was four inches, I say FOUR inches below the cross members of the frame. The LOWEST point of anything on my truck, the exhaust. Not gonna work, I would rip that crap off in minutes if I actually tried to wheel the thing. Not to mention the leaks. I'm just gonna skip the rest of this story, there is a lot more. I then found Joe of Joe's Muffler's in Addison, Tx. Down the road from where I work. I loved this guy. He knew what he was doing and very easily picked up how important this exhaust job was to me and that I wanted it right. He laughed his ass of at the last guys job. Joe thought about it and looked at my truck for days, I didn't mind 'cause I wanted it right. He came up with a plan that I agreed on. I'll have to get pics later today or tomorrow of his work. He moved the cat closer to the muffler and cut the pre cats off. Bent new pipe to run back the length of the transmission and made a new y pipe that tied together where the drive shaft starts. It's all out of the way and comes apart easily when I go to remove my tranny. Here are some pics of the headers and the headers installed. Instead of studs(no way I'm paying anything over a dollar a pop for fasteners, what a rape job otherwise) I just used grade 8 bolts bought at home depot, i think .54 cents each. Perfect fit/length/whatever. M8x1.25x30 IIRC And pay no attention to my steering shaft, I wasn't done with it yet <BR><BR> <BR> <BR> <BR> <BR> <BR> <BR> <BR> <BR> <BR> Edited April 5, 2010 by SamTex Link to comment Share on other sites More sharing options...
Dowser Posted January 19, 2010 Share Posted January 19, 2010 (edited) Well the Quality of them looks pretty good. What was the output Diameter? Looks fairly large in a couple of pictures to me. I'm just curious. Perhaps you can get a photo of the pipe work the second guy did so we can all see when you get a chance. I've been trying to find an alternative to Thorely's because of the low hanging Y pipe so I'd like to see. Also, did they come with a Gasket? Edited January 19, 2010 by Dowser Link to comment Share on other sites More sharing options...
edicer2 Posted January 19, 2010 Share Posted January 19, 2010 where did u get those at? Link to comment Share on other sites More sharing options...
SamTex Posted January 19, 2010 Author Share Posted January 19, 2010 I'm not sure of the diameter at the collector, I think it's 2.5". They did come with gaskets, I went ahead and used some copper silicone along with them. They also came with two clamps, but that is it. I will get pics of the rest tonight when I get home and post them up tomorrow. Found them on ebay after someone here mentioned them, snagged 'em for 170 plus 20 shipping. Link to comment Share on other sites More sharing options...
Dowser Posted January 20, 2010 Share Posted January 20, 2010 One more thing. Looking at their homepage I don't see an option for those headers. Least I can't find them. Was there a Part Number with any of you paperwork that you can list for us. Link to comment Share on other sites More sharing options...
Yendor Posted January 20, 2010 Share Posted January 20, 2010 Wow. I have the OBX headers too. (not installed yet) If you could post some more pics of your y-pipe setup, that'd be really helpfull. Good thing my 3" body lift just came today too. Link to comment Share on other sites More sharing options...
Precise1 Posted January 20, 2010 Share Posted January 20, 2010 Interesting, I haven't heard of that brand, but it looks pretty beefy. Too bad about the fitment issues without a 3" body lif though. I don't know what you paid for all the other exhaust work, but that's on top of the $190. I got a set of Thorley headers shipped to my door for $406 and they included a cross over pipe, hardware and gaskets. Bolts right up to the stock midpipe also. It just sounds like you didn't save much $ in the long run, but good job and I'm glad you got it worked out. Does it run any stronger?? B Link to comment Share on other sites More sharing options...
OldSlowReliable Posted January 21, 2010 Share Posted January 21, 2010 I saw those and wanted to buy em....nice Link to comment Share on other sites More sharing options...
GrimGreg Posted January 21, 2010 Share Posted January 21, 2010 One more thing. Looking at their homepage I don't see an option for those headers. Least I can't find them. Was there a Part Number with any of you paperwork that you can list for us. Given the fitment issue, I woder if they aren't actually for Z cars? Link to comment Share on other sites More sharing options...
SamTex Posted January 22, 2010 Author Share Posted January 22, 2010 Here are pics of the finished job. Because of my mistake with the first guy and the amount of material/time the second guy used, this was definitely NOT a cheap route. A plus however is that the tranny pan and the transmission itself can drop without having to touch the exhaust. And as you can see from that last pic, the next time I high center on something I won't be worried about damaging any of it. I was wrong about the collector size of the headers, I put new clamps on and the 2" are what worked, not sure of the inside diameter. If you have these headers or get them, do not use the clamps supplied. Both of them leaked, those two dollar clamps at O'Reilly's work like a charm. Link to comment Share on other sites More sharing options...
Yendor Posted January 22, 2010 Share Posted January 22, 2010 So the new "Y" pipe is more like a "T" pipe now? Link to comment Share on other sites More sharing options...
SamTex Posted January 22, 2010 Author Share Posted January 22, 2010 Ha, still looks Y'ish to me? I need to get a shot of what he did with the cat, where you see the new Y,T, what have you, is where the cat used to be. Link to comment Share on other sites More sharing options...
MY1PATH Posted January 22, 2010 Share Posted January 22, 2010 where's the o2 sesor now? is it running off only one manifold now? how's it run? Link to comment Share on other sites More sharing options...
SamTex Posted January 22, 2010 Author Share Posted January 22, 2010 Yup! He welded a new bung a little further back than the stock location. That is actually something I was going to ask you guys about after I looked into it further. It's not an issue so far, logged about 400 miles since, no CEL. It runs good, but I'm still using the stock cat and muffler, so I wasn't expecting a huge difference. Even though it seems a little peppier it may just be in my head A nice wrap job on these headers would be beneficial to reduce noise, they have tin can sound but I'm already used to it. I would guess if you had a high flow cat and muffler you wouldn't hear much of anything... Link to comment Share on other sites More sharing options...
SamTex Posted January 22, 2010 Author Share Posted January 22, 2010 o2 Link to comment Share on other sites More sharing options...
FUELER Posted January 22, 2010 Share Posted January 22, 2010 Nice header! How did the bolts (studs) look? Were you able to remove them all with hand-tools, or did any of them snap flush with the block? Im about to tackle a 1995 header job on my buddys Pathfinder and would like to know what to expect... Link to comment Share on other sites More sharing options...
SamTex Posted January 22, 2010 Author Share Posted January 22, 2010 Nice header! How did the bolts (studs) look? Were you able to remove them all with hand-tools, or did any of them snap flush with the block? Im about to tackle a 1995 header job on my buddys Pathfinder and would like to know what to expect... I did it all prior to the body lift and with a 90 degree drill. Two were snapped flush(requiring drill and extrude) and one had enough meat left on it I just used some vice grips. That drill saved my ass, and with a wire wheel made cleaning the old gasket material a cake walk. If you already have a body lift it should be a lot easier. If you have one sitting in the box like I did, i would recommend installing it prior Link to comment Share on other sites More sharing options...
SamTex Posted January 22, 2010 Author Share Posted January 22, 2010 And as far as fitment issues without a body lift, I'm sure they would work without a body lift. Its just that these things are so long you can't get them in without lifting the body up. Once installed or at least placed, the body can come back down and you have no problems. Link to comment Share on other sites More sharing options...
MY1PATH Posted January 23, 2010 Share Posted January 23, 2010 Yup! He welded a new bung a little further back than the stock location. That is actually something I was going to ask you guys about after I looked into it further. It's not an issue so far, logged about 400 miles since, no CEL. I'd be curious to see... If you put your ecu in AFR mode if it thinks you are running lean becase its only getting reading off one manifold. I have heard that our Heated-type o2 sensors need a reading from both manifolds going by it and need to be close to the manifolds as possible to get an accurate reading but I wonder how much truth is really in that. maybe you can bust a myth for me.... Link to comment Share on other sites More sharing options...
Yendor Posted January 24, 2010 Share Posted January 24, 2010 I would imaging that your Y pipe looks like the one pictured here? Right? Link to comment Share on other sites More sharing options...
SamTex Posted January 26, 2010 Author Share Posted January 26, 2010 I'd be curious to see... If you put your ecu in AFR mode if it thinks you are running lean becase its only getting reading off one manifold. I have heard that our Heated-type o2 sensors need a reading from both manifolds going by it and need to be close to the manifolds as possible to get an accurate reading but I wonder how much truth is really in that. maybe you can bust a myth for me.... I'm getting a CEL now, going to pull into the shop tonight and have a look see... I just cleaned my MAF last night I would imaging that your Y pipe looks like the one pictured here? Right? Looks similar, but it's way further back and doesn't go under the transmission pan like that one. It's also two pieces with a flange in the middle for easy removal. Link to comment Share on other sites More sharing options...
SamTex Posted April 5, 2010 Author Share Posted April 5, 2010 Just an update, I installed a filter relocation kit from Summit, went in no problem, works fine. Replaced a working 02 from a parts truck, still get my CEL. Just have it unplugged for now, but will be installing a simulator to get correct A/F ratio and get rid of that light. Link to comment Share on other sites More sharing options...
Tungsten Posted April 8, 2010 Share Posted April 8, 2010 when i did my headers i had the following issues 1. the o2 sensor went bad 2. the midpipe was hitting against the the transmission crossmember 3. the old catalytic converter crapped out 4. the tailpipe was mashing the gas tank try resetting your ECU by unplugging the battery also that tin can sound could possibly be coming from the intake, i have the same issue Link to comment Share on other sites More sharing options...
k9sar Posted April 8, 2010 Share Posted April 8, 2010 mine are running fine now (pacesetters and no lift). One concern I have is that the pacesetters were painted and that paint is burning/peeling off. No issue on the outside but I think there was paint on the insides aw well. If that peels instead of burning off, I may get blockage at my new cat. I plan to run them hot for a couple weeks then drop the cat and blow it out just to be sure. My crossover pipe has no interference issues and had a flange to bolt directly to a replacement intermediate pipe. I had to bend the muffler mount a bit to get the right fit and my EGR tube would not line up. A torch and a little bending took care of that easily. Link to comment Share on other sites More sharing options...
Tungsten Posted April 8, 2010 Share Posted April 8, 2010 btw for me the ECU was throwing a code because the exhaust rattled and triggered a knock code as of now, no issues with using headers and the truck feels peppier when the studs aren't snapped it will even feel quick with the manifolds if they are in good shape so there is not much need for headers the performance difference is about 7 hp and 10 ft-lbs of torque with a full custom exhaust but it won't be as quiet anymore Link to comment Share on other sites More sharing options...
Recommended Posts
Create an account or sign in to comment
You need to be a member in order to leave a comment
Create an account
Sign up for a new account in our community. It's easy!
Register a new accountSign in
Already have an account? Sign in here.
Sign In Now