
PathyGig12
-
Posts
407 -
Joined
-
Last visited
-
Days Won
30
Content Type
Profiles
Forums
Calendar
Everything posted by PathyGig12
-
Oh believe me, I’ve realized! Ive got way too many wants and way too little money my friend. Current to do list: -Manual hubs -New CVs (one boot is torn but both sides are probably in need of replacing anyway) -New front control arms, tie rod ends, lower ball joints, end links, and steering rack boots -New upstream O2 sensors -Getting the power valve screws tightened -Front Lokka -Bilstein shocks to replace the Gabriel ultras and give me more flex -Hi lift jack, Tow ropes, traction boards - Rock lights and reverse mounted LED bar - rock sliders -coastal off-road front bumper with 10,000lb smitty winch - limiting straps - custom swing out rear gas can carrier (mounted to a custom rear bumper) My wallet is crying. It’s telling me to run away from this forum My family lives in vegas so I’ll be there for thanksgiving. Pray for me fellow pathfinder nuts, if I hit even a minor jackpot I can check quite a few things off the list! Lol
-
Oh yeah and the alignment is done now. They said it was easily doable with just one bolt per side so I must not have been too far off. Ahhhhhhhhhh..... no camber feels good
-
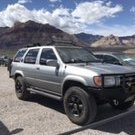
As you can see, the camera is a really basic set up. It could be refined in about a million different ways, but what I have right now works for me so I’ll leave it alone. The wiring goes up along the lower trailing arm to the underside of the running board, and then into the crack of the door (reinforced with plastic tubing and tape so it doesn’t get pinched). I also made sure to leave some slack in the wiring so that they don’t tear under flexing and compression. Ignore the clump of tape haha, I was trying to wrap more of the wiring quickly before going to work but it’s falling off already so I’ll have to find a better solution. I was pressed for time on the install, but I’ll revisit it soon. You can also see in the top picture that there’s actually a bit of rake front to back. I’m noticing it more now that I’m taking more pictures from the sides. For some reason it looks more level in person. Anyway, I don't think I mind it.This way I can still load up the back with people and camping gear without sagging
-
How did you go about taking off the plastic?
-
I just went with a random one from harbor freight. Couldn’t tell you what it is, but it seems to be good enough to me. It’s red and puts out fires. Rain goat, the fire extinguisher I have came with a plastic hard mount for screwing into a wall, and attaches to the extinguisher with a plastic clip by the neck of the bottle plus a strap around the middle, so I’m considering just screwing the mount into the plastic but I would prefer to use nuts and bolts if I could get behind it. Ideally I’d drill holes into the metal behind the plastic but that’s quite an involved job and I have no idea the layout of what’s under there. It’s hard to tell from those pics what a suitable spot would be
-
I’ll grab a pic of the camera today for you. Its actually mounted on the sway bar just to the right of the rear diff using zip ties and then coated in some epoxy to keep it from changing angle. Again, not an ideal mount but I warned you guys not to look for perfectionist tendencies in my build lol It hasn’t budged in the last week and I’ve gone over some nasty pot holes
-
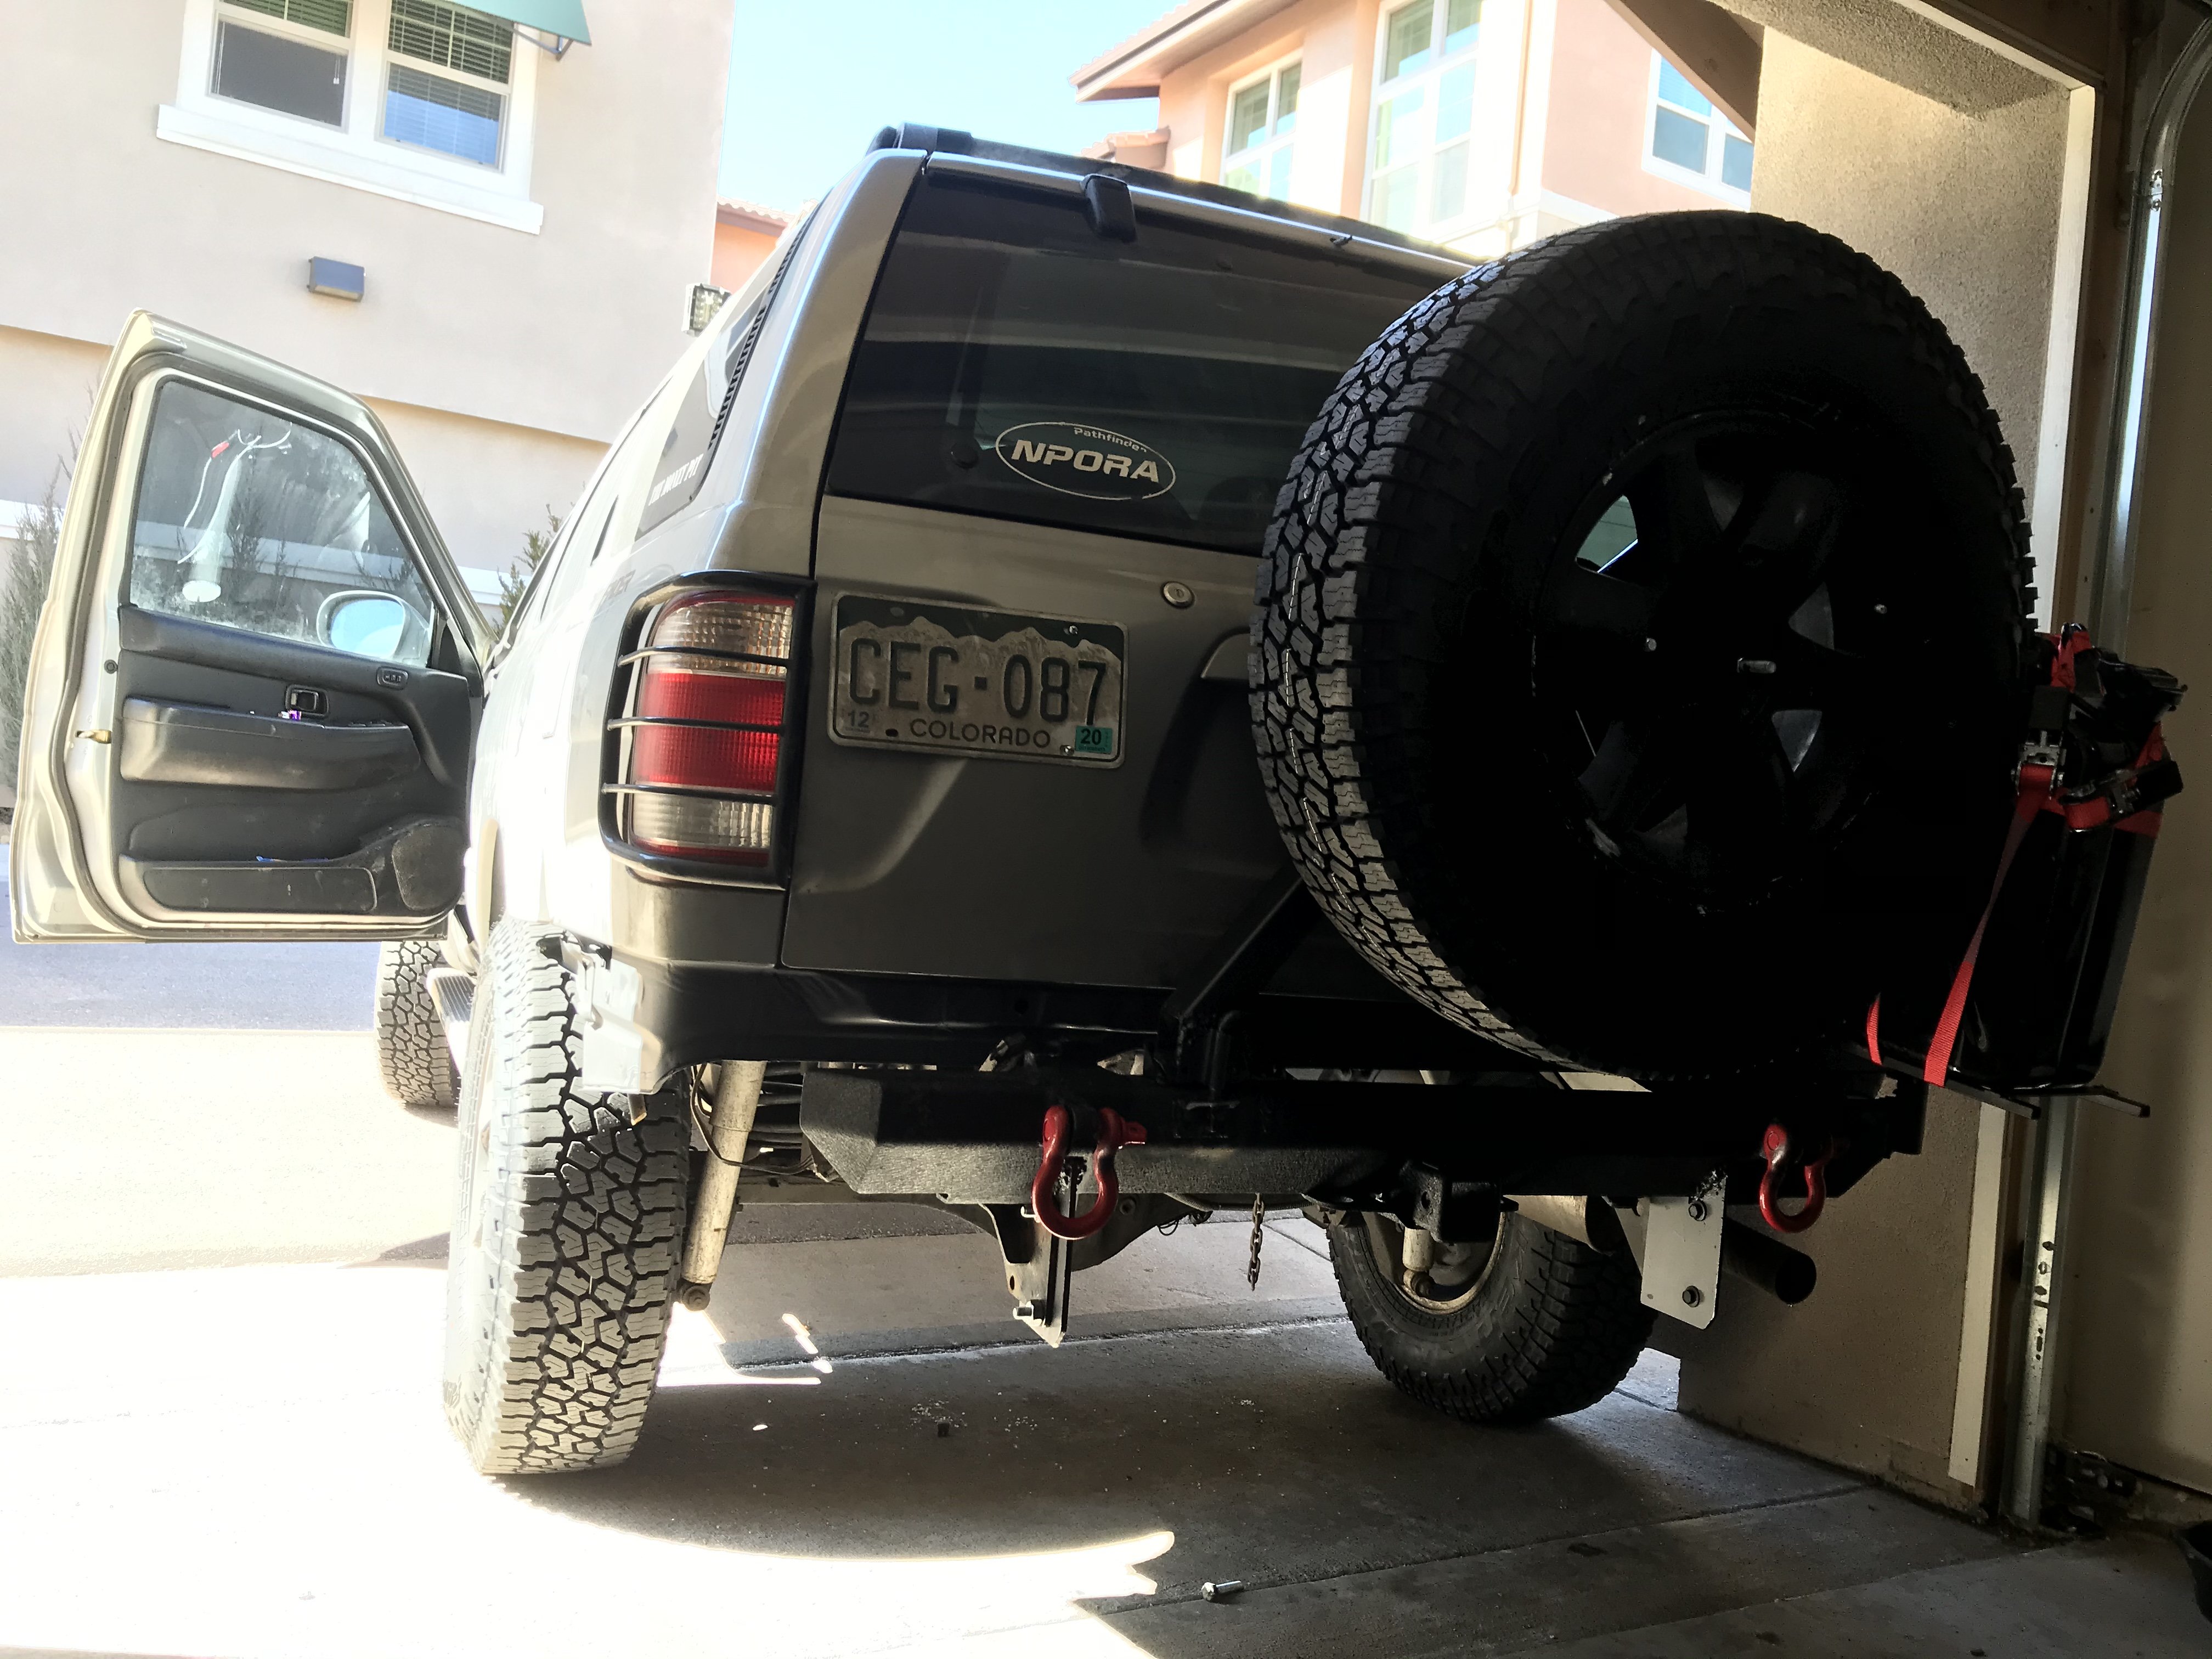
I’ll get to it eventually, money is pretty tight right now so I’m just happy it’s organized back there. I’m planning on more secure cargo solutions in the future. Does anyone know how to get behind the plastic on the left side so that I can bolt the fire extinguisher mount? Or another way it could be done securely?
-
Today I got the tires mounted and set about organizing / cleaning the interior. I tidied up the back and added an axe and fire extinguisher, plus a small shovel mounted on the rack. Good news is the tires don’t rub except mildly when I’m at full lock in reverse. I’ll see what I can trim to make this go away, but it’s not too bad as it is. My alignment is scheduled for tomorrow at 1, I’m sick of this crazy camber and ready for it to be gone I’ll get some better pics during the day tomorrow. And take measurements. After all the organizing I ran out of daylight. The last pic is the undercarriage monitor.
-
Yeah I used them, but I’m having trouble getting them to work properly. I’m just going to tell the guys at the alignment shop about the bolts and let them sort it out while they are aligning the front
-
Well if it ends up causing me problems on trails, I’ll go ahead and get myself a new one. But as it stands, the mirror issue isn’t as bad as you’d think. Your brain can compensate for a lot
-
I’ll try to take measurements after the tires go on, and get pictures of the camera mounting point. Its surprisingly decent quality for the price, and the wireless makes it convenient. I just had to run wires to the socket under the center console to power the camera and the monitor came with an adapter to plug into the 12 socket in the dash so the install was ridiculously easy. I gave up on trying to tap into the 4Wd light, and besides it’s nice to be able to switch it on whenever I want to. This particular model had the option to overlay lines on the screen but has a feature to turn them off as well, which I personally chose to do. I wish I could have gotten the front facing camera now that I know they exist. Ha, I guess I just jumped on the first one I thought I could make work.
-
Thanks man! Yeah he definitely knows his stuff, I’ve been peppering him with questions for the past week and getting too many details to know what to do with! lol Ok maybe the tires aren’t THAT bad. But I won’t let another day pass with them on, I’ll tell you that much! Haha, I just need those damn wheel wells filled out, and the extra inch of height will be nice too. Speaking of extra height.... the underbody camera is now able to clearly see both front wheels which is awesome! I’ll be sure to include a pic of the monitor tomorrow. The only weird thing is that it’s mirrored, so the drivers side shows up on the right side of the screen because... backup camera. Not sure if I can change that or if I care to
-
Thanks for the pics RainGoat, good to know that I already had the spacers. I figured as much, but wasn’t 100% sure Yeah I made sure the shop aligned the strut components properly with the Ls and Rs and notches and whatnot. These incompetent morons could have kill me with how out of whack the geometry would have been, had I used their original configuration. I would have loved to do it myself, and no doubt could have done it faster than they did, but amazon screwed up my order for the new compressor so it got labeled as “undeliverable” and returned to sender. Oh well. I don’t see myself doing this job again. The truck will likely die before this suspension does Im getting some odd clunking going around corners as soon as I turn the wheel , but it’s intermittent and sometimes doesn’t do it. Hawairish suggested that it might be the end links in the front so I’ll give those some extra tightening when I get a chance. I haven’t noticed any topping out yet, nor has the ride been harsh at all. These ACs are fantastic as far as I can tell. The 9447s are even nicer still. I cant tell you how great it is to not be bottoming out on every bump! As far as I can tell the truck is perfectly level, but I’ll confirm that tomorrow with some good side angle pics
-
Phew that was a long day! Got up at 8, picked up the keys at 9 and had the truck on the lift by 10. Good start. Taking off the struts was way easier that I thought it would be. The bolts took some decent force to crack, but I had all the clearance for the breaker bars that I could ask for, and the lift made it much more comfortable to work on. The hardest part was reaching one of the bolts on the driver side tower, but still not too bad. Total time for disassembly was 2 hours Then I brought them to pepboys for the reassembly with AC coils. First thing the “manager” told me was that it would be a few hours because they were all booked up. I said fair enough, and went back to do the rear coils. Before I left I gave him all the parts and explained what everything was, and he was convinced that I didn’t need to leave the old struts because “you’ve already got the tops right here” (pointing at the strut mounts). Oh lord..... After explaining to him that without the old ones he wouldn’t have upper spring perches, he relented and took everything into the shop. When I got back around 4 to pick them up, I wasn’t surprised when I found they had completely messed up the orientation of the notches and mounts. I had them redo it while I waited, and sure enough the second time was still wrong. I had to rotate the mounts on the counter in front of them, but at least they were done so I was happy. Reinstalling them was pretty much just as easy as taking them out, just a bit of a pain holding them up over my head. The rear coils were extremely simple to put in because of the lift. I just had to disconnect the end links, shocks, and panhard, then lower the axle using the tall jack stand the shop had and the OEM springs popped right out. I only needed to compress the Land Rover springs an inch to be able to seat them, and that was only so that it would be easier to maneuver them between the other components. Even fully uncompressed they had a couple inches of clearance between the tops and the upper perches until I reconnected everything and brought the axle back to normal height, so theoretically I didn’t even need to compress them. Where are the pics of the truck?? I’m just going to tease you guys with these mid-build pics until I can get the tires mounted tomorrow and the alignment done. Im way too embarrassed to post photos of the truck with its 29.5 inch tires lol Before getting the new tires, Im wondering if I should just guesstimate the rubbing areas and pre cut them? If they rub badly I don’t want to be damaging the tires on the way home
-
Alright so I got the camera and monitor installed and it turned out great in my opinion. I’m easily satisfied, so don’t look for perfectionist tendencies in my build. If it works, it works. That being said, I’m going to wait to post pics until after the lift is done so that I can see where/if I should move the camera mount to get the absolute best angle. I think the extra inches of height should help better clear the catalytic but as it stands right now the view isn’t too bad. As for the flood sensor idea....well it sort of worked. But the contacts to make it trigger were not what I wanted them to be. And it also didn’t trigger in water unless the leads were extremely close, meaning that any bumps would have set it off again and again when driving. It also seemed to go off randomly whenever it wanted to.... I looked at the data sheet for the MOSFET transistor I was using and it seems that I might have reversed the pins even though that’s what the guide said to connect to, so I’ll try it again the other way and see what I get. I’m also using a slightly better/different window alarm than the one in the guide I’m following, so maybe I need to get the one they used. This is the guide https://www.cnet.com/how-to/how-to-build-your-own-flood-sensor/
-
Yeah I’d like to keep it relatively tame for my first few trails as well. I hear good things about some of the ones by Empire/Idaho springs, but I’d have to look into boulder and see what options they have. Be aware though, there’s a good chance they might be “Prius only”. Either that or they won’t be open for several hundred years on account of all the environmental surveys they’ll have to do to make sure our tires won’t endanger any of the dirt? Sorry can you tell I hate boulder?
-
The power valve screws did worry me when I initially heard about the issue, but I figure if they haven’t come out after 260K miles, either my truck is not one of the bad ones, or the previous owner had them locktited under warranty years ago when the problem became known. They could also be well and truly baked into position by this point just because of the heat and corrosion over time. Ill see if I can look into the service history and find out whether it was done but it’s not really at the top of my list right now
-
You mentioned a strut spacer? I’m confused. What spacer are you referring to? If you mean the spacer inside of the mount, can you elaborate? I bought OEM mounts and bearings but have no clue as to the spacer orientation. Pics would be awesome. I’m going off of the SFcreations installation video when it comes to aligning the pieces of the strut
-
I’m in the Denver area and I should have my rig built by then. Message me if you’re interested in hitting some nearby trails. There’s a few I’ve looked into but I haven’t tried any yet.
-
Tempting, but it will still be slower than having the shop do it with a press. And I’ll likely never use the compressor again On a different subject, some of my packages came in early so I’m going to try to wire up the camera and water sensor tomorrow so that I don’t have to worry about squeezing everything into one shop day. I’ll post up some pics when it’s done.
-
Fair enough, I guess I’ll play it safe and take it to pepboys once I have the old struts off My biggest worry with having someone else do it is that they wont align all of the notches or orient the thing properly. I suppose after it’s done I can always have them redo it if I notice that they’ve screwed up, but still that’s extra time
-
Ok I hear you. Ive also heard of people doing it with two sets of spring compressors, making 4 total. I’m pretty sure this will be the way I do it, as it seems much safer. Slower, of course, but safer
-
New guy here, been studying the forum for a couple months and finally have all of the pieces lined up for a 2 inch lift. The plan is to get everything done on Monday, I rented out a bay at a local shop that has a two post lift and an assortment of tools. My apartment garage is tiny and not heated, not to mention my only jack currently is the Nissan scissor jack from the truck, so needless to say, it would have taken a week to try and do everything at home. First things first, I’d like to list out the parts I have gathered and make sure that there is nothing I’m missing before tearing into the suspension. Please chime in if you notice anything that was overlooked/ or might be problematic. I am looking for 2” of lift all around with an emphasis on minimizing the possibility of CV damage due to binding, which is why I opted to forego the spacers. I also picked the tire size based on a desire to avoid using wheel spacers. I understand fender rub will likely still be a problem in the front, but I don’t mind doing a bit of cutting. Right now I have: -KYB Gr-2 struts left and right -OEM strut mounts and bearings -Two camber bolts for help with alignment -New set of boots and bumpstops for the struts -AC 2” lift front coils -Land Rover nrc9447 rear coils -Gabriel Ultra shocks for the rear (will upgrade to longer Bilsteins in the future when I can afford them) -235/85R16 M/Ts If all goes according to plan I should be able to post pics by Tuesday, and update this thread whenever future mods are done. I’m planning on installing manual hubs and a front LOKKA when I have the money for it, along with a coastal off-road bumper and winch. It would also be nice to do some seat covers and floor mats to spruce up the aging and worn interior. Rock sliders aren’t out of the question, but the price is a bit prohibitive when you think that the truck has over 260K in the clock and probably isn’t worth more than 2 grand. The engine is still solid as far as I can tell, but who knows how long till the tranny goes or the power valve screws work themselves loose? I do have a couple of questions before diving into this first phase of the build. I have searched and searched and can’t seem to figure out whether it’s possible to use a standard McPherson strut compressor to install the AC front coils on the new struts? Every post I have seen has either said it’s totally doable if you spread the compressor arms as far apart as possible, or that it’s impossible because they are too strong and too dangerous. Can someone who has done it please confirm that it’s possible? I need to know whether I should plan to visit a pep boys on Monday once I have the old struts removed. The goal is to be as fast as possible because Im only going to have about 8 hours in the shop. And the next day I need my truck to go to work. Also, speaking of the struts, I know that the mounts and bearings must be changed. But what about the top coil seats? Do I just reuse the old ones? I’ve already put on the shocks when I went to replace the panhard and lower trailing arms, so it’s just going to be a matter of getting the front done and slipping the rear coils on. Hopefully it’s doable within the timeframe but the more I can plan ahead, the less messing around I‘ll need to do when the day comes, so any tips and tricks would be helpful. I’m familiar with the process for the struts but I’ve heard varying reports on the difficulty of getting the old ones out because of the clearance issues, especially the driver side one. What needs to be removed to get at the bolts? Also, If I have a spare hour or two, I’ll probably try wiring up the undercarriage camera and dash mounted monitor I bought for visibility off-road. And possibly making a little dohicky that senses water submersion. Like a homemade flood sensor but for 5 dollars instead of 20, and wired to the cabin for instant alarm in the event that water is approaching the level of the airbox intake Let me know what you guys think. Any comments, advice, tips, etc would be appreciated. I’m really excited for this to get done.
-
I’ve been running KO2s for a couple years now and I always set them to 34-35. Haven’t noticed any uneven wear unless I forget to rotate them for 20K miles, which unfortunately I’ve managed to do more than once *hides face in shame* Im thinking of dropping them into the 32-33 range for better comfort but they’re pretty solid where they’re at, even off road they’ve performed great
-
I appreciate the input. Do you think mounting a small off-road light pointed in the same direction would be a possible solution? Either way, the camera is pretty cheap so I cant see a reason why I shouldn’t give it a shot.