Leaderboard


Popular Content
Showing content with the highest reputation on 05/11/2019 in all areas
-
Alright folks, I finally got around to installing my tire carrier. Special thanks to everyone in the R50 Tire Carrier Mod: Lets Settle This! post. I thoroughly went through that and studied everything in preparation for this. Special tools I picked up include the following: M10 Rivet Nut 95105A199 (hinges) M10 bolts 91280A636 (hinge bolts) M8 Rivet Nuts 95105A191 (lower latch) Astro Rivet Nut Kit Rivet Tool (lower hatch plate) 1.5 x 1.5" x 1/8" thick angle aluminum First step was to mock up the carrier to get an idea of where the lower mounting hardware needed to be bolted. Then I took off the bumper to check to see if there were the OEM cutout locations- Indeed there were cutouts! I used a hot X-acto blade to easily trim out the holes. At this point I wanted to get the lower latch hardware finished first so I can use it to hold the carrier while I do the hinge portion. I trimmed 1" off one side of the 1.5" angle aluminum, that way it can tuck under toward the vehicle a bit. I tested the rivnuts, seem to work well! I transferred my hardware marks from the metal bumper to my aluminum and used a step bit to drill out the holes, then finished them to the rivnut size of 13.5mm (17/32") using a hard-to-find bit. Both the M8 and M10 required the same hole size. I drilled two small holes to temporarily rivet the aluminum to the vehicle, then used the holes I drilled in the aluminum to drill the holes in the bumper for the rivnuts. The aluminum was then removed and the rivnuts were installed- Then the aluminum went back on. The rivnuts have a washer-head that's larger than the hole, so when you put the aluminum back on it sandwiches the rivnut. I drilled out a bunch of holes and installed rivets to hold it in place. Took no time at all. From here it was as simple as bolting on all the lower hardware. Note: unlike some, I did not have the swing gate door ajar sensor wiring left in the bumper. Hinge time. I put some protective tape down and removed the inner plastic trim to get access to behind the vehicle skin- With the carrier mounted up, locked into the lower latch, I marked out my hole locations. Using pilot holes, I started with the ones I could reach with the carrier closed. Lots of removing, testing, drilling, removing, looking, etc. Eventually I got enough holes in to start the rivnuts. The most aft two holes on each hinge are in very difficult to reach locations, I opted to just rivnut those. The side holes are accessable relatively easily from the inside so I fished nylocks with washers onto those. Fully assembled! I have a license plate bracket + light combo in the mail. I think I'll use the rivnut gun again and mount it on the hatch to the driver's side of the tire carrier. And of course, a tribute to the ruster that I pulled the carrier from: Junkyard bonus stuff- Got these 5' long Yakima crossbars with mounts that work on the OEM Pathfinder rails. Here I am testing them on a junker: Also scored me one of them fancy string dampers for the glove box.6 points
-
Adding @Astrorami's build link to the thread, since we completed his last weekend. His is the newer style aluminum carrier, which weighed around 36.5 lbs vs. the 58-lb steel carrier. For his, we used a 1.5" x 14" (14.5?", I don't recall already) 14ga steel strip and a bunch of 1/4" and 3/16" rivets, in addition to the rivnuts. I was very pleased with how that turned out; barely any deflection when pushing or lifting the support bracket. Admittedly, we installed the hinge mounts about 1/4" too high, which created some alignment issues with the support bracket, as well as made the lower plastic hinge cover come up over the tail light a little. Overall, pleased with the install despite that issue. The release lever on this model is lower than the older models, so it doesn't contact the valence panel on the liftgate, about a 1/4" gap. We didn't come up with a license plate mount or lighting...the aluminum frame tubing had a larger diameter than the vinyl-coated clamps that I had. Since it was very late (er, very early in the morning), we just cable tied the plate and literally taped a freebie Harbor Freight LED light to it so that he could legally drive it home that night. We also did not wire up the switch for the tire carrier cluster light that looks like a hamburger. Just like my experience, his switch did not match the harness that's there, which seems to confirm that there's some additional pigtail wiring that needs to be grabbed from a donor to avoid having to splice wires. Oh...and I also learned that long ago when I did mine, I flipped the hole opening for the switch...Astrorami gave me grief about it...the hole for the switch body is supposed to be on the right of the screw hole. I had put it on the left, and we did the same on his just because the positioning on the reinforcement template was already set (and because it doesn't really matter...you can just as easily flip the plastic depressor piece on the carrier to make it line up). Lastly, I don't recall finding any set of 5 M12x1.25 locking lug nuts when I looked years ago, but they seem to exist now. McGard 25442: http://www.mcgard.com/product/chrome-cone-seat-wheel-lock-set-m12-x-1-25-thread-size-set-of-5-locks-and-1-key/ (I'm still using the Rugged Ridge 16715.22 single wheel lock.) ... In other news, I removed my carrier from my truck the other day for bedlining, along with my bumpers, sliders, and skids. Here's how my rivnuts have held up over the years: By no means terrible. The overall damage is minimal; the indentations on the side panels are from an accidental too fast/hard opening long ago (lesson learned), but it's also apparent that at some point I dragged the tire while off-roading judging by the 4 rivets at the rear...the top two are pushed in a little (panel is dented from corner of hinge bracket), and the bottom two are bulged out a tiny amount. I never knew I did that, but if that's the extent of carnage, I can totally live with that. Naked truck...5 points
-
Another mission success! I got this on a little bit ago, but haven't had a chance to post pics. You can find way more pics/info in my build thread here.4 points
-
I pulled all the metal part from the truck for painting/bedlining (the parts, not the truck). Everything weighs over 460 lbs! No wonder my MPG has been crap for years... Also have my new Kia Telluride and the project FJ80 creeping in the background. Carnage from the sliders. Will likely modify them to avoid further damage. And finally got some lights mocked up on the bumper before removing it.3 points
-
The answer is yes Aaaand a little something to remember the trail. There’s now a random boulder with a nice red stripe on it in the middle of the woods now. Time to build some sliders! Sent from my iPhone using Tapatalk2 points
-
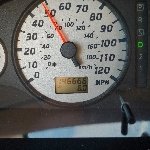
Really interesting to see your long term experience with the retrofit. AZ lends itself to just about the roughest off road driving and your truck has seen some real use (any idea how much time &/or miles). Combined with@TowndawgR50 ‘s experience we now have a real track record on these. He can even show what happens when you abruptly put the weight of the whole truck on the underside of the swingate spare - it dented & tore the metal at the some of the mount locations - but surprisingly little.2 points
-
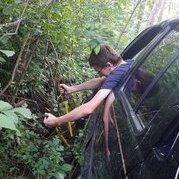
Haven’t been on here in a bit, so I figured I’d throw up some pics from the last couple weekends. Also I don’t think I mentioned it on here yet but I switched to AC’s up front and am running Land Rover 9448’s in the back now with a pretty long travel bilstein shock. Long enough that I can swap springs on the trail [emoji23][emoji1598] Anyway, here’s the pics. I think I’ll split them up in a few different posts for each trip Here’s my car camping setup. Don’t judge the flowers, it was free haha Sent from my iPhone using Tapatalk1 point
-
Drum brake trucks with single-taper bearings used thrust blocks. Disc brake WD21 and D22 Frontiers, WD22 Xterras, and R50s (all drum brakes) used double-taper bearings, but not thrust blocks. The note about it not fitting drum brakes makes no sense because R50s only had drum brakes. My R50 is the exception. ?1 point
-
I made good headway on getting the bumper ready to mount the winch tonight. Along with fabbing up a winch mount out of 1/4 inch steel, I also welded a section of 1/4 inch steel across the radiator support. It’s tied into the frame rails at each end as well as stitch welded to the radiator support across the front. I’ve heard stories of the rad support buckling a bit under winch loads, so I figured this would help beef up the stock thin sheet metal it is made up of. With this, plus the supports I welded on to the radiator support a couple years ago while doing some rust repair, my radiator support is significantly stronger than the stock piece ever was. Sent from my iPhone using Tapatalk1 point
-
Before and after's The photos need to be swapped, but you get the picture Sent from my SM-S737TL using Tapatalk1 point
-
If you're running an auto trans, put a cooler on it.1 point
-
Yeah, they'll hold it solid. Bigger issue is how you load it and the strain on the transmission, it's not really a vehicle intended to tow at max capacity through hilly terrain for long periods of time. I used my hitch for snatch recoveries off-road a number of times and it never bent a bit or even tried to come off.1 point
-
That’ll come in handy if you go wheeling with any Jeeps1 point
-
Picked up a new toy today!should make a nice addition to the bumper Sent from my iPhone using Tapatalk1 point
-
i can’t wait until i get the chance to get out. i’m up in sussex county and have the trails in stokes state forest to play in. it’s not crazy but good fishing spots off some of them too and beautiful scenery. i’m so jealous lol Sent from my iPhone using Tapatalk1 point
-
Sent from my iPhone using Tapatalk1 point
-
Just keepin the thread going. #97jlr50 #infinitinorthamerica #cleanmachine Sent from my SM-S737TL using Tapatalk1 point
-
Yo dude welcome to the forum!! I'm from Bozeman, if you ever want help on anything or wanna go wheel some weekend I'd totally be down to hang!1 point
-
Took out the front seats and cleaned everything properly..thinkin'. Maybe I'll do the same with the console tomorrow.. Gonna check on a r50 one first at the pull a part... C'mon cup holders.1 point