Leaderboard
Popular Content
Showing content with the highest reputation on 03/28/2019 in all areas
-
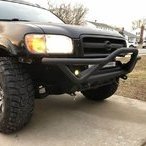
Awesome skid plates and customer service from Steve! Can't wait to skid on them!3 points
-
AC coils are in! Sitting at 36.5” in the front after driving home, so as of right now my rig is completely level. Also, I forgot to mention this, but I complained to AC about their shipping and got refunded $18 lol. Also, old spacer kit is up for sale, 2.5” front 3” rear. Pm for details.3 points
-
Kind of cool to look at some pictures back to back to see how it’s evolved over the past few years! Sent from my iPhone using Tapatalk3 points
-
I don’t think my wife would say it was fast, I know she feels like I’ve been living in the garage the past couple of weeks! Sometimes it’s a blessing, and sometimes a curse, but when I get started on something I have a really hard time stopping. I’m more likely to just stay up and work through the night than to stop and go back to it the next day.3 points
-
Land Rover Springs and 5100's in the rear. El cheapo struts and 2" spacers in the front, about to be replaced with KYB/OME HD and 1" spacers.2 points
-
As jjonez mentioned, it's likely one of the front door switches. Set the dome light to "DOOR" and close the doors. Gently push and pull the lower rear corner of each front door away from the jamb to see which door triggers the light. If the light goes on and off, then the button on the door switch isn't pressing deep enough to prevent it from connecting intermittently. You can remove the door switch from the body, being careful not to let the wiring harness fall into the body, then remove the rubber covering over the switch. Insert something like a pencil eraser into the bellows so that it rests between the button and the inside of the bellows. This will effectively lengthen the switch, causing it to depress more when the door is closed. Reinstall rubber covering onto switch, then reinstall switch in door jamb.2 points
-
Working on wiring the aiming motors up. Done making wiring harness now wiring switch into the newly made harness and adding power. Having the diagram sure helps without a doubt. #r50obsessed Sent from my SM-S737TL using Tapatalk2 points
-
In that picture, 2.5” strut spacer. But the shop just called and they’ve got my AC coils installed1 point
-
a lot of people seem to get about 1”-1.25” out of OME HD springs if they have no extra weight1 point
-
The OME HD springs plus a 1” SF creations spacer is a great, safe setup. Multiple guys run it, no report of CV issues1 point
-
Yes, check the switch on the door jams. Also, does the alarm cut off after 30 or so seconds?1 point
-
Open the driver's door and look at the lower corner of the door jamb on the body. You'll see a little rubber plunger. That's the door switch. When you push it in, it simulates the door being closed. The issue could be that the switch is not being depressed enough because of the door not being as snug to the body as it was when new.1 point
-
I did something similar to what xplorx4 did with a little piece of inner tube. If the R50 switch is like the WD21 switch, you can also take them apart and clean out the corrosion and schmoo that might be causing problems. IIRC the R50 alarm system has its own horn, on the passenger's side of the engine bay. If you unplugged that, and the siren (assuming it has a siren too), all the alarm could do is flash the lights.1 point
-
1 point
-
Finally got a hold of the junkyard this evening. As it turns out they weren't avoiding me, they were trying to get a good answer for me. Apparently company policy doesn't allow them to ship things through other shipping companies (even if I found the company and am willing to relieve the junkyard of any liability once the shipping company takes over), and the lady I was in contact with was trying to pull strings to make it happen for a couple of days with no luck. Really appreciate the effort, but unfortunately no deal.1 point
-
I made a barter to obtain it by some parts of an ATV with a friend, I did not know the situation of the company, but for what I use it the truth I am quite happy1 point
-
I bet it's the same issue that myself and another member have had with our alarm system. It's probably a bad connection with a door jamb switch. Search my post history for an overly-detailed explanation. For me I tracked it down to the switch for the front passenger door and disconnected it. I've had zero problems since. Edit: Here is the link to my post1 point
-
That's what's amazing me, this all happened really fast! Between this and LR springs there may be a killer combo for R50's coming to light.1 point
-
NRC9449 w/32” tires puts my rear at 37” for now. Maybe it’ll settle down to 36.5?1 point
-
Brake line fixed, and brakes bled! WOW those springs are good. Definitely tightened up my rear handling, and they’re not annoyingly stiff. Stiffer for sure though. Rear currently sits at 37”. Front is currently at 35.5”. The rear used to be at 35.5” with 3” of spacers. AC coils showed up late last night! They go on tomorrow morning at my local suspension alignment shop. Special thanks to @02_Pathy and @micahfelker to giving me advice and help along the way!1 point
-
Yep, I agree. The new hazard switches I found were all around $40, jumping the wires was free. Hopefully this will help some one else eventually.1 point
-
you’re right! i thought it looked out of place there, i gotta get under with a flash light today after work and see if i can zip that bad boy back in Sent from my iPhone using Tapatalk1 point
-
Some friends here in Argentina have installed navara snorkel in their r50 and others in their d21 and they work well, here they are manufactured by a local company called airflow I will buy it soon and surely make a detailed thread1 point
-
1 point
-
No problem bro I will definitely help you wire yours up. I done a quick install on these because my wife drives this one and I wanted her to be able to tell a difference when she drives to work tonight. The halogen lamps that came on this thing as you know are terrible it's so hard to see at night so she's going to think she's in a new vehicle I'm sure. On my QX4 the HIDs on it I wired them up to factory specs using the factory diagram. It calls for 4 diodes to be wired in I will get into that later when I walk you through everything. So just for tonight she's only going to have the low beam HIDs. I started at 9 this morning and just now wrapping things up but I had a lot of down time because I had it to deal with my puppies. I really enjoy this so much. I played music for 15 years and that was a great feeling no doubt but to be honest with you this feeling is 10 times better in my opinion anyway let me know when you want to go over things and I'll help you@micahfelker Sent from my SM-G530T using Tapatalk1 point
-
I also used a few different sizes of wire brushes, wheels etc to knock off any surface rust along with some rustoleum self etching primer before the undercoating process. You really don't have to use the self etching primer I did just for piece of mind. Mr Cox 96R50-97JR501 point
-
How many times can I be wrong??? Got the engine down to bare block, took to machine shop. They did a "test" bore on the cylinder with the most rust, their verdict was... the block cannot be used. Well hell ... the thing I needed the most off the donor engine and I can't even use that! I might as well have set 12 $100.00 dollar bills on fire, would have saved a lot of greasy cleanup! LESSON LEARNED, NEVER BUY A JDM ENGINE AGAIN!0 points




.thumb.jpg.3351162271e2c1bf86fe7c0c7e657df0.jpg)

