Leaderboard


Popular Content
Showing content with the highest reputation on 02/24/2019 in all areas
-
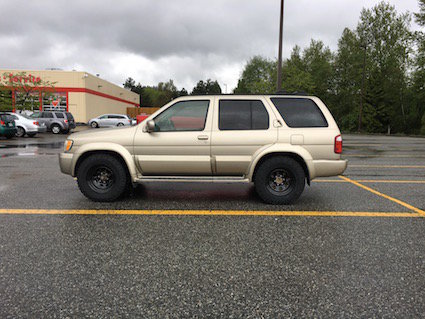
Now with 2” lift, 16x8 ProComps and Falken Wild Peak 255/70/r16s. Skid plates and bumpers next. Sent from my iPhone using Tapatalk7 points
-
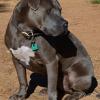
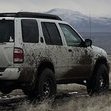
Went running around some trails in the south half of the Valley. My cousin got his dad’s jeep stuck until we had the bright idea to use its front and rear differential locks. Good time, lots of mud. My new tires handled really well except they got clogged with mud here and there.4 points
-
What RainGoat said. They can be had for pretty cheap, but replicating would be a pretty tall task anyway. However, if we get around to producing some bumpers, we'll definitely be exploring carrier options.3 points
-
Thought I would link this video for you all3 points
-
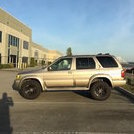
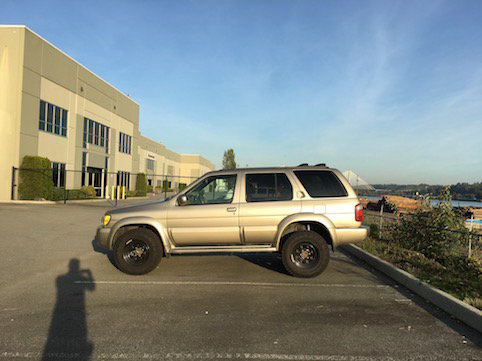
Well folks, to those who haven’t seen it yet, here’s the new Pathfinder! Ended up getting it for $600, and I’ll be driving it back to Bozeman tomorrow and starting my new job at Go Fast Campers on Monday. It’s got a 5 speed manual which it’ll be donating to the red Pathfinder once the weather improves. Also, huge thanks to Alex for the old lift springs! Might as well roll around with a little extra style before the trans comes out! Sent from my iPhone using Tapatalk3 points
-
Yeah of course man! If you have more questions feel free to ask anytime Sent from my SM-G960U using Tapatalk2 points
-
I see some people do and some dont, probably be best if you had one on the bottom. I've had mine on for about 2 to 3 years on lots of trails and miles and I haven't any issues. Sent from my SM-G960U using Tapatalk1 point
-
Not a problem man, the bilstein's i got didnt come with sleeves, I went to the hardware store and got a sleeve that fit perfectly for the top bushing I just had to cut it down ever so slightly then for the bottom one I just put it on at the time with no bushing as mine fit the stud perfectly. I didn't have the right tools at the time to make the bushing bigger and put in a sleeve for the bottom. So I just have a steel bushing for the top and none at the bottom currently. Also I did extend my brake lines with SS braided lines that are 2 inches longer front and rear. Sent from my SM-G960U using Tapatalk1 point
-
Have been following your thread. What is the make and model of the roof rack? I like the idea of the traction board and mount. I would manufacture the mount for the shovel, traction board and spare fuel can. BTW, my spare fuel can for my 2000 Xterra is a 6 gallon marine fuel can that fits great. I will mod up same for my 2000 SE. This Pathfinder spends its’ time in SW New Mexico where we have a place. Will not go to Montana. Lots of off reading here in NM. MTG1 point
-
Yeah I like that I didn't give up any trunk space and that its hidden from potential thieves. Only downside really is that you have to use a low profile sub so you compromise on the amount of bass. But for me it's great, just wanted a little extra thump in the trunk ?1 point
-
The coolant hoses in the back are the hard part. Even at the factory where the vehicle was put together that had to be the worst job... there’s no way around it. I hate putting the upper intake on, hate. I feel as strongly about putting NEW hoses and NEW clamps on back there as I do about a new rear main seal and oil pan sealant while the engine is out... IMO, two transmission replacements are equal to one upper intake job.1 point
-
Yep, that is a 1Up Super Duty rack.1 point
-
http://i1380.photobucket.com/albums/ah169/bobby555/post-1057-1550699170_zpsdvl8gamq.jpg http://i1380.photobucket.com/albums/ah169/bobby555/IMG_20190224_152027_zps7ukvda6w.jpg http://i1380.photobucket.com/albums/ah169/bobby555/IMG_20190224_151857_zps1adf577f.jpg http://i1380.photobucket.com/albums/ah169/bobby555/O6lMJiQ2fb0_zpsfp2vcvft.jpg1 point
-
Thanks! Yeah it really is... next paycheck I’m just going to get a cat back exhaust1 point
-
One of my favorite waterfalls is Denton Branch Falls and it’s at the end of Charlie’s Creek Road OR at the end of Tallulah River Road depending on which direction you come from. Either way you get a secluded waterfall and some decent wheeling! Our parent company is in Japan and they’ve installed an automated blow molding machine over there. Now they’re getting ready to ship the whole thing here and I have to go put my eyes on it while it’s running.1 point
-
Wow, there's some nastiness in that hose. What the hell even is that? I had my VG30 that far apart shortly after I got it to clean the dirt and rat crap out from the plug wells (and for the TB of course). If you pull the lower manifold, you can get all the crap out of the spark plug wells, and you can also knock out the casting flash that prevents the plug wells from draining like they're supposed to. If you go that far, make sure you get the coolant pipe running under the manifold done up before you put the manifold back on, or you won't be able to get to its fasteners. I forgot that part on mine and had to pull it apart again. The crank sprocket on mine just slid off. Maybe the leaky seal behind it helped prevent corrosion. If yours is stuck, maybe a little gentle beating from the front might break it free, plus a little heat and some penetrating oil. I'd avoid trying to drive something in behind it, the washer between the sprocket and the seal probably wouldn't appreciate that. Also remember that's your oil pump behind it. It doesn't look bad, hopefully it doesn't fight you too hard. The camshaft sprockets are bolted, so you'll need something to hold them while you remove and install them. I made an F-shaped tool out of steel rod that slots into the holes in the sprockets, but I've heard a pair of vise grips and your old timing belt work just as well (used sort of like a strap wrench). It's really not that bad to put back together, just keep in mind what you're doing and what order things came off in and you'll get it eventually!1 point
-
I thought you replaced your diff bushings with OEM rubber in an effort to solve the rumble? My bushings were shot and the poly bushings made a pretty noticeable difference but I cant say they are dramatically better than a new set of OEM rubber bushings because I don't have any wheel time with a fresh OEM rubber set to compare to. Like all polyurethane bushings they transfer more road "feeling" into the steering wheel which I like. Even with the front Lokka its not harsh and there are no vibrations but a very crisp and firm translation of the front drivetrain to the steering wheel when going down the road or a trail. Doubly so when wheeling in 4-low1 point
-
I mean the guy bypassed the ignition switch and ran a wire all the way to the starter, and hooked up a push button to crank the starter. I had to yank the wires out and fix the starter relay and hook it back up with the factory wiring. It is starting to look like a decent vehicle, I know got to figure out how to fix all the screw holes in all the plastic trim peices he screwed into. trying to find a drivers side parking brake cable for rear disc is impossible. the guy cut the cables and used cable u bolts to tie the cables together. That ofcourse did not work. he spliced in the headlight socket to wire up his fog lamps and melted the bulb socket. gotta fix that too1 point
-
Dreaming of warm road trips!!1 point
-
Just get another tire carrier from the wreckers.1 point
-
Probably not when you can buy them at a JY for less than $201 point
-
This is becoming a lot of work Spent the last weekend reversing all the band-aids and rigging the previous owners have done to this vehicle. removed 2 inches of silicone from rear cargo area windows, heated the warped window trim and got it to sit back flush, sealed with black marine grade adheasive. removed the 30 + screws that were used to incorrectly hold things on. removed the 15 + wirenuts under the hood used to run wiring and rig up ignition system Removed vinyl sagging plastic headliner peice and cleaned and painted and reattached. removed 6 layers of paint used on the lego rim hub caps, repainted. fixed cigarette burns in seats, then put seat covers on them removed lights from bumper. replaced grill that they notched to fix lights on bumper vacuumed and steam cleaned carpet and seats painted coroded battery tray changed transmission fluid and engine oil doing complete front end rebuild this weekend: brakes, rotors, ball joints, controll arm bushings, bearings, manual locking hubs, shocks, folowing weekend: installing new stereo and speakers, alarm system , fix door locks, speedometer replacement, recover door panels.1 point
-
3/4in level spacer in the front, everything else is right. And yep, 32's!1 point
-
Hey everyone, RustyQ and I are newbes on the forum. We just wanted to thank you for the amazing information and share the result of our recent lift based on the recommendations on here. Front: OME HD springs, KYB strut, Moog strut mount(financial decision, no issues yet) Rear: NRC 9447 springs, Bilstein 5125 shocks Wheel: 245/75 R16 Duratracs on 16x7 steelies measurements from the ground to the top of wheel arch (inches) Before After front L 31 1/2 32 3/4 front R 31 7/8 33 rear L 32 1/2 35 3/4 rear R 32 3/4 36 1/2 max front 1 1/4 max rear 3 3/4 Before After
 1 point