Leaderboard


Popular Content
Showing content with the highest reputation on 02/09/2019 in all areas
-
I'd be interested to see how much those LCA mounts actually shift around without a missing link. Make a collapsible missing link (one piece of conduit sleeved over another smaller one or something like that), rigid enough that it doesn't flop up and down but free to slide so it's not providing any actual bracing. Rig a Sharpie to one piece, with the tip resting against the other piece, and then take the truck out for a rip. If the mounts move relative to each other (movement the missing link would prevent), the Sharpie will draw a line the length of the total deflection. Then crawl back under and measure the length of the line. (Or mount a GoPro if you have one of those laying around for a better look at what's going on under varying circumstances, not just the max deflection.) That could make a compelling case for/against this mod.5 points
-
Here it is in all its glory. Took just over an hour of labor mainly due to taking and marking measurements/test fitting. Only thing I highly and I mean highly recommend is to have some sort of air impact wrench if you can because those bolts were frozen. Other than that fairly simple. Decided to use 3/4 EMT but I may have a version 2.0 in the future with just a flat stock bar like CNAM’s. The only reason I didn’t choose this to begin with was because I definitely don’t have the tools to drill through a 1/4in piece of solid steel. After having driven around the block I’ve noticed no huge improvement but body roll has seemed to improve pretty noticeably. Maybe feel like I can take corners faster? Im sure for most people the placebo effect is at play but I think it’s worth the what $10 max you might pay. Sent from my iPhone using Tapatalk2 points
-
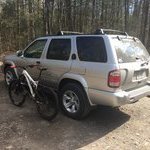
Hey everyone I haven't made a post in like 7 years, the ex crashed my pathfinder on an icy morning and slid into a trailer. So it sat in a field for a good long while until I decided it was time to bring it back to life. Someone had come along and cut out my amps and stole my sub. So my first order was to rebuild the stereo. I swapped out the speakers, deck, replaced sub and amp. Deck: Kenwood Double Din DPX503BT Amp: Kenwood 5 Channel amp XR901-5 Speakers: C2- 570x JL Audio Now onto the Dynomatting after upgrading the stereo it was quite evident that there was a lot of resonance between the body panels and the interior pieces especially when the base drops hit. This in turn took away from the music clarity with all the rattling, vibrations. It was the worst inside the front doors and the roof. Dynomat is a sound deadening material that keeps the road noise out, keeps the stereo sound inside. It makes a stock stereo sound great and an upgraded system sound phenomenal. I removed all interior panels, roof pieces (steam cleaned them once they were out) and went to town. I finished the cargo area, roof, pillars. Also to note I rolled up chunks of Dynomat and squeezed them inside the doors to eliminate the annoying buzzing sound in there. Its not a complete project there's a product they make called Dynopad and its thicker and specially designed to be placed on your floors under your carpet/vinyl. It was out of my budget at the time and eventually I will get around to it. This project cost me about $580 Canadian for just the dynomat. Its not cheap but if your serious about music its worth every penny. Also music aside it makes driving much more pleasurable when you take it on the highway the road noise is almost completely cancelled out, let me put it this way its the difference between driving a tin can and driving a Vault. There are other products similar to it but this was what was available to me in the area Hauling it home after it sitting in an impound for over a year. Before that It sat in a field for nearly 5 years The start of my quest to clean the underbody and frame began with dropping the fuel tank After several hours removing all the grit I had discovered some nasty little pinholes I sealed them up with JB steel stick that plugged the holes hopefully forever. 3 coats of Por-15 later and it was looking a hell of a lot better. Later on the Cap for the fuel pump was cleaned up and painted and wires all saudered wrapped The old calipers were looking rough so I replaced them and painted the new ones with some blue caliper paint ( little did I know I would start to paint everything in sight this electric blue scheme) Old springs vs. New comparison Since I had upgraded my shifter to a leather wrap and put a leather knob on my transfer case shifter. I cut this wrap off a BMW in the pick n pull yard. I had to drill out some of the internals to make it fit then I just slapped some contact cement on there and there you have it Been storing some spray cans of tint around for awhiles so decided to black out the tail lights and 3rd brake like, with the leds in there it looks very sharp Every single bolt, nut washers, locknut I removed was caked in rust, I methodically used my wire wheel cleaned everything up and painted with primer and 3 coats of a gloss black rust paint. After I reassembled the front end I realized that my knuckle, lower and upper control arms looked awful bolted to those freshly painted pieces so I continued on dismantling the rest of it. This is a comparison shot of lower control arms before and after primer I figured why not carry on with the blue so I used this raptor box liner paint to coat my upper and lower control arms, transmission support brackets, torsion bars, panhard bar, the torsion bar bracket, I tinted it "Electric Blue" Rear stabalizer bar, that dog bone piece off the front end. this pic I believe is of the first coat, I ended up applying 2 Im still putting it together here is some of the driver side assembled Since the front corner was crumpled I had to order a new radiator support, still in the process of removing the old one I cut out the heating pads and wiring out of some luxury suv at the pick n pull yard and installed them in my seats. Always wanted heated seats Since I was painting the entire frame and underbody with the por-15 black gloss (afterwards I painted over top of that with ashphalt undercoating)there were areas I could not reach, so I dropped the transmission out and ensure nothing was left uncoated from the rear all the way up the firewall Ordered some pacesetters, cleaned all the shipping paint (a real pain in the ass) and gave them 3 coats of por-20 high temp paint. I intend to wrap them with header wrap afterwards. will upload pics once I get around to it There are a few other things I am bouncing around on ( bodywork mostly) but this old girl has come a long way, and I dont intend of stopping here! Hope you guys enjoy this update! It certainly has been awhile!1 point
-
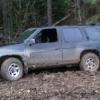
Hi, new member here from Coeur d'Alene, Id. Picked up a clean '92 recently with 82,000 original miles. Hard to believe but all the reciepts for service are in the manual and the dates and mileage seem to add up. Changed timing belt and associated stuff that goes with that. I'm pretty happy with, hope it lasts forever.
 1 point
 -
Nice score! I like the wheels.1 point
-
Sounds like the speed sensor to me too. The sensor on yours mounts into the transfer case and has a gear on the end spun by the output shaft. The intermittent nature of the fault would have me checking the condition of the wiring and the plug for the sensor before ordering a new one, on the off chance something is obviously corroded or loose. The service manual has the procedure to troubleshoot a faulty VSS (vehicle speed sensor). EF&EC section of the '95 manual should have what you need, and you can download that here. Looks like VSS diagnostics starts on EF&EC-88. That same section has instructions for pulling codes if you want to verify why the light is on. EL-41 has a test for the sensor. The manual shows the sensor having two wires, red and white, which might help you track it down. There are a couple of switches mounted to the transfer as well (to control the light on the dash).1 point
-
Very nice work bud!!1 point
-
Yep, that’s the route hawairish & TowndawgR50 are going. hawairish has the older RRO sliders & I have a new set with the kick outs, however, they don’t mount well with regard to the pinch welds. The two them think it would be better to use the stock mount points as they’re more hardy. I’m awaiting that fix. My current running boards ones are the low profile black step as opposed to the tubes so they don’t get in the way much or catch debris. Personally, I think sliders should come right after tires as you can almost irrevocably damage your truck by landing on the rocker.1 point
-
I'm planning on attempting this probably this weekend. Anyone else at all concerned about the possible head-on collision factor? I read on another thread the potential for the engine to not drop far enough in the event of a collision.1 point
-
Wow! I'm amazed at my lack of common sense sometimes! A little bearing grease and in it went. ?1 point
-
That's a handy trick! Just make sure your neighbors don't see you holding a lighter under a spoon haha.1 point
-
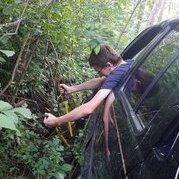
Little snow exploring and not being able to go over an obstacle kind of day Sent from my SM-G960U using Tapatalk1 point
-
Here's what it sounds like coming from a distance under a little throttle. Sounds pretty nice when you accelerate but it's dead silent at cruising speeds somehow. Literally no drone at all on the highway, until you start going uphill lol1 point
-
I've got the stock dual piping into 2 spiral chamber mufflers into a y and then out to the back. (Think glasspacks only with an italian pasta noodle inside) It sounds super duper nice but isn't loud at all. If you want a video of the sound while it's actually driving let me know, I can upload one.1 point