Leaderboard

Popular Content
Showing content with the highest reputation on 10/27/2018 in all areas
-
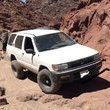
Hello all it’s me again. So I have some free time right now where I thought I would do a quick write up. So I’ll be going over how I installed my light bar into the bumper for a clean look and also without the use of a brush guard or other mounting bar.Then I’ll go over on how I installed amber lights into the grill to mimic what every 4runner does lol. Might as well kill 2 birds with one stone. So with the light bar I used a 30 inch china bar that is spot middle and floods on either side and unfortunately I do not know what brand it is as I got it on Ebay like 2 years ago. But the important part of the bar is how it mounts. Preferably you would need a light bar with a slim adjustable bracket that goes on the body of the light bar compared to the end mounting brackets. Next you need to remove the plastic front bumper cover to trim the “teeth” in the plastic bumper and cut a notch at the end of the plastic bumper as well as expose the steel crash bar. After cutting the “teeth” off and cutting a notch you’ll need to line up the light bar as centered as possible and perfectly perpendicular to the crash bar. I used a sharpie to mark the holes as well as used a straight edge and measuring tape to get it as close as possible. Drilling in the crash bar is not easy and takes some effort but is doable. After mounting the light bar go ahead and turn it on as this is the easiest to adjust the angle of the bar before putting the plastic cover on. After you do that you’re done! It took me several times to put the bumper back on and off to trim the plastic just a little bit at a time and as well as measuring. With this setup you get no hood glare (obviously) and also more of a “stealth” look without the addition of other mounting brackets. The only downside to this is that is removes your front plate bracket which could be a bad thing in your area depending on your front plate laws. I went ahead and just put my plate in windshield and I may relocate it up to the rack potentially. For the amber lights I used Grand General 77650 amber lights off amazon. I also went ahead and bought a 99 to 01 SE grill as I was tired of the LE grill of the pathy. When it arrived it was a silver color so I had to paint it black and I got it close enough with the original black on the truck. Then thanks to@TowndawgR50 and@RainGoat for light placement I then carefully dremeled out the back to cut a notch in so the lights could be more secure as the mesh wasn’t flat. After getting the right depth and width I went ahead and super glued the lights in and as well as zip tied it to the grill as an extra precaution. I then routed the wiring between the mesh so you can’t see it and I just tapped the wiring into the cigarette lighter fuse spot. So when I turn the key the lights come on and serve as my driving lights and as well as giving it more of a unique look. I tried plugging the tap into an empty slot but it didn’t work for some reason but when I put my CB radio tap in the same slot it worked so I don’t know if it needs a switch but I’m just gonna use the cigarette lighter for now. Since I was doing “light” mods I also went ahead and installed some clear corners as well. Also currently waiting for the emblem as Nissan changed it from a stick on to a bolt on but I think USPS lost it but that's another topic. Sent from my SM-G960U using Tapatalk2 points